X
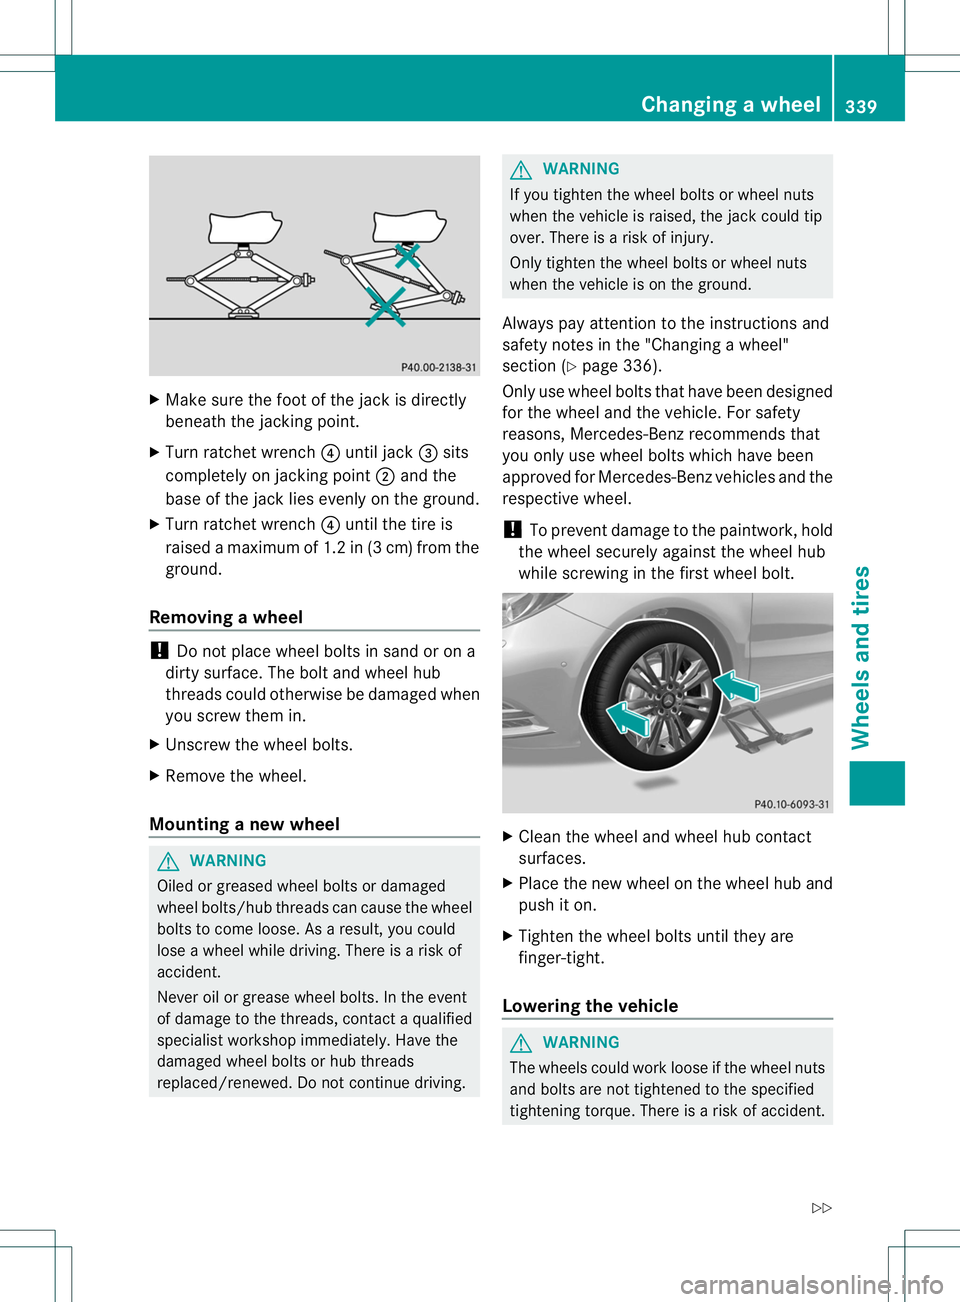
Make sure the foot of the jack is directly
beneath the jackingp oint.
X Turn ratchet wrench 0021until jack 0023sits
completely on jackingp oint0010and the
base of the jack lies evenly on the ground.
X Turn ratchet wrench 0021until the tire is
raised amaximum of 1. 2in(3cm)from the
ground.
Removing awheel !
Do not place wheel bolts in sand or on a
dirty surface. The bol tand whee lhub
thread scould otherwise be damage dwhen
yo us cre wthem in.
X Unscrew the whee lbolts.
X Remov ethe wheel.
Mounting anew wheel G
WARNING
Oiled or greased wheel bolt sordamaged
wheel bolts/hub threads can cause th ewheel
bolt stoc omeloose .Asa result, you could
lose awheel while driving. There is arisk of
accident.
Never oil or grease wheel bolts. In the event
of damage to the threads, contact aqualified
specialist workshop immediately.H ave the
damage dwheel bolt sorhub threads
replaced/renewed. Do no tcontinue driving. G
WARNING
If you tighten the wheel bolts or wheel nuts
when the vehicle is raised, the jack could tip
over. There is arisk of injury.
Only tighten the wheel bolts or wheel nuts
when the vehicle is on the ground.
Always pay attention to the instructions and
safety notes in the "Changing awheel"
section (Y page 336).
Only use wheel bolts that have been designed
for the wheel and the vehicle. For safety
reasons, Mercedes-Benz recommends that
you only use wheel bolts which have been
approved for Mercedes-Benz vehicles and the
respective wheel.
! To prevent damage to the paintwork, hold
the wheel securely against the wheel hub
while screwing in the first wheel bolt. X
Clean the wheel and wheel hub contact
surfaces.
X Place the new wheel on the wheel hub and
push it on.
X Tighten the wheel bolts until they are
finger-tight.
Lowering the vehicle G
WARNING
The wheels could work loose if the wheel nuts
and bolts are not tightened to the specified
tightening torque. There is arisk of accident. Changing
awheel
339Wheels and tires
Z
monitor cannot function reliably. Only
restart the tire pressure loss warning
system/the tire pressure monitor when the
damaged whee lhas been replaced with a
new wheel.
Vehicles with tire pressure monitor:
after mounting an emergency spare wheel,
the system may still display the tire
pressure of the removed whee lfor afew
minutes. The value displayed for the
mounted emergenc yspare wheel is not the
same as the current tire pressure of the
emergenc yspare wheel.
An emergenc yspare wheel may also be
mounted against the direction of rotation.
Observe the time restriction on use as well as
the speed limitation specified on the
emergenc yspare wheel.
Replace the tires after six years at the latest,
regardless of wear. This also applies to the
emergenc yspare wheel. Removing the emergency sparew
heelVehicles with the "Minispare" emergenc
yspare
wheel:
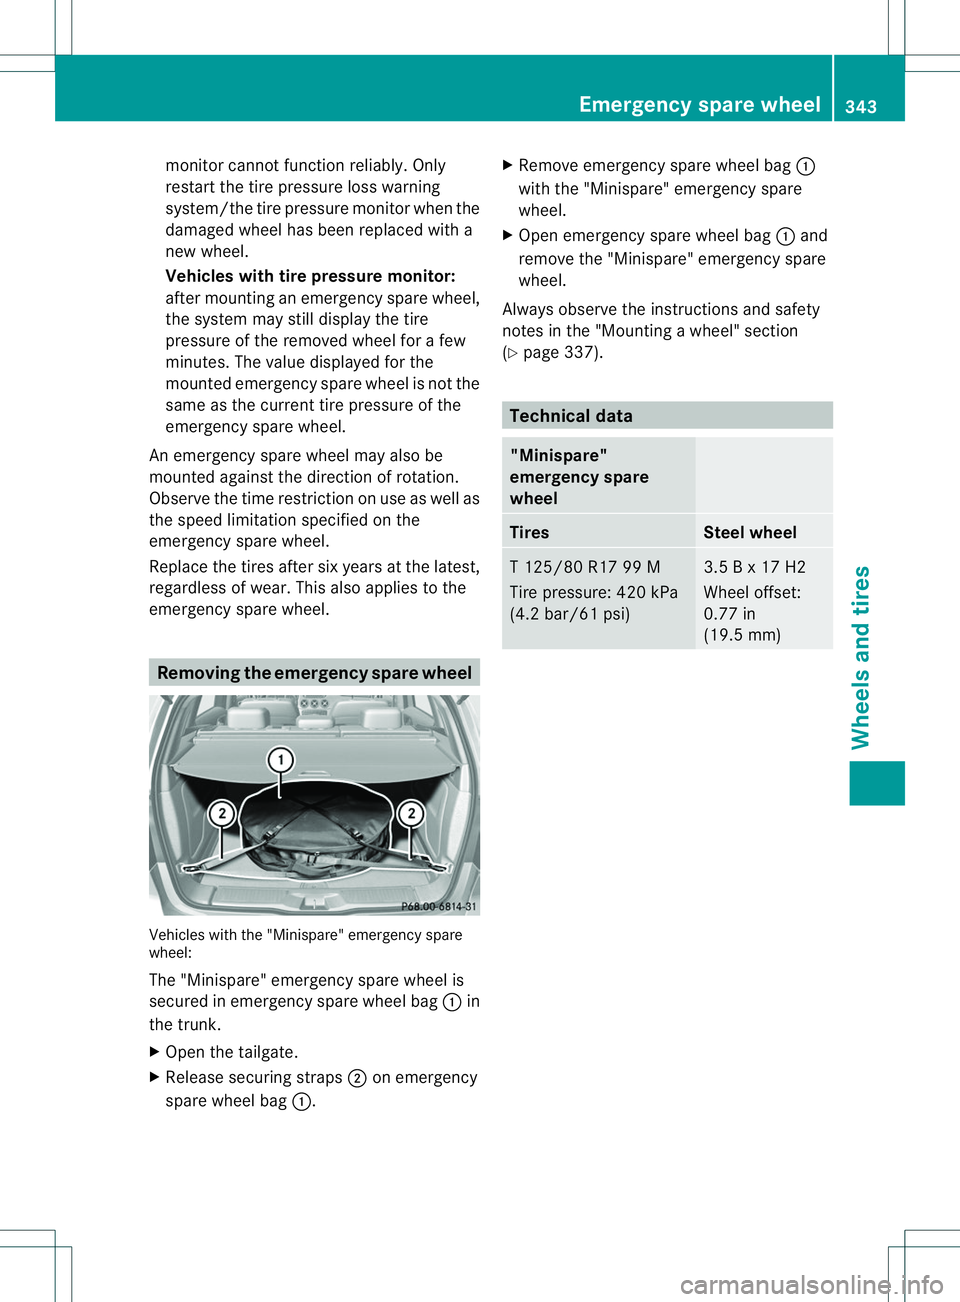
The "Minispare" emergenc yspare wheel is
secured in emergenc yspare wheel bag 001Ain
the trunk.
X Open the tailgate.
X Release securing straps 0010on emergency
spare wheel bag 001A. X
Remove emergenc yspare wheel bag 001A
with the "Minispare" emergenc yspare
wheel.
X Open emergenc yspare wheel bag 001Aand
remove the "Minispare" emergenc yspare
wheel.
Always observe the instructions and safety
notes in the "Mounting awheel" section
(Y page 337). Technical data
"Minispare"
emergency spare
wheel
Tires Steel wheel
T1
25/80 R17 99 M
Tire pressure: 420 kPa
(4.2 bar/61 psi) 3.5
Bx17H2
Wheel offset:
0.77 in
(19.5 mm) Emergency sparew
heel
343Wheels and tires Z