2014 FORD F150 ignition
[x] Cancel search: ignitionPage 175 of 472

PARKING AID (IF EQUIPPED)
WARNINGS
To help avoid personal injury, please
read and understand the limitations
of the system as contained in this
section. Sensing is only an aid for some
(generally large and fixed) objects when
moving in reverse on a flat surface at
parking speeds. Traffic control systems,
inclement weather, air brakes, and external
motors and fans may also affect the
function of the sensing system; this may
include reduced performance or a false
activation. To help avoid personal injury, always
use caution when in R (Reverse) and
when using the sensing system.
This system is not designed to
prevent contact with small or moving
objects. The system is designed to
provide a warning to assist the driver in
detecting large stationary objects to avoid
damaging the vehicle. The system may not
detect smaller objects, particularly those
close to the ground. Certain add-on devices such as large
trailer hitches, bike or surfboard racks
and any device that may block the
normal detection zone of the system, may
create false beeps. Note:
Keep the sensors, located on the
bumper or fascia, free from snow, ice and
large accumulations of dirt. If the sensors
are covered, the system ’s accuracy can be
affected. Do not clean the sensors with
sharp objects.
Note: If your vehicle sustains damage to
the bumper or fascia, leaving it misaligned
or bent, the sensing zone may be altered
causing inaccurate measurement of
obstacles or false alarms. Note:
If your vehicle is equipped with
MyKey ™, it is possible to prevent turning
the sensing system off. See MyKey ™
(page
53).
Note: If your vehicle is equipped with a fully
integrated electronic trailer brake controller
(TBC) and a trailer with electric trailer
brakes is connected to your vehicle, the RSS
will be disabled. When the vehicle is shifted
into reverse, the information display will
remain in the Rear Park Aid Off selection.
For more information on the TBC, See
Trailer Sway Control
(page 192).
The sensing system warns the driver of
obstacles within a certain range of the
bumper area. The system turns on
automatically whenever the ignition is
switched on.
When receiving a detection warning, the
radio volume is reduced to a
predetermined level. After the warning
goes away, the radio volume returns to the
previous level.
Rear Sensing System
The rear sensors are only active when the
transmission is in R (Reverse). As the
vehicle moves closer to the obstacle, the
rate of the audible warning increases.
When the obstacle is fewer than 12 inches
(30 centimeters) away, the warning
sounds continuously. If a stationary or
receding object is detected farther than 12
inches (30 centimeters) from the side of
the vehicle, the tone sounds for only three
seconds. Once the system detects an
object approaching, the warning sounds
again.
172
F150 (TF6) , enUSA Parking Aids
Page 179 of 472
PRINCIPLE OF OPERATION
Cruise control lets you maintain a set
speed without keeping your foot on the
accelerator pedal. You can use cruise
control when your vehicle speed is greater
than 20 mph (30 km/h).
USING CRUISE CONTROL WARNINGS
Do not use cruise control in heavy
traffic, on winding roads or when the
road surface is slippery. This could
result in loss of vehicle control, serious
injury or death. When you are going downhill, your
vehicle speed may increase above
the set speed. The system will not
apply the brakes. Change down a gear to
assist the system in maintaining the set
speed. Failure to do so could result in loss
of vehicle control, serious injury or death. Note:
Cruise control will disengage if the
vehicle speed decreases more than 10 mph
(16 km/h) below your set speed while
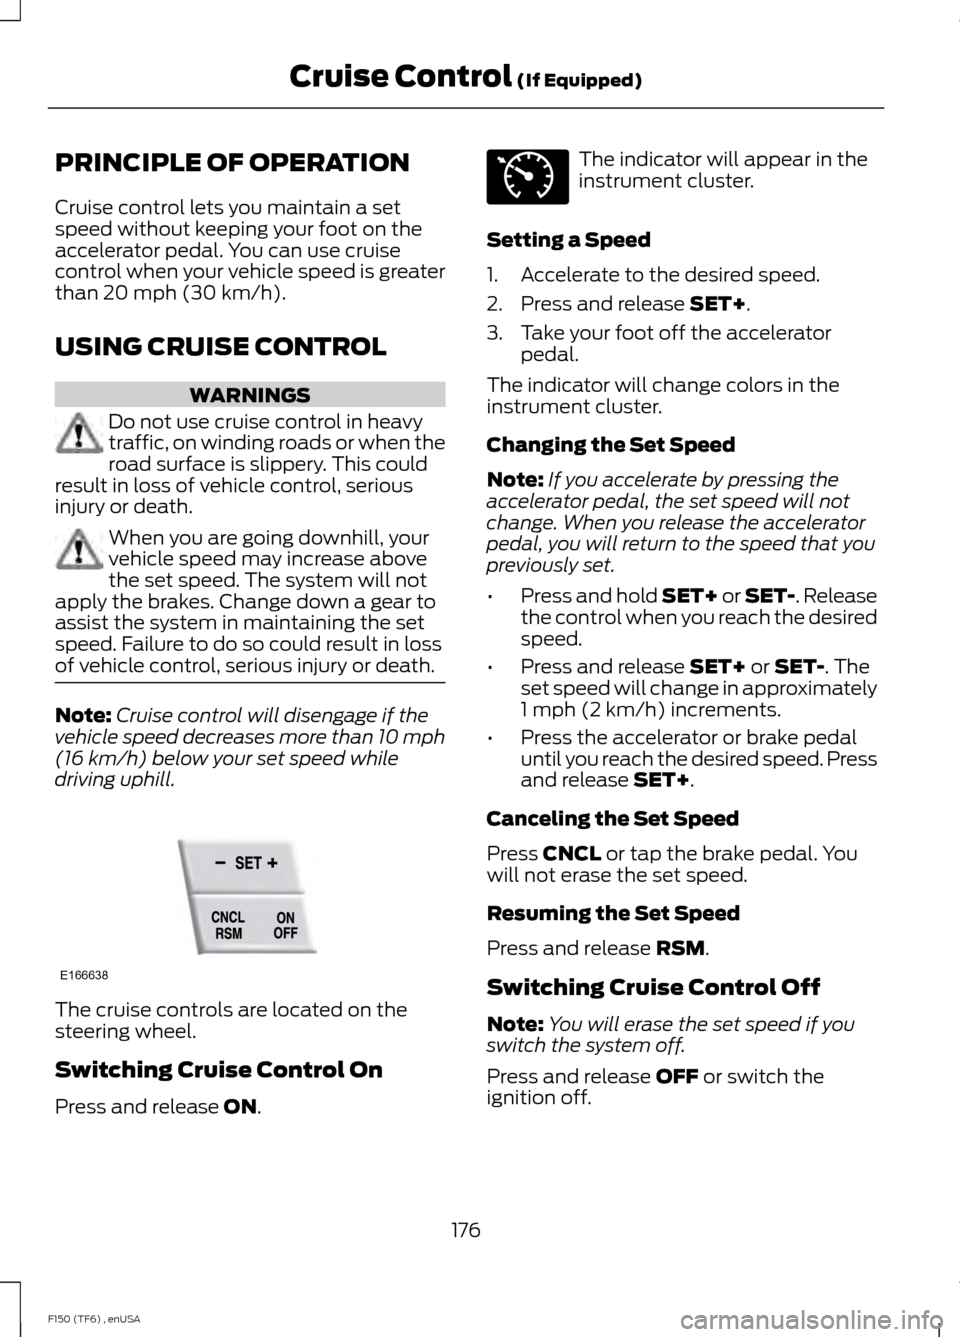
driving uphill. The cruise controls are located on the
steering wheel.
Switching Cruise Control On
Press and release
ON. The indicator will appear in the
instrument cluster.
Setting a Speed
1. Accelerate to the desired speed.
2. Press and release
SET+.
3. Take your foot off the accelerator pedal.
The indicator will change colors in the
instrument cluster.
Changing the Set Speed
Note: If you accelerate by pressing the
accelerator pedal, the set speed will not
change. When you release the accelerator
pedal, you will return to the speed that you
previously set.
• Press and hold SET+ or SET-. Release
the control when you reach the desired
speed.
• Press and release
SET+ or SET-. The
set speed will change in approximately
1 mph (2 km/h) increments.
• Press the accelerator or brake pedal
until you reach the desired speed. Press
and release
SET+.
Canceling the Set Speed
Press
CNCL or tap the brake pedal. You
will not erase the set speed.
Resuming the Set Speed
Press and release
RSM.
Switching Cruise Control Off
Note: You will erase the set speed if you
switch the system off.
Press and release
OFF or switch the
ignition off.
176
F150 (TF6) , enUSA Cruise Control
(If Equipped)E166638 E71340
Page 180 of 472
STEERING
Electric Power Steering (3.7L, 5.0L
and 3.5L EcoBoost™ engines) (If
Equipped) WARNINGS
The electric power steering system
has diagnostic checks that
continuously monitor the system to
ensure proper operation. When a system
error is detected a steering message will
appear in the information display. The electric power steering system
has diagnostic checks that
continuously monitor the system to
ensure proper operation of the electronic
system. When an electronic error is
detected, a message will be displayed in
the information display. If this happens,
stop the vehicle in a safe place, and turn
off the engine. After at least 10 seconds,
reset the system by restarting the engine,
and watch the information display for a
steering message. If a steering message
returns, or returns while driving, take the
vehicle to your dealer to have it checked. Obtain immediate service if a system
error is detected. You may not notice
any difference in the feel of your
steering, but a serious condition may exist.
Failure to do so may result in loss of
steering control. Your vehicle is equipped with an electric
power-assisted steering system. There is
no fluid reservoir to check or fill.
If your vehicle loses electrical power while
you are driving (or if the ignition is turned
off), you can steer the vehicle manually,
but it takes more effort. Extreme
continuous steering may increase the effort
it takes for you to steer. This occurs to
prevent internal overheating and
permanent damage to your steering system. If this should occur, you will neither
lose the ability to steer the vehicle
manually nor will it cause permanent
damage. Typical steering and driving
maneuvers will allow the system to cool
and steering assist will return to normal.
Hydraulic Steering (6.2L engine)
(If Equipped)
To help prevent damage to the power
steering system, never hold the steering
wheel at its furthest turning points (until
it stops) for more than a few seconds
when the engine is running. If the power
steering system breaks down (or if the
engine is turned off), you can steer the
vehicle manually, but it takes more effort.
•
Never hold the steering wheel at its
furthest turning points (until it stops)
for more than three to five seconds
when the engine is running.
• Do not operate the vehicle with a low
power steering pump fluid level (below
the MIN mark on the reservoir).
• Some noise is normal during operation.
If excessive, check for low power
steering pump fluid level before
seeking service by your dealer.
• Heavy or uneven efforts may be caused
by low power steering fluid. Check for
low power steering pump fluid level
before seeking service by your dealer.
• Do not fill the power steering pump
reservoir above the MAX mark on the
reservoir, as this may result in leaks
from the reservoir.
If the power steering system breaks down
(or if the engine is turned off), you can
steer the vehicle manually, but it takes
more effort.
177
F150 (TF6) , enUSA Driving Aids
Page 189 of 472
be: 635 kilograms - (2 x 99
kilograms) - (12 x 45 kilograms) =
635 - 198 - 540 = -103 kilograms.
You will need to reduce the load
weight by at least 240 pounds
(104 kilograms). If you remove
three 100-pound (45-kilogram)
cement bags, then the load
calculation would be:1400 - (2 x
220) - (9 x 100) = 1400 - 440 -
900 = 60 pounds. Now you have
the load capacity to transport the
cement and your friend home. In
metric units, the calculation would
be: 635 kilograms - (2 x 99
kilograms) - (9 x 45 kilograms) =
635 - 198 - 405 = 32 kilograms.
The above calculations also
assume that the loads are
positioned in your vehicle in a
manner that does not overload
the Front or the Rear Gross Axle
Weight Rating specified for your
vehicle on the Safety Compliance
Certification Label. The label shall
be affixed to either the door hinge
pillar, door-latch post, or the door
edge that meets the door-latch
post, next to the driver's seating
position.
Special Loading Instructions
for Owners of Pick-up Trucks
and Utility-type Vehicles WARNING
Loaded vehicles may handle
differently than unloaded
vehicles. Extra precautions, such
as slower speeds and increased
stopping distance, should be
taken when driving a heavily
loaded vehicle. Your vehicle can haul more cargo
and people than most passenger
cars. Depending upon the type
and placement of the load,
hauling cargo and people may
raise the center of gravity of the
vehicle.
TAILGATE
Tailgate Lock (If Equipped)
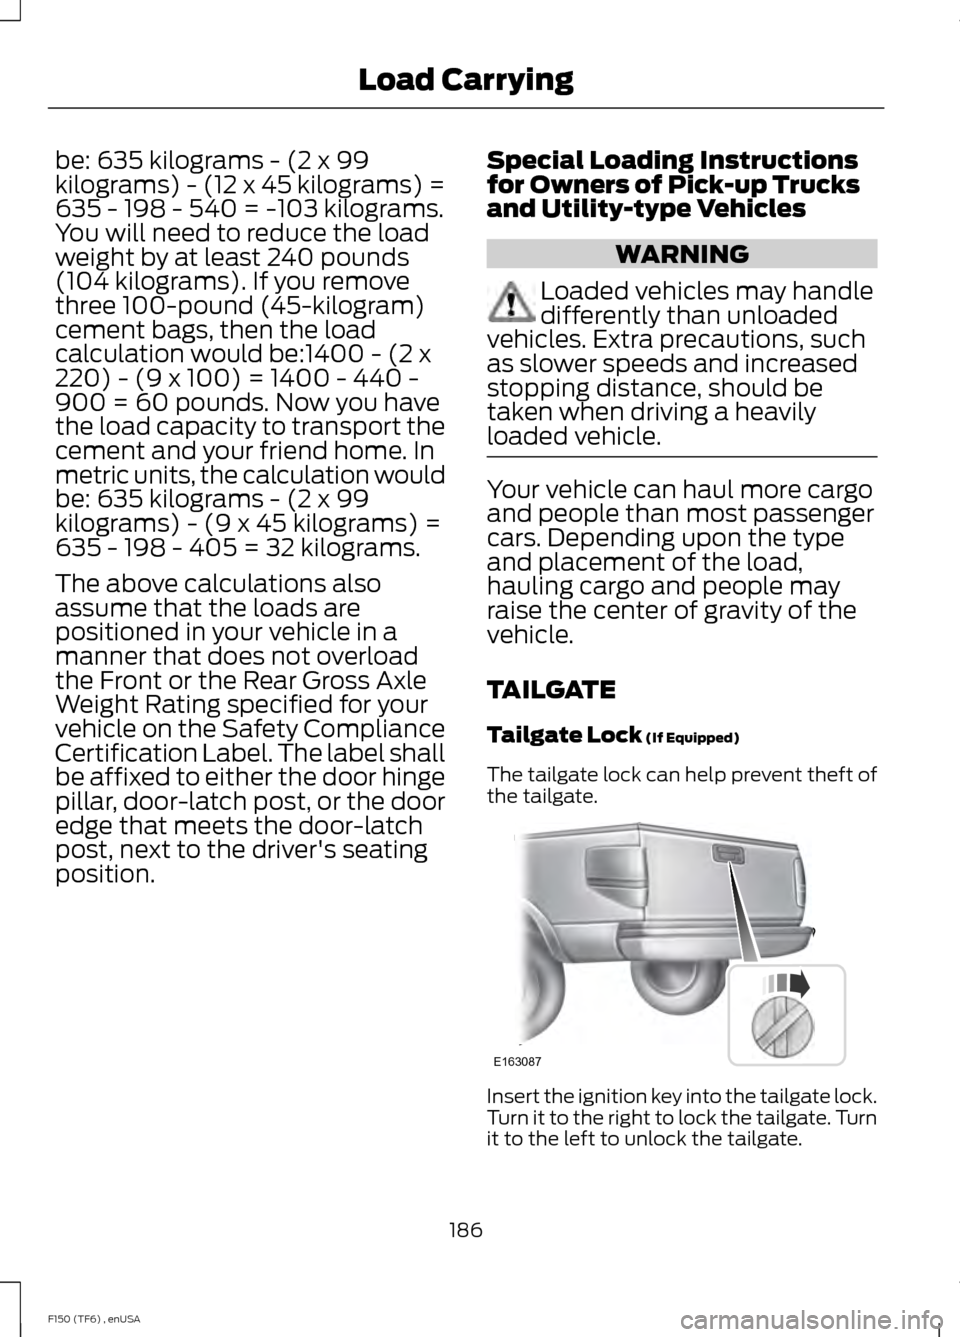
The tailgate lock can help prevent theft of
the tailgate. Insert the ignition key into the tailgate lock.
Turn it to the right to lock the tailgate. Turn
it to the left to unlock the tailgate.
186
F150 (TF6) , enUSA Load CarryingE163087
Page 207 of 472
The controller shows gain setting, output
bar graph, and trailer connectivity status
in the information display. They appear in
the information display as follows:
•
TBC GAIN = XX.X NO TRAILER:
Shows the current gain setting during
a given ignition cycle and when
adjusting the gain. This also displays if
you use the manual control lever or
make gain adjustments with no trailer
connected.
• TBC GAIN = XX.X OUTPUT=/ / / /
/ /: Displays when you push your
vehicle's brake pedal, or upon use of
the manual control. Bar indicators
illuminate in the information display to
indicate the amount of power going to
the trailer brakes relative to the brake
pedal or manual control input. One bar
indicates the least amount of output;
six bars indicate maximum output.
• TRAILER CONNECTED:
Displays
when the system senses a correct
trailer wiring connection (a trailer with
electric trailer brakes) during a given
ignition cycle.
• TRAILER DISCONNECTED:
Displays,
accompanied by a single audible time,
when the system senses a trailer
connection and then a disconnection,
either intentional or unintentional,
during a given ignition cycle. It also
displays if a truck or trailer-wiring fault
occurs causing the trailer to appear
disconnected. This message can also
display if you use the manual control
lever without a trailer connected.
Procedure for Adjusting Gain
Note: Only perform this procedure in a
traffic-free environment at speeds of
approximately 20-25 mph (30-40 km/h). The gain setting sets the trailer brake
controller for the specific towing condition.
You should change the setting as towing
conditions change. Changes to towing
conditions include trailer load, vehicle load,
road conditions and weather.
The gain should be set to provide the
maximum trailer braking assistance while
making sure the trailer wheels do not lock
when using the brakes. Locked trailer
wheels may lead to trailer instability.
1.
Make sure the trailer brakes are in good
working condition, functioning normally
and properly adjusted. See your trailer
dealer if necessary.
2. Hook up the trailer and make the electrical connections according to the
trailer manufacturer's instructions.
3. When you plug in a trailer with electric or electric-over-hydraulic brakes,
TRAILER CONNECTED
appears in
the information display.
4. Use the gain adjustment (+ and -) buttons to increase or decrease the
gain setting to the desired starting
point. A gain setting of 6.0 is a good
starting point for heavier loads.
5. In a traffic-free environment, tow the trailer on a dry, level surface at a speed
of 20-25 mph (30-40 km/h) and
squeeze the manual control lever
completely.
6. If the trailer wheels lock up, indicated by squealing tires, reduce the gain
setting. If the trailer wheels turn freely,
increase the gain setting. Repeat Steps
5 and 6 until the gain setting is at a
point just below trailer wheel lock-up.
If towing a heavier trailer, trailer wheel
lock-up may not be attainable even
with the maximum gain setting of 10.
204
F150 (TF6) , enUSA Towing
Page 208 of 472
Explanation of Information Display
Warning Messages
Note:
An authorized dealer can diagnose
the trailer brake controller to determine
exactly which trailer fault has occurred.
However, your Ford warranty does not cover
this diagnosis if the fault is with the trailer.
TRAILER BRAKE MODULE FAULT:
Displays in response to faults sensed by
the trailer brake controller, accompanied
by a single tone. If this message appears,
contact an authorized dealer as soon as
possible for diagnosis and repair. The
controller may still function, but
performance may be degraded.
WIRING FAULT ON TRAILER: Displays
when there is a short circuit on the electric
brake output wire. If the
WIRING FAULT
ON TRAILER message displays,
accompanied by a single tone, with no
trailer connected, the problem is with your
vehicle wiring between the trailer brake
controller and the 7-pin connector at the
bumper. If the message only displays with
a trailer connected, the problem is with the
trailer wiring. Consult your trailer dealer for
assistance. This can be a short to ground
(such as a chaffed wire), short to voltage
(such as a pulled pin on trailer emergency
breakaway battery) or the trailer brakes
may be drawing too much current.
Points to Remember
Note: Do not attempt removal of the trailer
brake controller without consulting the
Workshop Manual. Damage to the unit may
result.
• Adjust gain setting before using the
trailer brake controller for the first time.
• Adjust gain setting, using the procedure
above, whenever road, weather and
trailer or vehicle loading conditions
change from when the gain was initially
set. •
Only use the manual control lever for
proper adjustment of the gain during
trailer setup. Misuse, such as
application during trailer sway, could
cause instability of trailer or tow
vehicle.
• Avoid towing in adverse weather
conditions. The trailer brake controller
does not provide anti-lock control of
the trailer wheels. Trailer wheels can
lock up on slippery surfaces, resulting
in reduced stability of trailer and tow
vehicle.
• The trailer brake controller is equipped
with a feature that reduces output at
vehicle speeds below 11 mph (18 km/h)
so trailer and vehicle braking is not jerky
or harsh. This feature is only available
when applying the brakes using your
vehicle's brake pedal, not the
controller.
• The controller interacts with the brake
control system and powertrain control
system of your vehicle to provide the
best performance on different road
conditions.
• Your vehicle's brake system and the
trailer brake system work
independently of each other. Changing
the gain setting on the controller does
not affect the operation of your
vehicle's brakes whether you attach a
trailer or not.
• When you switch the engine off, the
controller output is disabled and the
display and module shut down. The
controller module and display turn on
when you switch the ignition on.
• The trailer brake controller is only a
factory-installed or dealer-installed
item. Ford is not responsible for
warranty or performance of the
controller due to misuse or customer
installation.
205
F150 (TF6) , enUSA Towing
Page 211 of 472
Ford Motor Company produces a towing
manual for all authorized tow truck
operators. Have your tow truck operator
refer to this manual for proper hook-up
and towing procedures for your vehicle.
It is acceptable to have your two-wheel
drive vehicle towed with the front wheels
on the ground (without dollies) and the
rear wheels off the ground.
We recommend towing a four-wheel drive
vehicle with all wheels off the ground, such
as using a wheel lift and dollies or flatbed
equipment.
TOWING THE VEHICLE ON
FOUR WHEELS
Emergency Towing
If your vehicle becomes inoperable
(without access to wheel dollies,
car-hauling trailer, or flatbed transport
vehicle), it can be flat-towed (all wheels
on the ground, regardless of the powertrain
and transmission configuration) under the
following conditions:
•
Your vehicle is facing forward for
towing in a forward direction.
• Place the transmission in position N. If
you cannot move the transmission into
N
, you may need to override it. See
Transmission (page 147).
• Maximum speed is 35 mph (56 km/h).
• Maximum distance is 50 miles (80
kilometers).
Recreational Towing
Note: Put your climate control system in
recirculated air mode to prevent exhaust
fumes from entering your vehicle. See
Climate Control
(page 106). Follow these guidelines if you have a need
for recreational towing, such as towing
your vehicle behind a motorhome. We
designed these guidelines to prevent
damage to your transmission.
Two-wheel Drive Vehicles
You cannot tow a two-wheel drive vehicle
with any wheels on the ground as vehicle
or transmission damage may occur. You
must tow your vehicle with all four wheels
off the ground, such as when using a
car-hauling trailer.
Four-wheel Drive Vehicles
You can only tow a four-wheel drive
vehicle with all wheels on the ground by
placing the transfer case in its neutral
position and engaging the
four-wheel-down towing feature. Perform
the steps outlined in the following section
after positioning your vehicle behind the
tow vehicle and properly securing them
together.
Four-wheel-down Towing
1.
Turn the ignition to the on position. Do
not start the engine.
2. Press and hold the brake pedal.
3. Rotate the four-wheel drive switch to 2H
.
4. Shift the transmission to position
N.
5. Rotate the four-wheel drive switch from
2H to 4L and back to 2H five
times within seven seconds.
Note: If completed successfully, the
information display shows NEUTRAL TOW
LEAVE IN N or NEUTRAL TOW ENABLED
LEAVE TRANSMISSION IN NEUTRAL
.
This indicates that your vehicle is safe to
tow with all wheels on the ground
Note: If you do not see the message in the
display, you must perform the procedure
again from the beginning.
208
F150 (TF6) , enUSA Towing
Page 212 of 472
Note:
You may hear an audible noise as the
transfer case shifts into its neutral position.
This is normal.
6. Leave the transmission in position N
and turn the ignition as far as it will go
toward the off position (it will not turn
fully off when the transmission is in
position
N. You must leave the key in
the ignition while towing. To lock and
unlock your vehicle, use the keyless
entry keypad or extra set of keys.
7. Release the brake pedal. WARNINGS
Do not disconnect the battery during
recreational towing. Doing so will
prevent the transfer case from
shifting properly and may cause the vehicle
to roll even if the transmission is in P
(Park). Shifting the transfer case to its
neutral position for recreational
towing may cause the vehicle to be
able to roll even if the transmission is in P
(Park). The driver or others could be
injured. Make sure the foot brake is
depressed and the vehicle is in a secure
and safe position while the transfer case
is being shifted to its neutral position. Failing to put the transfer case in its
neutral position will damage vehicle
components.
Note:
You can check four-wheel-down
towing status at any time by opening the
driver's door or turning the ignition to the
accessory or on position and verifying the
NEUTRAL TOW ENABLED
message
displays in the cluster.
To exit four-wheel-down towing and return
the transfer case to its
2H position:
1. With your vehicle still properly secured
to the tow vehicle, press and hold the
brake pedal. 2.
Turn the ignition to the on position. Do
not start the engine.
3. Shift the transmission out of N and into
any gear.
4. Release the brake pedal.
Note: If completed successfully, the
instrument cluster displays
4X2, and
NEUTRAL TOW DISABLED.
Note: If the indicator light and message do
not display, you must perform the procedure
again from the beginning.
Note: You may hear an audible noise as the
transfer case shifts out of its neutral
position. This is normal.
5. Apply the parking brake, and then disconnect the vehicle from the tow
vehicle.
6. Release the parking brake, start the engine, and shift the transmission to
position
D to make sure the transfer
case is out of position N.
7. If the transfer case does not successfully shift out of position N, set
the parking brake until you can have
your vehicle serviced.
209
F150 (TF6) , enUSA Towing