2014 FORD F150 seat memory
[x] Cancel search: seat memoryPage 5 of 472

Wipers and Washers
Windshield Wipers........................................69
Autowipers.......................................................69
Windshield Washers.....................................70
Lighting
Lighting Control................................................71
Autolamps..........................................................71
Instrument Lighting Dimmer......................72
Daytime Running Lamps.............................72
Front Fog Lamps.............................................72
Direction Indicators
........................................73
Interior Lamps..................................................73
Windows and Mirrors
Power Windows
..............................................75
Exterior Mirrors
................................................76
Interior Mirror
....................................................78
Sun Visors
.........................................................79
Moonroof...........................................................79
Instrument Cluster
Gauges................................................................81
Warning Lamps and Indicators
.................82
Audible Warnings and Indicators.............85
Information Displays
General Information......................................87
Information Messages
.................................98
Climate Control
Manual Climate Control
............................106
Manual Climate Control.............................107
Automatic Climate Control
......................109
Hints on Controlling the Interior Climate..........................................................110
Heated Windows and Mirrors
....................112
Remote Start
...................................................113 Seats
Sitting in the Correct Position...................114
Head Restraints..............................................114
Manual Seats..................................................116
Power Seats.....................................................117
Memory Function
..........................................118
Rear Seats........................................................119
Heated Seats
.................................................120
Ventilated Seats
.............................................121
Front Seat Armrest.......................................122
Rear Seat Armrest........................................123
Universal Garage Door Opener
Universal Garage Door Opener
...............124
Auxiliary Power Points
Auxiliary Power Points................................132
Storage Compartments
Center Console
..............................................134
Overhead Console........................................134
Starting and Stopping the Engine
General Information....................................135
Ignition Switch
...............................................135
Starting a Gasoline Engine
........................135
Engine Block Heater.....................................137
Fuel and Refueling
Safety Precautions......................................139
Fuel Quality
....................................................140
Running Out of Fuel......................................141
Refueling..........................................................142
Fuel Consumption
........................................143
Emission Control System..........................144
2
F150 (TF6) , enUSA Table of Contents
Page 53 of 472
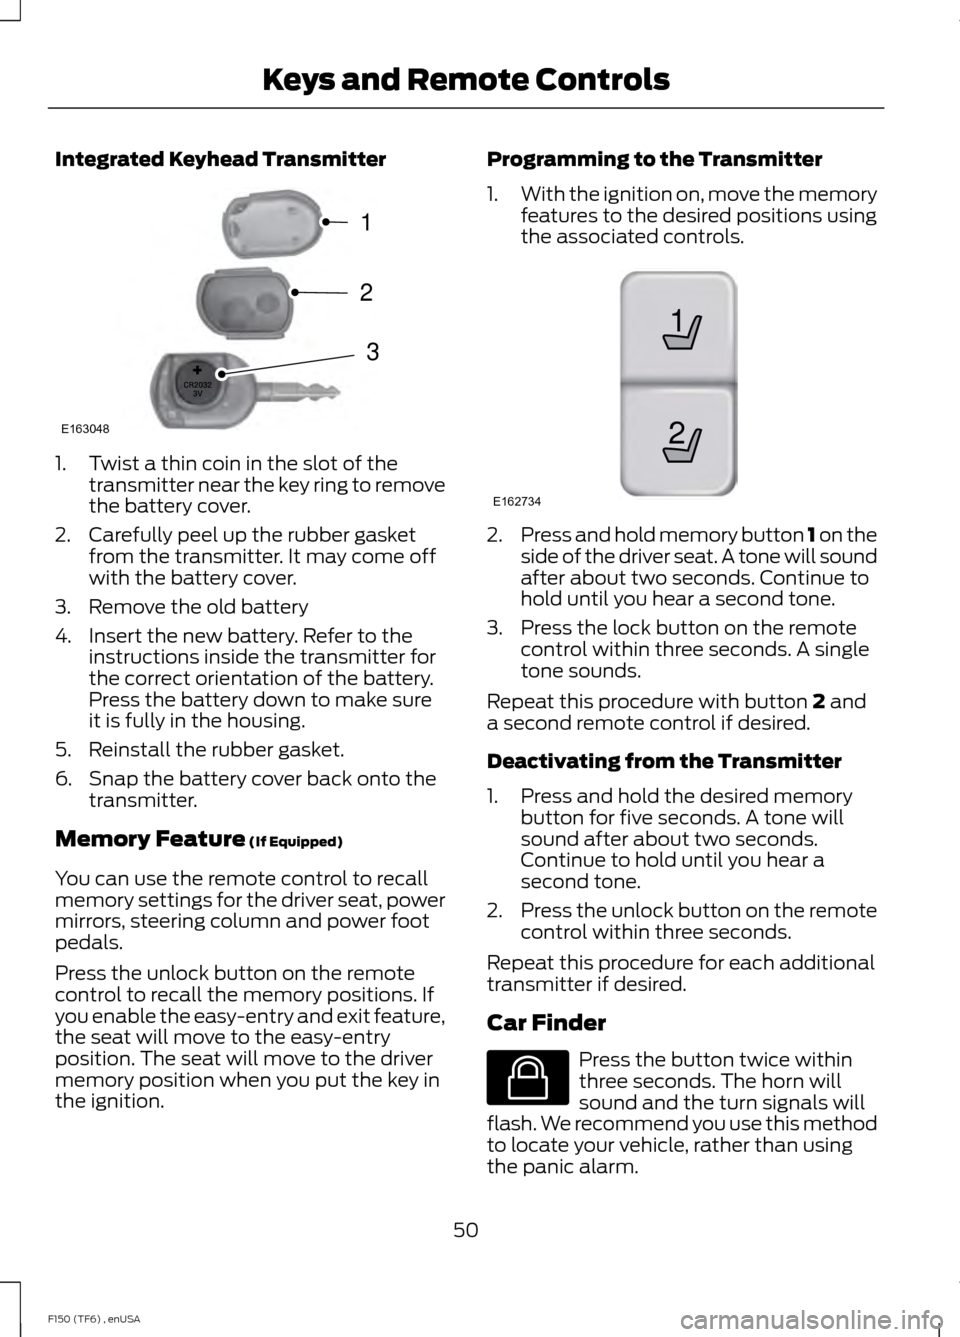
Integrated Keyhead Transmitter
1. Twist a thin coin in the slot of the
transmitter near the key ring to remove
the battery cover.
2. Carefully peel up the rubber gasket from the transmitter. It may come off
with the battery cover.
3. Remove the old battery
4. Insert the new battery. Refer to the instructions inside the transmitter for
the correct orientation of the battery.
Press the battery down to make sure
it is fully in the housing.
5. Reinstall the rubber gasket.
6. Snap the battery cover back onto the transmitter.
Memory Feature (If Equipped)
You can use the remote control to recall
memory settings for the driver seat, power
mirrors, steering column and power foot
pedals.
Press the unlock button on the remote
control to recall the memory positions. If
you enable the easy-entry and exit feature,
the seat will move to the easy-entry
position. The seat will move to the driver
memory position when you put the key in
the ignition. Programming to the Transmitter
1.
With the ignition on, move the memory
features to the desired positions using
the associated controls. 2.
Press and hold memory button 1 on the
side of the driver seat. A tone will sound
after about two seconds. Continue to
hold until you hear a second tone.
3. Press the lock button on the remote control within three seconds. A single
tone sounds.
Repeat this procedure with button
2 and
a second remote control if desired.
Deactivating from the Transmitter
1. Press and hold the desired memory button for five seconds. A tone will
sound after about two seconds.
Continue to hold until you hear a
second tone.
2. Press the unlock button on the remote
control within three seconds.
Repeat this procedure for each additional
transmitter if desired.
Car Finder Press the button twice within
three seconds. The horn will
sound and the turn signals will
flash. We recommend you use this method
to locate your vehicle, rather than using
the panic alarm.
50
F150 (TF6) , enUSA Keys and Remote ControlsE163048
3
2
1 21
E162734 E138623
Page 99 of 472
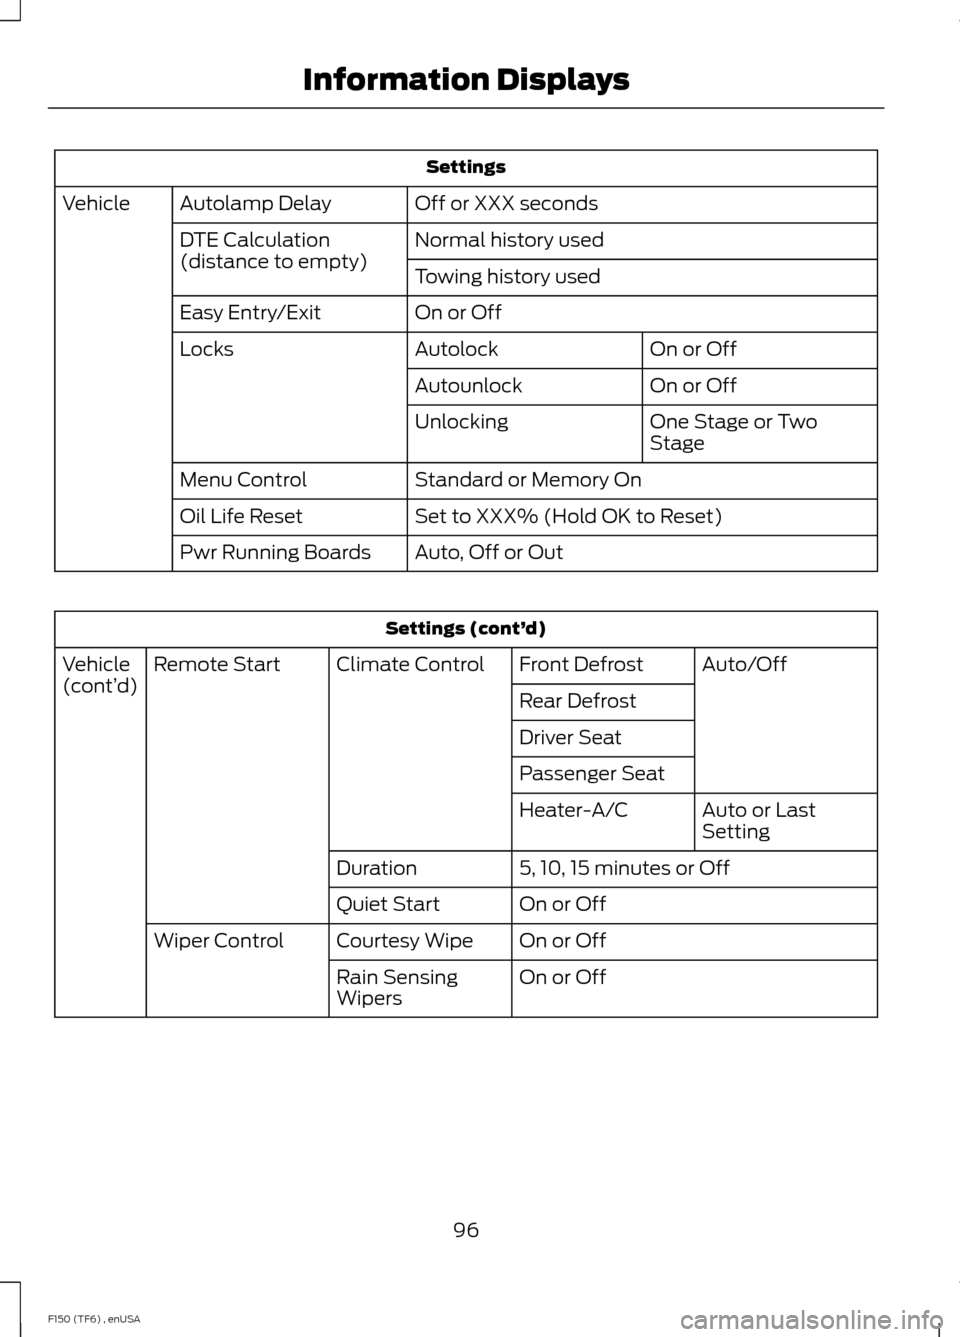
Settings
Off or XXX seconds
Autolamp Delay
Vehicle
Normal history used
DTE Calculation
(distance to empty)
Towing history used
On or Off
Easy Entry/Exit
On or Off
Autolock
Locks
On or Off
Autounlock
One Stage or Two
Stage
Unlocking
Standard or Memory On
Menu Control
Set to XXX% (Hold OK to Reset)
Oil Life Reset
Auto, Off or Out
Pwr Running Boards Settings (cont’
d)
Auto/Off
Front Defrost
Climate Control
Remote Start
Vehicle
(cont’ d)
Rear Defrost
Driver Seat
Passenger Seat
Auto or Last
Setting
Heater-A/C
5, 10, 15 minutes or Off
Duration
On or Off
Quiet Start
On or Off
Courtesy Wipe
Wiper Control
On or Off
Rain Sensing
Wipers
96
F150 (TF6) , enUSA Information Displays
Page 121 of 472
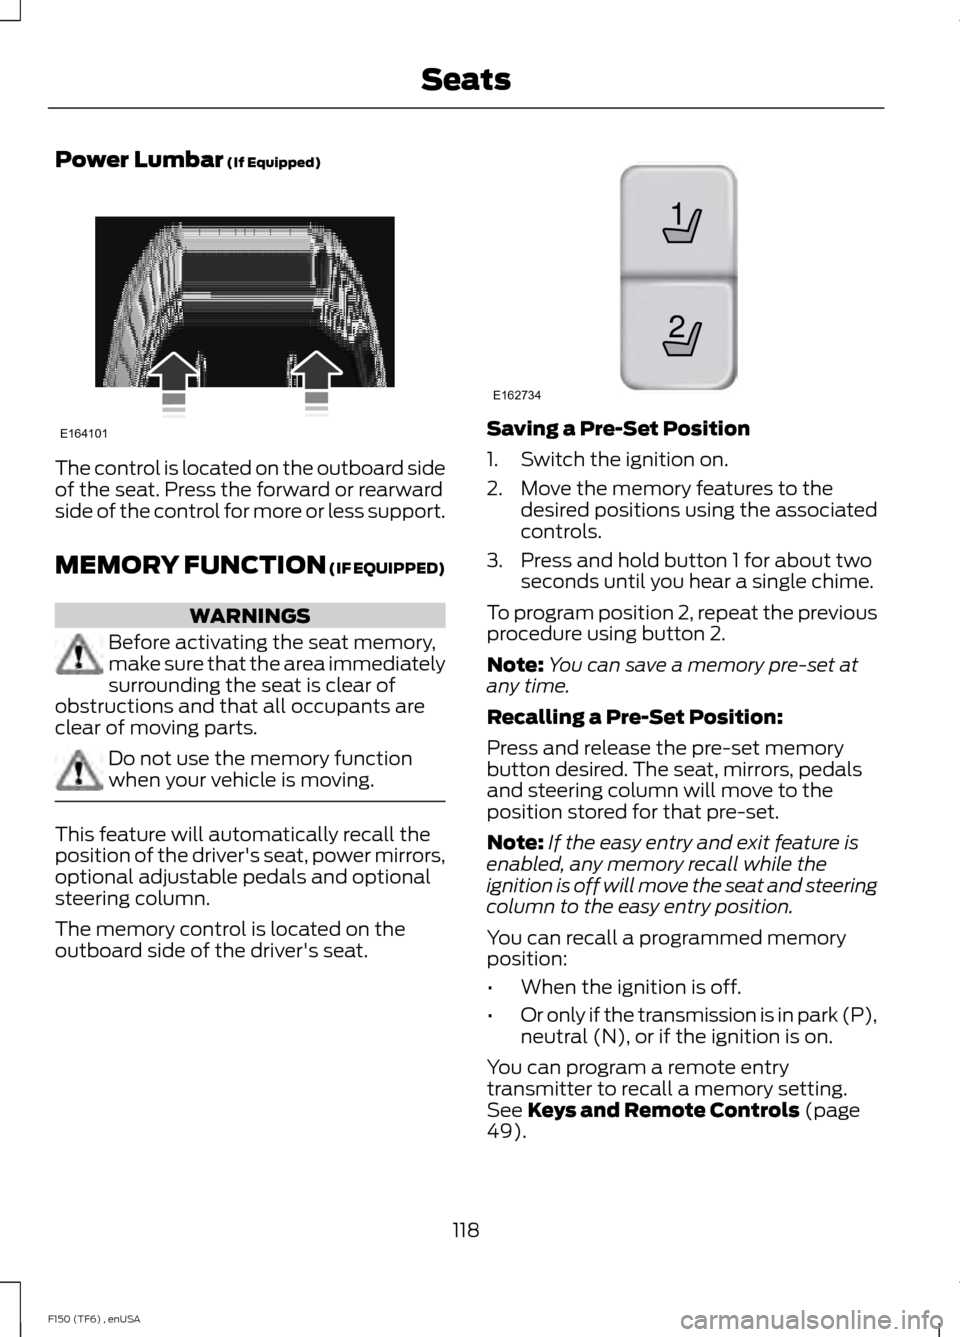
Power Lumbar (If Equipped)
The control is located on the outboard side
of the seat. Press the forward or rearward
side of the control for more or less support.
MEMORY FUNCTION
(IF EQUIPPED)
WARNINGS
Before activating the seat memory,
make sure that the area immediately
surrounding the seat is clear of
obstructions and that all occupants are
clear of moving parts. Do not use the memory function
when your vehicle is moving.
This feature will automatically recall the
position of the driver's seat, power mirrors,
optional adjustable pedals and optional
steering column.
The memory control is located on the
outboard side of the driver's seat. Saving a Pre-Set Position
1. Switch the ignition on.
2. Move the memory features to the
desired positions using the associated
controls.
3. Press and hold button 1 for about two seconds until you hear a single chime.
To program position 2, repeat the previous
procedure using button 2.
Note: You can save a memory pre-set at
any time.
Recalling a Pre-Set Position:
Press and release the pre-set memory
button desired. The seat, mirrors, pedals
and steering column will move to the
position stored for that pre-set.
Note: If the easy entry and exit feature is
enabled, any memory recall while the
ignition is off will move the seat and steering
column to the easy entry position.
You can recall a programmed memory
position:
• When the ignition is off.
• Or only if the transmission is in park (P),
neutral (N), or if the ignition is on.
You can program a remote entry
transmitter to recall a memory setting.
See
Keys and Remote Controls (page
49).
118
F150 (TF6) , enUSA SeatsE164101 21
E162734
Page 122 of 472
You can also program a personal keyless
entry code to recall a memory setting. See
Locks (page 57).
Easy Entry and Exit Feature
(If
Equipped)
If you enable the easy entry and exit
feature, it automatically moves the driver's
seat rearward 2 inches (5 centimeters)
when the transmission selector lever is in
position
P and you remove the key from
the ignition.
If the seat is located less than 2 inches (5
centimeters) from the rear of the seat
track, the seat travel will be less than 2
inches (5 centimeters) rearward.
The driver's seat will return to the previous
position when you put the key in the
ignition.
You can enable or disable this feature
through the information display. See
Information Displays
(page 87).
REAR SEATS
Folding Up the Rear Seats (SuperCab)
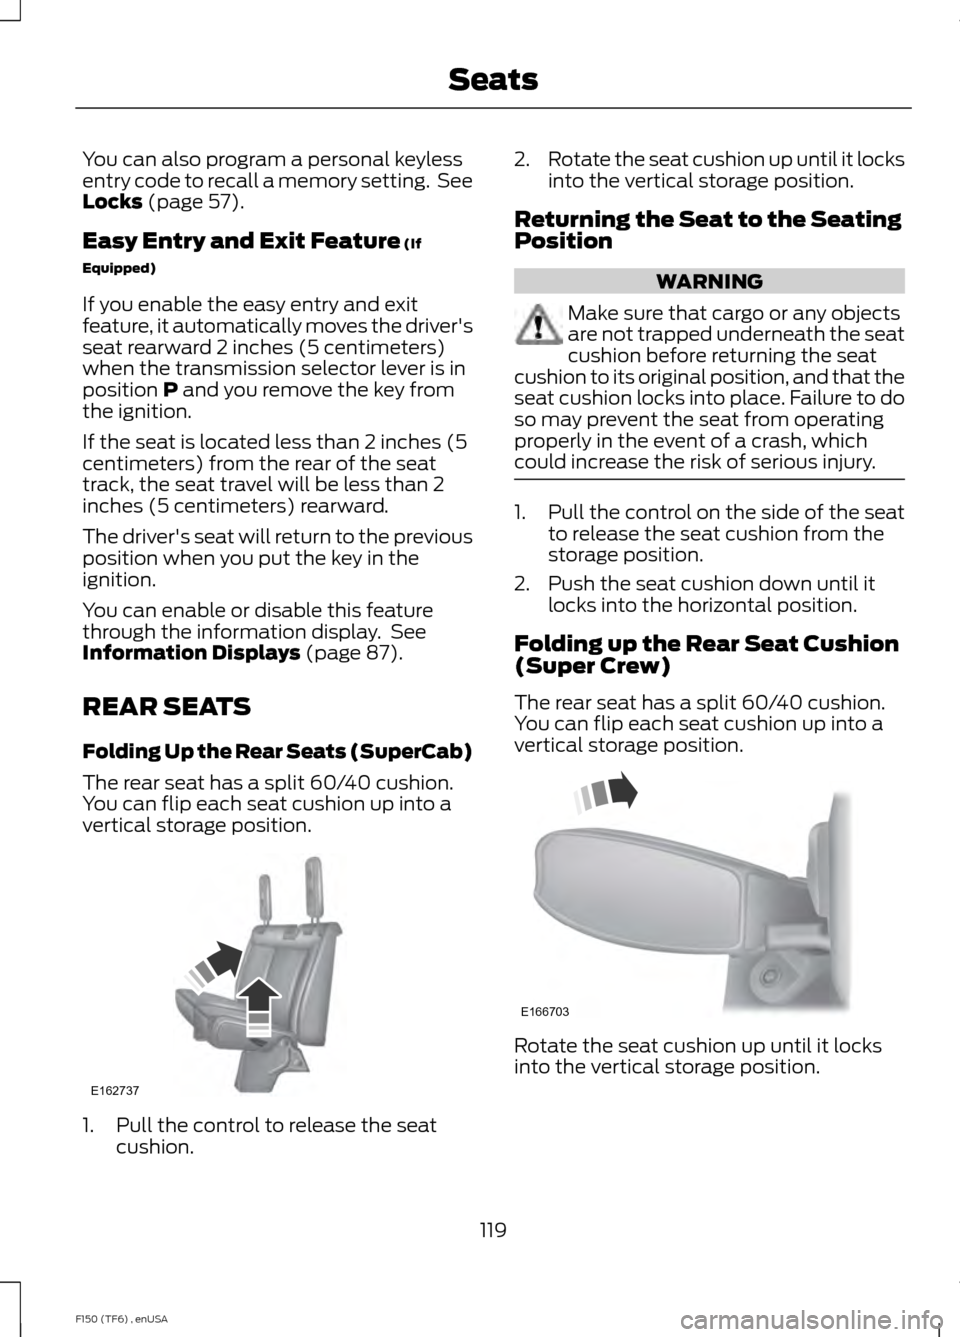
The rear seat has a split 60/40 cushion.
You can flip each seat cushion up into a
vertical storage position. 1. Pull the control to release the seat
cushion. 2.
Rotate the seat cushion up until it locks
into the vertical storage position.
Returning the Seat to the Seating
Position WARNING
Make sure that cargo or any objects
are not trapped underneath the seat
cushion before returning the seat
cushion to its original position, and that the
seat cushion locks into place. Failure to do
so may prevent the seat from operating
properly in the event of a crash, which
could increase the risk of serious injury. 1. Pull the control on the side of the seat
to release the seat cushion from the
storage position.
2. Push the seat cushion down until it locks into the horizontal position.
Folding up the Rear Seat Cushion
(Super Crew)
The rear seat has a split 60/40 cushion.
You can flip each seat cushion up into a
vertical storage position. Rotate the seat cushion up until it locks
into the vertical storage position.
119
F150 (TF6) , enUSA SeatsE162737 E166703
Page 232 of 472

Protected components
Fuse amp rating
Fuse or relay number
Driver power seat/memory module
30A*
74
Powertrain control module – voltage
power 1 (3.7L, 5.0L, 6.2L engines)
15A**
75
Powertrain control module – voltage
power 1 (3.5L engine)
25A**
Powertrain control module – Voltage
power 2: General powertrain components
(Mass air flow/Intake air temp sensor -
3.7L, 5.0L, 6.2L engines) (Canister vent
solenoid - 3.5L engine)
20A**
76
Powertrain control module – Voltage
power 3 (Emission related powertrain
components, Electric fan relays coil)
10A**
77
Powertrain control module – Voltage
power 4 – Ignition coils (3.5L, 3.7L, 5.0L
engines)
15A**
78
Powertrain control module – Voltage
power 4 – Ignition coils (6.2L engine)
20A**
Rain sensor
5A**
79
Not used
—
80
Not used
—
81
Not used
—
82
Not used
—
83
Not used
—
84
Electric fan (low speed)
Relay
85
*Cartridge fuses
**Mini fuses
Passenger Compartment Fuse
Panel
The fuse panel is in the right-hand side of
the passenger footwell behind a trim panel. To remove the trim panel, pull it toward
you and swing it away from the side. To
reinstall it, line up the tabs with the grooves
on the panel, and then push it shut.
To remove the fuse panel cover, press in
the tabs on both sides of the cover, and
then pull it off.
229
F150 (TF6) , enUSA Fuses
Page 233 of 472

To reinstall the fuse panel cover, place the
top part of the cover on the fuse panel and
push the bottom part until it latches.
Gently pull on the cover to make sure it has
latched properly. Protected components
Fuse amp rating
Fuse or relay number
Driver side front window
30A
1
SYNC , Display module (8 inch)
15A
2
Passenger side front window
30A
3
Interior lamps
10A
4
Memory module
20A
5
Not used (spare)
5A
6
Power mirror switch, Memory seat module
7.5A
7
Not used (spare)
10A
8
Radio display, GPS module, Electric finish
panel module
10A
9
230
F150 (TF6) , enUSA FusesE163102
Page 313 of 472
SIRIUS allows you to access different satellite radio options.
CLOCK#:
Press this button to set the time. Use the memory preset buttons to
enter the time, and then press OK.
F
PHONE:
Press this button to access the phone features of the SYNC system.
See Using SYNC™ With Your Phone (page 327). If your vehicle is not equipped
with SYNC, the display reads NO PHONE.
G
SOUND:
Press this button to access settings for Treble, Middle, Bass, Balance
and Fade. Use the SEEK or TUNE controls to change the settings.
H
Bass
levels can be increased or decreased.
Treble
levels can be increased or decreased.
Balance
adjusts the sound between left and right speakers.
Fade
adjusts the sound between the front and back speakers.
Speed Compensated Volume
adjusts the volume to compensate for speed
and wind noise. You can set the system between off and +7.
All Seat Mode/Driver Seat Mode
optimizes sound quality for the chosen
seating position.
DSP Mode
(if equipped) allows you to choose between STEREO SURROUND
mode and STEREO mode.
SEEK:
I
In radio mode, select a frequency band and press one of these buttons. The
system stops at the first station it finds in that direction.
In Sirius mode, press one of these buttons to select the previous or next channel.
If you select a specific category (such as Jazz, Rock or News), use these buttons
to find the previous or next channel in the selected category.
In CD and MP3 modes, press one of these buttons to select the previous or next
track.
CD:
Press this button to access CD and MP3 modes.
J
The disc begins to play where it left off. If no CD is loaded, NO DISC
appears
in the display.
Press the
SEEK buttons to access the previous or next track. Press and hold
the SEEK buttons to quickly reverse or fast-forward within the same track.
TUNE/OK/Play/Pause:
K
In radio mode, turn the control to search manually through the radio frequency
band.
In Sirius mode, turn the control to find the next or previous available satellite
radio station.
OK
allows you to confirm commands with phone and media features.
310
F150 (TF6) , enUSA Audio System