Page 25 of 328
1
2
3
4
5
6
7
8
9
2
25
1. INITIAL SCREEN .......................... 26
2. TOUCH SCREEN OPERATION .... 27
3. INPUTTING LETTERS AND NUMBERS/LIST SCREEN
OPERATION ............................... 28
4. SCREEN ADJUSTMENT .............. 30
SCREEN SETTINGS ADJUSTMENT .... 30
5. MAP SCREEN OPERATION......... 32
CURRENT POSITION DISPLAY ........... 32
SCREEN SCROLL OPERATION .......... 32
SWITCHING THE SCREENS ................ 36
MAP SCALE .......................................... 38
ORIENTATION OF THE MAP ............... 39
STANDARD MAP ICONS ...................... 39
1. GENERAL SETTINGS .................. 40
SCREENS FOR GENERAL SETTINGS .......................................... 40
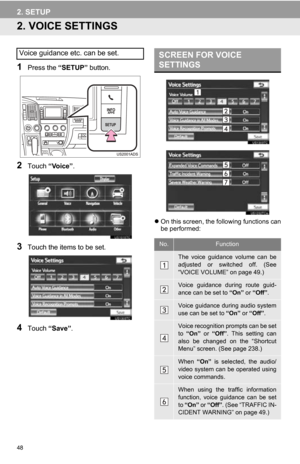
2. VOICE SETTINGS ......................... 48
SCREEN FOR VOICE SETTINGS .......................................... 48
1BASIC INFORMATION BEFORE
OPERATION
2SETUP
BASIC FUNCTION
Page 26 of 328

26
1. BASIC INFORMATION BEFORE OPERATION
1. INITIAL SCREEN
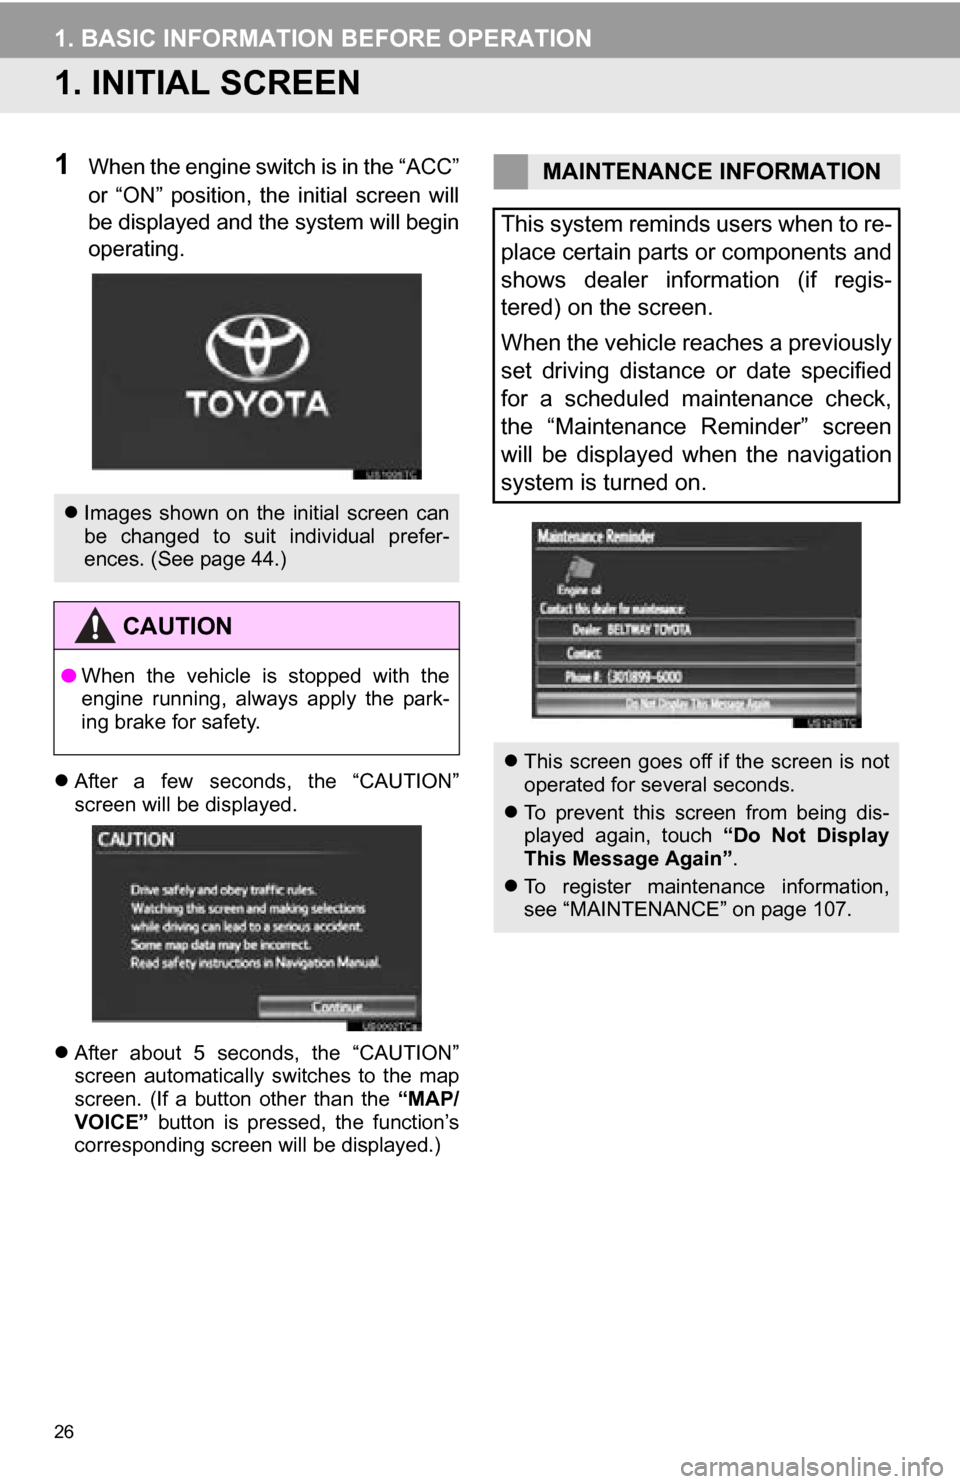
1When the engine switch is in the “ACC”
or “ON” position, the initial screen will
be displayed and the system will begin
operating.
After a few seconds, the “CAUTION”
screen will be displayed.
After about 5 seconds, the “CAUTION”
screen automatically switches to the map
screen. (If a button other than the “MAP/
VOICE” button is pressed, the function’s
corresponding screen will be displayed.)
Images shown on the initial screen can
be changed to suit individual prefer-
ences. (See page 44.)
CAUTION
●When the vehicle is stopped with the
engine running, always apply the park-
ing brake for safety.
MAINTENANCE INFORMATION
This system reminds users when to re-
place certain parts or components and
shows dealer information (if regis-
tered) on the screen.
When the vehicle reaches a previously
set driving distance or date specified
for a scheduled maintenance check,
the “Maintenance Reminder” screen
will be displayed when the navigation
system is turned on.
This screen goes off if the screen is not
operated for several seconds.
To prevent this screen from being dis-
played again, touch “Do Not Display
This Message Again” .
To register maintenance information,
see “MAINTENANCE” on page 107.
Page 27 of 328

27
1. BASIC INFORMATION BEFORE OPERATION
2
BASIC FUNCTION
2. TOUCH SCREEN OPERATION
This system is operated mainly by the
buttons on the screen. (Referred to as
screen buttons in this manual.)
When a screen button is touched, a
beep sounds. (To set the beep sound,
see page 40.)
NOTICE
● To prevent damaging the screen, lightly
touch the screen buttons with your finger
pad.
● Do not operate or rub the screen with a
ballpoint pen, a mechanical pencil, fin-
ger nail, a pointy and/or hard object
because this will damage the screen.
● Do not use objects other than your finger
to touch the screen.
● When wiping the touch screen, it is
advisable to wipe with a soft and dry
cloth wrapped around the finger. Do not
use chemical cleaners to clean the
touch screen. Also, be careful not to
apply excessive force on the screen.
INFORMATION
●If the system does not respond to touch-
ing a screen button, move your finger
away from the screen and then touch it
again.
● Dimmed screen buttons cannot be oper-
ated.
● To operate the touch screen, press
touch screen buttons properly with finger
pad.
● When dew condensation occurs inside
the touch screen, it is sometimes difficult
to operate the display properly. In such
case, please leave the screen
untouched and do not operate the touch
screen until dew condensation disap-
pears.
● The displayed image may become
darker and moving images may be
slightly distorted when the screen is
cold.
● In extremely cold conditions, the map
may not be displayed and the data input
by a user may be deleted. Also, the
screen buttons may be harder than
usual to depress.
● When the screen is viewed through
polarized sunglasses, a rainbow pattern
may appear on the screen due to optical
characteristics of the screen. If this is
disturbing, please operate the screen
without polarized sunglasses.
Page 28 of 328

28
1. BASIC INFORMATION BEFORE OPERATION
3. INPUTTING LETTERS AND NUMBERS/LIST SCREEN OPERATION
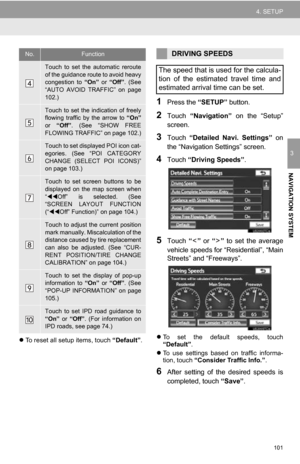
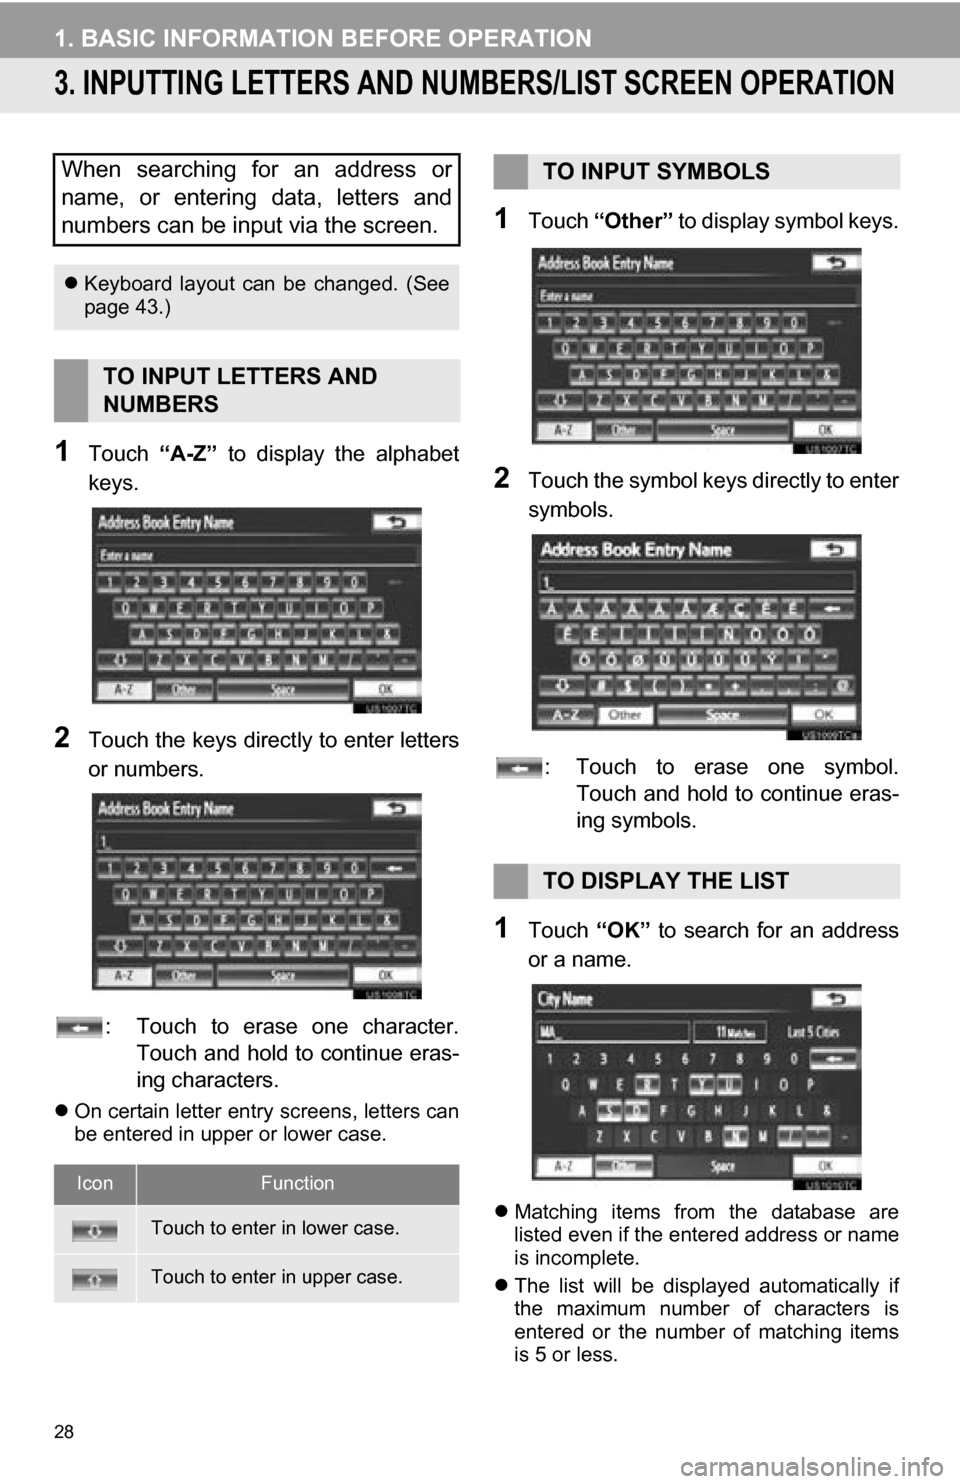
1Touch “A-Z” to display the alphabet
keys.
2Touch the keys direct ly to enter letters
or numbers.
: Touch to erase one character. Touch and hold to continue eras-
ing characters.
On certain letter entry screens, letters can
be entered in upper or lower case.
1Touch “Other” to display symbol keys.
2Touch the symbol keys directly to enter
symbols.
: Touch to erase one symbol. Touch and hold to continue eras-
ing symbols.
1Touch “OK” to search for an address
or a name.
Matching items from the database are
listed even if the entered address or name
is incomplete.
The list will be displayed automatically if
the maximum number of characters is
entered or the number of matching items
is 5 or less.
When searching for an address or
name, or entering data, letters and
numbers can be input via the screen.
Keyboard layout can be changed. (See
page 43.)
TO INPUT LETTERS AND
NUMBERS
IconFunction
Touch to enter in lower case.
Touch to enter in upper case.
TO INPUT SYMBOLS
TO DISPLAY THE LIST
Page 29 of 328

29
1. BASIC INFORMATION BEFORE OPERATION
2
BASIC FUNCTION
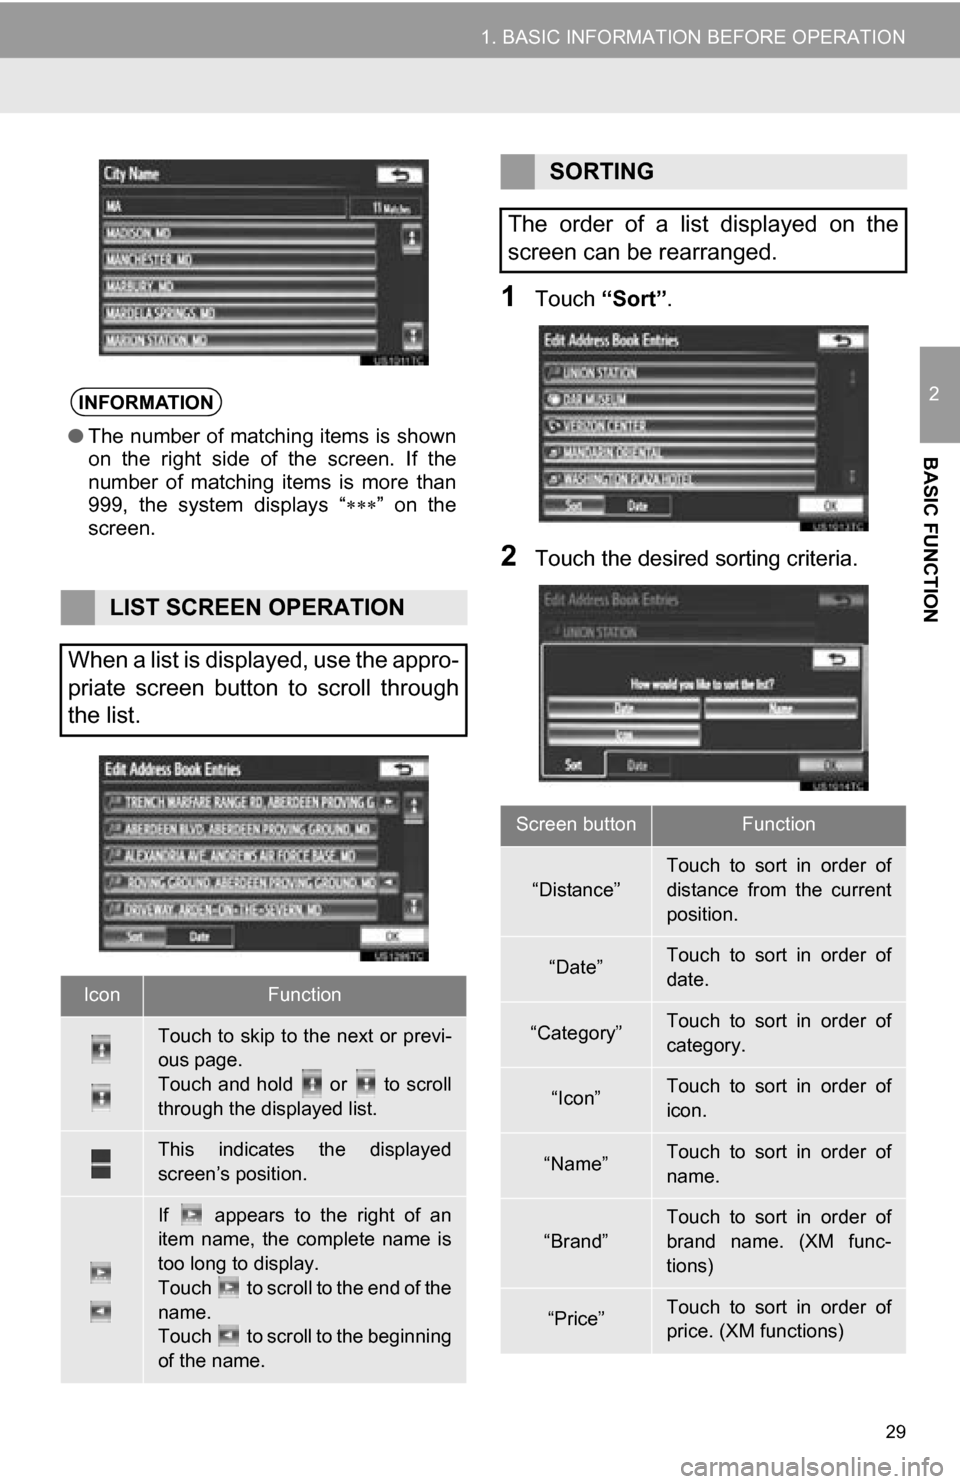
1Touch “Sort”.
2Touch the desired sorting criteria.
INFORMATION
●The number of matching items is shown
on the right side of the screen. If the
number of matching items is more than
999, the system displays “ ” on the
screen.
LIST SCREEN OPERATION
When a list is displayed, use the appro-
priate screen button to scroll through
the list.
IconFunction
Touch to skip to the next or previ-
ous page.
Touch and hold or to scroll
through the displayed list.
This indicates the displayed
screen’s position.
If appears to the right of an
item name, the complete name is
too long to display.
Touch to scroll to the end of the
name.
Touch to scroll to the beginning
of the name.
SORTING
The order of a list displayed on the
screen can be rearranged.
Screen buttonFunction
“Distance”Touch to sort in order of
distance from the current
position.
“Date”Touch to sort in order of
date.
“Category”Touch to sort in order of
category.
“Icon”Touch to sort in order of
icon.
“Name”Touch to sort in order of
name.
“Brand”
Touch to sort in order of
brand name. (XM func-
tions)
“Price”Touch to sort in order of
price. (XM functions)
Page 30 of 328
30
1. BASIC INFORMATION BEFORE OPERATION
4. SCREEN ADJUSTMENT
1Press the “SETUP” button.
2Touch “Display”.
Adjusting the screen display
“Camera” : Touch to adjust the image the
camera displays.
Adjusting the image the camera displays
“Map·Menu”: Touch to return to the
screen display settings.
The contrast and brightness of the
screen display and the image the cam-
era displays can be adjusted. The dis-
play can also be turned off, and/or
changed to either day or night mode.
(For information regarding audio/video
screen adjustment, see “AUDIO
SCREEN ADJUSTMENT” on page
198.)
SCREEN SETTINGS
ADJUSTMENT
ADJUSTING SCREEN DISPLAY
AND CAMERA SETTINGS
Page 31 of 328

31
1. BASIC INFORMATION BEFORE OPERATION
2
BASIC FUNCTION
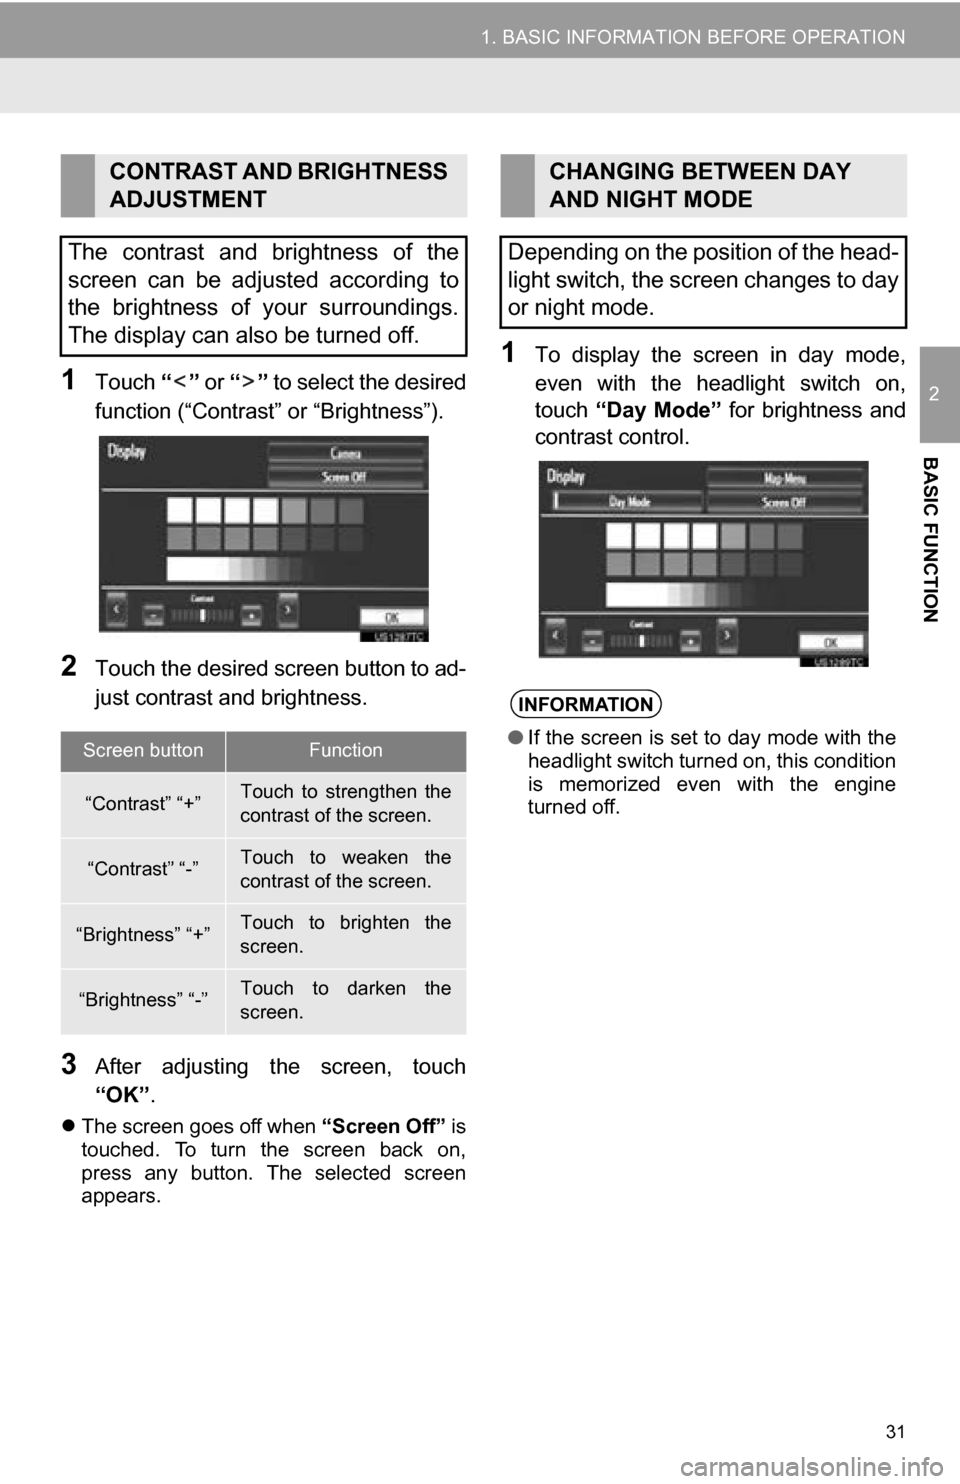
1Touch “” or “” to select the desired
function (“Contrast” or “Brightness”).
2Touch the desired screen button to ad-
just contrast and brightness.
3After adjusting t he screen, touch
“OK” .
The screen goes off when “Screen Off” is
touched. To turn the screen back on,
press any button. The selected screen
appears.
1To display the screen in day mode,
even with the headlight switch on,
touch “Day Mode” for brightness and
contrast control.
CONTRAST AND BRIGHTNESS
ADJUSTMENT
The contrast and brightness of the
screen can be adjusted according to
the brightness of your surroundings.
The display can also be turned off.
Screen buttonFunction
“Contrast” “+”Touch to strengthen the
contrast of the screen.
“Contrast” “-”Touch to weaken the
contrast of the screen.
“Brightness” “+”Touch to brighten the
screen.
“Brightness” “-”Touch to darken the
screen.
CHANGING BETWEEN DAY
AND NIGHT MODE
Depending on the position of the head-
light switch, the screen changes to day
or night mode.
INFORMATION
● If the screen is set to day mode with the
headlight switch turned on, this condition
is memorized even with the engine
turned off.
Page 32 of 328

32
1. BASIC INFORMATION BEFORE OPERATION
5. MAP SCREEN OPERATION
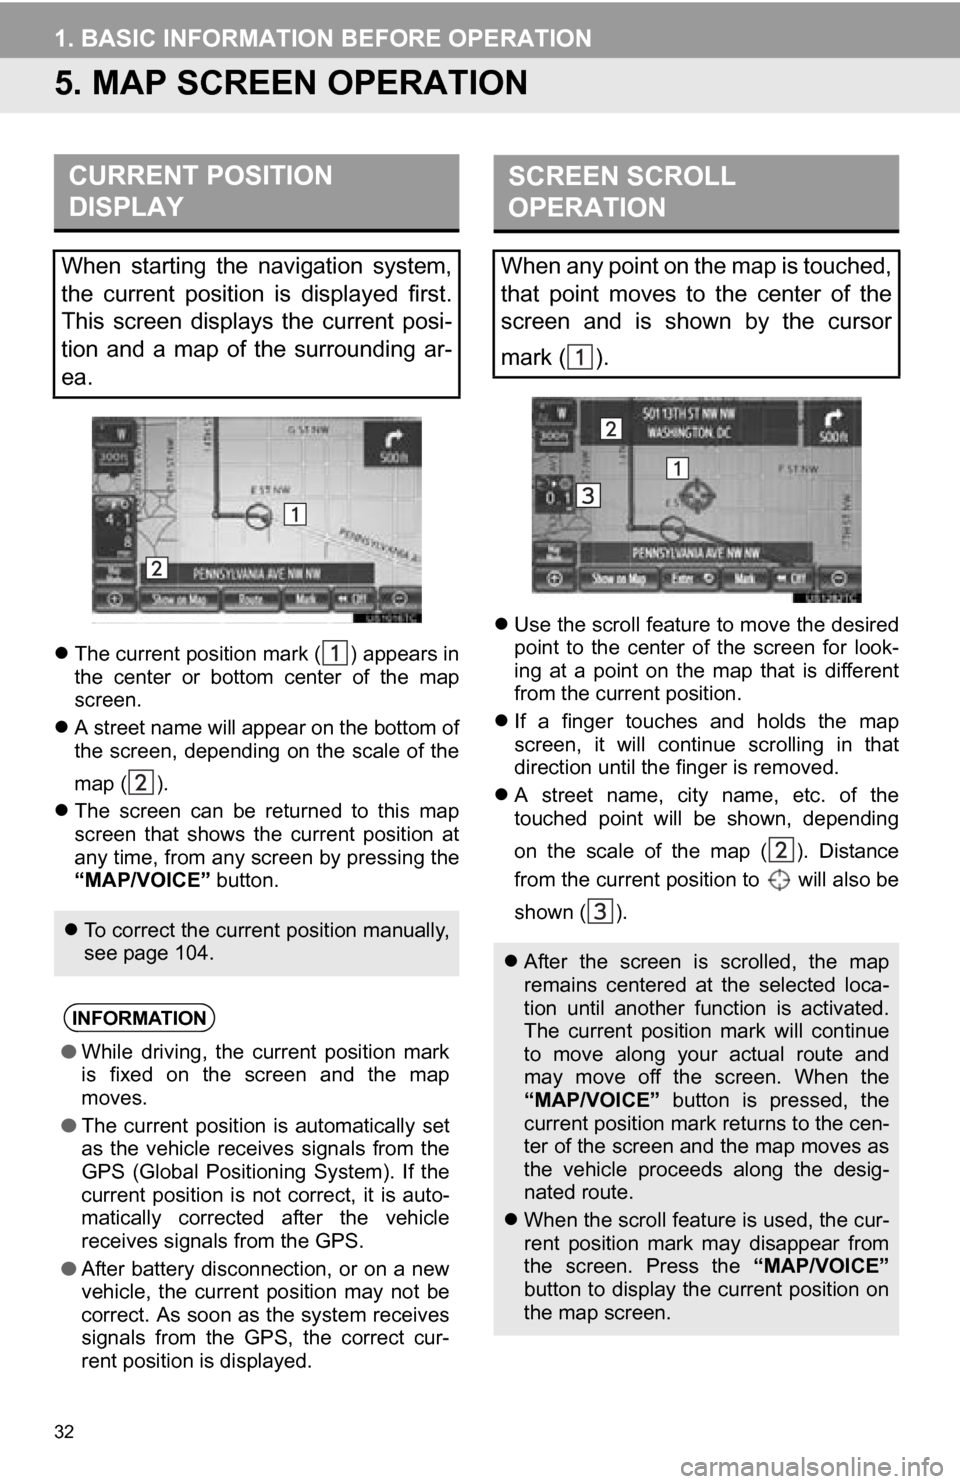
The current position mark ( ) appears in
the center or bottom center of the map
screen.
A street name will appear on the bottom of
the screen, depending on the scale of the
map ( ).
The screen can be returned to this map
screen that shows the current position at
any time, from any screen by pressing the
“MAP/VOICE” button.
Use the scroll feature to move the desired
point to the center of the screen for look-
ing at a point on the map that is different
from the current position.
If a finger touches and holds the map
screen, it will continue scrolling in that
direction until the finger is removed.
A street name, city name, etc. of the
touched point will be shown, depending
on the scale of the map ( ). Distance
from the current position to will also be
shown ( ).
CURRENT POSITION
DISPLAY
When starting the navigation system,
the current position is displayed first.
This screen displays the current posi-
tion and a map of the surrounding ar-
ea.
To correct the current position manually,
see page 104.
INFORMATION
●While driving, the current position mark
is fixed on the screen and the map
moves.
● The current position is automatically set
as the vehicle receives signals from the
GPS (Global Positioning System). If the
current position is not correct, it is auto-
matically corrected after the vehicle
receives signals from the GPS.
● After battery disconnection, or on a new
vehicle, the current position may not be
correct. As soon as the system receives
signals from the GPS, the correct cur-
rent position is displayed.
SCREEN SCROLL
OPERATION
When any point on the map is touched,
that point moves to the center of the
screen and is shown by the cursor
mark ( ).
After the screen is scrolled, the map
remains centered at the selected loca-
tion until another function is activated.
The current position mark will continue
to move along your actual route and
may move off the screen. When the
“MAP/VOICE” button is pressed, the
current position mark returns to the cen-
ter of the screen and the map moves as
the vehicle proceeds along the desig-
nated route.
When the scroll feature is used, the cur-
rent position mark may disappear from
the screen. Press the “MAP/VOICE”
button to display the current position on
the map screen.