Page 97 of 328
97
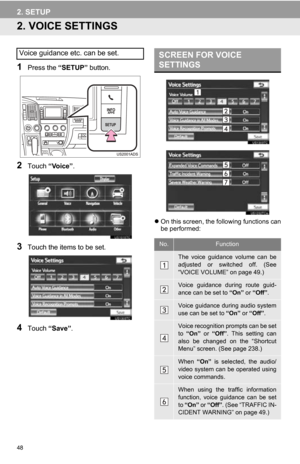
3. ADDRESS BOOK
3
NAVIGATION SYSTEM
6Touch “Edit” next to the item to be ed-
ited.
“Show Name on Map”:
The name of an
area to be avoided that may be dis-
played on the map by touching “On” or
“Off” .
(See page 97.)
“Active”: To turn on or off the area to avoid
feature. To turn on the feature, touch “On”
on the “Area to Avoid” screen. To turn off
the feature, touch “Off” on the “Area to
Avoid” screen.
7Touch “OK”.
■TO CHANGE “Name”
1Touch “Edit”.
2Enter the name using the alphanumer-
ic keys.
Up to 70 characters can be entered.
3Touch “OK”.
The previous screen will be displayed.
■DISPLAYING NAMES OF AREAS
TO BE AVOIDED
1Touch “On”, next to “Show Name on
Map”, to display the area to be avoided
name on the map. Touch “Off” to not
display it.
No.FunctionPage
To edit the name of the
area to avoid. The name
can be displayed on the
map.
97
To edit the area location.98
To edit the area size.98
Page 98 of 328
98
3. ADDRESS BOOK
■TO CHANGE “Location”
1Touch “Edit”.
2Touch one of the 8 directional screen
buttons to move the cursor to the
desired point on the map.
3Touch “OK”.
The previous screen will be displayed.
■TO CHANGE “Size”
1Touch “Edit”.
2Touch either or to change
the size of the area to be avoided.
3Touch “OK”.
The previous screen will be displayed.
1Press the “SETUP” button.
2Touch “Navigation” on the “Setup”
screen.
3Touch “Areas to Avoid” on the “Navi-
gation Settings” screen.
4Touch “Delete” .
DELETING AREAS TO AVOID
Page 99 of 328
99
3. ADDRESS BOOK
3
NAVIGATION SYSTEM
5Touch the area to be deleted.
6Touch “Delete” .
7Touch “Yes” to delete the area(s) and
touch “No” to cancel the deletion.
1Press the “SETUP” button.
2Touch “Navigation” on the “Setup”
screen.
3Touch “Delete Previous Dest.” .
4Touch the previous destination to be
deleted.
5Touch “Delete” .
6Touch “Yes” to delete the destina-
tion(s) and touch “No” to cancel the
deletion.
Screen buttonFunction
“Select All”Touch to select all regis-
tered areas to avoid.
“Unselect All”Touch to cancel the “Se-
lect All” function.
DELETING PREVIOUS
DESTINATIONS
Previous destinations can be deleted.
Screen buttonFunction
“Select All”Touch to select all previ-
ous destinations.
“Unselect All”Touch to cancel the “Se-
lect All” function.
Page 100 of 328
100
4. SETUP
1. DETAILED NAVIGATION SETTINGS
1Press the “SETUP” button.
2Touch “Navigation” .
3Touch “Detailed Navi. Settings” .
4Touch the items to be set.
5Touch “Save” .
On this screen, the following functions can
be performed:
Settings are available for driving
speeds, favorite POI categories, auto-
matic screen change, “
Off” func-
tion, etc.
SCREENS FOR NAVIGATION
SETTINGS
No.Function
Touch to set the average cruising
speed. (See “DRIVING SPEEDS”
on page 101.)
Touch to set the automatic input
function to “On” or “Off” .
Touch to set the voice guidance for
the next street name to “On” or
“Off” during route guidance.
Page 101 of 328

101
4. SETUP
3
NAVIGATION SYSTEM
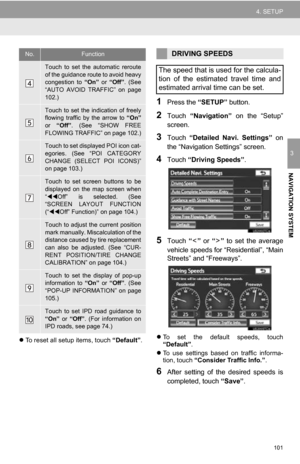
To reset all setup items, touch “Default”.
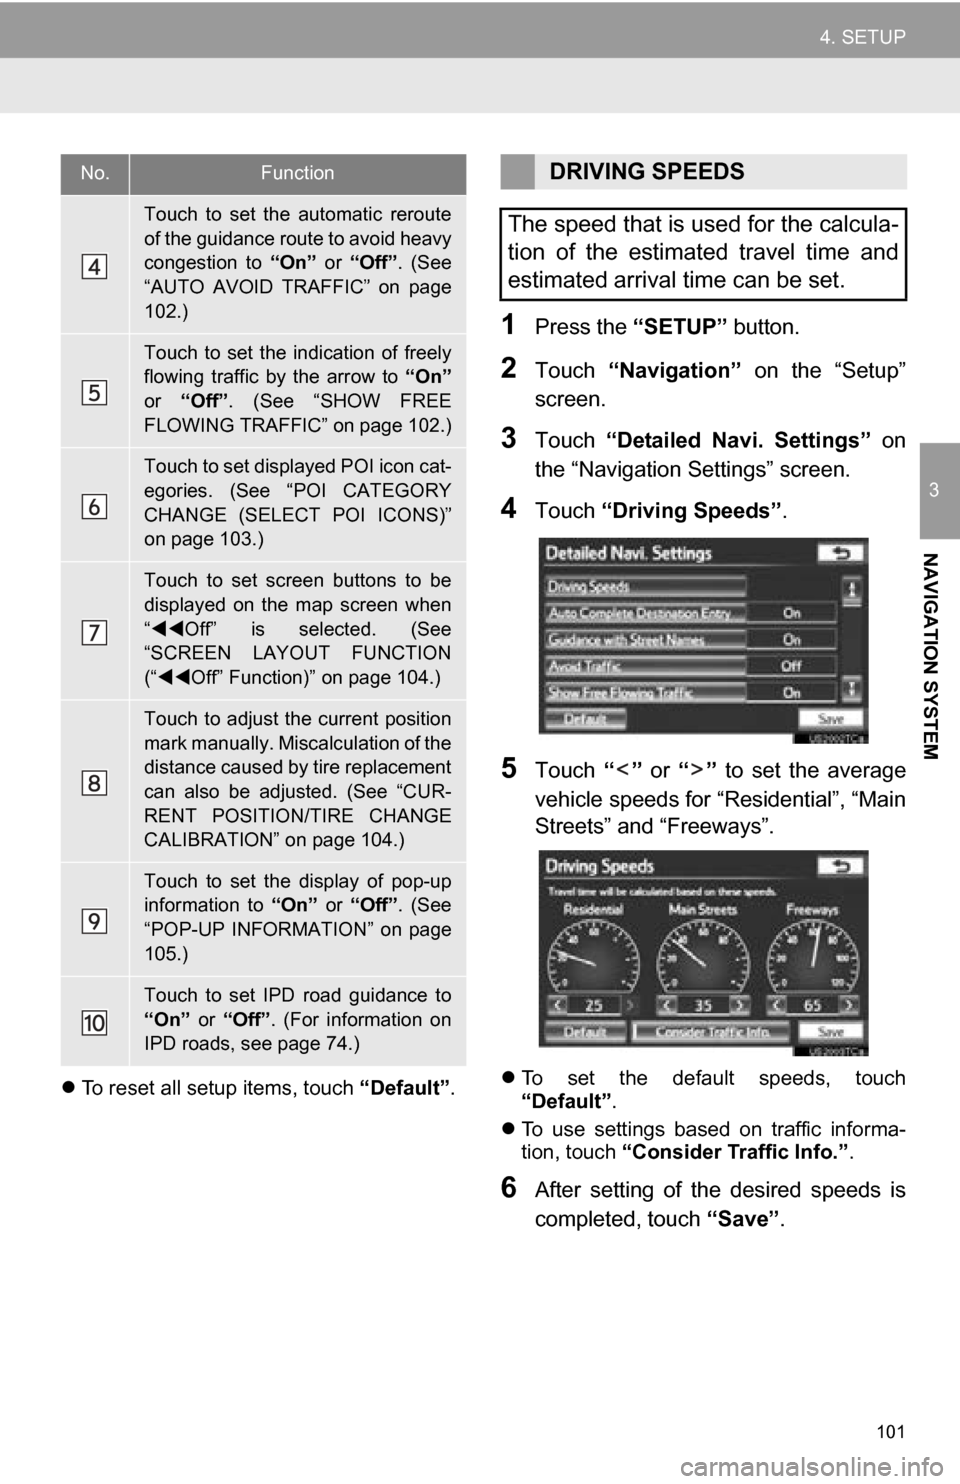
1Press the “SETUP” button.
2Touch “Navigation” on the “Setup”
screen.
3Touch “Detailed Navi. Settings” on
the “Navigation Settings” screen.
4Touch “Driving Speeds” .
5Touch “” or “” to set the average
vehicle speeds for “Residential”, “Main
Streets” and “Freeways”.
To set the default speeds, touch
“Default”.
To use settings based on traffic informa-
tion, touch “Consider Traffic Info.” .
6After setting of the desired speeds is
completed, touch “Save”.
Touch to set the automatic reroute
of the guidance route to avoid heavy
congestion to “On” or “Off”. (See
“AUTO AVOID TRAFFIC” on page
102.)
Touch to set the indication of freely
flowing traffic by the arrow to “On”
or “Off” . (See “SHOW FREE
FLOWING TRAFFIC” on page 102.)
Touch to set displayed POI icon cat-
egories. (See “POI CATEGORY
CHANGE (SELECT POI ICONS)”
on page 103.)
Touch to set screen buttons to be
displayed on the map screen when
“ Off” is selected. (See
“SCREEN LAYOUT FUNCTION
(“ Off” Function)” on page 104.)
Touch to adjust the current position
mark manually. Miscalculation of the
distance caused by tire replacement
can also be adjusted. (See “CUR-
RENT POSITION/TIRE CHANGE
CALIBRATION” on page 104.)
Touch to set the display of pop-up
information to “On” or “Off”. (See
“POP-UP INFORMATION” on page
105.)
Touch to set IPD road guidance to
“On” or “Off”. (For information on
IPD roads, see page 74.)
No.FunctionDRIVING SPEEDS
The speed that is used for the calcula-
tion of the estimated travel time and
estimated arrival time can be set.
Page 102 of 328

102
4. SETUP
1Press the “SETUP” button.
2Touch “Navigation” on the “Setup”
screen.
3Touch “Detailed Navi. Settings” on
the “Navigation Settings” screen.
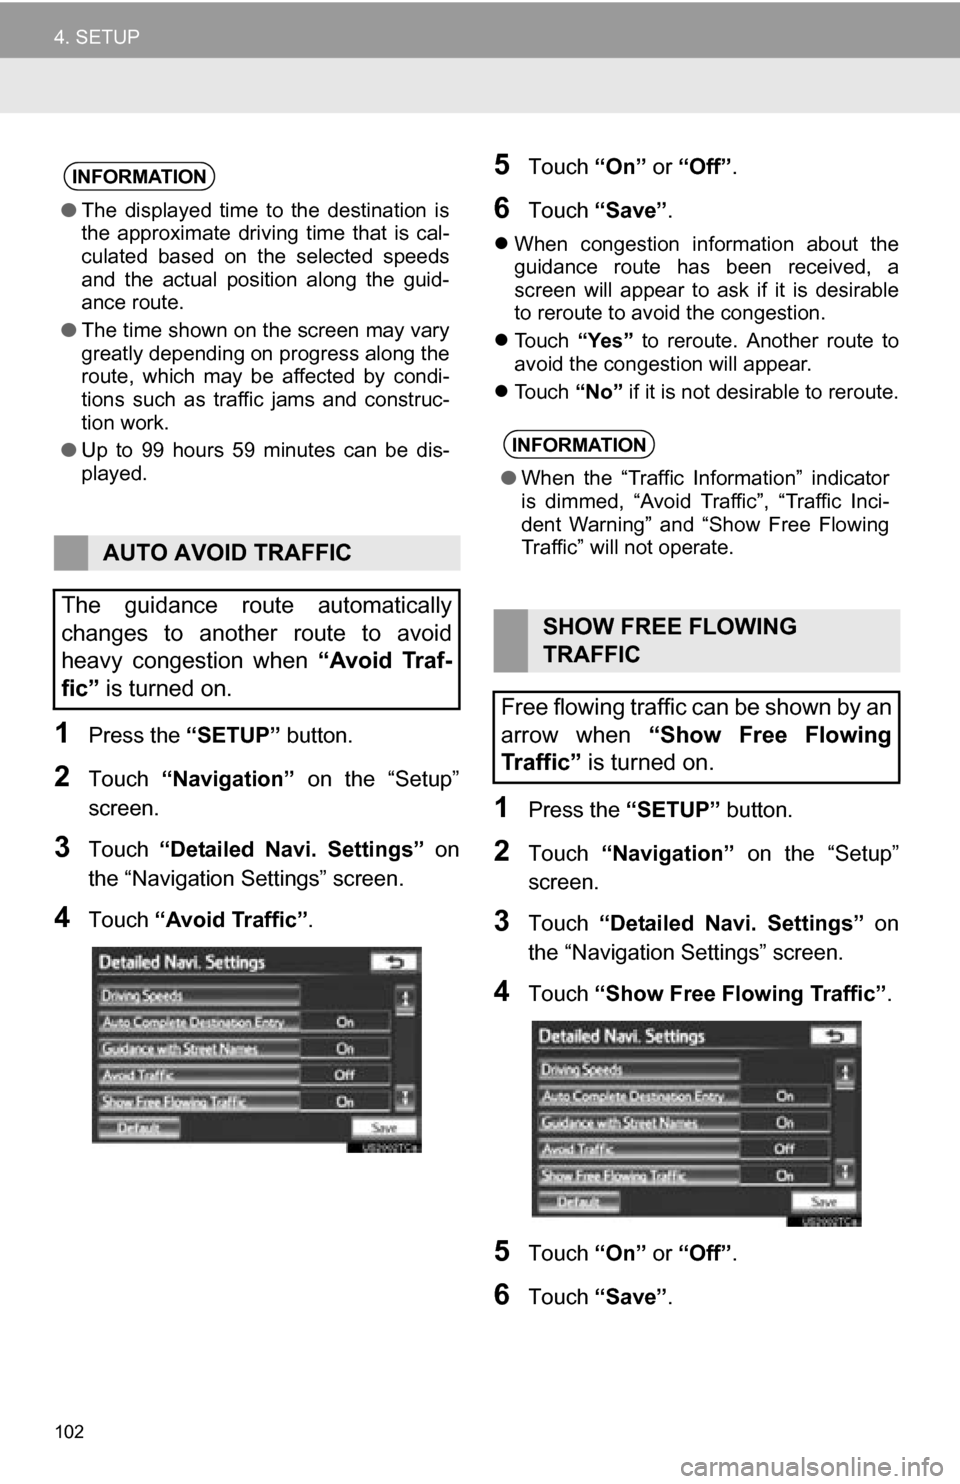
4Touch “Avoid Traffic” .
5Touch “On” or “Off” .
6Touch “Save” .
When congestion information about the
guidance route has been received, a
screen will appear to ask if it is desirable
to reroute to avoid the congestion.
Touch “Yes” to reroute. Another route to
avoid the congestion will appear.
Touch “No” if it is not desirable to reroute.
1Press the “SETUP” button.
2Touch “Navigation” on the “Setup”
screen.
3Touch “Detailed Navi. Settings” on
the “Navigation Settings” screen.
4Touch “Show Free Flowing Traffic” .
5Touch “On” or “Off” .
6Touch “Save” .
INFORMATION
●The displayed time to the destination is
the approximate driving time that is cal-
culated based on the selected speeds
and the actual position along the guid-
ance route.
● The time shown on the screen may vary
greatly depending on progress along the
route, which may be affected by condi-
tions such as traffic jams and construc-
tion work.
● Up to 99 hours 59 minutes can be dis-
played.
AUTO AVOID TRAFFIC
The guidance route automatically
changes to another route to avoid
heavy congestion when “Avoid Traf-
fic” is turned on.
INFORMATION
● When the “Traffic Information” indicator
is dimmed, “Avoid Traf fic”, “Traffic Inci-
dent Warning” and “Show Free Flowing
Traffic” will not operate.
SHOW FREE FLOWING
TRAFFIC
Free flowing traffic can be shown by an
arrow when “Show Free Flowing
Traffic” is turned on.
Page 103 of 328
103
4. SETUP
3
NAVIGATION SYSTEM
1Press the “SETUP” button.
2Touch “Navigation” on the “Setup”
screen.
3Touch “Detailed Navi. Settings” on
the “Navigation Settings” screen.
4Touch “Favorite POI Categories” .
5Touch the category to be changed.
6Touch the desired group.
If the desired POI category is not on the
screen, touch “List All Categories” to list
all POI categories.
7Touch the desired category.
The screen returns to the first page of the
“Favorite POI Categories” screen.
8Touch “OK”.
INFORMATION
●When the “Traffic Information” indicator
is dimmed, “Avoid Traffic”, “Traffic Inci-
dent Warning” and “Show Free Flowing
Traffic” will not operate.
POI CATEGORY CHANGE
(SELECT POI ICONS)
Select up to 6 POI icons to be dis-
played on the map screen.
Page 104 of 328

104
4. SETUP
1Press the “SETUP” button.
2Touch “Navigation” on the “Setup”
screen.
3Touch “Detailed Navi. Settings” on
the “Navigation Settings” screen.
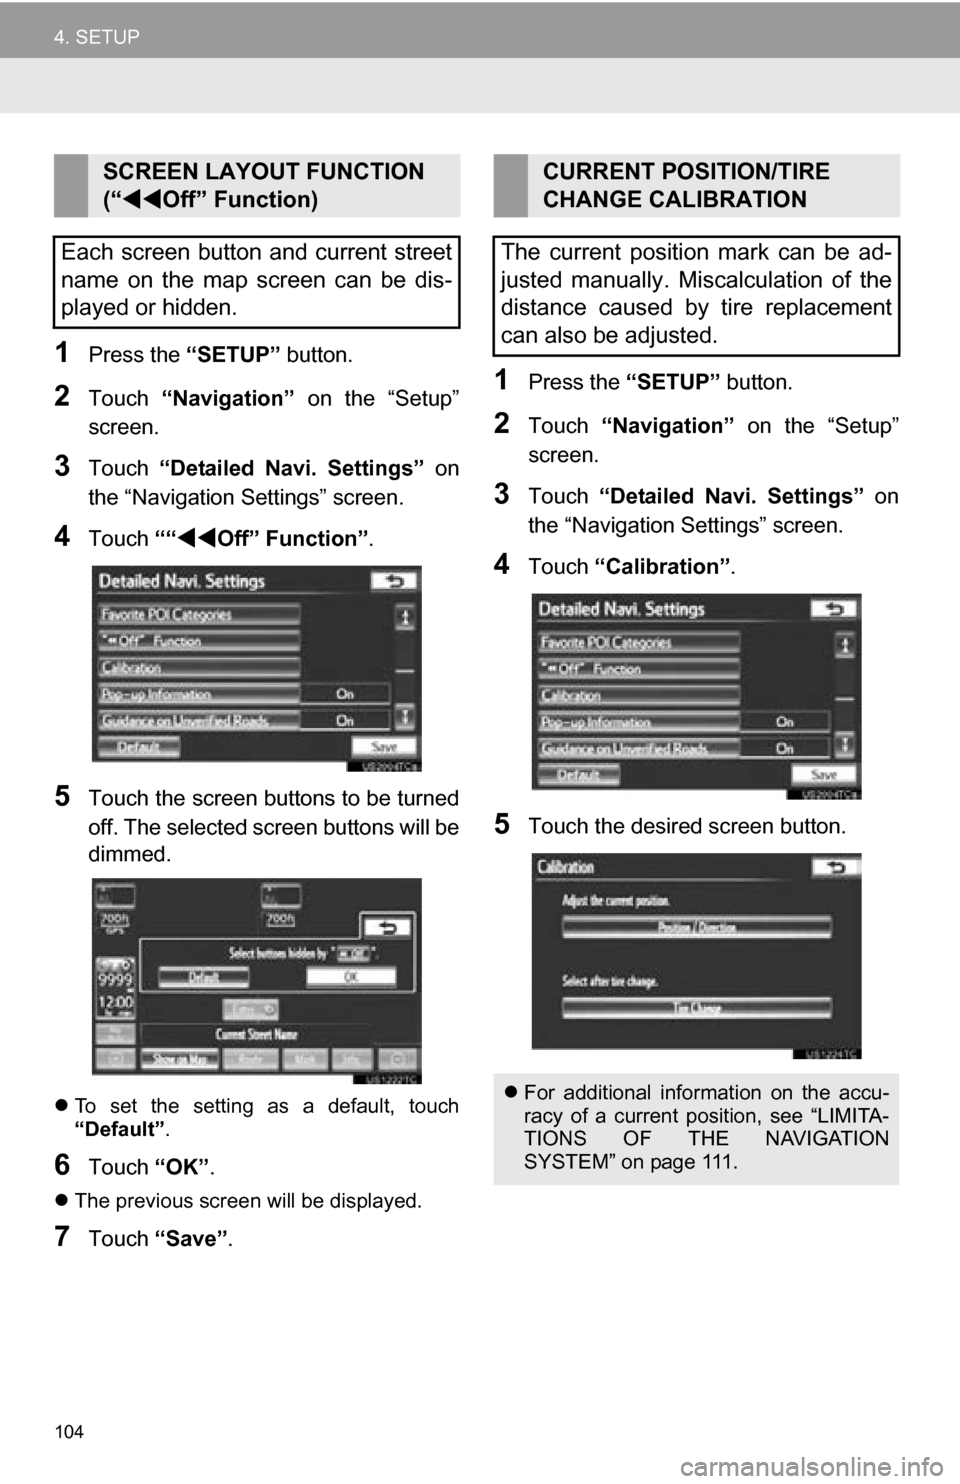
4Touch ““Off” Function” .
5Touch the screen buttons to be turned
off. The selected screen buttons will be
dimmed.
To set the setting as a default, touch
“Default”.
6Touch “OK”.
The previous screen will be displayed.
7Touch “Save” .
1Press the “SETUP” button.
2Touch “Navigation” on the “Setup”
screen.
3Touch “Detailed Navi. Settings” on
the “Navigation Settings” screen.
4Touch “Calibration”.
5Touch the desired screen button.
SCREEN LAYOUT FUNCTION
(“Off” Function)
Each screen button and current street
name on the map screen can be dis-
played or hidden.CURRENT POSITION/TIRE
CHANGE CALIBRATION
The current position mark can be ad-
justed manually. Miscalculation of the
distance caused by tire replacement
can also be adjusted.
For additional information on the accu-
racy of a current position, see “LIMITA-
TIONS OF THE NAVIGATION
SYSTEM” on page 111.