2013 MERCEDES-BENZ B-CLASS SPORTS reset
[x] Cancel search: resetPage 185 of 336
Menus and submenus
Menu overview
Operating the on-board computer (Y page 180).
Depending on the equipment installed in the vehicle, you can call up the following menus:
R Trip menu (Y
page 182)
R Navi menu (navigationi
nstructions) (Ypage 184)
R Audio menu (Y
page 185)
R Tel menu (telephone) (Y
page 186)
R DriveAssist menu (assistance) (Y
page 187)
R Serv. menu (Y
page 189)
R Sett. menu (Y
page 189)
The Audio ,
Navi and
Tel menus differ slightly in vehicles with Audio 20 and in vehicles with
COMAND. The examples given in this Operator's Manual apply to vehicles equipped with
COMAND. Trip menu
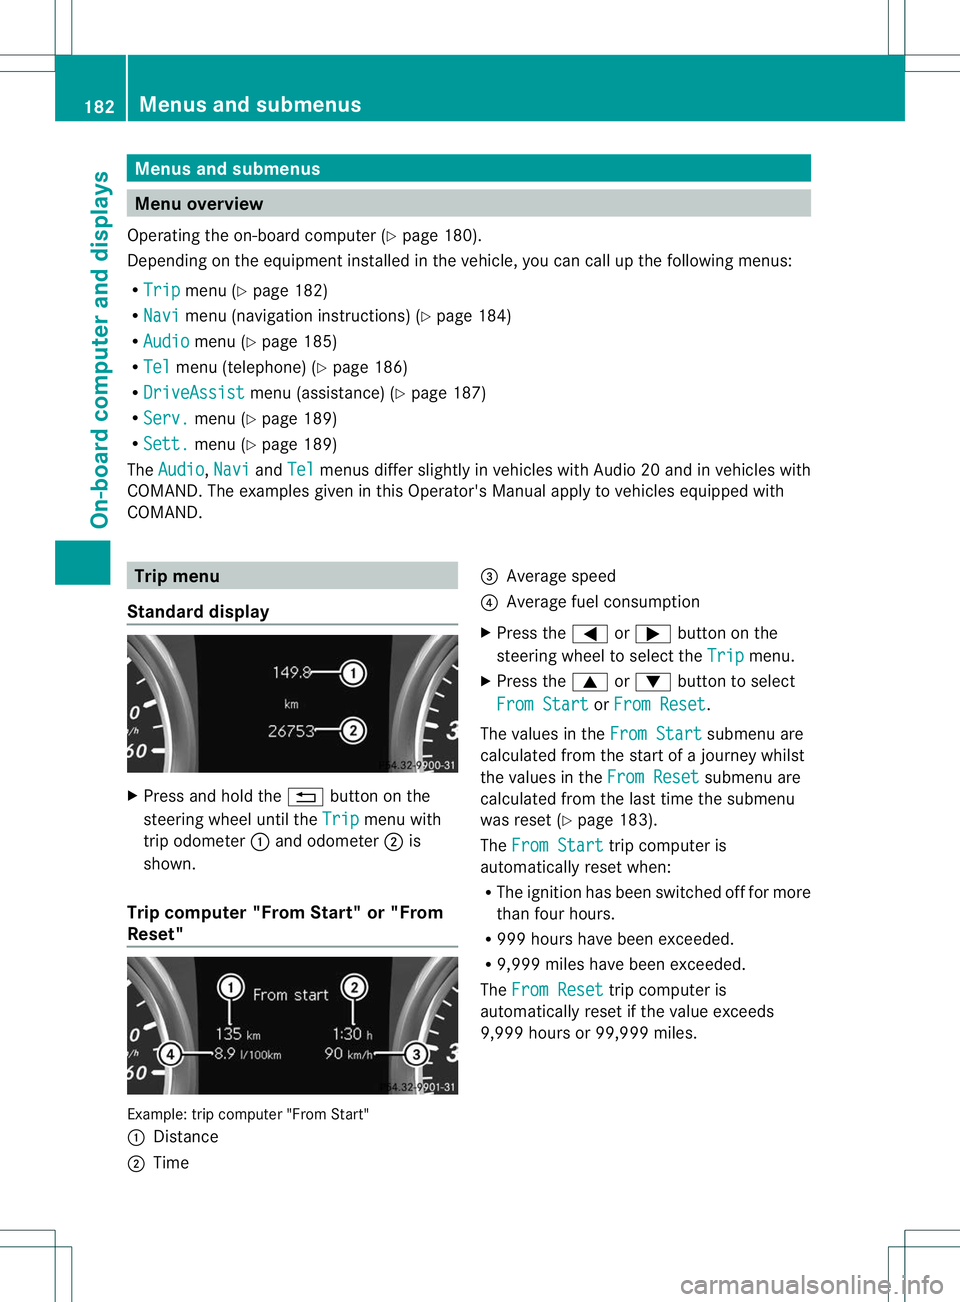
Standard display X
Press and hold the %button on the
steering wheel until the Trip menu with
trip odometer :and odometer ;is
shown.
Trip computer "From Start" or "From
Reset" Example: trip computer "From Start"
:
Distance
; Time =
Average speed
? Average fuel consumption
X Press the =or; button on the
steering wheel to select the Trip menu.
X Press the 9or: button to select
From Start or
From Reset .
The values in the From Start submenu are
calculated from the start of a journey whilst
the values in the From Reset submenu are
calculated from the last time the submenu
was reset (Y page 183).
The From Start trip computer is
automatically reset when:
R The ignition has been switched off for more
tha nfour hours.
R 999 hours have been exceeded.
R 9,999 miles have been exceeded.
The From Reset trip computer is
automatically reset if the value exceeds
9,999 hours or 99,999 miles. 182
Menus and submenusOn-board computer and displays
Page 186 of 336
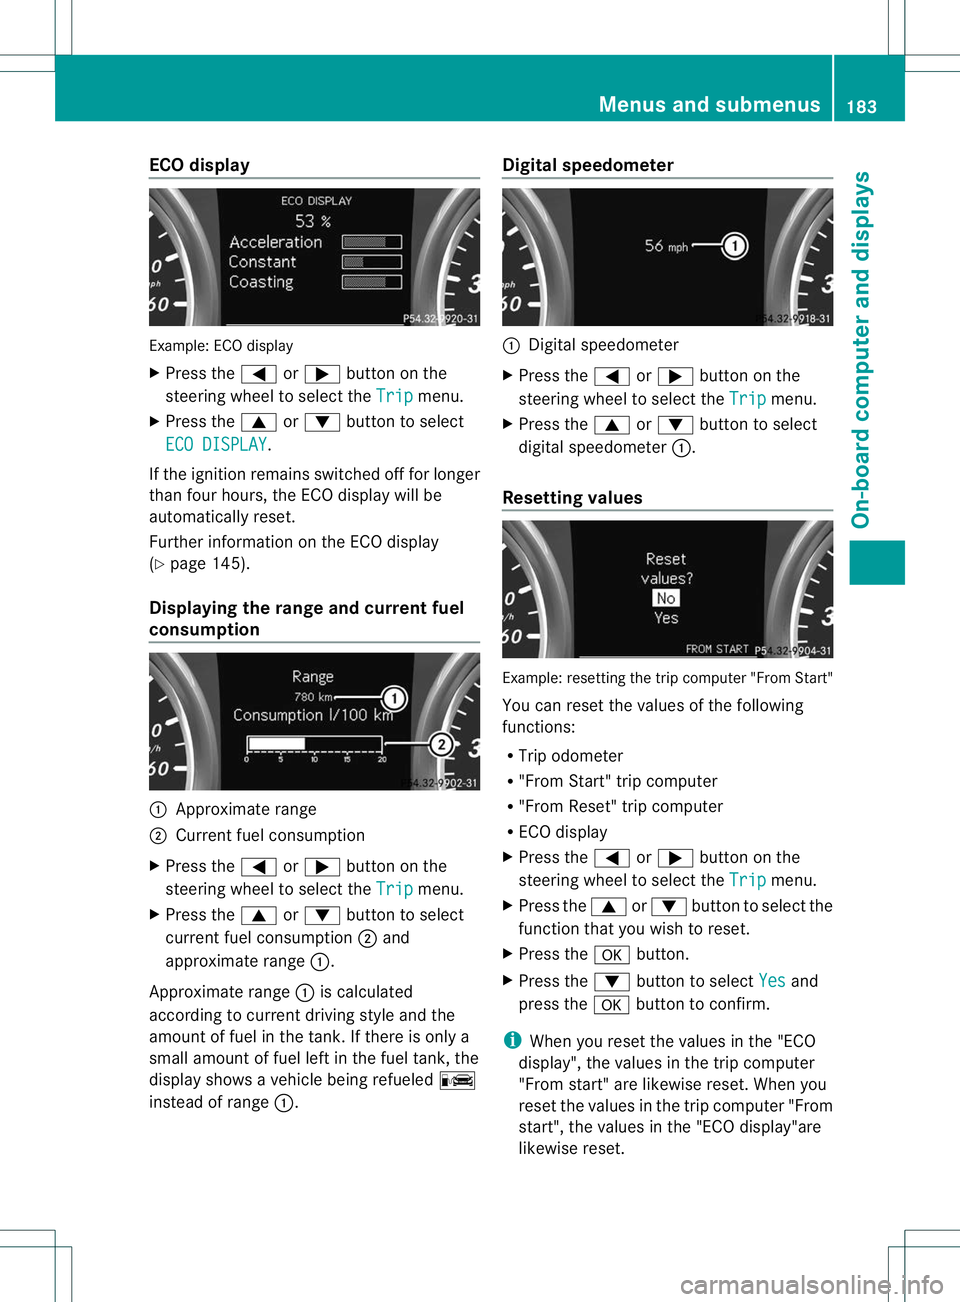
ECO display
Example
:ECO display
X Press the =or; button on the
steering wheel to selec tthe Trip menu.
X Press the 9or: button to select
ECO DISPLAY .
If the ignition remains switched off for longer
than four hours, the ECO display will be
automatically reset.
Further information on the ECO display
(Y page 145).
Displaying the range and current fuel
consumption :
Approximate range
; Current fuel consumption
X Press the =or; button on the
steering wheel to select the Trip menu.
X Press the 9or: button to select
current fuel consumption ;and
approximate range :.
Approximate range :is calculated
according to current driving style and the
amount of fuel in the tank. If there is only a
small amount of fuel left in the fuel tank, the
display shows a vehicle being refueled C
instead of range :. Digital speedometer :
Digital speedometer
X Press the =or; button on the
steering wheel to select the Trip menu.
X Press the 9or: button to select
digital speedometer :.
Resetting values Example: resetting the trip computer "From Start"
You can reset the values of the following
functions:
R
Trip odometer
R "From Start" trip computer
R "From Reset" trip computer
R ECO display
X Press the =or; button on the
steering wheel to select the Trip menu.
X Press the 9or: button to select the
function that you wish to reset.
X Press the abutton.
X Press the :button to select Yes and
press the abutton to confirm.
i When you reset the values in the "ECO
display", the values in the trip computer
"From start" are likewise reset. When you
reset the values in the trip computer "From
start", the values in the "ECO display"are
likewise reset. Menus and submenus
183On-board computer and displays Z
Page 195 of 336
Activating/deactivating the rada
rsensor
system
X Press the =or; button on the
steering wheel to selec tthe Settings menu.
X Press the :or9 button to select the
Vehicle submenu.
X Press ato confirm.
X Press the 9or: button to select
Radar Sensor (See Oper. Manual): .
You will see the selected setting: Enabledor
Disabled .
X Press the abutton to save the setting.
If the radar sensor system is switched off,
Blind Spot Assist is deactivated
(Y page 173).
Convenience Switching the fold-in mirrors when
locking feature on/off
This function is only available on vehicles with
the memory function (Y
page 93).
X Press the =or; button on the
steering wheel to select the Sett. menu.
X Press the :or9 button to select the
Convenience submenu.
X Press ato confirm.
X Press the :or9 button to select the
Fold Mirrors in when Locking: function.
You will see the selected setting:
Enabledor
Disabled .
X Press the abutton to save the setting.
If you switch on the Fold Mirrors in when
Locking: function, the exterior mirrors fold
in when you lock the vehicle. If you unlock the
vehicle and then open the driver's or front-
passenger door, the exterior mirrors fold out
again.
If you have switched the function on and you
fold the exterior mirrors in using the button
on the door (Y page 91), they will not fold out
automatically.T he exterior mirrors can then only be folded out using the button on the
door.
Restoring the factory settings X
Press the =or; button on the
steering wheel to select the Sett. menu.
X Press the :or9 button to select the
Factory Setting submenu.
X Press ato confirm.
The Reset All Settings? message
appears.
X Press the :or9 button to select
No or
Yes .
X Press ato confirm the selection.
If you have selected Yes , the multifunction
display shows a confirmation message.
For safety reasons, the Daytime Running Lights: function in the
Lights submenu is
only reset when the vehicle is stationary. 192
Menus and submenusOn-board computer and displays
Page 267 of 336
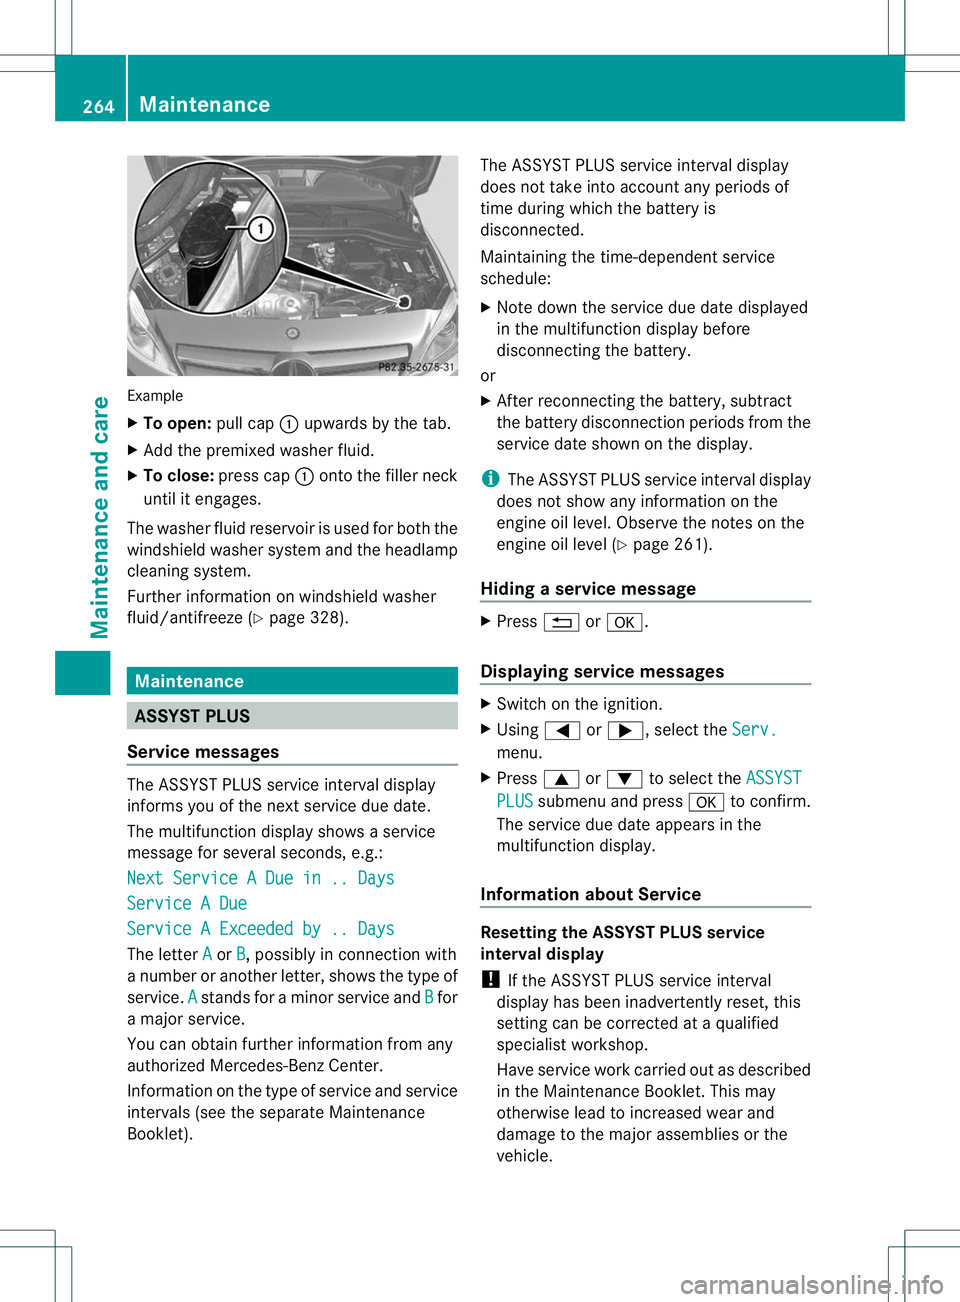
Example
X
To open: pull cap:upwards by the tab.
X Add the premixed washe rfluid.
X To close: press cap :onto the filler neck
until it engages.
The washer fluid reservoir is used for both the
windshield washer system and the headlamp
cleaning system.
Further information on windshield washer
fluid/antifreeze (Y page 328).Maintenance
ASSYST PLUS
Service messages The ASSYST PLUS service interval display
informs you of the nexts
ervice due date.
The multifunction display shows a service
message for several seconds, e.g.:
Next Service A Due in .. Days Service A Due
Service A Exceeded by .. Days
The letter
A or
B , possibly in connection with
a number or another letter, shows the type of
service. A stands for a minor service and
B for
a major service.
You can obtain further information from any
authorized Mercedes-Benz Center.
Information on the type of service and service
intervals (see the separate Maintenance
Booklet). The ASSYST PLUS service interval display
does not take into accoun
tany periods of
time during which the battery is
disconnected.
Maintaining the time-dependent service
schedule:
X Note down the service due date displayed
in the multifunctio ndisplay before
disconnecting the battery.
or
X After reconnecting the battery, subtract
the battery disconnection periods fro mthe
service date shown on the display.
i The ASSYST PLUS service interval display
does not show any information on the
engine oil level. Observe the notes on the
engine oil level (Y page 261).
Hiding aservice message X
Press %ora.
Displaying service messages X
Switch on the ignition.
X Using =or;, selec tthe Serv. menu.
X Press 9or: to select the ASSYST PLUS submenu and press
ato confirm.
The service due date appears in the
multifunction display.
Information about Service Resetting the ASSYST PLUS service
interval display
!
If the ASSYST PLUS service interval
display has been inadvertently reset, this
setting can be corrected at a qualified
specialist workshop.
Have service work carried out as described
in the Maintenance Booklet. This may
otherwise lead to increased wear and
damage to the major assemblies or the
vehicle. 264
MaintenanceMaintenance and care
Page 268 of 336
Aq
ualified specialist workshop, e.g. an
authorized Mercedes-Ben zCenter, will reset
the ASSYST PLUS service interval display
after the service work has been carried out.
You can obtain further information, e.g.
regarding service work, from an authorized
Mercedes-Benz Center or directly from
Mercedes-Benz.
Special service requirements
Arduous operating conditions or increased
loads on the vehicle will require some service
work to be performed more often than for a
vehicle in normal use. Such arduous
conditions include regular city driving with
frequent intermediate stops and use in
mountainous terrain or on poor road
surfaces.
For example, if the vehicle is used under
arduous operating conditions, have air filters,
engine oil and oil filters changed frequently
and chec kthe wheels often.F urther
information can be obtaine dataqualified
specialist workshop, e.g. an authorized
Mercedes-Benz Center.
Driving abroad
An extensive Mercedes-Benz Service network
is also available in other countries. You can
obtain further information from any
authorized Mercedes-Benz Center. Care
General notes
G
WARNING
Many cleaning products can be hazardous.
Some are poisonous, others are flammable.
Always follow the instructions on the
particular container .Always open your
vehicle's doors or windows when cleaning the
inside.
Never use fluids or solvents that are not
designed for cleaning your vehicle.
Always lock away cleaning products and keep
them out of reach of children. H
Environmental note
Dispose of empty packaging and cleaning
cloths in an environmentally responsible
manner.
! For cleaning your vehicle, do not use any
of the following:
R dry, rough or hard cloths
R abrasive cleaning agents
R solvents
R cleaning agents containing solvents
Do not scrub.
Do not touch the surfaces or protective
films with hard objects, e.g. a ring or ice
scraper. You could otherwise scratch or
damage the surfaces and protective film.
! Do not park the vehicle for an extended
period straight after cleaning it, particularly
after having cleaned the wheels with wheel
cleaner. Wheel cleaners could cause
increased corrosio nofthe brake discs and
brake pads/linings. For this reason, you
should drive for a few minutes after
cleaning. Braking heats the brake discs and
the brake pads/linings, thus drying them.
The vehicle can then be parked.
Regular care of your vehicle is a condition for
retaining the quality in the long term.
Use care products and cleaning agents
recommended and approved by Mercedes-
Benz. Exterior care
Automatic car wash G
WARNING
Braking efficiency is reduced after washing
the vehicle. This could cause an accident. For
this reason, you must drive particularly
carefully after washing the vehicle until the
brakes have dried. Care
265Maintenance and care Z
Page 284 of 336
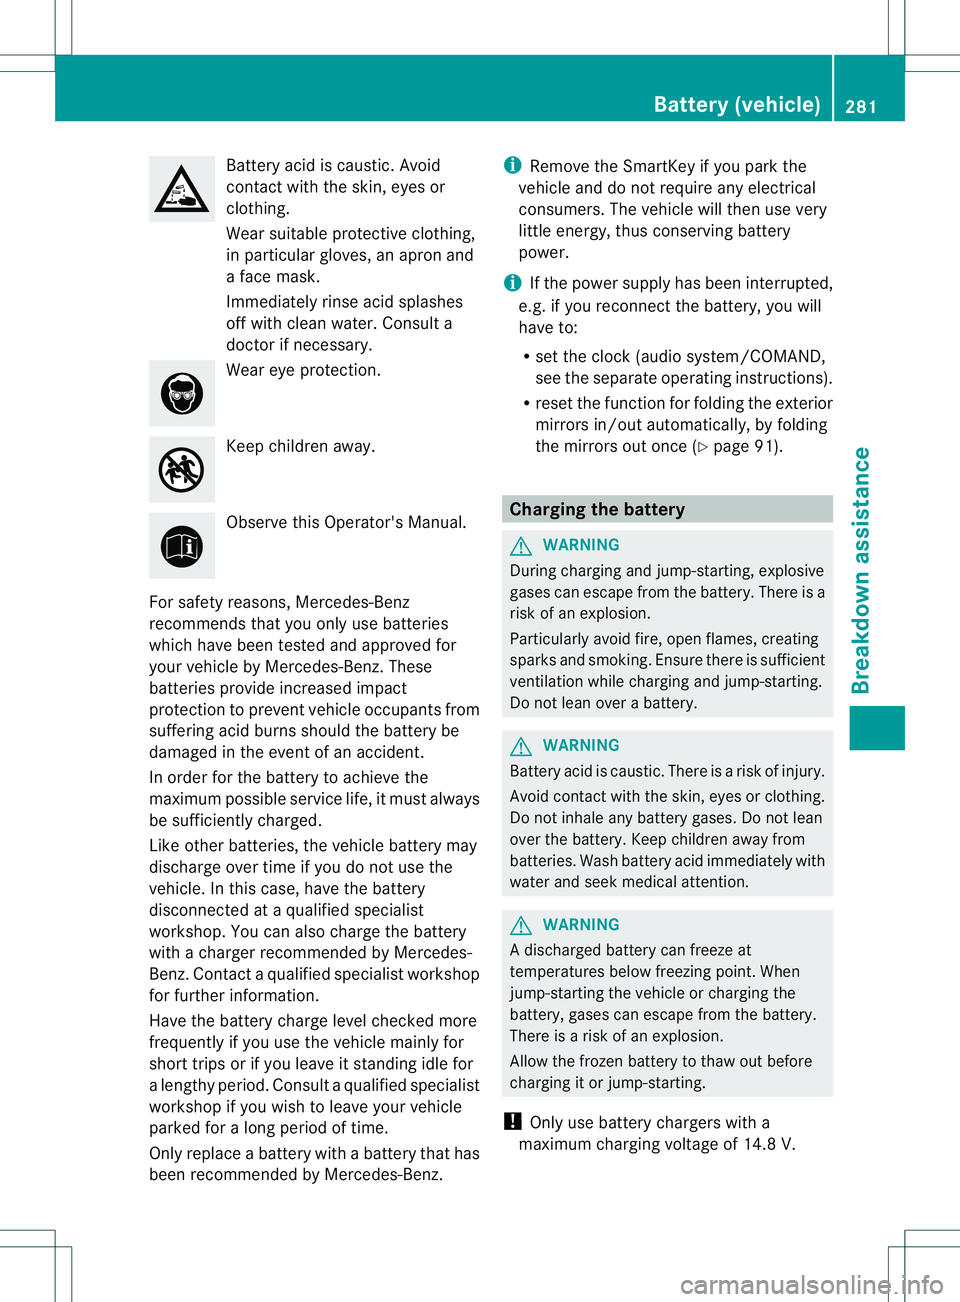
Battery acid is caustic. Avoid
contact with the skin, eyes or
clothing.
Wea
rsuitable protective clothing,
in particular gloves, an apro nand
a face mask.
Immediately rinse acid splashes
off with clean water. Consult a
doctor if necessary. Wear eye protection.
Keep children away.
Observe this Operator's Manual.
For safety reasons, Mercedes-Benz
recommends tha tyou only use batteries
which have been tested and approved for
your vehicle by Mercedes-Benz. These
batteries provide increased impact
protection to prevent vehicle occupants from
suffering acid burns should the battery be
damaged in the event of an accident.
In order for the battery to achieve the
maximum possible service life, it must always
be sufficiently charged.
Like other batteries, the vehicle battery may
discharge over time if you do not use the
vehicle. In this case, have the battery
disconnected at a qualified specialist
workshop. You can also charge the battery
with a charger recommended by Mercedes-
Benz.C ontact a qualified specialist workshop
for further information.
Have the battery charge level checked more
frequently if you use the vehicle mainly for
short trips or if you leave it standing idle for
a lengthy period. Consult a qualified specialist
workshop if you wish to leave your vehicle
parked for a long period of time.
Only replace a battery with a battery that has
been recommended by Mercedes-Benz. i
Remove the SmartKey if you park the
vehicle and do not require any electrical
consumers. The vehicle will then use very
little energy, thus conserving battery
power.
i If the power supply has been interrupted,
e.g. if you reconnect the battery, you will
have to:
R set the clock (audio system/COMAND,
see the separate operating instructions).
R reset the function for folding the exterior
mirrors in/out automatically, by folding
the mirrors out once (Y page 91). Charging the battery
G
WARNING
During charging and jump-starting, explosive
gases can escape from the battery. There is a
risk of an explosion.
Particularly avoid fire, open flames, creating
sparks and smoking. Ensure there is sufficient
ventilation while charging and jump-starting.
Do not lean over a battery. G
WARNING
Battery acid is caustic. There is a risk of injury.
Avoid contact with the skin, eyes or clothing.
Do not inhale any battery gases. Do not lean
over the battery. Keep children away from
batteries. Wash battery acid immediately with
water and seek medical attention. G
WARNING
Ad ischarged battery can freeze at
temperatures below freezing point .When
jump-starting the vehicle or charging the
battery, gases can escape from the battery.
There is a risk of an explosion.
Allow the frozen battery to thaw out before
charging it or jump-starting.
! Only use battery chargers with a
maximum charging voltage of 14.8 V. Battery (vehicle)
281Breakdown assistance Z
Page 289 of 336
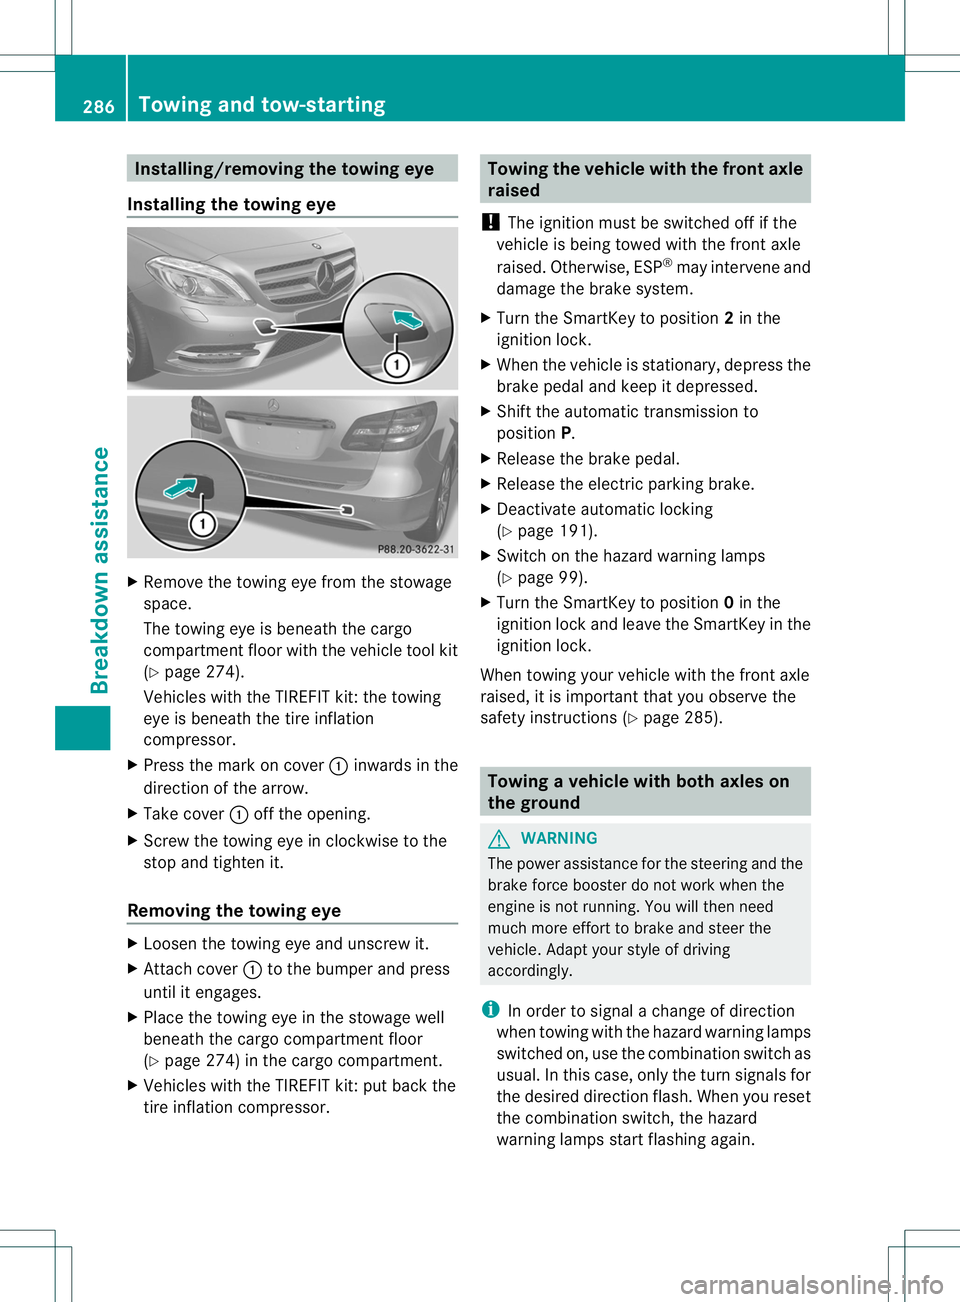
Installing/removing the towing eye
Installing the towing eye X
Remove the towing eye from the stowage
space.
The towing eye is beneath the cargo
compartmen tfloor with the vehicle tool kit
(Y page 274).
Vehicles with the TIREFIT kit :the towing
eye is beneath the tire inflation
compressor.
X Press the mark on cover :inwards in the
direction of the arrow.
X Take cover :off the opening.
X Screw the towing eye in clockwise to the
stop and tighten it.
Removing the towing eye X
Loosen the towing eye and unscrew it.
X Attach cover :to the bumper and press
until it engages.
X Place the towing eye in the stowage well
beneath the cargo compartmentf loor
(Y page 274) in the cargo compartment.
X Vehicles with the TIREFIT kit: put back the
tire inflation compressor. Towing the vehicle with the front axle
raised
! The ignition must be switched off if the
vehicle is being towed with the front axle
raised. Otherwise, ESP ®
may intervene and
damage the brake system.
X Turn the SmartKey to position 2in the
ignition lock.
X When the vehicle is stationary, depress the
brake pedal and keep it depressed.
X Shift the automatic transmission to
position P.
X Release the brake pedal.
X Release the electric parking brake.
X Deactivate automatic locking
(Y page 191).
X Switch on the hazard warning lamps
(Y page 99).
X Turn the SmartKey to position 0in the
ignition lock and leave the SmartKey in the
ignition lock.
When towing your vehicle with the front axle
raised, it is importan tthat you observe the
safety instructions (Y page 285). Towing
avehicle with both axles on
the ground G
WARNING
The power assistance for the steering and the
brake force booster do not work when the
engine is not running. You will then need
much more effort to brake and steer the
vehicle .Adapt your style of driving
accordingly.
i In order to signal a change of direction
when towing with the hazard warning lamps
switched on, use the combination switch as
usual. In this case, only the turn signals for
the desired direction flash. When you reset
the combination switch, the hazard
warning lamps start flashing again. 286
Towing and tow-startingBreakdown assistance
Page 299 of 336
are valid for the maximum permissible load
and up to the maximum permissible vehicle
speed.
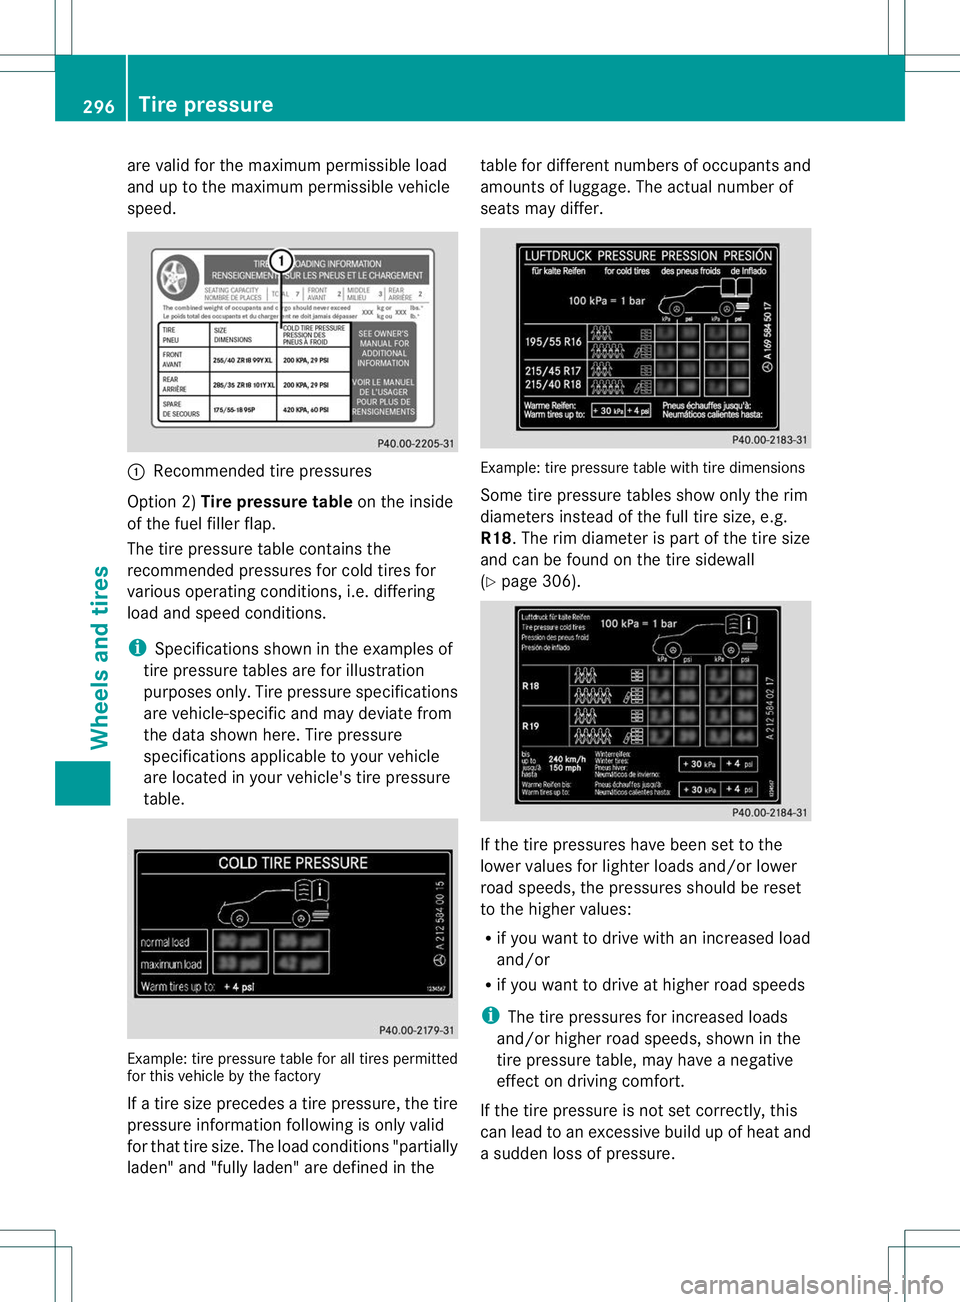
:
Recommended tire pressures
Option 2) Tire pressure table on the inside
of the fuel fille rflap.
The tire pressure table contains the
recommended pressures for cold tires for
various operating conditions, i.e. differing
load and speed conditions.
i Specifications shown in the examples of
tire pressure tables are for illustration
purposes only. Tire pressure specifications
are vehicle-specific and may deviate from
the data shown here. Tire pressure
specifications applicable to your vehicle
are located in your vehicle's tire pressure
table. Example: tire pressure table for all tires permitted
for this vehicle by the factory
If a tire size precedes a tire pressure, the tire
pressure information followin
gis only valid
for that tire size. The load conditions "partially
laden" and "fully laden" are defined in the table for different numbers of occupants and
amounts of luggage. The actual number of
seats may differ.
Example: tire pressure table with tire dimensions
Some tire pressure tables show only the rim
diameters instead of the full tire size, e.g.
R18. The rim diameter is part of the tire size
and can be found on the tire sidewall
(Y
page 306). If the tire pressures have been set to the
lower values for lighter loads and/or lower
road speeds, the pressures should be reset
to the higher values:
R
if you want to drive with an increased load
and/or
R if you want to drive at higher road speeds
i The tire pressures for increased loads
and/or higher road speeds, shown in the
tire pressure table, may have a negative
effect on driving comfort.
If the tire pressure is not set correctly, this
can lead to an excessive build up of heat and
a sudden loss of pressure. 296
Tire pressureWheels and tires