2013 MERCEDES-BENZ B-CLASS SPORTS check oil
[x] Cancel search: check oilPage 12 of 336
E
EASY-VARIO-PLUS system Cargo compartment enlargement ..234
EBD (electronic brake force
distribution)
Display message ............................ 196
Function/notes ................................ 64
ECO display
Function/notes ............................. 145
On-board computer .......................183
ECO start/stop function
Deactivating/activating .................130
General information .......................128
Important safety notes ..................128
Electronic Stability Program
see ESP ®
(Electroni cStability Program)
Emergenc yrelease
Driver's door .................................... 75
Vehicle ............................................. 75
Emergency spare wheel
General notes ................................ 318
Important safety notes ..................318
Removing ....................................... 319
Technical data ............................... 319
Emergency tensioning device
Activation ......................................... 37
Emergency Tensioning Devices
Function .......................................... .47
Safety guidelines. ............................ 38
Emergency unlocking
Tailgate ............................................ 77
Emissions control
Service and warranty information ....21
Engine
Check Engine warning lamp ........... 226
Display message ............................ 206
ECO start/stop function ................128
Engine number ............................... 324
Irregularr unning............................ 131
Jump-starting ................................. 283
Starting problems ..........................131
Starting the engine with the
SmartKey ....................................... 127
Switching off .................................. 142
Tow-starting (vehicle) ..................... 287
Engine electronics
Problem (malfunction) ...................131Engine jump starting
see Jump starting (engine)
Engine oil
Adding ........................................... 262
Additives ........................................ 327
Checking the oil level ..................... 261
Checking the oil level using the
dipstick .......................................... 262
Display message ............................ 208
Filling capacity ............................... 327
Notes about oil grades ................... 326
Notes on oil level/consumption ....261
Viscosity ........................................ 327
ESP ®
(Electronic Stability
Program) Deactivating/activating .................187
Deactivating/activating (notes) .......64
Display message ............................ 194
ETS .................................................. 63
Function/notes ................................ 63
Important safety information ...........63
Warning lamp ................................. 222
ETS (Electronic Traction System) ....... 63
Exhaus tcheck ................................... 145
Exhaus tpipe (cleaning
instructions) ...................................... 269
Exterior lighting Setting options ................................ 96
see Lights
Exterior mirrors
Adjusting ......................................... 90
Dipping (automatic) .........................91
Folding in/out( automatically).........91
Folding in/out( electrically).............91
Folding in whenl ocking (on-board
computer) ...................................... 192
Out of position (troubleshooting) .....91
Setting ............................................. 91
Storing settings (memory
function) .......................................... 93
Storing the parking position ............. 92
Eyeglasses compartment .................231 F
Fille rcap
see Fuel filler flap
First-aid kit ......................................... 274 Index
9
Page 18 of 336

Adjusting the 4-way lumbar
support
............................................ 88
Adjusting the head restraint ............87
Cleaning the cover .........................270
Correct driver's seat position ........... 84
Important safety notes ....................85
Seat heating problem ......................89
Storing settings (memory
function) .......................................... 93
Switching sea theating on/off .........89
Sensors (cleaning instructions) .......269
Service see ASSYST PLUS
Service menu (on-board computer) .189
Service products Brake fluid ..................................... 327
Coolant (engine) ............................ 327
Engine oil ....................................... 326
Fuel ................................................ 324
Important safety notes ..................324
Washer fluid .................................. .328
Service work
see ASSYST PLUS
Settings
Factory (on-board computer) .........192
On-board computer .......................189
Setting the air distribution ...............120
Setting the airflow ............................120
Side impact air bag .............................42
Side marker lamp (display
message) ............................................ 205
Side windows Cleaning ......................................... 268
Convenience closing feature ............78
Convenience opening feature ..........78
Important safety information ...........77
Opening/closing .............................. 78
Problem (malfunction) .....................79
Resetting ......................................... 79
Sliding sunroof
see Panorama roof with power
tilt/sliding panel
SmartKey
Changing the battery .......................70
Changing the programming .............69
Checking the battery .......................70
Convenience closing feature ............78
Convenience opening feature ..........78 Display message
............................ 218
Door central locking/unlocking .......68
Important safety notes ....................68
Loss ................................................. 72
Mechanical key ................................ 69
Positions (ignition lock) .................127
Problem (malfunction) .....................72
Starting the engine ........................127
SmartKey positions (ignition lock) ..127
Snow chains ...................................... 295
Sockets Center console .............................. 244
Luggage compartment ...................245
Points to observe before use .........244
Rea rcompartmen t......................... 245
Specialist workshop ............................ 23
Speed, controlling see Cruise control
Speedometer
Activating/deactivating the
additional speedometer .................189
Digita l............................................ 183
In the Instrument cluster .................27
Segments ...................................... 179
Selecting the unit of
measurement ................................ 189
see Instrument cluster
SRS (Supplemental Restraint
System)
Display message ............................ 201
Introduction ..................................... 37
Warning lamp ................................. 225
Warning lamp (function) ................... 37
Standing lamps
Changing bulbs .............................. 105
Display message ............................ 204
Switching on/off .............................. 98
Starting (engine) ................................ 127
STEE RCONTROL .................................. 64
Steering (display message) ..............217
Steering wheel Adjusting (manually). .......................89
Button overview ............................... 29
Buttons (on-board computer) ......... 180
Cleaning ......................................... 270
Important safety notes ....................89
Paddle shifters ............................... 136
Steering wheel paddle shifters ........136 Index
15
Page 136 of 336
DIRECT SELECT lever
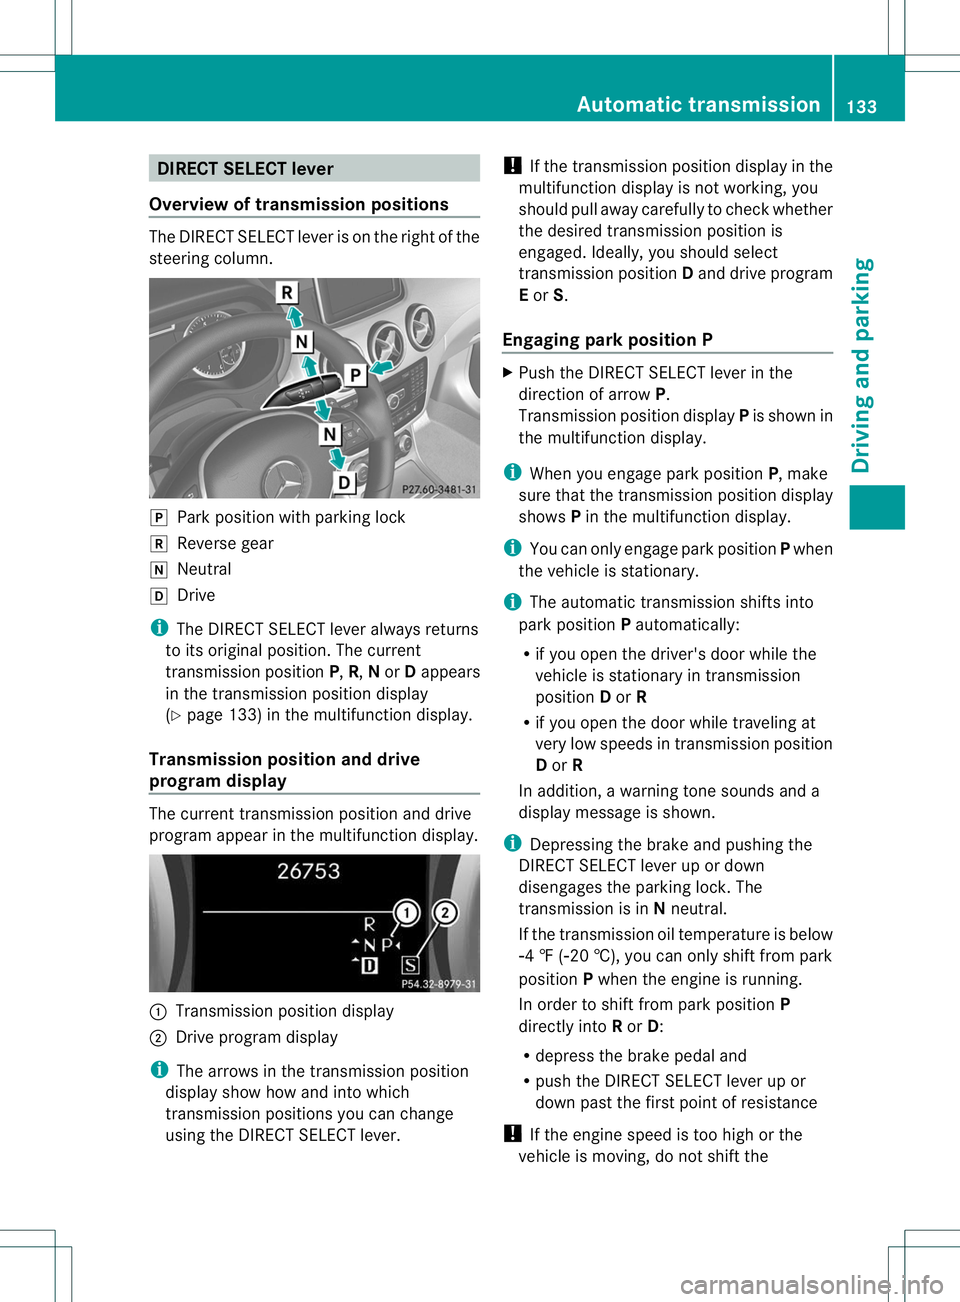
Overview of transmission positions The DIRECT SELECT lever is on the right of the
steering column.
j
Parkposition with parking lock
k Reverse gear
i Neutral
h Drive
i The DIRECT SELECT lever always returns
to its original position. The current
transmission position P,R, Nor Dappears
in the transmission position display
(Y page 133) in the multifunction display.
Transmission position and drive
program display The current transmission position and drive
program appear in the multifunction display.
:
Transmission position display
; Drive program display
i The arrows in the transmission position
display show how and into which
transmission positions you can change
using the DIRECT SELECT lever. !
If the transmission position display in the
multifunction display is not working, you
should pull away carefully to check whether
the desired transmission position is
engaged. Ideally, you should select
transmission position Dand drive program
E or S.
Engaging parkp osition P X
Push the DIRECT SELECT lever in the
directio nofarrowP.
Transmission position display Pis show nin
the multifunctio ndisplay.
i When you engage park position P, make
sure that the transmission position display
shows Pin the multifunction display.
i You can only engage park position Pwhen
the vehicle is stationary.
i The automatic transmission shifts into
park position Pautomatically:
R if you open the driver's door while the
vehicle is stationary in transmission
position Dor R
R if you open the door while traveling at
very low speeds in transmission position
D or R
In addition, a warning tone sounds and a
display message is shown.
i Depressing the brake and pushing the
DIRECT SELECT lever up or down
disengages the parking lock .The
transmission is in Nneutral.
If the transmission oil temperature is below
Ò4 ‡ (Ò20 †), you can only shift from park
position Pwhen the engine is running.
In order to shift from park position P
directly into Ror D:
R depress the brake pedal and
R push the DIRECT SELECT lever up or
down past the first point of resistance
! If the engine speed is too high or the
vehicle is moving, do not shift the Automatic transmission
133Driving and parking Z
Page 142 of 336
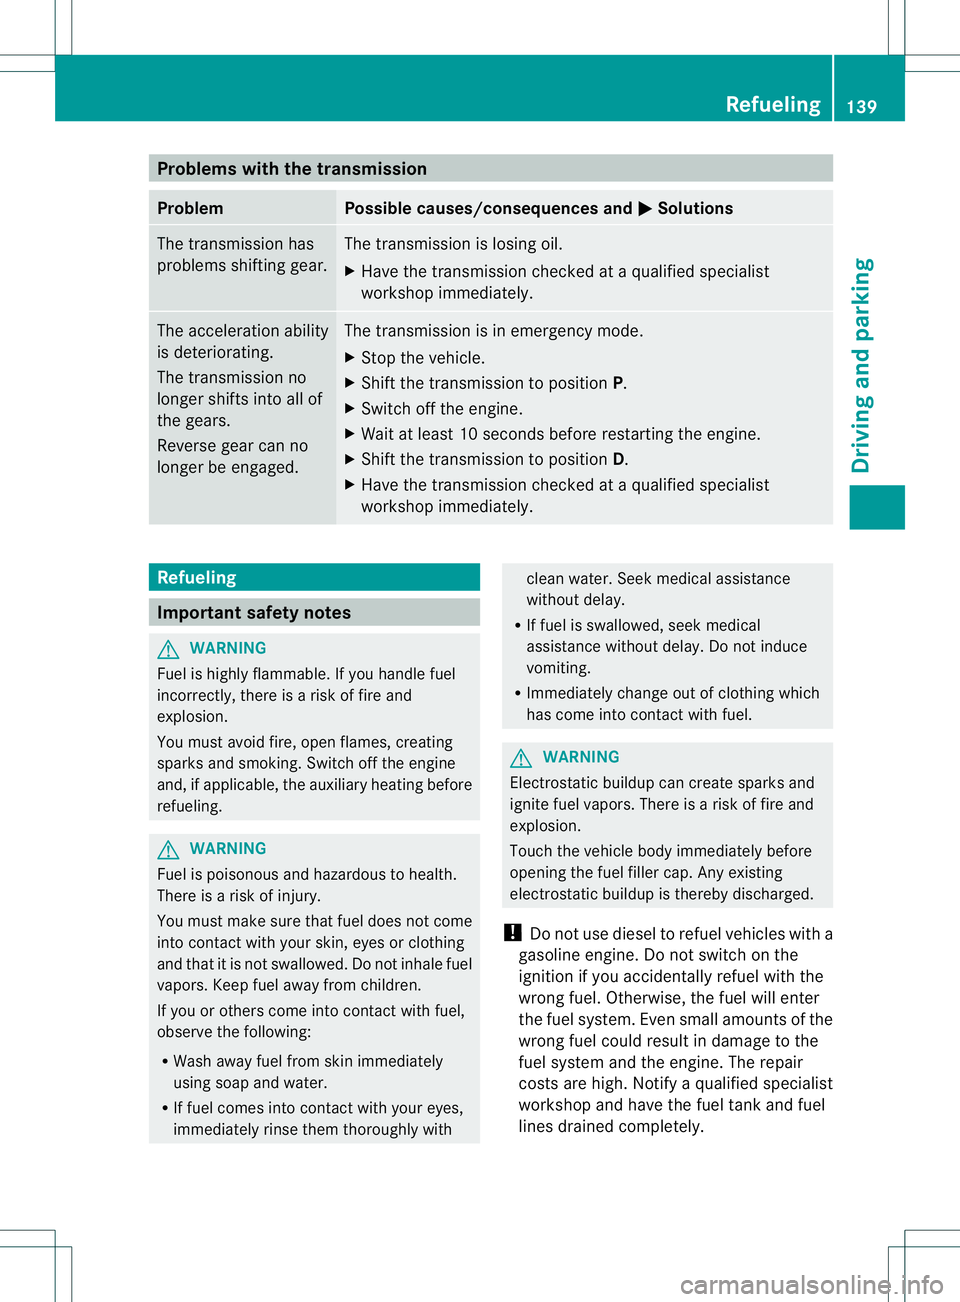
Problems with the transmission
Problem Possible causes/consequences and
M Solutions
The transmission has
problems shifting gear. The transmission is losing oil.
X
Have the transmission checked at a qualified specialist
workshop immediately. The acceleration ability
is deteriorating.
The transmission no
longer shifts into all of
the gears.
Reverse gear can no
longer be engaged. The transmission is in emergency mode.
X
Stop the vehicle.
X Shift the transmission to position P.
X Switch off the engine.
X Wait at least 10 seconds before restarting the engine.
X Shift the transmission to position D.
X Have the transmission checked at a qualified specialist
workshop immediately. Refueling
Important safety notes
G
WARNING
Fuel is highly flammable. If you handle fuel
incorrectly, there is a risk of fire and
explosion.
You must avoid fire, open flames, creating
sparks and smoking. Switch off the engine
and, if applicable, the auxiliary heating before
refueling. G
WARNING
Fuel is poisonous and hazardous to health.
There is a risk of injury.
You must make sure that fuel does not come
into contact with your skin, eyes or clothing
and that it is not swallowed. Do not inhale fuel
vapors. Keep fuel away from children.
If you or others come into contact with fuel,
observe the following:
R Wash away fuel from skin immediately
using soap and water.
R If fuel comes into contact with your eyes,
immediately rinse them thoroughly with clean water. Seek medical assistance
without delay.
R If fuel is swallowed, seek medical
assistance without delay.Don ot induce
vomiting.
R Immediately change out of clothing which
has come into contact with fuel. G
WARNING
Electrostatic buildup can create sparks and
ignite fuel vapors. There is a risk of fire and
explosion.
Touch the vehicle body immediately before
opening the fuel filler cap. Any existing
electrostatic buildup is thereby discharged.
! Do not use diesel to refuel vehicles with a
gasoline engine. Do not switch on the
ignition if you accidentally refuel with the
wrong fuel. Otherwise, the fuel will enter
the fuel system. Even small amounts of the
wrong fuel could result in damage to the
fuel system and the engine. The repair
costs are high. Notify aqualified specialist
workshop and have the fuel tan kand fuel
lines drained completely. Refueling
139Driving and parking Z
Page 211 of 336
Display messages Possible causes/consequences and
M Solutions
# The battery is no
tbeing charged.
Aw arning tone also sounds.
Possible causes are:
R a defective alternator
R a torn poly-V-belt
R a malfunction in the electronics
X Pull ove rand stop the vehicle safely and switch off the engine,
paying attention to road and traffic conditions.
X Ope nthe hood.
X Check whether the poly-V-belt is torn.
If the poly-V-belt is torn:
! Do not continue driving. The engine could otherwise overheat.
X Consult a qualified specialist workshop.
If the poly-V-belt is not damaged:
X Visit a qualified specialist workshop immediately. 4
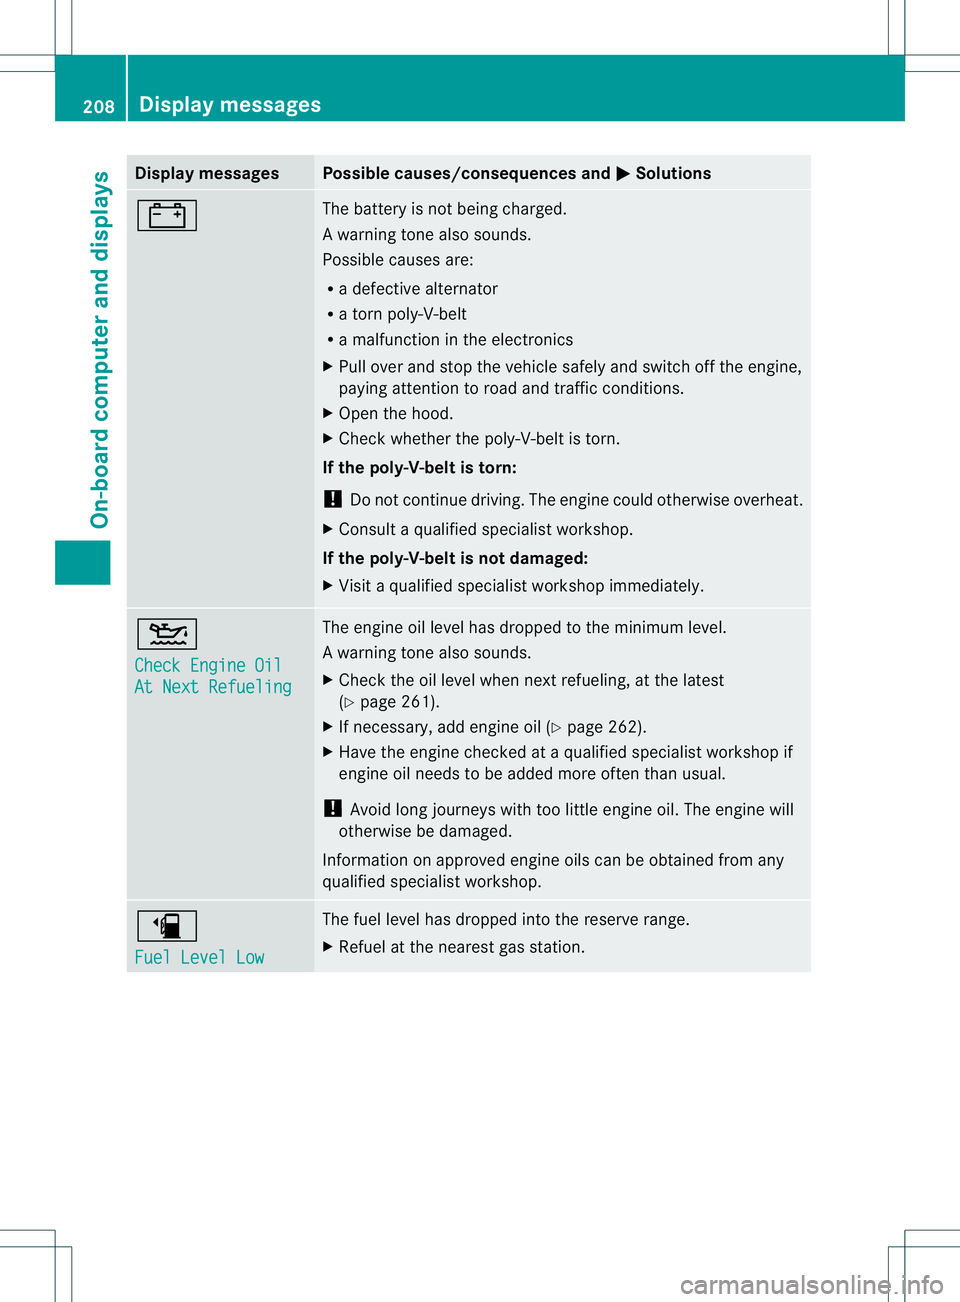
Check Engine Oil
At Next Refueling The engine oil level has dropped to the minimum level.
Aw
arning tone also sounds.
X Chec kthe oil level when next refueling, at the latest
(Y page 261).
X If necessary, add engine oil (Y page 262).
X Have the engine checked at a qualified specialist workshop if
engine oil needs to be added more often than usual.
! Avoid long journeys with too little engine oil. The engine will
otherwise be damaged.
Information on approved engine oils can be obtained from any
qualified specialist workshop. æ
Fuel Level Low The fuel level has dropped into the reserve range.
X
Refuel at the nearest gas station. 208
Display messagesOn-board computer and displays
Page 264 of 336
X
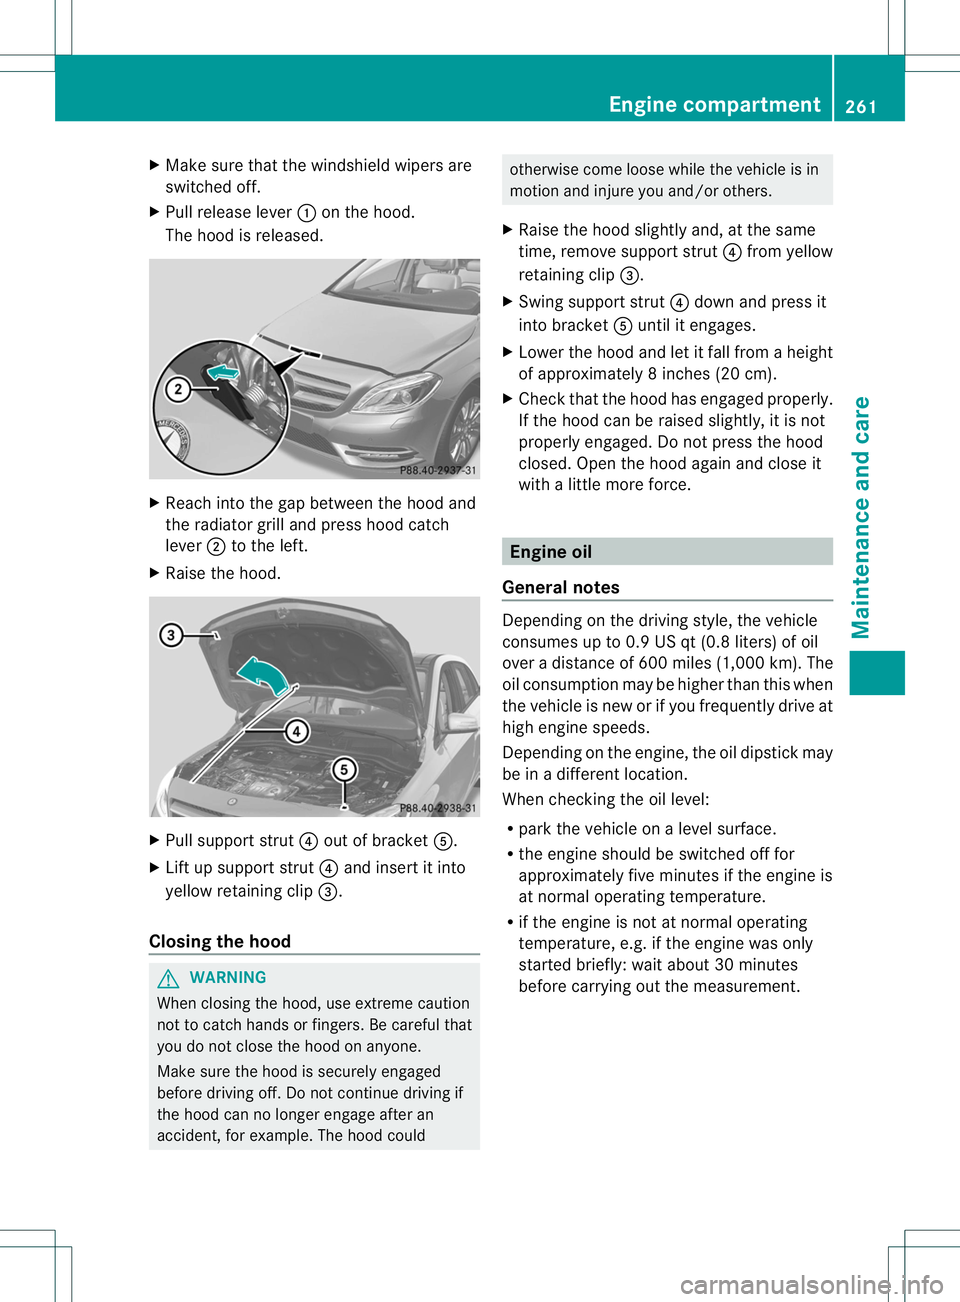
Make sure that the windshield wipers are
switched off.
X Pull release lever :on the hood.
The hood is released. X
Reach into the gap between the hood and
the radiator grill and press hood catch
lever ;to the left.
X Raise the hood. X
Pull support strut ?out of bracket A.
X Lift up support strut ?and insert it into
yellow retaining clip =.
Closing the hood G
WARNING
When closing the hood, use extreme caution
not to catch hands or fingers. Be careful that
you do not close the hood on anyone.
Make sure the hood is securely engaged
before driving off. Do not continue driving if
the hood can no longer engage after an
accident, for example. The hood could otherwise come loose while the vehicle is in
motion and injure you and/or others.
X Raise the hood slightly and, at the same
time, remove support strut ?from yellow
retaining clip =.
X Swing support strut ?down and press it
into bracket Auntil it engages.
X Lower the hood and let it fall from a height
of approximately 8inche s(20 cm).
X Check that the hood has engaged properly.
If the hood can be raised slightly, it is not
properly engaged. Do not press the hood
closed. Open the hood again and close it
with a little more force. Engine oil
General notes Depending on the driving style, the vehicle
consumes up to 0.9 US qt (0.8 liters) of oil
over
adistanc eof600 miles (1,000 km). The
oil consumption may be higher than this when
the vehicle is new or if you frequently drive at
high engine speeds.
Depending on the engine, the oil dipstic kmay
be in a different location.
When checking the oil level:
R park the vehicle on a level surface.
R the engine should be switched off for
approximately five minutes if the engine is
at normal operating temperature.
R if the engine is not at normal operating
temperature, e.g.ift he engine was only
started briefly: wait about 30 minutes
before carrying out the measurement. Engine compartment
261Maintenance and care Z
Page 265 of 336
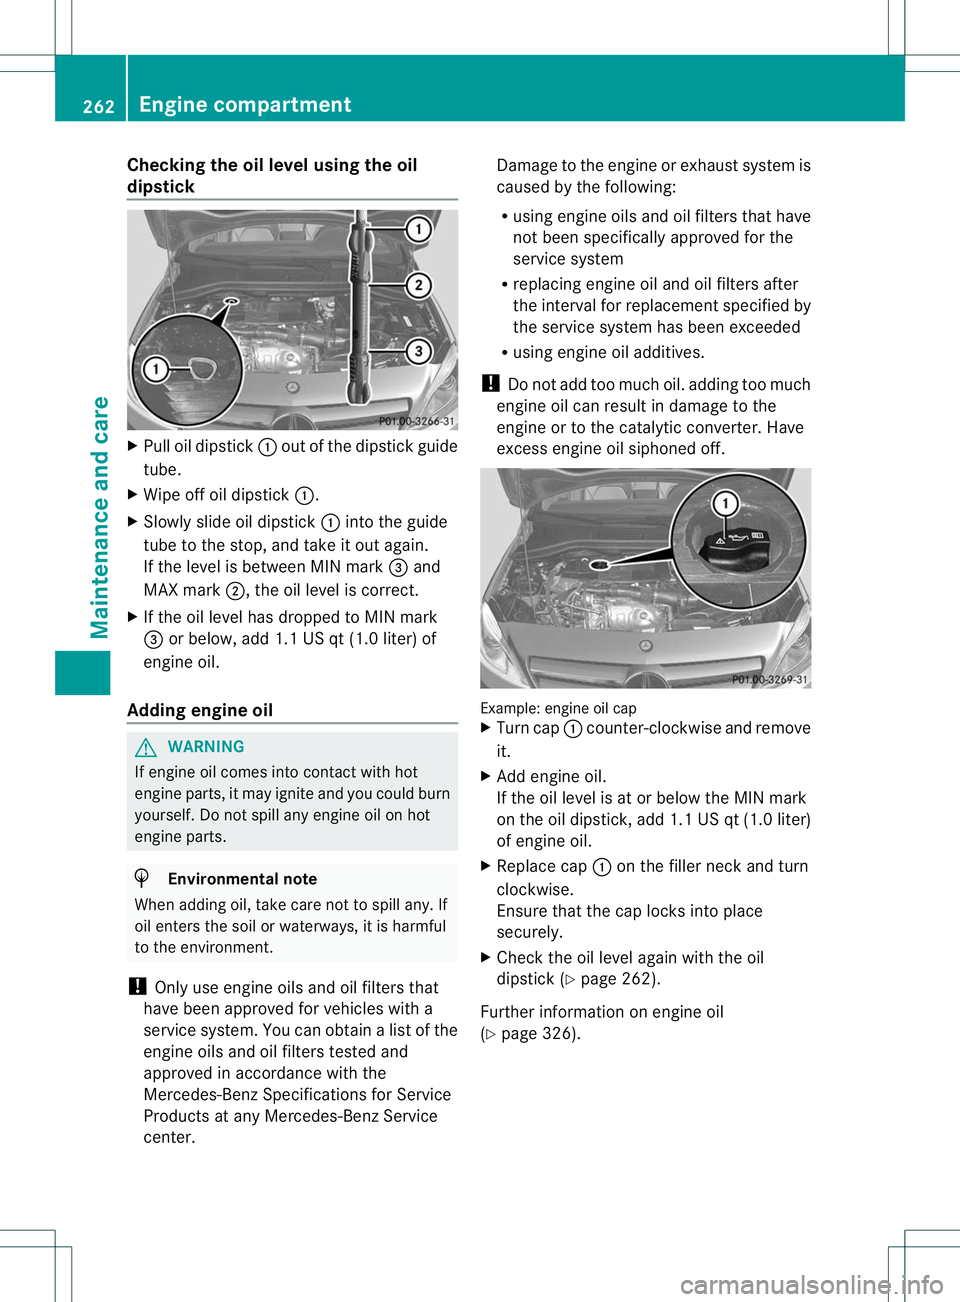
Checking the oil level using the oil
dipstick
X
Pull oil dipstick :out of the dipstick guide
tube.
X Wipe off oil dipstick :.
X Slowly slide oil dipstick :into the guide
tube to the stop, and take it out again.
If the level is between MIN mark =and
MAX mark ;, the oil level is correct.
X If the oil level has dropped to MIN mark
= or below, add 1.1 US qt (1.0 liter) of
engine oil.
Adding engine oil G
WARNING
If engine oil comes into contact with hot
engine parts, it may ignite and you could burn
yourself. Do no tspill any engine oil on hot
engine parts. H
Environmental note
When adding oil, take care not to spill any. If
oil enters the soil or waterways, it is harmful
to the environment.
! Only use engine oils and oil filters that
have been approved for vehicles with a
service system. You can obtain a list of the
engine oils and oil filters tested and
approved in accordance with the
Mercedes-Benz Specifications for Service
Products at any Mercedes-Benz Service
center. Damage to the engine or exhaust system is
caused by the following:
R
using engine oils and oil filters that have
not been specifically approved for the
service system
R replacing engine oil and oil filters after
the interval for replacements pecified by
the service system has been exceeded
R using engine oil additives.
! Do not add too much oil. adding too much
engine oil can result in damage to the
engine or to the catalytic converter. Have
excess engine oil siphoned off. Example: engine oil cap
X
Turn cap :counter-clockwise and remove
it.
X Add engine oil.
If the oil level is at or below the MIN mark
on the oil dipstick, add 1.1 US qt (1.0 liter)
of engine oil.
X Replace cap :on the filler neck and turn
clockwise.
Ensure that the cap locks into place
securely.
X Check the oil level againw ith the oil
dipstick (Y page 262).
Further information on engine oil
(Y page 326). 262
Engine compartmentMaintenance and care
Page 281 of 336
i
If tire sealant leaks out, allow it to dry. It
can then be removed like a layer of film.
If yourc lothes are soiled with tire sealant,
have the mcleaned with perchloroethylene
at a dry cleaner as soon as possible.
Tire pressure not reached If
ap ressure of 200 kPa (2.0 bar/ 29 psi) has
not been achieved after ten minutes:
X Switch off the tire inflation compressor.
X Unscrew the filler hose from the valve of
the faulty tire.
X Very slowly drive forwards or reverse
approximately 30 ft (10 m).
X Pump up the tire again.
After a maximum of ten minutes, the tire
pressure must be at least 200 kPa (2.0 bar/
29 psi). G
WARNING
If the required tire pressure is not reached
after the specified time, the tire is too badly
damaged. The tire sealant cannot repair the
tire in this instance. Damaged tires and a tire
pressure that is too low can significantly
impair the vehicle's braking and driving
characteristics. There is a risk of accident.
Do not continue driving. Contact a qualified
specialist workshop.
Tire pressure reached G
WARNING
At ire temporarily sealed with tire sealant
impairs the driving characteristics and is not
suitable for higher speeds. There is a risk of
accident.
You should therefore adapt your driving style
accordingly and drive carefully. Do not exceed
the specified maximum speed with a tire that
has been repaired using tire sealant.
! After use, excess tire sealant may run out
of the filler hose. This could cause stains. Therefore, place the filler hose in the plastic
bag that contained the TIREFIT kit. H
Environmental note
Have the used tire sealant bottle disposed of
professionally, e.g. at aqualified specialist
workshop.
If ap ressure of 200 kPa (2.0 bar/ 29 psi) has
been attained after a maximum of ten
minutes:
X Switch off the tire inflation compressor.
X Unscrew the filler hose from the valve of
the faulty tire.
X Stow the tire sealant bottle and the tire
inflation compressor.
X Pull away immediately.
The maximu mspeed for atire treated with tire
sealant is 50 mph (80k m/h). The upper part
of the TIREFIT sticker must be affixed to the
instrument cluster in the driver's field of
vision.
X Stop after driving for approximately ten
minutes and check the tire pressure with
the tire inflation compressor.
The tire pressure must now be at least
130 kPa (1.3 bar/19 psi). G
WARNING
If the required tire pressure is not reached
after driving for a short period, the tire is too
badly damaged. The tire sealant cannot repair
the tire in this instance. Damaged tires and a
tire pressure that is too low can significantly
impair the vehicle's braking and driving
characteristics. There is a risk of accident.
Do not continue driving. Contact a qualified
specialist workshop.
X Correct the tire pressure if it is still at least
130 kPa (1.3 bar/19 psi) (for the values,
see the Tire and Loading Information
placard on the driver's side B-pillar or tire
pressure table on the fuel filler flap).
X To increase the tire pressure: switch on
the tire inflation compressor. 278
Flat tireBreakdown assistance