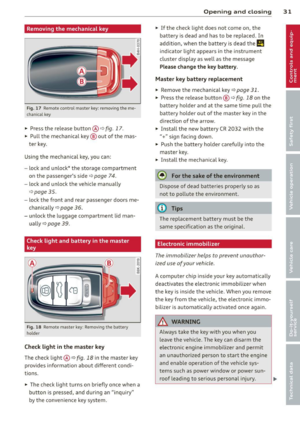
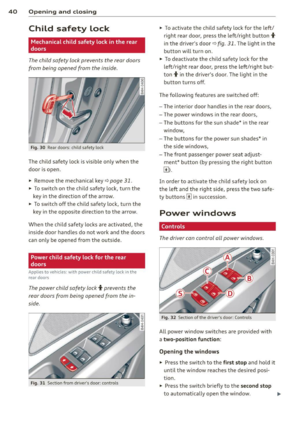
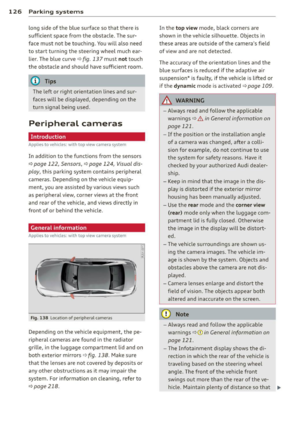
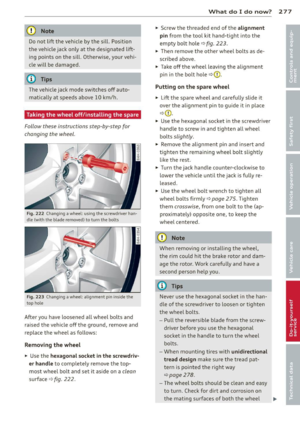
Page 289 of 318

.. Press in ward strongly on the left side of the
cap to remove it from the bumper
e::>fig . 231 .
.. Screw the towing loop in the threaded
opening and tighten it until it stops
e::> fig . 232 .
Remove the towing loop when you are done
using it and place it back in the vehicle tool
kit. Install the cover in the bumper. Always
keep the towing loop in the vehicle .
..&_ WARNING
If you do not sc rew the tow ing loop com
pletely, it cou ld come out of the threaded
hole while the vehicle is bei ng towed caus
ing damage to the vehicle and possib le se
r ious perso nal injury .
Rear towing loop
Only install the rear towing loop when it is
needed.
0 0
Fig . 233 Rear bumper: cover
0 0
Fig. 2 34 Rear bumper : screw ing in towing loop
There are threads located be hind the right
side of the rear bumper w here a towing loop
can be installed. The threads are located be
hind a cover.
-
Emergenc y situ ation s 287
.. Remove the tow ing loop from the vehicle
too l kit .
.. Press inward strongly on the left side (AB)/
upper s ide (58) of the cap to remove it from
the bumper
e::>fig. 233.
.. Screw the towing loop in the threaded
open ing and t ighten it unt il it stops. The in
dicator ma rking must be f lush with the
bumper
e::> fig. 234 .
Remove the towing loop when you are done
using it and plac e it back in the ve hicle too l
ki t. Always keep the towing loop in the vehi
cle.
..&_ WARNING
If yo u do not screw the towing loop com
p letely, i t could come ou t of the t hreaded
hole while the vehicle is be ing towed caus
ing damage to the vehicle and possible se
rious pe rsonal injury.
loading the vehicle onto a flat bed truck
Fi g. 235 Vehicle on flat bed tru ck
Front hook up
.. Align the vehicle wi th the centerline of the
car car rier ramp .
.,. Attach the winch hook to the front tow line
eye prev iously insta lled .
Rear hook up
.,. Align the vehicle with the c enter line of the
car earner ramp .
.. Att ach the winch hook to the re ar towli ne
eye prev ious ly insta lled .
Page 290 of 318

288 Emergency situations
@ Tips
Check carefully to make sure the hook- up
is secure before moving the car up the flat
bed truck ramp.
Vehicle transport
Whenever you have your vehicle transported ,
be sure to note the following:
(D Note
Mou nt the tie-down cha ins/cab les over the
r u nning surface (c ircumference) of the
tires. Never secure the vehicle by the ax le,
the suspension struts or the front or rear
towline eye . For technical reaso ns, the
pressure i n the suspension struts may
change during the t ransport and this will
adve rsely affe ct vehicle handling.
Lifting vehicle
Lifting with workshop hoist and with
floor jack
The vehicle may only be lifted at the lif ting
poin ts illustra ted.
F ig . 23 6 Fro nt lift in g po int
Fi g. 237 Rea r lift in g point
.,. Read and heed WARNING ¢ _& .
.,. Ac tivate the vehicle jack mode in the M MI:
!CARI fu nction button > Car systems cont ro l
button
> Servicing & checks > Air susp. :
jack mode
> On .
.,. Locate lifting poi nts ¢ fig . 236 and
¢fig . 237 .
.,. Adjust lifting arms of worksho p hoist o r
floo r jack to match ve hicle lift ing poi nts .
.,. In sert a rubbe r pad be tween the floo r ja ck/
w or ksho p hoist and t he lift ing poin ts.
The veh icle jack mode must be ac tiva ted so
t h at the au tomat ic ad justment of the Adap
t ive A ir Suspens io n does not ma ke i t more dif
ficu lt to raise t he vehicle wit h the floor ja ck.
If you must lift your veh icle with a floor jack
to work underneath, be sure the vehicle is
safel y supported on stand s intended for thi s
purpo se.
Front lifting point
T he lifti ng poi nt is located o n the floor pan re
i nforcement abo ut at the same l eve l as the
ja ck mount ing poi nt
¢ fig . 236 . Do not lift
the vehicle at the verti cal sill reinforcement.
Rear lifting point
The lifting po int is located on the vert ica l rein
fo rcement of the lower s ill for the on-boa rd
jack
¢ fig . 237 .
Lifting with vehicle jack
Refer to ¢page 276.
A WARNING ,= -
-To reduce the risk of ser ious injury and
veh icle damage .
- Alw ays li ft the vehicle o nly at the spe
c ia l workshop hoist and floor jac k lift
points illustrated
¢ fig. 236 and
¢fig. 237 .
-Fail ure to lift the ve hicl e at these
po ints co uld cause the vehicle to tilt or
fall from a lift if there is a change i n ve
hicle weight dist ributi on and balance .
This might happen, fo r example, when
heavy components such as the eng ine
block o r transmission a re remove d .
Page 291 of 318
-When removing heavy components like
these, anchor vehicle to hoist o r add cor
respond ing weig hts to mai nta in the cen
ter of g ravity. Otherwise, the vehicle
m ight tilt o r slip off the hois t, causi ng
ser ious persona l injury .
Q) Note
-Be awa re of the fo llow ing points befo re
li fting t he vehicle:
- The vehicle should never be lifted or
jacked up from underneath the engine
oil pan, the transmission housing , the
front or rear axle or the body side members. This could lead to serious
damage.
- To avoid damage to the underbody or
chassis frame, a rubber pad must be
i nserted between the floor jack and
the lift points .
- Before driv ing over a workshop hoist,
check that the veh icle weight does not
exceed the permissibl e lifting capacity
of the hoist.
- Before driving over a workshop hoist,
ensure that there is sufficient clear ance between the hoist and low parts
of the vehicle.
Emergency situations 289
•
•
Page 292 of 318

2 90 General information
General information Explanation of
technical data
Some of the technical data listed in this man
ual requires further explanation .
The technical data for your vehicle is listed in
the charts starting on
r:::> page 292. This sec ·
tion provides general information, notes and restrictions which apply to this data .
Vehicle identification
The key data is given on the vehicle identifica·
tion number (VIN) plate and the vehicle data
sticker.
Fig. 238 Veh icle Ide ntific atio n Number (VlN) p late: lo
cation on driver 's sid e das h panel
Fig. 239 The vehicle identi fication label -inside the
luggage co mpa rtmen t
The Vehicle Identification Number (VIN)
is located on the driver's side so that it is visi
b le from the outside through the windshield
r:::> fig . 238. You can also display the Vehicle
Identification Number of your vehicle in the
MMI. Select: Function button
ICAR ! > Car sys
tems
> VIN number . The
vehicle identification label
is located in the luggage compartment in the
spare wheel wel l.
The label¢
fig. 239 shows the following vehi
cle data :
(D Production control No .
@ Vehicle identification No.
® Type code number
@ Type designation/engine output in Kilo·
watts
® Engine and transmission code letter
@ Paint No./Interior
(f) Optional equipment No.'s
Vehicle data 2 to 7 are also found in your War·
ranty
& Maintenance booklet.
The safety compliance sticker
is you r assurance that your new vehicle com
plies with all applicable Federal Motor Vehicle
Safety Standards which were in effect at the
time the vehicle was manufactured . You can
find this sticker on the left door jamb.
It
shows the month and year of production and
the ve hicle ident ification number of your vehi ·
cle (perforation) as well as the Gross Vehicle
Weight Rating (GVWR) and the Gross Axle
Weight Rating (GAWR) .
The high voltage warning label
is located on the lock carr ier .
The spark ignition system complies with
the Canadian standard ICES-002.
Weights
Gross Vehicle Weight Rating
The Gross Vehicle Weight Rating (GVWR), and
the Gross Axle Weight Rating (GAWR) for
front and rear are Listed on a sticker on the
left door jamb.
The Gross Vehicle Weight Rating includes the
weight of the basic vehicle plus full fuel tank,
oi l and coolant, plus maximum load, wh ich in·
eludes passenger weight (lSO lbs/68 kg per
Ill>
Page 293 of 318

designated seating position) and luggage
weight~&. .
Gros s Axle W eight Rating
The G ross Axle Weight Rating is the maximum
l oad that can be applied at each axle of the
vehicle
q .&. .
Vehicle capacit y weight
The vehicle capac ity we ight (max. load) is list
ed either on the dr iver's side B-pillar or inside
the fuel filler flap.
Roof weight
The maximum perm issible roof weight is 220
lb (100 kg ).
The roof weight is made up of
the we ight of the roof rack system and the
weight of the object be ing transported
q page 72, Loading the roof rack .
.&, WARNING
- T he ac tual Gross Axle Weight Rat ing at
the front and rear axles shou ld not ex
ceed the permiss ible weights, and their
combination must not exceed the Gross
Vehicle Weight Rat ing .
- Exceeding permissib le weight ratings can
result in vehicle damage, accidents and
personal injury.
(D Note
- The vehicle capacity weight figures apply
when the load is distributed evenly in the
vehicle (passengers and luggage). When
transporting a heavy load in the luggage
compartment, carry the load as near to
the rear axle as possib le so that the veh i
cle's handling is not impa ired.
- Do not exceed the maximum permissible
axle loads or the maximum gross vehicle
weight. Always remember that the vehi
cle's handling will be affected by the ex
tra load. Therefore, adjust you r speed ac
cord ingly.
- Always observe loca l regu lations.
-
G ene ral in formation 29 1
Dimensions
The specifications refer to the basic model.
Differences may occur depending on the mod
el type and options ordered, for example, tire
sizes.
l) Fig ures were not avai lab le at time of pub li
cation.
@ Note
When dr iv ing up steep ramps, on rough
r oads, over curbs, etc. it is important to re
member that some parts of your vehicle,
such as spoi lers or exhaust system compo
nents, may be close to the ground. Be
careful not to damage them.
•
•
Page 294 of 318

292 Data
Data
AS 3.0
TFSI engine, with all wheel drive
Engine data
Maximum outpu t SA E net
Maximum torque SAE net
N o. of cylinders
Displacement
Stroke
Bore
C ompression ratio hp@rpm
l
b-ft@ rpm
CID (cm
3 )
in (mm)
i n (mm)
333 @ 5500 - 6500
325
@ 2900 - 5300
6 cyli nder
182.7 (2995)
3.51 (89)
3.33 (8 4.5)
10.3: 1
Fuel Premium unleaded (91 AKI)
Recommended for maxi
mum engine performance. Further details
c:::> page 228,
Gasoline
Dimens ions (approx .)
Length (with license plate bracket) in (mm)
W idth (across mirrors) ____ in (mm)
He ight (unloaded) in (mm)
Turning circle diameter (curb to curb) ft . (m )
Capacities (approx.)
Fuel tank
- Total capacity gal (liters)
- Res erve (of total capacity) gal (lite rs)
Windshield and headlight washer quarts (liters)
fluid container
Engine oil with filter c hang e quarts (lit ers)
Footnotes
c:::> page 291
AS ASL
202.4 (5137) 207.52 (5267) _,, __
83 .1 7 (2 11 1) 83.17 (211 1)
57.52 (1460) 57 .96 (1471)
4 0.3 5 (12 .3) 41.67 (1 2,7 )
23.8 (90 .0)
4 (15)
5 .29 (5)
7.1 9 (6.8)
Page 295 of 318

AS 4.0 TFSI engine., with all wheel drive
Engine data
Maximum output SAE net
Maximum torque SAE net
No . of cylinders
Displacement
Stroke
Bore
Compression ratio hp@rpm
lb-ft@ rpm
CID (cm
3 )
in (mm)
in (mm)
Data
420@5000
444@1500
8 cylinder
243.57 (3993) 3.51 (89)
3 .33 (84.5)
10.1 : 1
Fuel Premium unleaded (91 AKI) Recommended for maxi
mum engine performance. Further details¢
page 228,
Gasoline
Dimensions (approx .)
Length (with license plate bracket)
Width (across mirrors)
He ight (unloaded) in (mm)
in (mm)
in (mm)
T urning circle diameter (curb to curb) ft . (m)
Capacities (approx.)
Fuel tank
- Total capacity gal (liters)
- Reserve (of total capacity) gal (l iters)
__ _.. __
Windshield and headlight washer quarts (liters)
fluid container
Engine oil with filter change
Footnotes
¢ page 291
quarts (liters)
AS
202.4 (5137)
83.17 (2111)
57 .52 (1460)
-....... -
4 0.35 (12.3)
ASL
207 .52 (5267)
83.17 (211 1)
57 .96 (1471)
41.67 (12,7)
23 .8 (90 .0)
4 (15)
5 .29 (5)
8 .77 (8.3)
293
•
•
Page 296 of 318
294 Data
S8 4.0 TFSI engine, with all wheel drive
Engine data
Maximum output SAE net
Maximum torque SAE net
N o. of cylinders
Displacement
Strok e
Bore
C ompression ratio hp@rpm
l
b-ft@ rpm
CID (cm
3 )
in (mm)
i n (mm)
520@6000
479@ 1700 - 5500
8 cylinder
243 .57 (3993)
3.51 (8 9)
3.33 (84 .5)
9.3 : 1
Fuel Premium unleaded (91 AKI) Recommended for maxi
mum engine performance. Further details
Q page 228,
Gasoline
Dimensions (approx .)
Leng th (wit h license pl ate brac ket) in (mm)
Width (across mirrors) in (mm)
He igh t (unloaded) in (mm)
T urning circle diamet er (curb to curb) ft. (m)
Capacities (appro x.)
Fuel tank
- Total capacity gal (liters)
- Reserve (o f to tal capacity) gal ( lite rs)
Windshield and headlight washer quarts (liters)
fluid container
Engine oil with filter change quarts (liters)
F oo tnotes
Q page 291
2 02 .2 (51 36)
83.17 (2111) 57.4 (1458)
4 0.35 (12.3)
23.8 (90.0)
4 (15)
5.29 (5)
8. 77 (8 .3)