Page 177 of 324
176Features
Bluetooth
® HandsFreeLink
®
HFL Menus
To delete a name
1. Say "Phonebook."
2. Say "Delete" after the prompts.
3. Say a name you want to delete.
4. Say "Yes," and follow the HFL prompts. To list all names in the phonebook
1. Say "Phonebook."
2. Say "List" after the prompts.
3. HFL begins reading the names in the order they were stored.
4. When you hear a name you want to call, say "Call." To store a specific phone number from your cell phone directly to the
HFL phonebook
*
1. Say "Phonebook."
2. Say "Receive Contact" after the prompts.
3. Follow the HFL prompts, select a number from your cell phone, and send it to
HFL.
If it is not the number you want to store, say "Discard."
4. Say the name for that number.
5. Follow the HFL prompts to continue.
* Not available on all models
Page 178 of 324

177
Continued
Features
Bluetooth
® HandsFreeLink
®
HFL Menus
System Setup
This command group allows you to change or customize HFL basic settings.
To set a four-digit passcode to lock the HFL system for security
1. Say "System Setup."
2. Say "Security."
3. Follow the HFL prompts and say the four-digit number of your choice.
4. Follow the HFL prompts and confirm the number. To change the security passcode
1. Say "System Setup."
2. Say "Change Passcode" after the prompts.
3. Say the new four-digit passcode after the HFL prompts.
4. Follow the HFL prompts. To select a ring tone or a prompt as the incoming call notification
1. Say "System Setup."
2. Say "Call Notification" after the prompts.
3. Say "Ring Tone" or "Prompt" after the prompts. For no audible notification, say
"O f f."
System SetupPress the
button before a command.
Once a passcode is set, you are required to enter
the passcode with every new key cycle to use HFL.
If you forget the code, go to your dealer to have the
passcode reset. You can also cancel the
passcode by clearing all the data stored in the HFL
system.
To clear the system
P. 17 8
The default setting of the incoming notification is a
ring tone.
Page 179 of 324

178Features
Bluetooth
® HandsFreeLink
®
HFL Menus
To activate or deactivate the auto transfer function
The call on your cell phone can be automatically transferred to HFL when you get
into the vehicle and turn on the ignition.
1. Say "System Setup."
2. Say "Auto Transfer" after the prompts. HFL lets you know the current status.
3. Follow the HFL prompts to change the setting. To clear the system
Paired phones, all stored or imported phonebook data, and any passcodes are
erased.
1. Say "System Setup."
2. Say "Clear" after the prompts.
3. Follow the HFL prompts. Change Language
*
You can set the system language to French or English.
1. Say "Change Language."
2. Follow the HFL prompts.
If you have not named your paired phone in the selected language, HFL will ask
you to name it in that language.
System Setup
Press the
button before a command.
You can clear the system when you have
forgotten the passcode and cannot access HFL.
When HFL asks you for the passcode, say
"System Clear."
Change Language
Press the
button before a command.
Quick Language Selection
If you want to change the language, to French for
example, say "Français," and follow the prompt.
* Not available on all models
Page 180 of 324

179
Features
* Not available on all modelsCompass
*
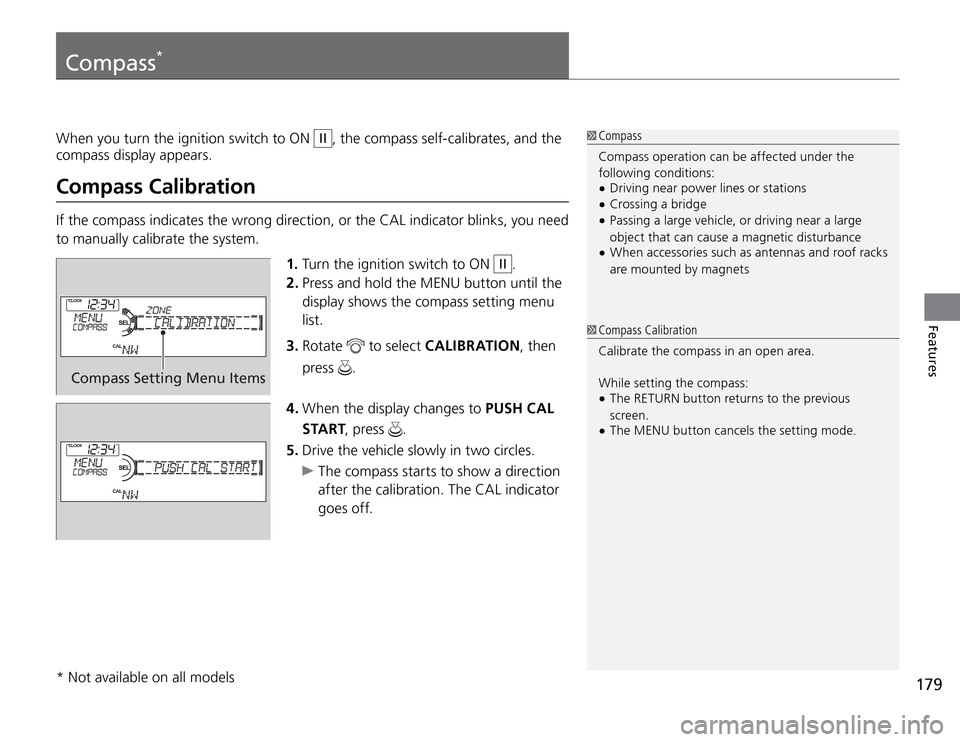
Compass Setting Menu Items
1. Turn the ignition switch to ON
II
.
2. Press and hold the MENU button until the
display shows the compass setting menu
list.
3. Rotate
to select CALIBRATION, then
press
.
4. When the display changes to PUSH CAL
START, press
.
5. Drive the vehicle slowly in two circles.
The compass starts to show a direction
after the calibration. The CAL indicator
goes off. When you turn the ignition switch to ON II
, the compass self-calibrates, and the
compass display appears.
Compass CalibrationIf the compass indicates the wrong direction, or the CAL indicator blinks, you need
to manually calibrate the system.
Compass Compass CalibrationCompass operation can be affected under the
following conditions:
Driving near power lines or stations tCrossing a bridge tPassing a large vehicle, or driving near a large tobject that can cause a magnetic disturbance
When accessories such as antennas and roof racks tare mounted by magnets
Calibrate the compass in an open area.
While setting the compass:
The RETURN button returns to the previous tscreen.
The MENU button cancels the setting mode. t
Page 181 of 324
180Features
Compass
*
Compass Zone Selection
Zone Number
1. Turn the ignition switch to ON
II
.
2. Press and hold the MENU button until the
display shows the compass setting menu
list.
3. Rotate
to select ZONE, then press
. The display shows the current zone
number.
4. Rotate
to select the zone number of
your area (See Zone Map), then press
.
Compass Zone Selection
The zone selection is done to compensate the
variation between magnetic north and true north.
If the calibration starts while the audio system
is in use, the display returns to normal after the
calibration is completed.
Zone Map
1
2
3
4
5
6
7891011121314 15
Guam Island : Zone 8
Puerto Rico : Zone 11
Page 182 of 324

181
This chapter discusses driving, refueling, and information on items such as accessories.
Driving
Cruise Control .................................... 201
VSA
® (Vehicle Stability Assist), aka
ESC (Electronic Stability Control),
System ............................................ 204
TPMS (Tire Pressure Monitoring
System) ............................................ 206
Tire Pressure Monitoring System (TPMS)-
Required Federal Explanation ........... 208
Braking
Brake System ......................................210
ABS (Anti-lock Brake System) .............212
Brake Assist System .............................213Parking Your Vehicle
When Stopped ....................................214
Parking ...............................................214
Refueling
Fuel Information .................................215
How to Refuel .....................................216
Fuel Economy ...................................... 218
Improving Fuel Economy .....................218
Accessories and Modifications
Accessories .........................................219
Modifications ......................................219 Before Driving
Driving Preparation ............................ 182
Maximum Load Limit ......................... 185
Towing a Trailer
Towing Preparation ............................ 187
Driving Safely with a Trailer ................ 189
Towing Your Vehicle .......................... 190
When Driving
Starting the Engine .............................191
Precautions While Driving ...................193
Automatic Transmissions .................... 194
Shifting (Automatic Transmission) ...... 195
Shifting (Manual Transmission) ........... 199
Page 183 of 324