Page 57 of 84
Navigation 67
Navigation Setup
Vehicle signalThis function allows certain vehicle data and GPS satellite data to be dis-
played.1
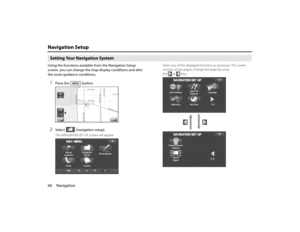
Press the button, then select (navigation
setup), select and then select (vehicle signal).The VEHICLE SIGNAL screen will appear.
Restore system defaultsUse this function if you want to change all of the system's current set-
tings back to the default settings.1
Press the button, then select (navigation
setup), select and then select (restore system
defaults).
2
Select to return all current systems settings to
default.
Select (default) to return average speed set-
ting to default.
NOTE
If you select this function, all your settings will be deleted.
Page 58 of 84
![SUBARU FORESTER 2010 SH / 3.G Navigation Manual 68 NavigationNavigation Setup
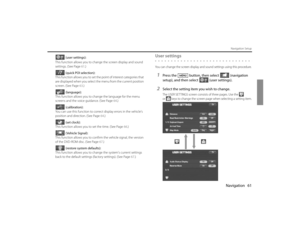
[Default List]Item Initial condition
Map display
Search Area
Display Guidance Language
Map Orientation (1 and 2 screen)
Map Display Mode
Map Display Scale
Map Configurati](/manual-img/17/7206/w960_7206-57.png "SUBARU FORESTER 2010 SH / 3.G Navigation Manual 68 NavigationNavigation Setup
[Default List]Item Initial condition
Map display
Search Area
Display Guidance Language
Map Orientation (1 and 2 screen)
Map Display Mode
Map Display Scale
Map Configurati")
68 NavigationNavigation Setup
[Default List]Item Initial condition
Map display
Search Area
Display Guidance Language
Map Orientation (1 and 2 screen)
Map Display Mode
Map Display Scale
Map Configuration
Q-POI Map Display
Show POI Icon Display
Right Screen Setting, POI
Passage Point Display/Current Location, Map Screen ( Time
Requirement, Time, Direction / Distance)Passage Point Display/
Full Route, Map Screen ( Time Require-
ment, Time, Direction / Distance)
Restricted Road
Freeway InformationDisc A ( WEST ): CA
Disc B (MID): IL
Disc C (EAST ): DC
US English, female
North up
Single-screen display
Single-screen:
10,000 map (1/16 mi) (100 m)
Dual-screen:
40,000 map (1/4 mi) (500 m)
Arrow Mode
Off
Off
On
Next passage point
Destination
On
Off
Volume Control
Volume Preset
4
Navigation Setup Menu
Distance
Road Restriction Warnings
Reverse Mute
Keyboard Layout
Arrival Timemile
On
Off
ABC
Required remaining time
Item Initial condition
Map Mode
Guidance Screen
Q-POI Selection
Language SelectionAuto
On
A: Gas station
B: ATM
C: Parking
D: Grocery store
E: All Restaurants
F: Hotel
US English, female, male,
French, Espanõl
Route Options
Search Condition
Route PreferencesQuick
Allow Toll Road: Off
Allow Ferry: Off
Allow Major Roads: On
Allow Time Restricted Road:
Off Item Initial condition
Page 59 of 84
Navigation 69
Stored LocationsYou can store, edit, or delete any destinations, waypoints, and
other marked points using the procedures described in this
section.1
Press the button.
2
Select (stored locations).
3
Select the desired item.
(Memory Points):
Use this function to place markers on the map. (See Page 70.)
(Avoid Area):
Use this function to store into the system's memory any areas you
want to avoid. (See Page 75.)
(Previous Destination):
Use this function to delete previously stored destinations and
waypoints. (See Page 77.)
(Display memory point icons):
Selecting this key allows you to display icons for memory points.
Each of the above six functions has some or all of the following
four standard editing functions (see the table below):
(add):
You can store a new location into memory.
(list):
You can see a list of the stored locations.
(delete):
You can delete stored locations.
(delete all):
You can delete all stored locations.
Page 60 of 84
70 NavigationStored Locations
Editing keys displayed for each function are as follows:
The numbers in parentheses following the function names indicate the
maximum locations you can store in the memory.
Memory points■Storing new memory pointsMemory points can be stored into any of the six categories (including
Home) of storage locations.1
Press the button, then select (stored loca-
tions), and then select (memory points).
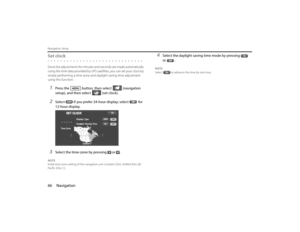
2
Select (add).
Memory Points (100)
Avoid Area (10)
Previous Dest. (5)
Page 61 of 84
Navigation 71
Stored Locations
3
Set the memory point using the preferred method avail-
able on the displayed screen.
NOTE
Up to 100 memory points can be stored. Once that number has been reached,
you must delete memory points that you no longer require (See Page 74) before
you can store new memory points. The number of memory points you can store
is indicated on the screen.
■Reviewing and modifying memory pointsUsing this function, you can review the stored memory points in the
form of a list on the screen and modify names, icons, telephone num-
bers, and other memory point data.1
Press the button, then select (stored loca-
tions), and then select (memory points).
2
Select (list).
Page 62 of 84
72 NavigationStored Locations3
Select the memory point to be modified.You can change the sequence in which memory points are listed by
selecting (Attribute), (icon), (na
me), or (date)
.
4
Select the category key corresponding to the memory
point to be modified.
(icon): Selecting this key allows you to choose a dis-
play icon. (Page 1) and (Page 2) of
the CHANGE ICON screen contain standard icons, whereas the
"With Sound" (with sound) page contains icons that are accompa-
nied by response sounds. Select (with sound) to
listen to these sounds.
Page 63 of 84
 keys in the \"With Sound\" page are
used to activate response sounds only when you come near the mem-
ory point from the specified directio")
Navigation 73
Stored Locations
NOTEThe "With direction" ( / ) keys in the "With Sound" page are
used to activate response sounds only when you come near the mem-
ory point from the specified direction. Select or and set
the direction using or . Selecting allows you to listen to
respective sounds.
(category): Use this key to change the storage cate-
gory. After selecting this key, select either key of HOME or Preset
Destinations 1 to 5.
For memory points to which the category has been set, it is possi-
ble to set them quickly as a destination. It is convenient to set in
advance the category to your home or a spot to which you go fre-
quently. When setting it as a destination, select the relevant key
on the DESTINATION ENTRY screen. See Page 29.
(name): Select this key to change the name of a mem-
ory point. When the change has been completed,
select (OK). Then select (on) if the name is to be
displayed on the map, or (off ) if it is not to be displayed.(position): Select this key to review the memory
points and modify a memory point on the map screen. After
checking or modifying it, select (OK).
( Tel): Select this key to modify a telephone number.
When the modification has been completed, select (OK).
Page 64 of 84
74 NavigationStored Locations■Deleting memory pointsYou can delete stored memory points by using this function.1
Press the button, then select (stored loca-
tions), and then select (memory points).
2
Select the category of the memory point to be deleted.
3
Select (delete).
4
Select the memory point to be deleted.
5
Confirmation message will be displayed. Select
(yes).Select (no) to cancel the deletion.
■Deleting all memory pointsUsing this function, you can delete all memory points.1
Press the button, then select (stored loca-
tions), and then select (memory points).
2
Select the category of the memory points to be deleted.
3
Select (delete all).


, select and then sel")


, (icon), (na
me), or (date)
.
4
Select th")
, and then select (memory points).")