2010 MERCEDES-BENZ SLS COUPE service
[x] Cancel search: servicePage 232 of 361
Manual drive program
In manual drive program
M, you need to
change geary ourself using the steering wheel
gearshift paddles (Y page 228). At low engine
speeds, the transmission shifts down auto-
matically.
! In manual drive program M, the transmis-
sion does not shift up automatically even
when the engine limiting speed for the cur-
rent gear is reached. When the engine lim-
iting speed is reached, the fuel supply is cut
to prevent the engine from overrevving.
Always make sure that the engine speed
does not reach the red area of the rev coun-
ter and observe the upshift indicator. There
is otherwise a risk of engine damage.
X To activate the manual drive program:
turn the program selector switch until M
appears in the instrument cluster's multi-
function display.
M lights up in red on the program selector
switch.
X To deactivate the manual drive pro-
gram: turn the selector switch and select
another drive program.
Upshift indicator
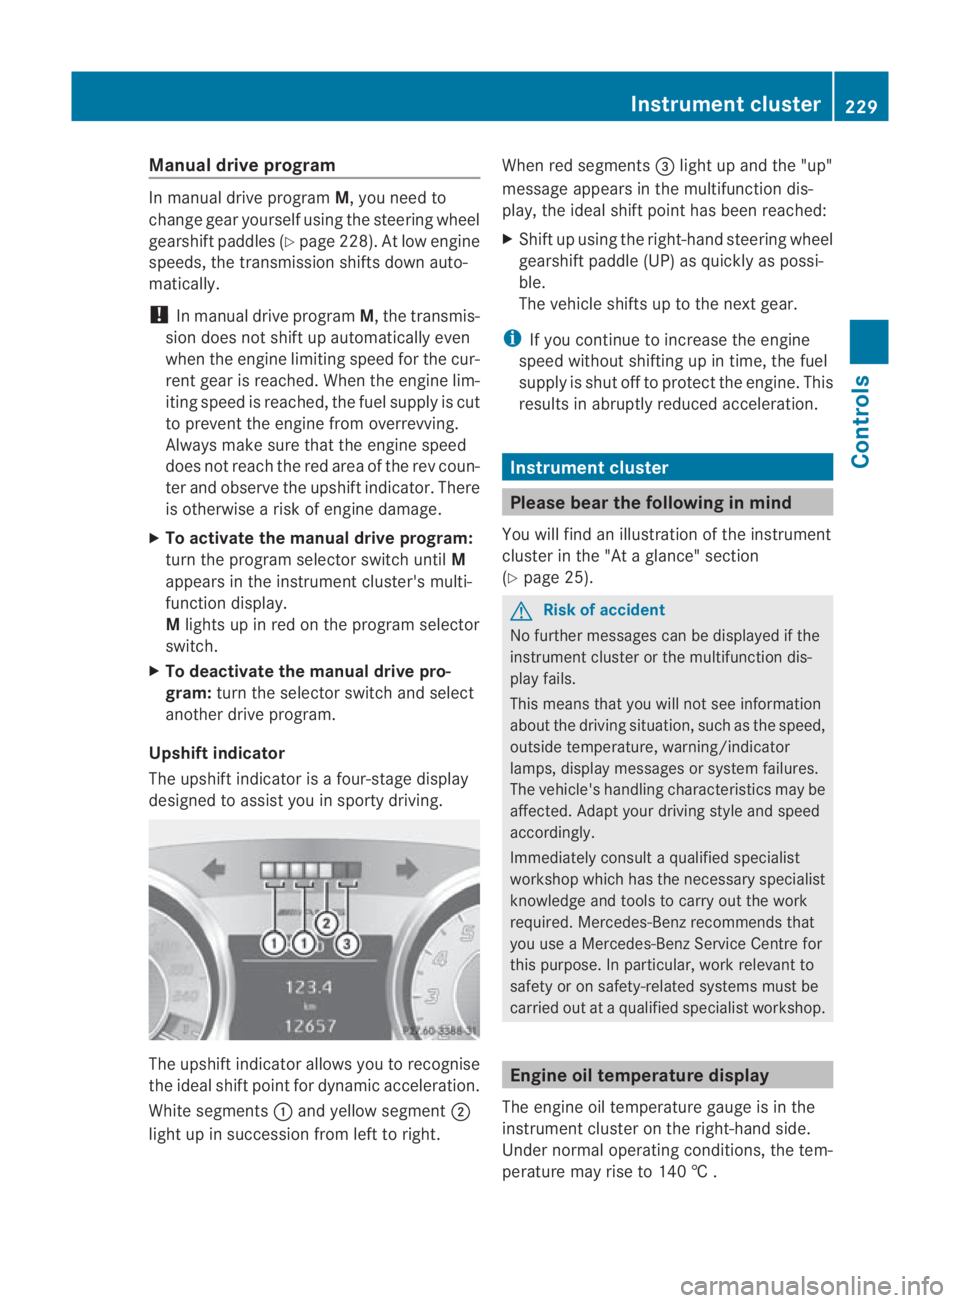
The upshift indicator is a four-stage display
designed to assist you in sporty driving. The upshift indicator allows you to recognise
the ideal shift point for dynamic acceleration.
White segments
0001and yellow segment 0002
light up in succession from left to right. When red segments
0015light up and the "up"
message appears in the multifunction dis-
play, the ideal shift point has been reached:
X Shift up using the right-hand steering wheel
gearshift paddle (UP) as quickly as possi-
ble.
The vehicle shifts up to the next gear.
i If you continue to increase the engine
speed without shifting up in time, the fuel
supply is shut off to protec tthe engine. This
results in abruptly reduced acceleration. Instrument cluster
Please bear the following in mind
You will find an illustration of the instrument
cluster in the "At a glance" section
(Y page 25). G
Risk of accident
No further messages can be displayed if the
instrument cluster or the multifunction dis-
play fails.
This means that you will not see information
about the driving situation, such as the speed,
outside temperature, warning/indicator
lamps, display messages or system failures.
The vehicle's handling characteristics may be
affected. Adapt your driving style and speed
accordingly.
Immediately consult a qualified specialist
workshop which has the necessary specialist
knowledge and tools to carry out the work
required. Mercedes-Ben zrecommends that
you use a Mercedes-Benz Service Centre for
this purpose. In particular, work relevant to
safety or on safety-related systems must be
carried out at a qualified specialist workshop. Engine oil temperature display
The engine oil temperature gauge is in the
instrument cluster on the right-hand side.
Under normal operating conditions, the tem-
perature may rise to 140 † . Instrument cluster
229Controls
BA 197 ECE RE 2010/6a; 1; 2, en-GB
sabbaeu Version: 3.0.3.6 2010-05-07T14:19:43+02:00 - Seite 229 Z
Page 235 of 361
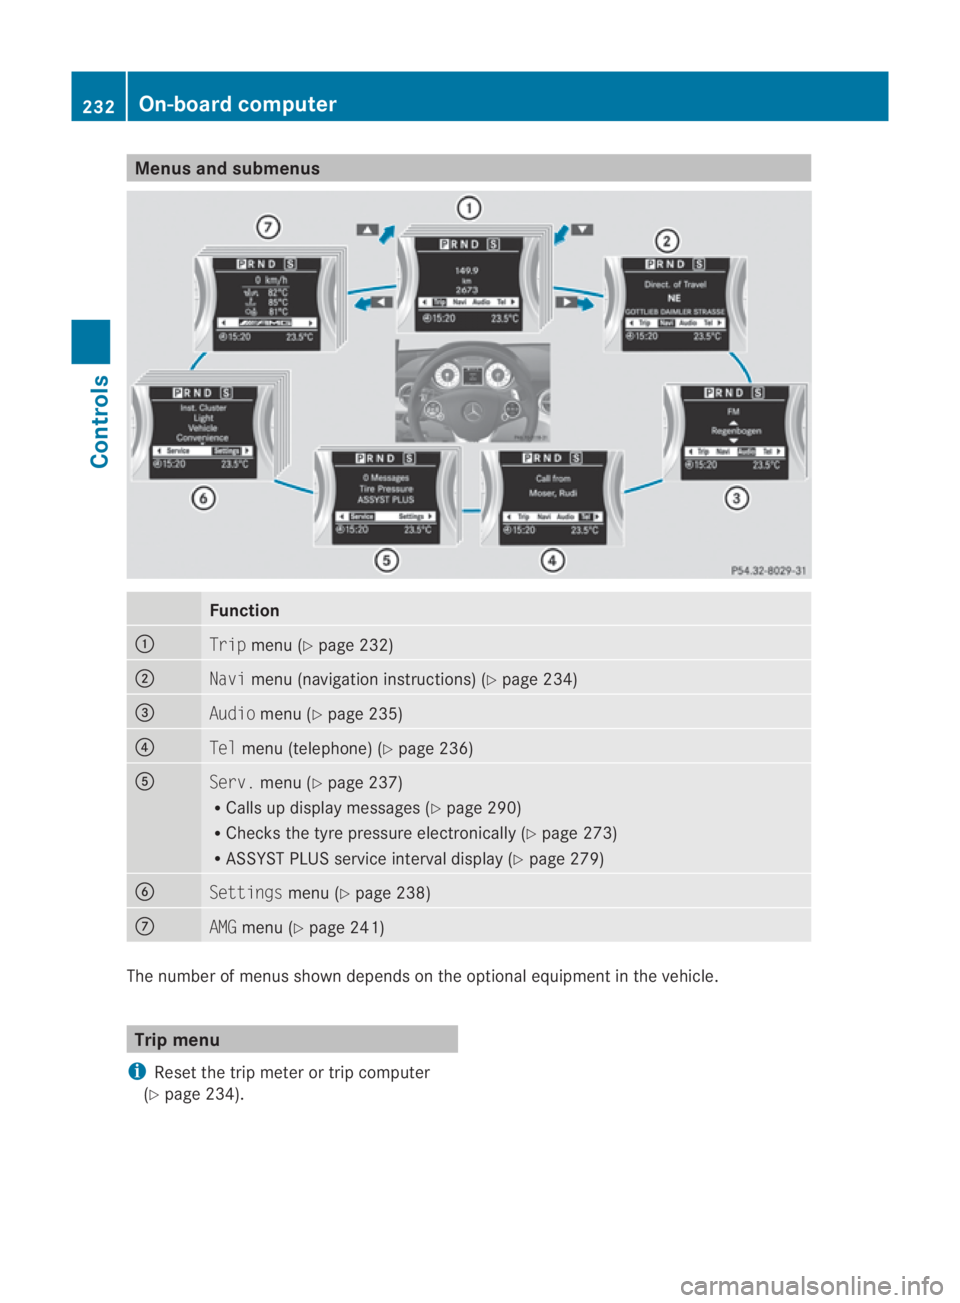
Menus and submenus
Function
0001
Trip
menu (Y page 232) 0002
Navi
menu (navigatio ninstructions) (Y page 234) 0015
Audio
menu (Y page 235) 0014
Tel
menu (telephone) (Y page 236)0012
Serv.
menu (Y page 237)
R Calls up display messages (Y page 290)
R Checks the tyre pressure electronically (Y page 273)
R ASSYST PLUS service interval display (Y page 279)0013
Settings
menu (Ypage 238) 000A
AMG
menu (Y page 241) The numbe
rofmenus shown depends on the optional equipment in the vehicle. Trip menu
i Reset the trip meter or trip computer
(Y page 234). 232
On-board computerControls
BA 197 ECE RE 2010/6a; 1; 2, en-GB
sabbaeu
Version: 3.0.3.6 2010-05-07T14:19:43+02:00 - Seite 232
Page 239 of 361
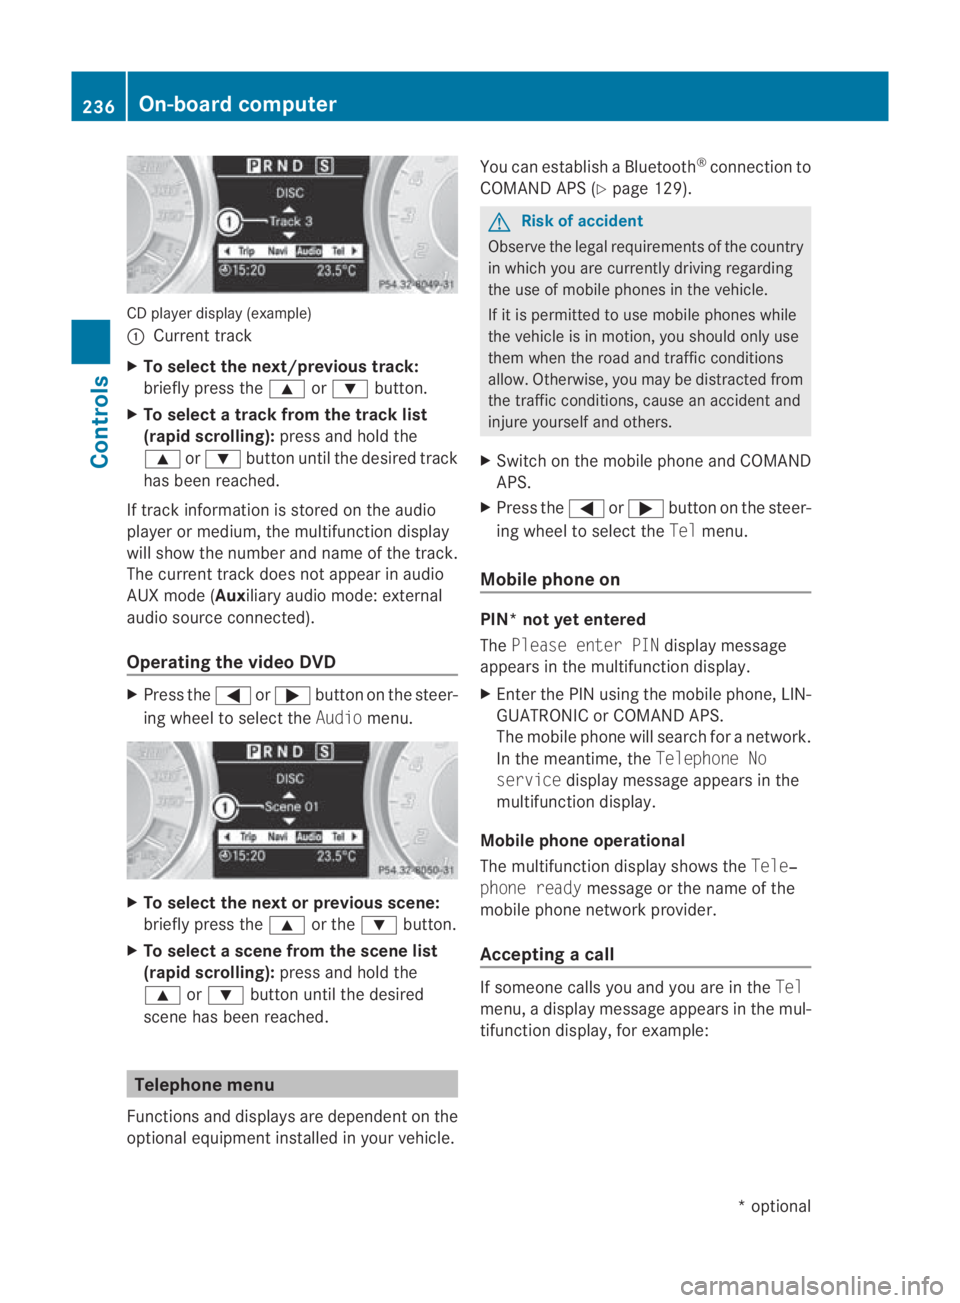
CD player display (example)
0001
Current track
X To select the next/previou strack:
briefly press the 000For000C button.
X To select a track from the track list
(rapid scrolling): press and hold the
000F or000C button until the desired track
has been reached.
If track information is stored on the audio
player or medium, the multifunctio ndisplay
will show the number and name of the track.
The current track does not appear in audio
AUX mode (Aux iliary audio mode: external
audio source connected).
Operating the video DVD X
Press the 0008or000E button on the steer-
ing wheel to selec tthe Audio menu. X
To selectt he next or previous scene:
briefly press the 000For the 000Cbutton.
X To selectas cene from the scene list
(rapid scrolling): press and hold the
000F or000C buttonuntil the desired
scene has been reached. Telephone menu
Functions and displays ar edependen tonthe
optional equipment installed in your vehicle. You can establish a Bluetooth
®
connection to
COMAND APS (Y page 129). G
Risk of accident
Observe the legal requirements of the country
in which you are currently driving regarding
the use of mobile phones in the vehicle.
If it is permitted to use mobile phones while
the vehicle is in motion, you should only use
them when the road and traffic conditions
allow.O therwise, you may be distracted from
the traffic conditions, cause an accident and
injure yourself and others.
X Switch on the mobile phone and COMAND
APS.
X Press the 0008or000E button on the steer-
ing wheel to select the Telmenu.
Mobile phone on PIN* not yet entered
The
Please enter PIN display message
appears in the multifunctio ndisplay.
X Enter the PIN using the mobile phone, LIN-
GUATRONIC or COMAND APS.
The mobile phone will search for a network.
In the meantime, the Telephone No
service display message appears in the
multifunction display.
Mobile phone operational
The multifunction display shows the Tele‐
phone ready message or the name of the
mobile phone network provider.
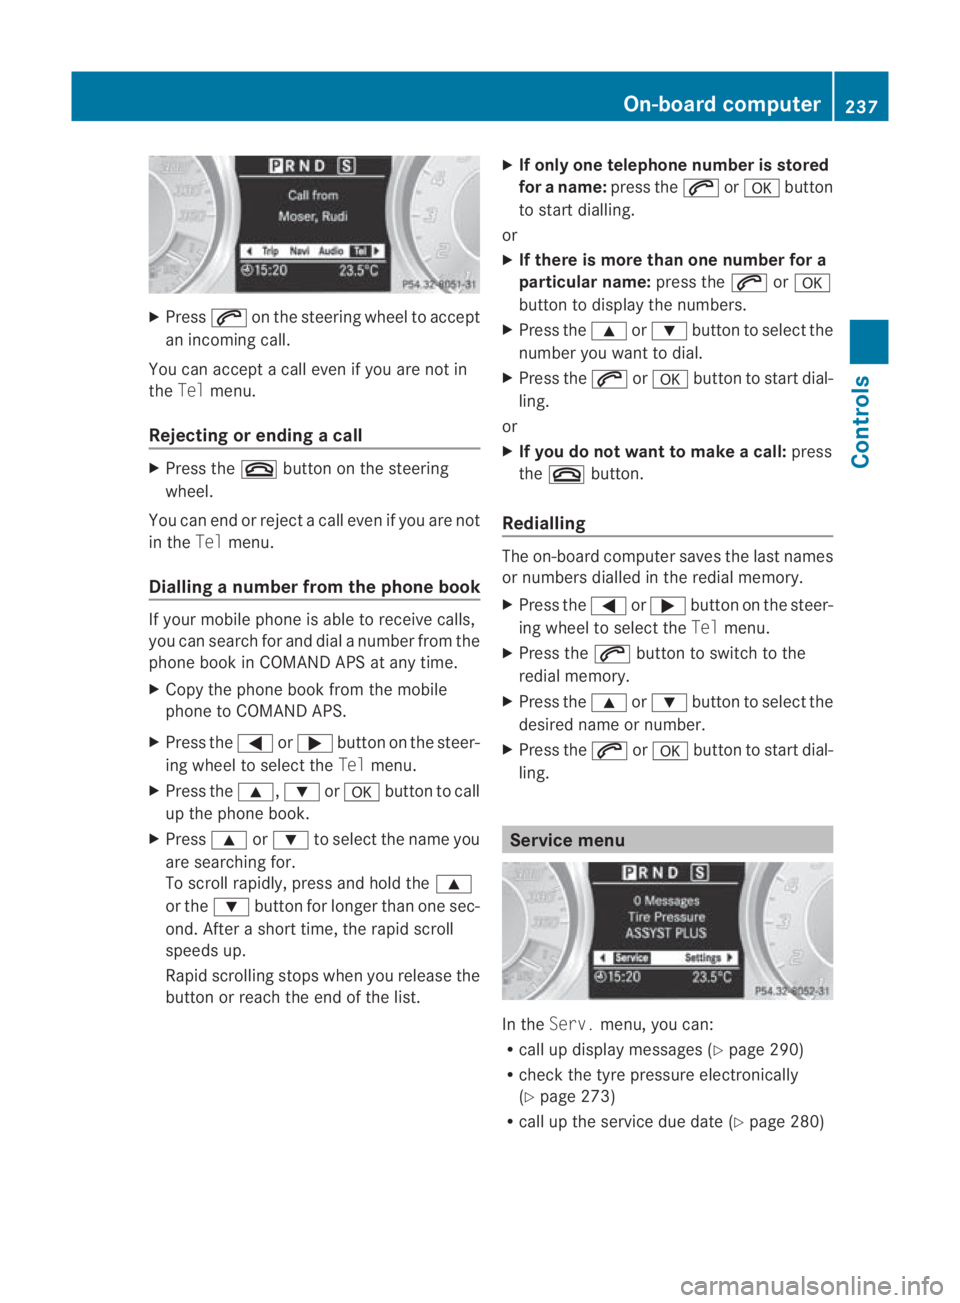
Accepting acall If someone calls you and you are in the
Tel
menu, a display message appears in the mul-
tifunctio ndisplay, for example: 236
On-board computerControls
*o
ptional
BA 197 ECE RE 2010/6a; 1; 2, en-GB
sabbaeu
Version: 3.0.3.6 2010-05-07T14:19:43+02:00 - Seite 236
Page 240 of 361
X
Press 001Con the steering wheel to accept
an incoming call.
You can accept a call even if you are not in
the Tel menu.
Rejecting or ending acall X
Press the 0015button on the steering
wheel.
You can end or reject a call even if you are not
in the Telmenu.
Dialling anumber from the phone book If you
rmobile phone is able to receive calls,
you can search for and dial a number from the
phone book in COMAND APS at any time.
X Copy the phone book from the mobile
phone to COMAND APS.
X Press the 0008or000E button on the steer-
ing wheel to select the Telmenu.
X Press the 000F,000Cor000A button to call
up the phone book.
X Press 000For000C to select the name you
are searching for.
To scroll rapidly, press and hold the 000F
or the 000Cbutton for longer than one sec-
ond. After a short time, the rapid scroll
speeds up.
Rapid scrolling stops when you release the
button or reach the end of the list. X
If only one telephone number is stored
for a name: press the001Cor000A button
to start dialling.
or
X If there is more than one number for a
particular name: press the001Cor000A
button to display the numbers.
X Press the 000For000C button to select the
number you want to dial.
X Press the 001Cor000A button to start dial-
ling.
or
X If you do not want to make a call: press
the 0015 button.
Redialling The on-board computer saves the last names
or numbers dialled in the redial memory.
X
Press the 0008or000E button on the steer-
ing wheel to select the Telmenu.
X Press the 001Cbutton to switch to the
redial memory.
X Press the 000For000C button to select the
desired name or number.
X Press the 001Cor000A button to start dial-
ling. Service menu
In the
Serv. menu, you can:
R call up display messages (Y page 290)
R check the tyre pressure electronically
(Y page 273)
R call up the service due date (Y page 280) On-board computer
237Controls
BA 197 ECE RE 2010/6a; 1; 2, en-GB
sabbaeu Version: 3.0.3.6 2010-05-07T14:19:43+02:00 - Seite 237 Z
Page 254 of 361
You can also switch off the display of the area
behind the vehicle in the COMAND display.
Climate control
General notes
THERMOTRONIC 2-zone automatic climate
control controls the temperature and the
humidity of the vehicle interior and filters out
undesirable substances fro mthe air.
THERMOTRONIC 2-zone automatic climate
control is only operational when the engine is
running. Optimum operation is achieved only
when you drive with the side windows closed.
i When the weather is warm, ventilate the
vehicle for a brief period. This will speed up
the cooling process and the desired vehicle
interior temperature will be reached more
quickly.
i The integrated filter can filter out most
particles of dust and completely filters out
pollen. Aclogged filter reduces the amount
of air supplied to the vehicle interior .For
this reason, you should always observe the
interval for replacing the filter, which is
specified in the Service Booklet .As it
depends on environmental conditions, e.g.
heavy air pollution, the interval may be
shorter than stated in the Service Booklet. G
Risk of accident
Observe the settings recommended on the
following pages. Otherwise, the windows
could mist up. This may obstruct your view of
the traffic situation and, as a result, you may
cause an accident. Climate control
251Controls
BA 197 ECE RE 2010/6a; 1; 2, en-GB
sabbaeu Version: 3.0.3.6 2010-05-07T14:19:43+02:00 - Seite 251 Z
Page 264 of 361
fere with the vehicle's electronics and thereby
jeopardise the operating safety of the vehicle
and you rsafety. Therefore, you must only use
this equipment if it is correctly connected to
a separate reflection-free exterio raerial. G
Risk of injury
Excessive levels of electromagnetic radiation
may cause damage to your health and the
health of others. Using an exterior aerial takes
into account current scientific discussions
relating to the possible health risk posed by
electromagnetic fields.
To ensure optimum reception quality for
mobile phones in the vehicle, and to minimise
mutual influences between the vehicle elec-
tronics and mobile phones, Mercedes–Benz
recommends the use of an approved exterior
aerial. An exterior aerial conducts the elec-
tromagnetic fields generated by a wireless
device to the exterior of the vehicle; the field
strength within the vehicle interior is lower
than in a vehicle that does not have an exte-
rior aerial.
i There are various mobile phone brackets
that may be fitted to your vehicle; in some
cases, these are country-specific. You can
obtain these mobile phone brackets from a
qualified specialist workshop, e.g. a
Mercedes-Benz Service Centre.
The functions and services available when
you use the phone depend on your mobile
phone model and service provider.
X To insert amobile phone: open the tele-
phone compartment (Y page 258).
X Place the mobile phone bracket into the
pre-installed bracket; see the separate
mobile phone bracket installation instruc-
tions.
X Insert the mobile phone into the mobile
phone bracket; see the separate mobile
phone bracket installation instructions.
If the mobile phone is inserted in the mobile
phone bracket, you can speak to the person
you are calling using the hands-free system. You can operate the telephon
eusing the
001C and0015 buttons on the multifunction
steering wheel. You can operate other mobile
phone functions via the on-board computer
(Y page 236).
When you select key position 0with the
Start/Stop button, the mobile phone stays on
but you can no longer use the hands-free sys-
tem.
If you are making a call and you would like to
take the key out of the ignition lock, first
remove the mobile phone from the bracket.
Otherwise, the call will be ended. Rear spoiler
0001
To extend and retract the rear spoiler
If you drive at speeds above 120 km/h, the
rear spoiler extends automatically. But-
ton 0001flashes until the rear spoiler has exten-
ded and then lights up in red.
If you drive at speeds above 80 km/h, the rear
spoiler remains extended. Button 0001remains
lit in red.
If you drive at speeds below 80 km/h, the rear
spoiler retracts automatically. Button 0001
flashes until the rear spoiler has retracted and
then goes out.
Extending and retracting the rear
spoiler manually G
Risk of injury
Make sure that nobody can become trapped
when you manually retract the rear aerofoil. Features
261Controls
BA 197 ECE RE 2010/6a; 1; 2, en-GB
sabbaeu Version: 3.0.3.6 2010-05-07T14:19:43+02:00 - Seite 261 Z
Page 265 of 361
If there is
arisk of entrapment, sto pretracting
the rear aerofoil. To do so, release the button.
The rear aerofoil extends again.
Never leave children unsupervised in the vehi-
cle. They could inadvertently retract the
extended rear aerofoil. Somebody could
become trapped.
! Do not enter an automatic car wash with
the rear aerofoil extended. Otherwise, the
rear aerofoil may be damaged.
Only extend the rear aerofoil in order to
wash it by hand. Retract it again when you
have finished cleaning it.
You can extend the rear spoiler manually at
speeds below 120 km/h.
X Close the boot lid.
X Select key position 2with the Start/Stop
button.
X Press button 0001.
The rear spoiler is extended.
Button 0001flashes until the rear spoiler has
extended and then lights up in red.
You can retract the rear spoiler manually at
speeds below 120 km/h.
X At speeds between 120 km/h and
80 km/h: briefly press button 0001.
Button 0001flashes until the rear spoiler has
retracted and then goes out.
X At speeds below 80 km/h: press and hold
button 0001until the rear spoiler is fully
retracted.
Button 0001flashes until the rear spoiler has
retracted and then goes out.
Rear spoiler retracts manually
appears in the display.
i If you release button 0001while retracting
the rear spoiler, it extends again automati-
cally. Garage door opener*
The remote control integrated in the rear-
view mirror allows you to operate up to three
differen tdoor and gate systems.
i The garage door opener is only available
for certain countries. Observe the legal
requirements in all countries concerned.
The HomeLink ®
garage door opener is
compatible with most European garage and
gate opener drives. More information on
HomeLink ®
and/or compatible products is
available from:
R any Mercedes-Benz Service Centre
R the HomeLink ®
hotline
(0) 08000 466 354 65 (free of charge) or
+49 (0) 6838 907-277 (charges apply)
R the Internet: www.homelink.com Remote control in the rear-view mirror
G
Risk of accident
Only press the transmitter button on the inte-
grated remote control if there are no persons
or objects present within the sweep of the
garage door. Persons could otherwise be
injured as the door moves.
Programming the remote control i
You will achieve the best results by insert-
ing new batteries in the garage door's
remote control before programming it. 262
FeaturesControls
*o
ptional
BA 197 ECE RE 2010/6a; 1; 2, en-GB
sabbaeu
Version: 3.0.3.6 2010-05-07T14:19:43+02:00 - Seite 262
Page 267 of 361
Deleting the remote control memory
X
Selec tkey position 2with the Start/Stop
button (Y page 202).
X Press and hold transmitter buttons 0002
and 0014for approximately 20 seconds until
indicator lamp 0001flashes rapidly.
The memory is cleared.
i You should clear the remot econtrol mem-
ory before selling the vehicle. Charge maintenance socket*
The charge maintenance socket is located in
the boot on the left-hand side. It is designed
solely for connecting a trickle charger. A
trickle charger can be obtained from a
Mercedes-Benz Service Centre, for example. X
Select key position 0with the Start/Stop
button.
X Connect the trickle charger to charge main-
tenance socket 0001. Consult the manufac-
turer's operating instructions on how to do
so.
i A trickle charger connected to charge
maintenance socket 0001only maintains the
current charge level of the vehicle's elec-
trical system battery. If the vehicle's elec-
trical system battery is discharged, it needs
to be charged with a battery charger. You
will find further information on charging the
battery on (Y page 334). Floormat* on the driver's side
G
Risk of accident
Make sure that there is sufficient clearance
around the pedals when floormats are used,
and that the floormats are properly secured.
The floormats must be correctly secured at all
times using retainers and press-studs.
Before you drive off, check the floormats and
secure if necessary. Afloormat which is not
properly secured can slip and, thereby, inter-
fere with the movemen tofthe pedals.
Do not place floormats on top of one another. X
Slide seat backwards.
X To fit: place the floormat in position.
X Press studs 0001onto retainers 0002.
X To remove: pull the floormats off retain-
ers 0002.
X Remove the floormat. 264
FeaturesControls
*o
ptional
BA 197 ECE RE 2010/6a; 1; 2, en-GB
sabbaeu
Version: 3.0.3.6 2010-05-07T14:19:43+02:00 - Seite 264