2010 JAGUAR XFR bearing
[x] Cancel search: bearingPage 577 of 3039

3. CAUTIONS:
Only use lubricants meeting the Jaguar specification.
Make sure the CV joint ball bearings do not drop out
of the CV joint.
NOTE: Clean the constant velocity (CV) joint,
removing as much of the old grease as possible.
Install the inner CV joint.
Fill the CV joint with 40 grams of grease.
Fill the CV joint boot with 100 grams of grease.
4. CAUTIONS:
Make sure the CV joint is not separated from the
halfshaft.
Make sure enough air is present in the CV boot.
Install a new retaining clip.
5. Install a new retaining clip.
6. Remove the rear halfshaft from the clamp.
Page 579 of 3039

Rear Drive Halfshafts - Outer Constant Velocity (CV) Joint Boot
Removal and Installation
Removal Published: 11-May-2011
1. WARNING: Do not work on or under a vehicle supported only by a
jack. Always support the vehicle on safety stands.
Raise and support the vehicle.
2.
3. For additional information, refer to: Inner Constant Velocity (CV) Joint Boot (205-05 Rear Drive Halfshafts, Removal and Installation).
4.
5.
6. CAUTION: Make sure the CV joint ball bearings do not drop out of
Page 582 of 3039

Brake System - General Information - Brake System
Diagnosis and Testing
Principle of Operation Published: 11-May-2011
For a detailed description of the brake system, refer to the relevant Description and Operation sections in the workshop
manual. REFER to:
Front Disc Brake (206-03, Description and Operation),
Front Disc Brake (206-03, Description and Operation),
Front Disc Brake (206-03, Description and Operation),
Rear Disc Brake (206-04, Description and Operation),
Rear Disc Brake (206-04, Description and Operation),
Rear Disc Brake (206-04, Description and Operation),
Parking Brake (206-05 Parking Brake and Actuation, Description and Operation), Parking Brake (206-05 Parking Brake and Actuation, Description and Operation), Parking Brake (206-05 Parking Brake and Actuation, Description and Operation), Hydraulic Brake Actuation (206-06 Hydraulic Brake Actuation, Description and Operation), Hydraulic Brake Actuation (206-06 Hydraulic Brake Actuation, Description and Operation), Hydraulic Brake Actuation (206-06 Hydraulic Brake Actuation, Description and Operation), Brake Booster (206-07 Power Brake Actuation, Description and Operation), Brake Booster (206-07 Power Brake Actuation, Description and Operation), Brake Booster (206-07, Description and Operation).
Inspection and Verification
Visually examine the front and rear wheel and tire assemblies for damage such as uneven wear patterns, tread worn out or
sidewall damage. Verify the tires are the same size, type and, where possible, same manufacturer. Replace the damaged
wheel or excessively worn tire.
Wheels and tires must be cleared of any foreign matter and tire pressures adjusted to the correct specification.
If the tires exhibit uneven wear or feathering, the cause must be corrected. Check the steering and suspension components for
damage or wear and, if necessary, check and adjust front wheel alignment. REFER to: (204-00 Suspension System - General
Information)
Specifications (Specifications), Front Toe Adjustment (General Procedures).
Visual Inspection
Mechanical Electrical
Brake master cylinder
Brake caliper piston(s)
Brake discs
Wheel bearings
Brake pads
Power brake booster
Brake pedal linkage
Brake booster vacuum hose
Tires
Debris
Parking brake actuator
Parking brake module
Parking brake switch
Damaged or corroded wiring harness
Brake master cylinder fluid level switch Road Test
Carry out a road test to compare actual vehicle braking performance with the performance standards expected by the driver.
The ability of the test driver to make valid comparisons and detect performance deficiencies will depend on experience.
The driver should have a thorough knowledge of brake system operation and accepted general performance guidelines to make
good comparisons and detect performance concerns.
An experienced brake technician will always establish a route that will be used for all brake diagnosis road tests. The roads
selected will be reasonably smooth and level. Gravel or bumpy roads are not suitable because the surface does not allow the
tires to grip the road equally. Crowned roads should be avoided because of the large amount of weight shifted to the low set
of wheels on this type of road. Once the route is established and consistently used, the road surface variable can be
eliminated from the test results.
Before a road test, obtain a complete description of the customer concerns or suspected condition. From the description, the
technician's experience will allow the technician to match possible causes with symptoms. Certain components will be tagged
as possible suspects while others will be eliminated by the evidence. More importantly, the customer description can reveal
unsafe conditions which should be checked or corrected before the road test. The description will also help form the basic
approach to the road test by narrowing the concern to specific components, vehicle speed or conditions.
Begin the road test with a general brake performance check. Keeping the description of the concern in mind, test the brakes at
different vehicle speeds using both light and heavy pedal pressure. To determine if the concern is in the front or rear braking
system, use the brake pedal and then use the parking brake control. If the condition (pull, vibration, pulsation) occurs only
with the parking brake, the concern is in the rear brake system.
Page 583 of 3039

If the concern becomes evident during this check, verify it fits the description given before the road test. If the concern is not
evident, attempt to duplicate the condition using the information from the description.
If a concern exists, use the Symptom Chart in order to isolate it to a specific sub-system and condition description. From this
description, a list of possible sources can be used to further narrow the cause to a specific component or condition.
Symptom Chart
Symptom Possible Cause Action Brakes noisy
Brake pads
Brake discs GO to Pinpoint Test A. Vibration when brakes are
applied
Wheels/tires out of balance
Wheel hub nuts loose
Brake caliper mounting bolts loose
Brake pads
Foreign material/scratches/corrosion
on brake disc contact surfaces
Excessive brake disc thickness
variation
Excessive brake disc runout
Wheel bearing wear or failure
Suspension bushing wear or failure
Steering bushing wear or failure GO to Pinpoint Test B. The brakes pull or drift
Tire pressures/wear
Brake calipers
Brake pads
Brake discs
Wheel alignment adjustment
Wheel bearing
Suspension bushings and ball joints GO to Pinpoint Test C. The pedal feels spongy
Air in brake hydraulic system
Leak in hydraulic system
Brake booster/master cylinder
Brake pads GO to Pinpoint Test D. The pedal goes down fast
Air in brake hydraulic system
Leak in hydraulic system
Brake booster/master cylinder
Brake pads GO to Pinpoint Test E. The pedal goes down
slowly
Air in brake hydraulic system
Brake booster/master cylinder GO to Pinpoint Test F. Excessive brake pedal
effort required
Brake pads
Brake booster GO to Pinpoint Test G. Brake lockup during light
brake pedal force
Brake pads
Brake calipers GO to Pinpoint Test H. Brakes drag
Parking brake control
applied/malfunction
Seized parking brake cables
Seized brake caliper slide pins
Seized brake caliper
Brake booster
Pedal gear GO to Pinpoint Test I. Excessive/Erratic brake
pedal travel
Hydraulic system
Brake pads Brake
discs
Hub and bearing assembly GO to Pinpoint Test J. The red brake warning
indicator is always on
Fluid level
Brake master cylinder fluid level
sensor
Parking brake control Fill the system to specification. Check for leaks.
Install a new brake master cylinder fluid reservoir as
required.
REFER to: Brake Fluid Reservoir (206-06 Hydraulic Brake Actuation, Removal and Installation).
Page 585 of 3039

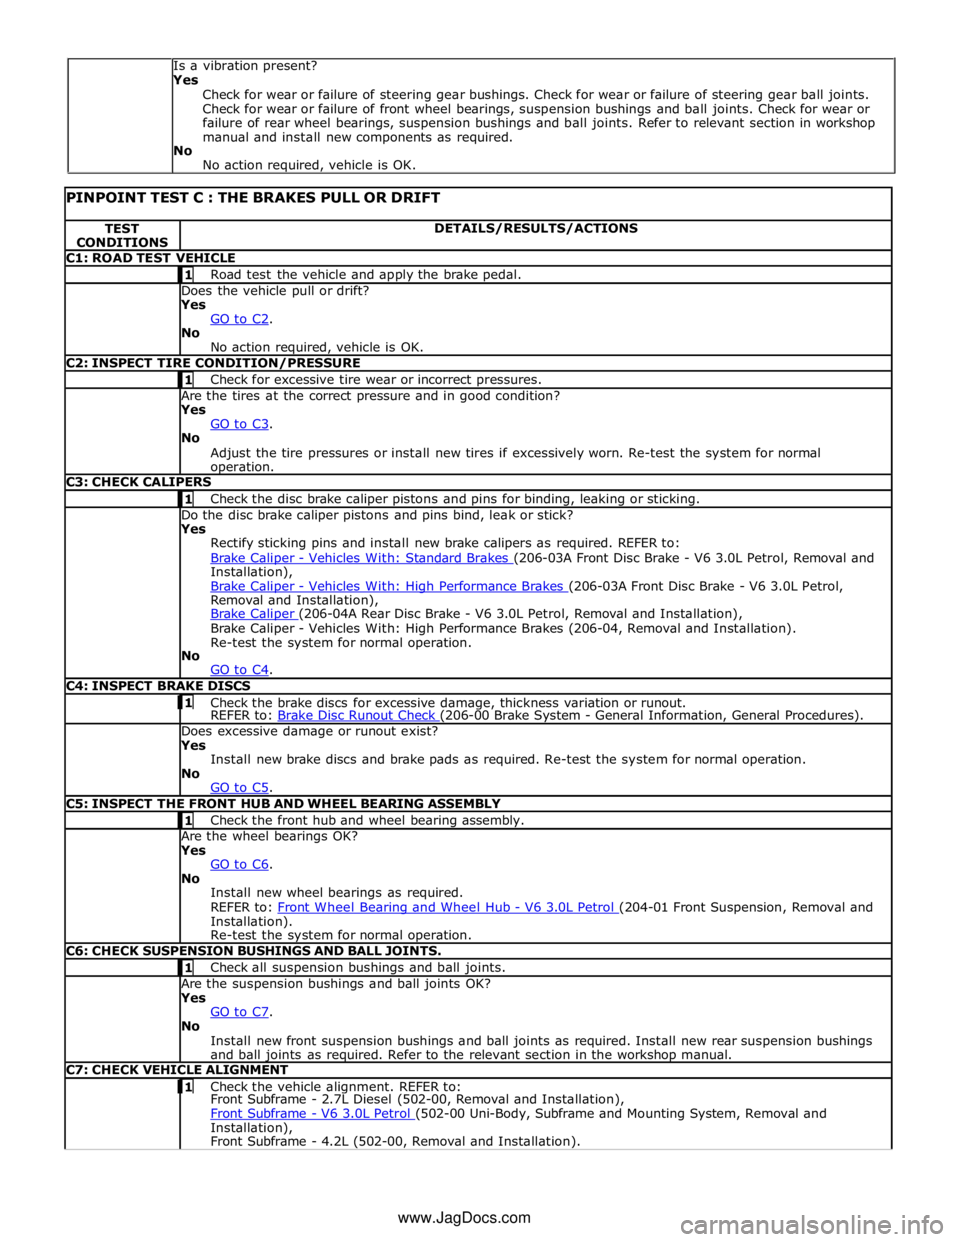
TEST
CONDITIONS DETAILS/RESULTS/ACTIONS C1: ROAD TEST VEHICLE 1 Road test the vehicle and apply the brake pedal. Does the vehicle pull or drift?
Yes
GO to C2. No
No action required, vehicle is OK. C2: INSPECT TIRE CONDITION/PRESSURE 1 Check for excessive tire wear or incorrect pressures. Are the tires at the correct pressure and in good condition?
Yes
GO to C3. No
Adjust the tire pressures or install new tires if excessively worn. Re-test the system for normal operation. C3: CHECK CALIPERS 1 Check the disc brake caliper pistons and pins for binding, leaking or sticking. Do the disc brake caliper pistons and pins bind, leak or stick?
Yes
Rectify sticking pins and install new brake calipers as required. REFER to:
Brake Caliper - Vehicles With: Standard Brakes (206-03A Front Disc Brake - V6 3.0L Petrol, Removal and Installation),
Brake Caliper - Vehicles With: High Performance Brakes (206-03A Front Disc Brake - V6 3.0L Petrol, Removal and Installation),
Brake Caliper (206-04A Rear Disc Brake - V6 3.0L Petrol, Removal and Installation), Brake Caliper - Vehicles With: High Performance Brakes (206-04, Removal and Installation).
Re-test the system for normal operation.
No
GO to C4. C4: INSPECT BRAKE DISCS 1 Check the brake discs for excessive damage, thickness variation or runout. REFER to: Brake Disc Runout Check (206-00 Brake System - General Information, General Procedures). Does excessive damage or runout exist?
Yes
Install new brake discs and brake pads as required. Re-test the system for normal operation.
No
GO to C5. C5: INSPECT THE FRONT HUB AND WHEEL BEARING ASSEMBLY 1 Check the front hub and wheel bearing assembly. Are the wheel bearings OK?
Yes
GO to C6. No
Install new wheel bearings as required.
REFER to: Front Wheel Bearing and Wheel Hub - V6 3.0L Petrol (204-01 Front Suspension, Removal and Installation).
Re-test the system for normal operation. C6: CHECK SUSPENSION BUSHINGS AND BALL JOINTS. 1 Check all suspension bushings and ball joints. Are the suspension bushings and ball joints OK?
Yes
GO to C7. No
Install new front suspension bushings and ball joints as required. Install new rear suspension bushings
and ball joints as required. Refer to the relevant section in the workshop manual. C7: CHECK VEHICLE ALIGNMENT 1 Check the vehicle alignment. REFER to: Front Subframe - 2.7L Diesel (502-00, Removal and Installation),
Front Subframe - V6 3.0L Petrol (502-00 Uni-Body, Subframe and Mounting System, Removal and Installation),
Front Subframe - 4.2L (502-00, Removal and Installation). Is a vibration present?
Yes
Check for wear or failure of steering gear bushings. Check for wear or failure of steering gear ball joints.
Check for wear or failure of front wheel bearings, suspension bushings and ball joints. Check for wear or
failure of rear wheel bearings, suspension bushings and ball joints. Refer to relevant section in workshop
manual and install new components as required.
No
No action required, vehicle is OK.
www.JagDocs.com
Page 589 of 3039

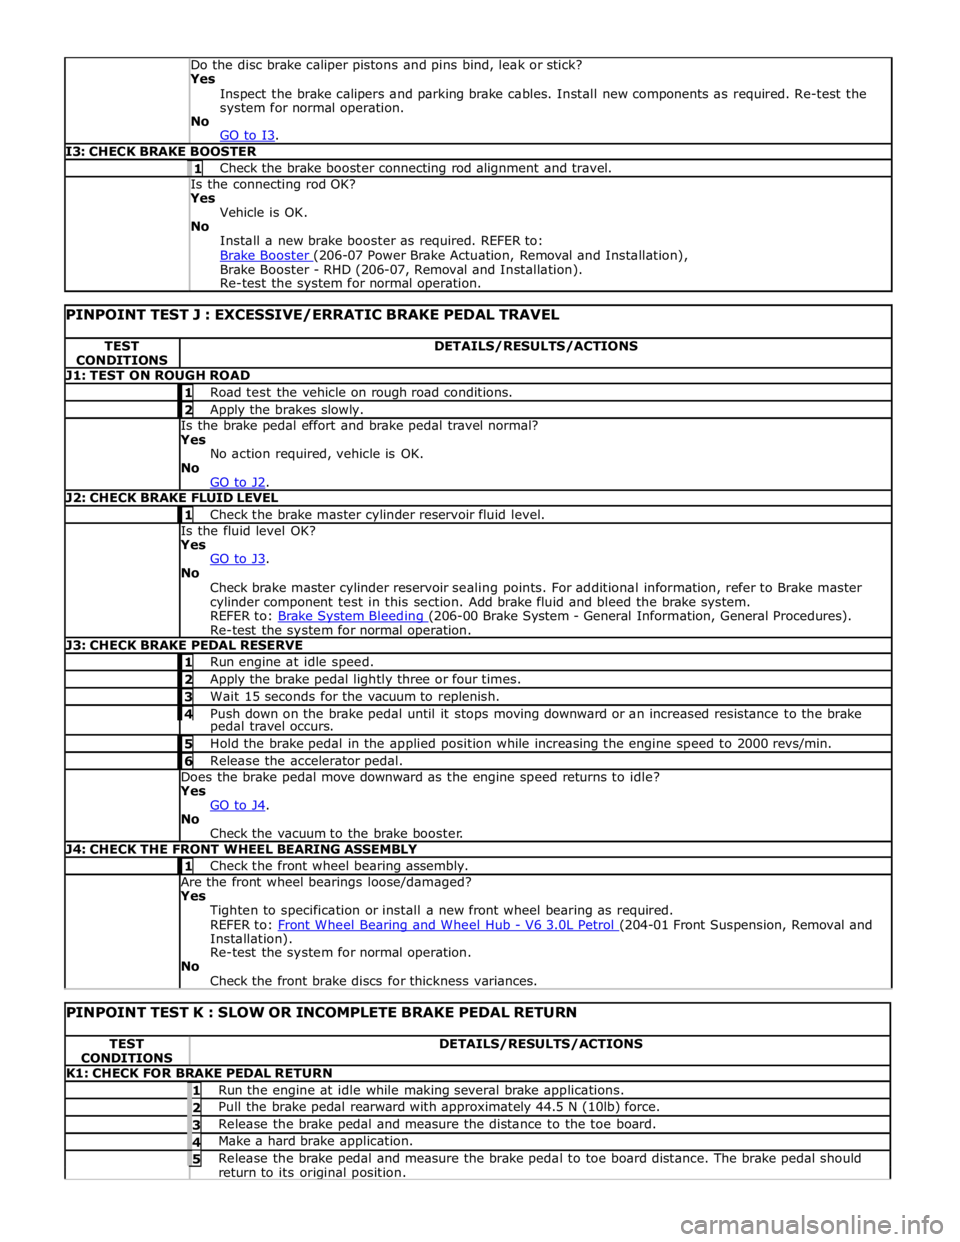
Yes
Inspect the brake calipers and parking brake cables. Install new components as required. Re-test the
system for normal operation.
No
GO to I3. I3: CHECK BRAKE BOOSTER 1 Check the brake booster connecting rod alignment and travel. Is the connecting rod OK? Yes
Vehicle is OK.
No
Install a new brake booster as required. REFER to:
Brake Booster (206-07 Power Brake Actuation, Removal and Installation), Brake Booster - RHD (206-07, Removal and Installation).
Re-test the system for normal operation.
PINPOINT TEST J : EXCESSIVE/ERRATIC BRAKE PEDAL TRAVEL TEST
CONDITIONS DETAILS/RESULTS/ACTIONS J1: TEST ON ROUGH ROAD 1 Road test the vehicle on rough road conditions. 2 Apply the brakes slowly. Is the brake pedal effort and brake pedal travel normal?
Yes
No action required, vehicle is OK.
No
GO to J2. J2: CHECK BRAKE FLUID LEVEL 1 Check the brake master cylinder reservoir fluid level. Is the fluid level OK?
Yes
GO to J3. No
Check brake master cylinder reservoir sealing points. For additional information, refer to Brake master
cylinder component test in this section. Add brake fluid and bleed the brake system.
REFER to: Brake System Bleeding (206-00 Brake System - General Information, General Procedures). Re-test the system for normal operation. J3: CHECK BRAKE PEDAL RESERVE 1 Run engine at idle speed. 2 Apply the brake pedal lightly three or four times. 3 Wait 15 seconds for the vacuum to replenish. 4 Push down on the brake pedal until it stops moving downward or an increased resistance to the brake pedal travel occurs. 5 Hold the brake pedal in the applied position while increasing the engine speed to 2000 revs/min. 6 Release the accelerator pedal. Does the brake pedal move downward as the engine speed returns to idle?
Yes
GO to J4. No
Check the vacuum to the brake booster. J4: CHECK THE FRONT WHEEL BEARING ASSEMBLY 1 Check the front wheel bearing assembly. Are the front wheel bearings loose/damaged?
Yes
Tighten to specification or install a new front wheel bearing as required.
REFER to: Front Wheel Bearing and Wheel Hub - V6 3.0L Petrol (204-01 Front Suspension, Removal and Installation).
Re-test the system for normal operation.
No
Check the front brake discs for thickness variances.
PINPOINT TEST K : SLOW OR INCOMPLETE BRAKE PEDAL RETURN TEST
CONDITIONS DETAILS/RESULTS/ACTIONS K1: CHECK FOR BRAKE PEDAL RETURN 1 Run the engine at idle while making several brake applications. 2 Pull the brake pedal rearward with approximately 44.5 N (10lb) force. 3 Release the brake pedal and measure the distance to the toe board. 4 Make a hard brake application. 5 Release the brake pedal and measure the brake pedal to toe board distance. The brake pedal should return to its original position.
Page 590 of 3039

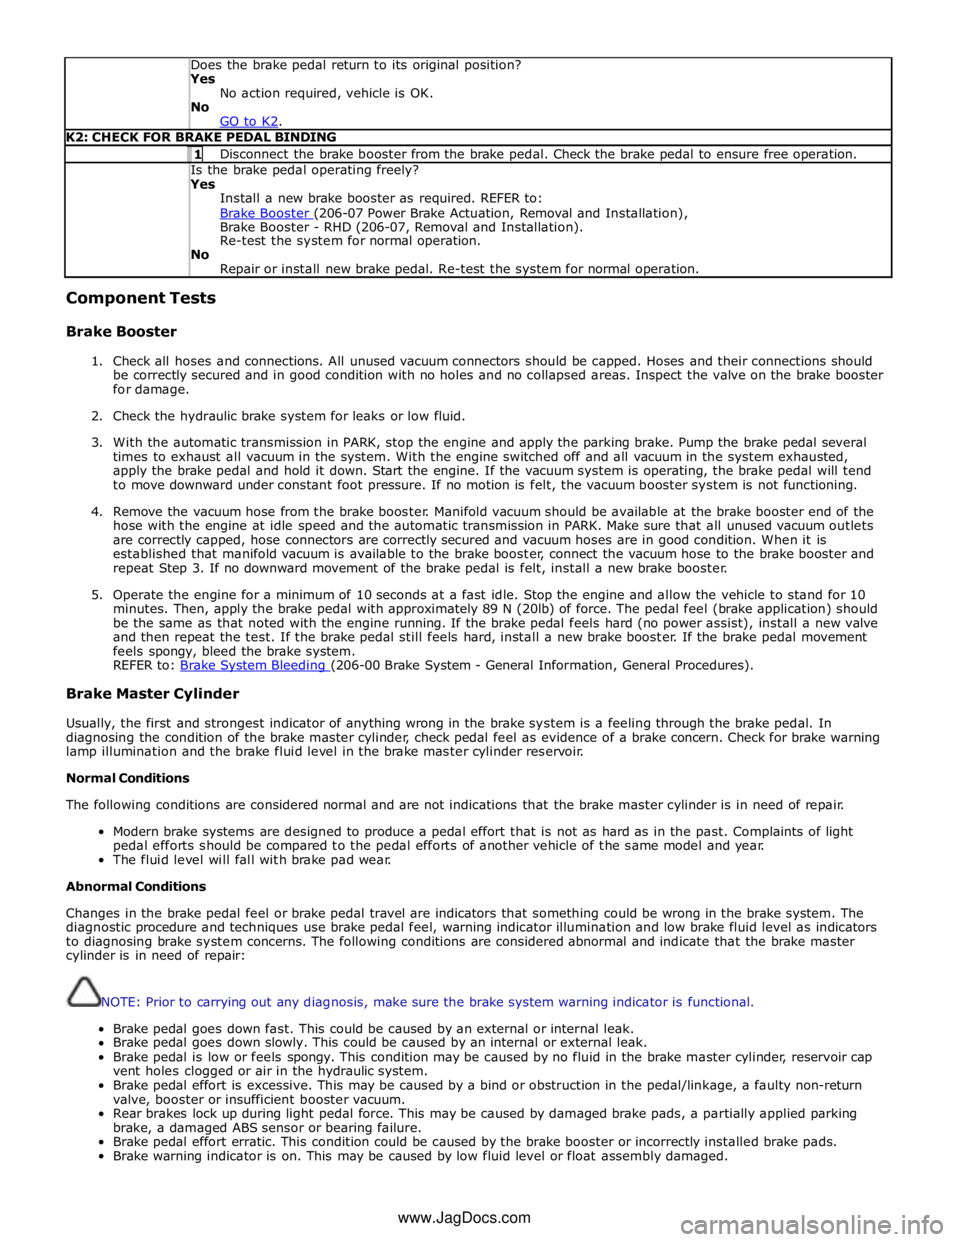
Does the brake pedal return to its original position? Yes
No action required, vehicle is OK.
No
GO to K2. K2: CHECK FOR BRAKE PEDAL BINDING 1 Disconnect the brake booster from the brake pedal. Check the brake pedal to ensure free operation. Is the brake pedal operating freely? Yes
Install a new brake booster as required. REFER to:
Brake Booster (206-07 Power Brake Actuation, Removal and Installation), Brake Booster - RHD (206-07, Removal and Installation).
Re-test the system for normal operation.
No
Repair or install new brake pedal. Re-test the system for normal operation. Component Tests
Brake Booster
1. Check all hoses and connections. All unused vacuum connectors should be capped. Hoses and their connections should
be correctly secured and in good condition with no holes and no collapsed areas. Inspect the valve on the brake booster
for damage.
2. Check the hydraulic brake system for leaks or low fluid.
3. With the automatic transmission in PARK, stop the engine and apply the parking brake. Pump the brake pedal several
times to exhaust all vacuum in the system. With the engine switched off and all vacuum in the system exhausted,
apply the brake pedal and hold it down. Start the engine. If the vacuum system is operating, the brake pedal will tend
to move downward under constant foot pressure. If no motion is felt, the vacuum booster system is not functioning.
4. Remove the vacuum hose from the brake booster. Manifold vacuum should be available at the brake booster end of the
hose with the engine at idle speed and the automatic transmission in PARK. Make sure that all unused vacuum outlets
are correctly capped, hose connectors are correctly secured and vacuum hoses are in good condition. When it is
established that manifold vacuum is available to the brake booster, connect the vacuum hose to the brake booster and
repeat Step 3. If no downward movement of the brake pedal is felt, install a new brake booster.
5. Operate the engine for a minimum of 10 seconds at a fast idle. Stop the engine and allow the vehicle to stand for 10
minutes. Then, apply the brake pedal with approximately 89 N (20lb) of force. The pedal feel (brake application) should
be the same as that noted with the engine running. If the brake pedal feels hard (no power assist), install a new valve
and then repeat the test. If the brake pedal still feels hard, install a new brake booster. If the brake pedal movement
feels spongy, bleed the brake system.
REFER to: Brake System Bleeding (206-00 Brake System - General Information, General Procedures). Brake Master Cylinder
Usually, the first and strongest indicator of anything wrong in the brake system is a feeling through the brake pedal. In
diagnosing the condition of the brake master cylinder, check pedal feel as evidence of a brake concern. Check for brake warning
lamp illumination and the brake fluid level in the brake master cylinder reservoir.
Normal Conditions
The following conditions are considered normal and are not indications that the brake master cylinder is in need of repair.
Modern brake systems are designed to produce a pedal effort that is not as hard as in the past. Complaints of light
pedal efforts should be compared to the pedal efforts of another vehicle of the same model and year.
The fluid level will fall with brake pad wear.
Abnormal Conditions
Changes in the brake pedal feel or brake pedal travel are indicators that something could be wrong in the brake system. The
diagnostic procedure and techniques use brake pedal feel, warning indicator illumination and low brake fluid level as indicators
to diagnosing brake system concerns. The following conditions are considered abnormal and indicate that the brake master
cylinder is in need of repair:
NOTE: Prior to carrying out any diagnosis, make sure the brake system warning indicator is functional.
Brake pedal goes down fast. This could be caused by an external or internal leak.
Brake pedal goes down slowly. This could be caused by an internal or external leak.
Brake pedal is low or feels spongy. This condition may be caused by no fluid in the brake master cylinder, reservoir cap
vent holes clogged or air in the hydraulic system.
Brake pedal effort is excessive. This may be caused by a bind or obstruction in the pedal/linkage, a faulty non-return
valve, booster or insufficient booster vacuum.
Rear brakes lock up during light pedal force. This may be caused by damaged brake pads, a partially applied parking
brake, a damaged ABS sensor or bearing failure.
Brake pedal effort erratic. This condition could be caused by the brake booster or incorrectly installed brake pads.
Brake warning indicator is on. This may be caused by low fluid level or float assembly damaged. www.JagDocs.com
Page 592 of 3039

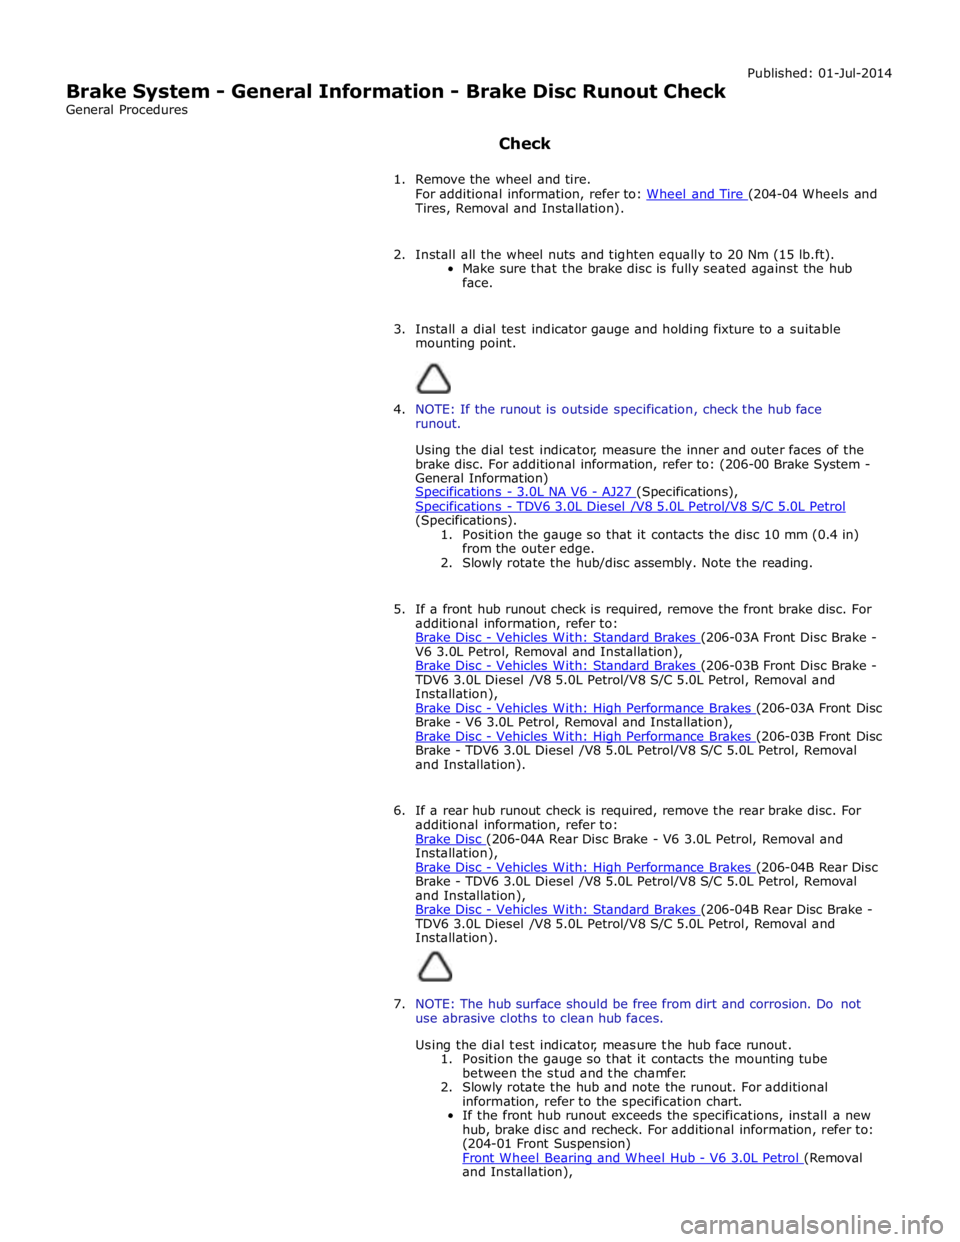
Brake System - General Information - Brake Disc Runout Check
General Procedures
Check Published: 01-Jul-2014
1. Remove the wheel and tire.
For additional information, refer to: Wheel and Tire (204-04 Wheels and Tires, Removal and Installation).
2. Install all the wheel nuts and tighten equally to 20 Nm (15 lb.ft).
Make sure that the brake disc is fully seated against the hub
face.
3. Install a dial test indicator gauge and holding fixture to a suitable
mounting point.
4. NOTE: If the runout is outside specification, check the hub face
runout.
Using the dial test indicator, measure the inner and outer faces of the
brake disc. For additional information, refer to: (206-00 Brake System -
General Information)
Specifications - 3.0L NA V6 - AJ27 (Specifications), Specifications - TDV6 3.0L Diesel /V8 5.0L Petrol/V8 S/C 5.0L Petrol (Specifications).
1. Position the gauge so that it contacts the disc 10 mm (0.4 in)
from the outer edge.
2. Slowly rotate the hub/disc assembly. Note the reading.
5. If a front hub runout check is required, remove the front brake disc. For
additional information, refer to:
Brake Disc - Vehicles With: Standard Brakes (206-03A Front Disc Brake - V6 3.0L Petrol, Removal and Installation),
Brake Disc - Vehicles With: Standard Brakes (206-03B Front Disc Brake - TDV6 3.0L Diesel /V8 5.0L Petrol/V8 S/C 5.0L Petrol, Removal and
Installation),
Brake Disc - Vehicles With: High Performance Brakes (206-03A Front Disc Brake - V6 3.0L Petrol, Removal and Installation),
Brake Disc - Vehicles With: High Performance Brakes (206-03B Front Disc Brake - TDV6 3.0L Diesel /V8 5.0L Petrol/V8 S/C 5.0L Petrol, Removal
and Installation).
6. If a rear hub runout check is required, remove the rear brake disc. For
additional information, refer to:
Brake Disc (206-04A Rear Disc Brake - V6 3.0L Petrol, Removal and Installation),
Brake Disc - Vehicles With: High Performance Brakes (206-04B Rear Disc Brake - TDV6 3.0L Diesel /V8 5.0L Petrol/V8 S/C 5.0L Petrol, Removal
and Installation),
Brake Disc - Vehicles With: Standard Brakes (206-04B Rear Disc Brake - TDV6 3.0L Diesel /V8 5.0L Petrol/V8 S/C 5.0L Petrol, Removal and
Installation).
7. NOTE: The hub surface should be free from dirt and corrosion. Do not
use abrasive cloths to clean hub faces.
Using the dial test indicator, measure the hub face runout.
1. Position the gauge so that it contacts the mounting tube
between the stud and the chamfer.
2. Slowly rotate the hub and note the runout. For additional
information, refer to the specification chart.
If the front hub runout exceeds the specifications, install a new
hub, brake disc and recheck. For additional information, refer to:
(204-01 Front Suspension)
Front Wheel Bearing and Wheel Hub - V6 3.0L Petrol (Removal and Installation),