2010 CHEVROLET EQUINOX fuse
[x] Cancel search: fusePage 5 of 394
Introduction v
Notice:This means there is
something that could result in
property or vehicle damage. This
would not be covered by the
vehicle's warranty.
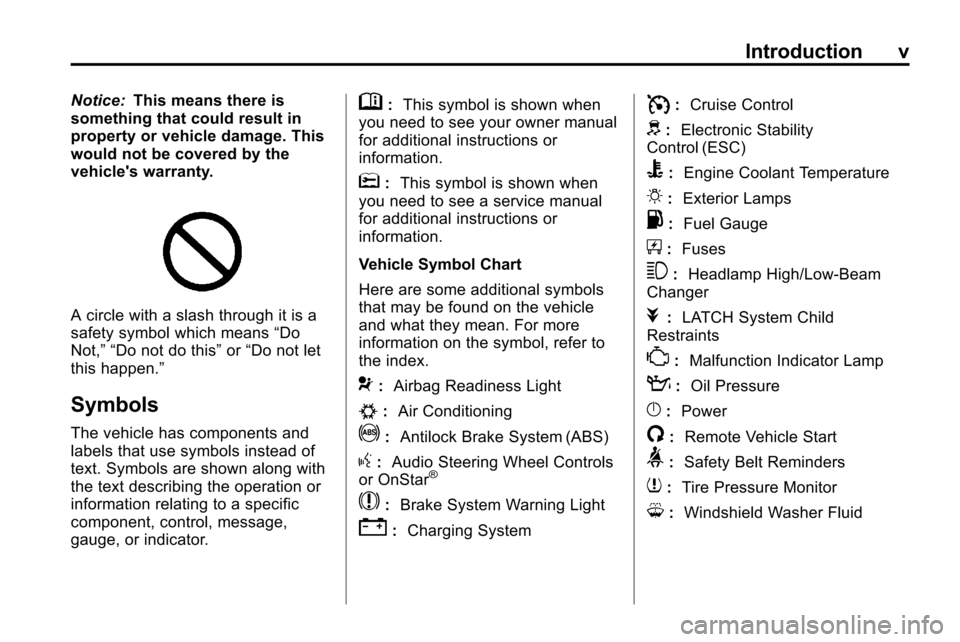
A circle with a slash through it is a
safety symbol which means “Do
Not,” “Do not do this” or“Do not let
this happen.”
Symbols
The vehicle has components and
labels that use symbols instead of
text. Symbols are shown along with
the text describing the operation or
information relating to a specific
component, control, message,
gauge, or indicator.
M: This symbol is shown when
you need to see your owner manual
for additional instructions or
information.
*: This symbol is shown when
you need to see a service manual
for additional instructions or
information.
Vehicle Symbol Chart
Here are some additional symbols
that may be found on the vehicle
and what they mean. For more
information on the symbol, refer to
the index.
9: Airbag Readiness Light
#:Air Conditioning
!:Antilock Brake System (ABS)
g:Audio Steering Wheel Controls
or OnStar®
$: Brake System Warning Light
":Charging System
I:Cruise Control
d:Electronic Stability
Control (ESC)
B: Engine Coolant Temperature
O:Exterior Lamps
.:Fuel Gauge
+:Fuses
3: Headlamp High/Low-Beam
Changer
j: LATCH System Child
Restraints
*: Malfunction Indicator Lamp
::Oil Pressure
}:Power
/:Remote Vehicle Start
>:Safety Belt Reminders
7:Tire Pressure Monitor
M:Windshield Washer Fluid
Page 29 of 394
Seats and Restraints 2-3
Front Seats
Seat Adjustment
{WARNING
You can lose control of the
vehicle if you try to adjust a
manual driver's seat while the
vehicle is moving. The sudden
movement could startle and
confuse you, or make you push a(Continued)
WARNING (Continued)
pedal when you do not want to.
Adjust the driver's seat only when
the vehicle is not moving.
To adjust the seat position:
1. Pull the handle located at the front of the seat.
2. Move the seat forward or backward to adjust the seat
position.
3. Release the handle to stop the seat from moving.
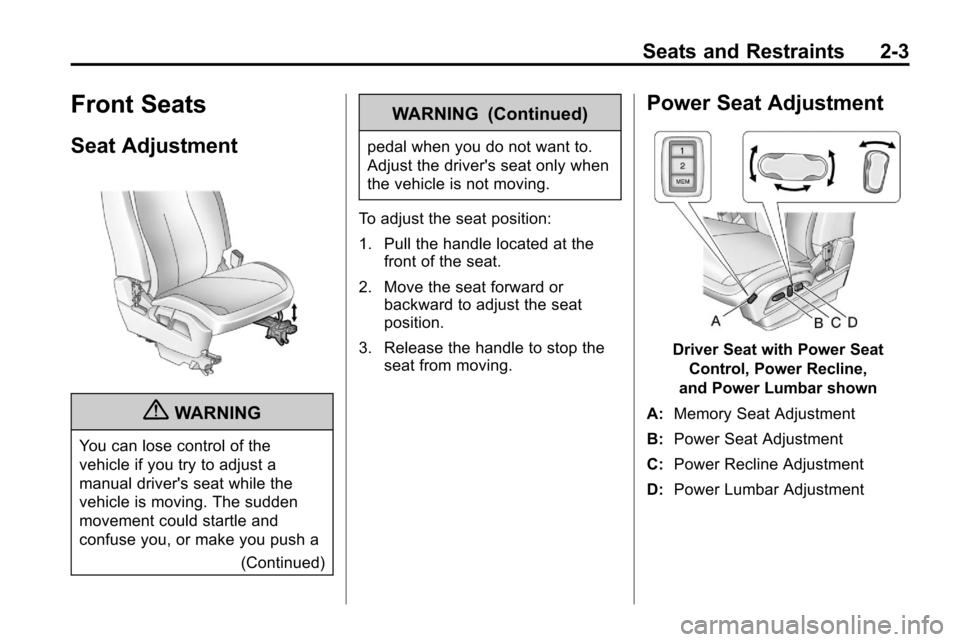
Power Seat Adjustment
Driver Seat with Power Seat
Control, Power Recline,
and Power Lumbar shown
A: Memory Seat Adjustment
B: Power Seat Adjustment
C: Power Recline Adjustment
D: Power Lumbar Adjustment
Page 31 of 394
Seats and Restraints 2-5
To stop recall movement of the RKE
remote recall feature, press one of
the power seat controls, memory
buttons, or power mirror buttons.
Memory Seat recall may stop if
the seat is blocked. Remove the
obstruction and then press the
memory button again. If the memory
function does not work properly, see
your dealer for service.
Easy Exit Seat
If the easy exit seat feature is on in
the Driver Information Center (DIC),
automatic adjustment occurs when
the ignition is turned to LOCK/OFF
and the driver door is opened. The
driver seat moves back.
SeeVehicle Personalization
on
page 4‑34for more information.
Lumbar Adjustment
Power Lumbar
Seats with power lumbar have
controls located on the outboard
side of the seat. See Power Seat
Adjustment
on page 2‑3for more
information.
Adjust lumbar support by using the
rocker switch (D) on the outboard
side of the driver seat.
Release the switch when the
seatback reaches the desired level
of lumbar support.
Reclining Seatbacks
Manual Reclining Seatbacks
{WARNING
You can lose control of the
vehicle if you try to adjust a
manual driver's seat while the
vehicle is moving. The sudden
(Continued)
WARNING (Continued)
movement could startle and
confuse you, or make you push a
pedal when you do not want to.
Adjust the driver's seat only when
the vehicle is not moving.
{WARNING
If either seatback is not locked, it
could move forward in a sudden
stop or crash. That could cause
injury to the person sitting there.
Always push and pull on the
seatbacks to be sure they are
locked.
Vehicles with manual reclining
seatbacks have a lever on the
outboard side of the seat. Lift the
lever and move the seatback to the
desired position, then release the
lever. The seatback should not
move when pushed or pulled.
Page 96 of 394
4-10 Instruments and Controls
Clock (Without Date
Display)
The infotainment system controls,
located on the instrument panel, are
used to access the time and date
settings through the menu system.
SeeOperation
on page 6‑7for
information about how to use the
menu system.
Setting the Time
1. Turn the infotainment system ON.
2. Press the CONFIG button and select Time Settings, or press
the
Hbutton.
3. Select Set Time.
4. Turn the MENU/SEL knob to adjust the highlighted value.
5. Press the MENU/SEL knob to select the next value. 6. To save the time and return to
the Time Settings menu, press
the
0BACK button at any time
or press the SELECT button
after adjusting the minutes.
Setting the 12/24 Hour Format
1. Turn the infotainment system ON.
2. Press the CONFIG button and select Time Settings, or press
the
Hbutton.
3. Highlight 12/24 Hour Format.
4. Press the MENU/SEL knob to select the 12 hour or 24 hour
display format.
Power Outlets
The accessory power outlets can
be used to connect electrical
equipment, such as a cellular
phone.
There are four accessory power
outlets in the following locations,
below the CD slot, inside the center console storage, on the rear of the
center console storage, and in the
rear cargo compartment.
To use the outlets, remove the
cover. Close the outlet cover, when
not in use.
Notice:
If electrical devices are
left plugged into a power outlet,
the battery may drain causing the
vehicle not to start or damage to
the battery. This would not be
covered by the vehicle warranty.
Always unplug all electrical
devices when turning off the
vehicle.
Certain electrical accessories
may not be compatible with the
accessory power outlets and could
result in blown vehicle or adapter
fuses. If you experience a problem,
see your dealer for additional
information on the accessory power
outlet.
Page 129 of 394
Lighting 5-3
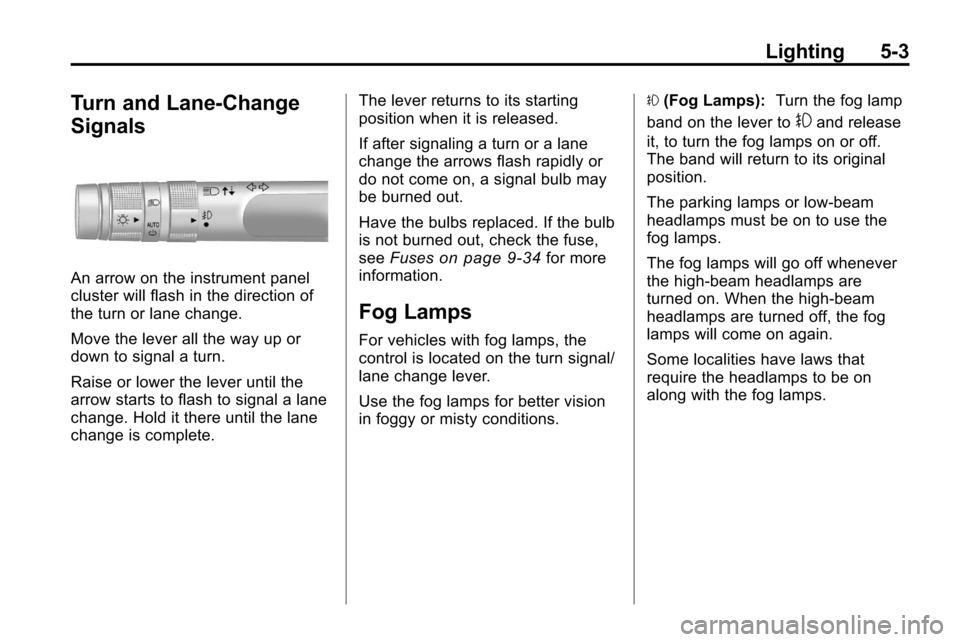
Turn and Lane-Change
Signals
An arrow on the instrument panel
cluster will flash in the direction of
the turn or lane change.
Move the lever all the way up or
down to signal a turn.
Raise or lower the lever until the
arrow starts to flash to signal a lane
change. Hold it there until the lane
change is complete.The lever returns to its starting
position when it is released.
If after signaling a turn or a lane
change the arrows flash rapidly or
do not come on, a signal bulb may
be burned out.
Have the bulbs replaced. If the bulb
is not burned out, check the fuse,
see
Fuses
on page 9‑34for more
information.
Fog Lamps
For vehicles with fog lamps, the
control is located on the turn signal/
lane change lever.
Use the fog lamps for better vision
in foggy or misty conditions. #
(Fog Lamps): Turn the fog lamp
band on the lever to
#and release
it, to turn the fog lamps on or off.
The band will return to its original
position.
The parking lamps or low‐beam
headlamps must be on to use the
fog lamps.
The fog lamps will go off whenever
the high-beam headlamps are
turned on. When the high‐beam
headlamps are turned off, the fog
lamps will come on again.
Some localities have laws that
require the headlamps to be on
along with the fog lamps.
Page 214 of 394
8-10 Driving and Operating
Environmental Concerns
Off-road driving can provide
wholesome and satisfying
recreation. However, it also
raises environmental concerns. We
recognize these concerns and urge
every off-roader to follow these
basic rules for protecting the
environment:
.Always use established trails,
roads, and areas that have been
specially set aside for public
off-road recreational driving and
obey all posted regulations.
.Avoid any driving practice that
could damage shrubs, flowers,
trees, or grasses or disturb
wildlife. This includes
wheel-spinning, breaking
down trees, or unnecessary
driving through streams or over
soft ground.
.Always carry a litter bag and
make sure all refuse is removed
from any campsite before
leaving.
.Take extreme care with open
fires (where permitted), camp
stoves, and lanterns.
.Never park your vehicle over dry
grass or other combustible
materials that could catch fire
from the heat of the vehicle's
exhaust system.
Traveling to Remote Areas
It makes sense to plan your trip,
especially when going to a remote
area. Know the terrain and plan
your route. Get accurate maps of
trails and terrain. Check to see if
there are any blocked or closed
roads.
It is also a good idea to travel with
at least one other vehicle in case
something happens to one of them.For vehicles with a winch, be sure to
read the winch instructions. In a
remote area, a winch can be handy
if you get stuck but you will want to
know how to use it properly.
Getting Familiar with Off-Road
Driving
It is a good idea to practice in an
area that is safe and close to home
before you go into the wilderness.
Off-roading requires some new and
different skills.
Tune your senses to different kinds
of signals. Your eyes need to
constantly sweep the terrain for
unexpected obstacles. Your ears
need to listen for unusual tire or
engine sounds. Use your arms,
hands, feet, and body to respond to
vibrations and vehicle bounce.
Page 269 of 394
Vehicle Care 9-1
Vehicle Care
General Information
General Information . . . . . . . . . . . 9-3
California Proposition65 Warning . . . . . . . . . . . . . . . . . . 9-3
California Perchlorate Materials Requirements . . . . . . . . . . . . . . . 9-3
Accessories and Modifications . . . . . . . . . . . . . . . . 9-4
Vehicle Checks
Doing Your OwnService Work . . . . . . . . . . . . . . . . 9-4
Hood . . . . . . . . . . . . . . . . . . . . . . . . . . 9-5
Engine Compartment Overview . . . . . . . . . . . . . . . . . . . . 9-6
Engine Cover . . . . . . . . . . . . . . . . . 9-9
Engine Oil . . . . . . . . . . . . . . . . . . . 9-10
Engine Oil Life System . . . . . . . 9-11
Automatic Transmission Fluid . . . . . . . . . . . . . . . . . . . . . . . 9-12 Engine Air Cleaner/Filter . . . . . 9-13
Cooling System . . . . . . . . . . . . . . 9-14
Engine Coolant . . . . . . . . . . . . . . 9-15
Engine Overheating . . . . . . . . . 9-18
Power Steering Fluid (2.4L
L4 Engine) . . . . . . . . . . . . . . . . . 9-20
Power Steering Fluid (3.0L V6 Engine) . . . . . . . . . . . . . . . . . 9-20
Washer Fluid . . . . . . . . . . . . . . . . 9-21
Brakes . . . . . . . . . . . . . . . . . . . . . . . 9-21
Brake Fluid . . . . . . . . . . . . . . . . . . 9-22
Battery . . . . . . . . . . . . . . . . . . . . . . . 9-24
All-Wheel Drive . . . . . . . . . . . . . . 9-24
Starter Switch Check . . . . . . . . 9-25
Automatic Transmission Shift Lock Control System
Check . . . . . . . . . . . . . . . . . . . . . . 9-25
Ignition Transmission Lock Check . . . . . . . . . . . . . . . . . . . . . . 9-25
Park Brake and P (Park) Mechanism Check . . . . . . . . . 9-26
Wiper Blade Replacement . . . 9-26
Headlamp Aiming
Headlamp Aiming . . . . . . . . . . . . 9-27
Bulb Replacement
Bulb Replacement . . . . . . . . . . . 9-30
Headlamps, Front Turn Signal, Sidemarker, and Parking
Lamps . . . . . . . . . . . . . . . . . . . . . . 9-30
Fog Lamps . . . . . . . . . . . . . . . . . . 9-31
Taillamps, Turn Signal, Sidemarker, Stoplamps,
and Back-Up Lamps . . . . . . . 9-32
License Plate Lamp . . . . . . . . . . 9-33
Replacement Bulbs . . . . . . . . . . 9-34
Electrical System
Fuses . . . . . . . . . . . . . . . . . . . . . . . . 9-34
Engine Compartment Fuse Block . . . . . . . . . . . . . . . . . . . . . . . 9-34
Instrument Panel Fuse Block . . . . . . . . . . . . . . . . . . . . . . . 9-37
Page 272 of 394
9-4 Vehicle Care
Accessories and
Modifications
Adding non‐dealer/non‐retailer
accessories to the vehicle can affect
vehicle performance and safety,
including such things as airbags,
braking, stability, ride and handling,
emissions systems, aerodynamics,
durability, and electronic systems
like antilock brakes, traction control,
and stability control. Some of these
accessories could even cause
malfunction or damage not covered
by the vehicle warranty.
Damage to vehicle components
resulting from the installation or use
of non‐GM certified parts, including
control module modifications, is not
covered under the terms of the
vehicle warranty and may affect
remaining warranty coverage for
affected parts.GM Accessories are designed to
complement and function with other
systems on the vehicle. Your GM
dealer can accessorize the vehicle
using genuine GM Accessories.
When you go to your GM dealer and
ask for GM Accessories, you will
know that GM-trained and
supported service technicians will
perform the work using genuine GM
Accessories.
Also, see
Adding Equipment to the
Airbag-Equipped Vehicle
on
page 2‑35.
Vehicle Checks
Doing Your Own
Service Work
{WARNING
You can be injured and the
vehicle could be damaged if you
try to do service work on a vehicle
without knowing enough about it.
.Be sure you have sufficient
knowledge, experience,
the proper replacement
parts, and tools before
attempting any vehicle
maintenance task.
.Be sure to use the proper
nuts, bolts, and other
fasteners. English and metric
fasteners can be easily
confused. If the wrong
fasteners are used, parts can
later break or fall off. You
could be hurt.