2010 CHEVROLET EQUINOX light
[x] Cancel search: lightPage 1 of 394

2010 Chevrolet Equinox Owner ManualM
Keys, Doors and Windows. . . 1-1
Keys and Locks . . . . . . . . . . . . . . . 1-2
Doors . . . . . . . . . . . . . . . . . . . . . . . . . . 1-8
Vehicle Security . . . . . . . . . . . . . . 1-12
Exterior Mirrors . . . . . . . . . . . . . . . 1-14
Interior Mirrors . . . . . . . . . . . . . . . . 1-15
Windows . . . . . . . . . . . . . . . . . . . . . 1-16
Roof . . . . . . . . . . . . . . . . . . . . . . . . . . 1-18
Seats and Restraints . . . . . . . . . 2-1
Head Restraints . . . . . . . . . . . . . . . 2-2
Front Seats . . . . . . . . . . . . . . . . . . . . 2-3
Rear Seats . . . . . . . . . . . . . . . . . . . . 2-8
Safety Belts . . . . . . . . . . . . . . . . . . . . 2-9
Airbag System . . . . . . . . . . . . . . . . 2-22
Child Restraints . . . . . . . . . . . . . . 2-37 Storage
. . . . . . . . . . . . . . . . . . . . . . . 3-1
Storage Compartments . . . . . . . . 3-1
Additional Storage Features . . . 3-1
Roof Rack System . . . . . . . . . . . . . 3-2
Instruments and Controls . . . . 4-1
Instrument Panel Overview . . . . 4-4
Controls . . . . . . . . . . . . . . . . . . . . . . . 4-6
Warning Lights, Gauges, and Indicators . . . . . . . . . . . . . . . . . . . 4-11
Information Displays . . . . . . . . . . 4-24
Vehicle Messages . . . . . . . . . . . . 4-27
Vehicle Personalization . . . . . . . 4-34
OnStar
®System . . . . . . . . . . . . . . 4-39 Lighting
. . . . . . . . . . . . . . . . . . . . . . . 5-1
Exterior Lighting . . . . . . . . . . . . . . . 5-1
Interior Lighting . . . . . . . . . . . . . . . . 5-4
Lighting Features . . . . . . . . . . . . . . 5-4
Infotainment System . . . . . . . . . 6-1
Introduction . . . . . . . . . . . . . . . . . . . . 6-1
Radio . . . . . . . . . . . . . . . . . . . . . . . . . 6-11
Audio Players . . . . . . . . . . . . . . . . 6-19
Rear Seat Infotainment . . . . . . . 6-33
Phone . . . . . . . . . . . . . . . . . . . . . . . . 6-42
Climate Controls . . . . . . . . . . . . . 7-1
Climate Control Systems . . . . . . 7-1
Air Vents . . . . . . . . . . . . . . . . . . . . . . . 7-6
Maintenance . . . . . . . . . . . . . . . . . . . 7-6
Page 5 of 394
Introduction v
Notice:This means there is
something that could result in
property or vehicle damage. This
would not be covered by the
vehicle's warranty.
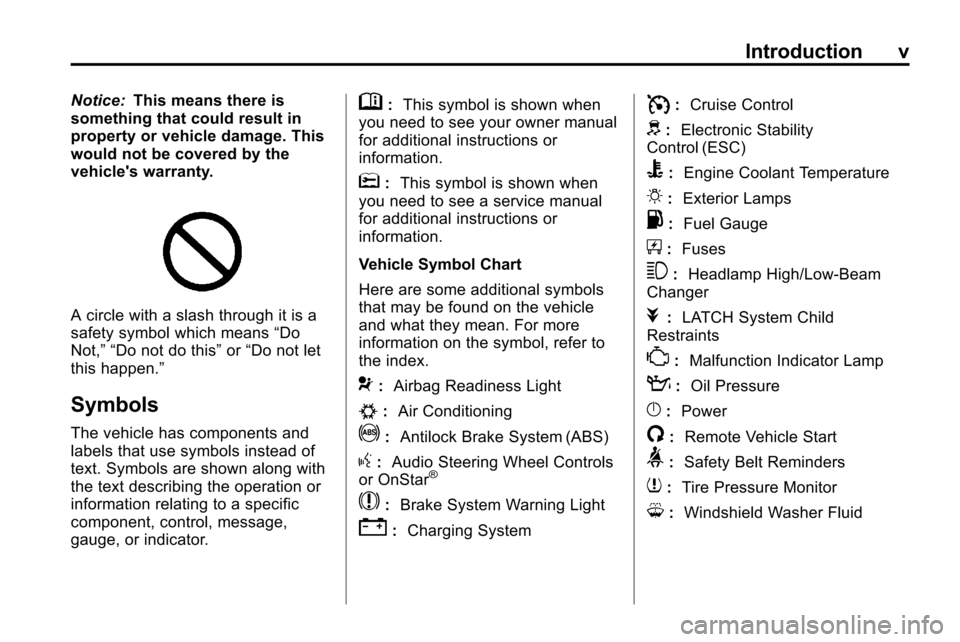
A circle with a slash through it is a
safety symbol which means “Do
Not,” “Do not do this” or“Do not let
this happen.”
Symbols
The vehicle has components and
labels that use symbols instead of
text. Symbols are shown along with
the text describing the operation or
information relating to a specific
component, control, message,
gauge, or indicator.
M: This symbol is shown when
you need to see your owner manual
for additional instructions or
information.
*: This symbol is shown when
you need to see a service manual
for additional instructions or
information.
Vehicle Symbol Chart
Here are some additional symbols
that may be found on the vehicle
and what they mean. For more
information on the symbol, refer to
the index.
9: Airbag Readiness Light
#:Air Conditioning
!:Antilock Brake System (ABS)
g:Audio Steering Wheel Controls
or OnStar®
$: Brake System Warning Light
":Charging System
I:Cruise Control
d:Electronic Stability
Control (ESC)
B: Engine Coolant Temperature
O:Exterior Lamps
.:Fuel Gauge
+:Fuses
3: Headlamp High/Low-Beam
Changer
j: LATCH System Child
Restraints
*: Malfunction Indicator Lamp
::Oil Pressure
}:Power
/:Remote Vehicle Start
>:Safety Belt Reminders
7:Tire Pressure Monitor
M:Windshield Washer Fluid
Page 10 of 394
1-4 Keys, Doors and Windows
See“Unlocked Door Anti Lock Out”
under Vehicle Personalizationon
page 4‑34.
Pressing
Qmay also arm the
theft-deterrent system. See
Anti-Theft Alarm System
on
page 1‑12.
K(Unlock): Press to unlock the
driver door or all doors, see
“Remote Door Unlock” under
Vehicle Personalization
on
page 4‑34. The turn signal
indicators flash to indicate unlocking
has occurred. For more information
see “Remote Unlock Light
Feedback” underVehicle
Personalization
on page 4‑34.
Pressing
Kmay also disarm the
theft-deterrent system. See
Anti-Theft Alarm System
on
page 1‑12.
V(Remote Liftgate Release):
First press
K, then press and hold
Vto unlock the liftgate. For
vehicles with the power liftgate,
press and hold
Vuntil the liftgate
begins to move to open the liftgate.
7(Vehicle Locator/Panic
Alarm): Press and release one
time to locate the vehicle. The
exterior lamps flash and the horn
chirps. Press and hold
7for at least
two seconds to sound the panic
alarm. The horn sounds and the
turn signals flash until
7is pressed
again or the key is placed in the
ignition and turned to ON/RUN.
/(Remote Vehicle Start): For
vehicles with this feature, first press
Qthen press and hold/to start
the engine from outside the vehicle
using the RKE transmitter. See
Remote Vehicle Start
on page 1‑5for additional information.
Programming Transmitters to
the Vehicle
Only RKE transmitters programmed
to this vehicle will work. If a
transmitter is lost or stolen, a
replacement can be purchased and
programmed through your dealer.
When the replacement transmitter is
programmed to this vehicle, all
remaining transmitters must also be
reprogrammed. Any lost or stolen
transmitters will no longer work
once the new transmitter is
programmed.
Battery Replacement
Replace the battery if the “Replace
Battery in Remote Key” message
displays in the DIC. See “Replace
Battery in Remote Key” underKey
and Lock Messages on page 4‑31.
The battery is not rechargeable.
See your dealer to replace the
battery.
Page 13 of 394
Keys, Doors and Windows 1-7
Power Door Locks
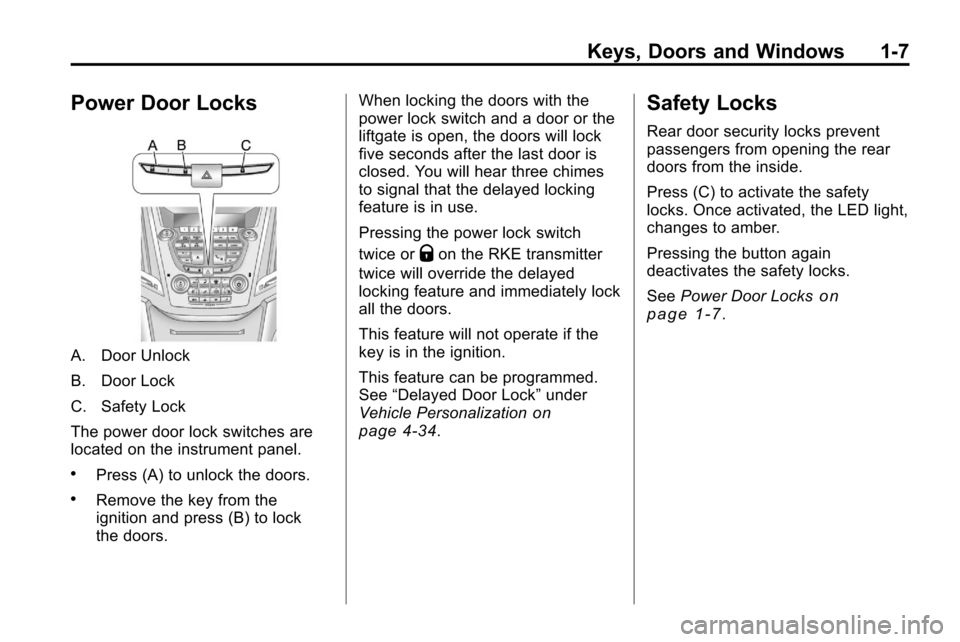
A. Door Unlock
B. Door Lock
C. Safety Lock
The power door lock switches are
located on the instrument panel.
.Press (A) to unlock the doors.
.Remove the key from the
ignition and press (B) to lock
the doors.When locking the doors with the
power lock switch and a door or the
liftgate is open, the doors will lock
five seconds after the last door is
closed. You will hear three chimes
to signal that the delayed locking
feature is in use.
Pressing the power lock switch
twice or
Qon the RKE transmitter
twice will override the delayed
locking feature and immediately lock
all the doors.
This feature will not operate if the
key is in the ignition.
This feature can be programmed.
See “Delayed Door Lock” under
Vehicle Personalization
on
page 4‑34.
Safety Locks
Rear door security locks prevent
passengers from opening the rear
doors from the inside.
Press (C) to activate the safety
locks. Once activated, the LED light,
changes to amber.
Pressing the button again
deactivates the safety locks.
See Power Door Locks
on
page 1‑7.
Page 18 of 394
1-12 Keys, Doors and Windows
disabled the liftgate electric latch will
still power latch once contact is
made with the striker. Always close
the liftgate before driving.
If the RKE button is pressed while
power operation is disabled, the turn
signals flash and the liftgate will
not move.
The liftgate has an electric latch.
If the battery is disconnected or has
low voltage, the liftgate will not
open. The liftgate will resume
operation when the battery is
reconnected and charged.Vehicle Security
Vehicle theft is big business,
especially in some cities. This
vehicle has theft-deterrent features,
however, they do not make it
impossible to steal.
Anti-Theft Alarm System
This vehicle has an anti-theft alarm
system.
Arming the System
To arm the system, either:
.PressQon the RKE transmitter.
.Or, lock the vehicle using the
key in the driver door.
The alarm automatically arms after
about 30 seconds. The security
light, located on the instrument
panel, flashes.
Press
Von the RKE transmitter to
open the liftgate without setting off
the alarm. The system rearms when
the liftgate is closed.
Disarming the System
To disarm the system, do one of the
following:
.PressKon the RKE transmitter.
.Turn the ignition to ON/RUN.
.Allow the alarm to time out after
about 30 seconds and reset
itself.
The alarm automatically disarms.
If the system is armed and any door
is unlocked without pressing
Kon
the RKE transmitter the alarm
sounds.
How to Detect a Tamper
Condition
IfKis pressed and the horn
sounds, an attempted break-in has
occurred while the system was
armed.
Page 19 of 394
Keys, Doors and Windows 1-13
If the alarm has been activated, the
“Theft Attempted”message will
appear on the DIC. See Key and
Lock Messages
on page 4‑31for
additional information.
Immobilizer
See Radio Frequency Statementon
page 12‑16for information
regarding Part 15 of the Federal
Communications Commission (FCC)
Rules and RSS-210/211 of Industry
Canada.
Immobilizer Operation
This vehicle has a passive
theft-deterrent system.
The system does not have to be
manually armed or disarmed.
The vehicle is automatically
immobilized when the key is
removed from the ignition. The system is automatically
disarmed when the vehicle is
started with the correct key. The key
uses a transponder that matches
an immobilizer control unit in the
vehicle and automatically disarms
the system. Only the correct key
starts the vehicle. The vehicle may
not start if the key is damaged.The security light, located in the
instrument panel cluster, comes on
if there is a problem with arming or
disarming the theft-deterrent
system.
When trying to start the vehicle, the
security light comes on briefly when
the ignition is turned on.If the engine does not start and the
security light stays on there is a
problem with the system. Turn the
ignition off and try again.
If the engine still does not start, and
the key appears to be undamaged
or the light continues to stay on, try
another ignition key. If the engine
does not start with the other key, the
vehicle needs service. If the vehicle
does start, the first key may be
damaged. See your dealer who can
service the theft-deterrent system
and have a new key made.
Do not leave the key or device that
disarms or deactivates the theft
deterrent system in the vehicle.
Page 22 of 394
1-16 Keys, Doors and Windows
Automatic Dimming Mirror
Operation
Automatic dimming reduces the
glare from the headlamps of the
vehicle behind you. The dimming
feature comes on and the indicator
light comes on each time the vehicle
is started.
Cleaning the Mirror
Do not spray glass cleaner directly
on the mirror. Use a soft towel
dampened with water.
Windows
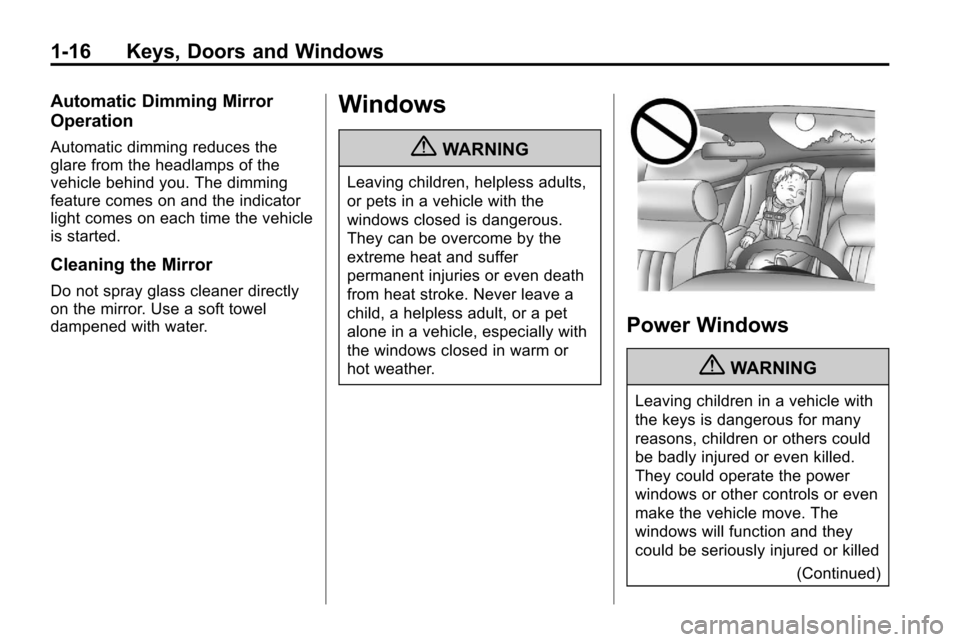
{WARNING
Leaving children, helpless adults,
or pets in a vehicle with the
windows closed is dangerous.
They can be overcome by the
extreme heat and suffer
permanent injuries or even death
from heat stroke. Never leave a
child, a helpless adult, or a pet
alone in a vehicle, especially with
the windows closed in warm or
hot weather.
Power Windows
{WARNING
Leaving children in a vehicle with
the keys is dangerous for many
reasons, children or others could
be badly injured or even killed.
They could operate the power
windows or other controls or even
make the vehicle move. The
windows will function and they
could be seriously injured or killed(Continued)
Page 24 of 394
1-18 Keys, Doors and Windows
Window Lockout
o(Window Lockout): The window
lockout switch is located on the
driver door. This feature prevents
the rear passenger windows from
operating, except from the driver
position. Press the switch to turn
the lockout feature on or off. An
indicator light shows the feature
is on.
Sun Visors
Pull the sun visor down to block
glare. Detach the sun visor from the
center mount and slide it along the
rod from side-to-side to cover the
driver or passenger side of the front
window. Swing the sun visor to the
side to cover the side window. It can
be moved along the rod from
side-to-side in this position also.
Roof
Sunroof
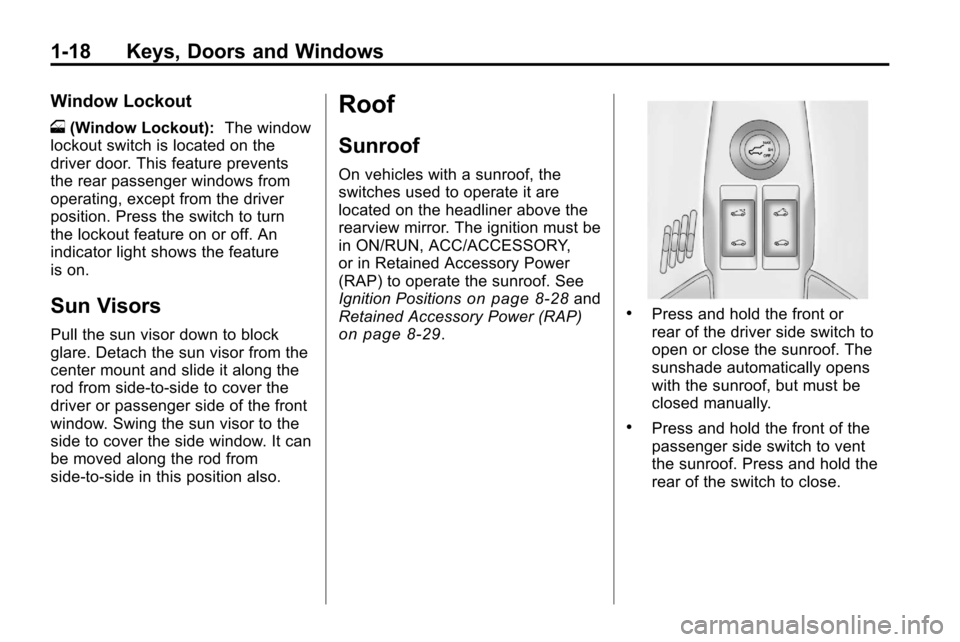
On vehicles with a sunroof, the
switches used to operate it are
located on the headliner above the
rearview mirror. The ignition must be
in ON/RUN, ACC/ACCESSORY,
or in Retained Accessory Power
(RAP) to operate the sunroof. See
Ignition Positions
on page 8‑28and
Retained Accessory Power (RAP)
on page 8‑29.
.Press and hold the front or
rear of the driver side switch to
open or close the sunroof. The
sunshade automatically opens
with the sunroof, but must be
closed manually.
.Press and hold the front of the
passenger side switch to vent
the sunroof. Press and hold the
rear of the switch to close.