Page 78 of 472
Airbag System
The vehicle has the following airbags:
.A frontal airbag for the driver.
.A frontal airbag for the right front passenger.
.A seat-mounted side impact airbag for the driver.
.A seat-mounted side impact airbag for the right
front passenger.
All of the airbags in the vehicle will have the word
AIRBAG embossed in the trim or on an attached label
near the deployment opening.
For frontal airbags, the word AIRBAG will appear on the
middle part of the steering wheel for the driver and on
the instrument panel for the right front passenger.
With seat-mounted side impact airbags, the word
AIRBAG will appear on the side of the seatback closest
to the door.
Airbags are designed to supplement the protection
provided by safety belts. Even though today's airbags
are also designed to help reduce the risk of injury from
the force of an inflating bag, all airbags must inflate very
quickly to do their job. Here are the most important things to know about the
airbag system:
{WARNING:
You can be severely injured or killed in a crash if
you are not wearing your safety belt
—even if you
have airbags. Airbags are designed to work with
safety belts, but do not replace them. Also,
airbags are not designed to deploy in every
crash. In some crashes safety belts are your only
restraint. See When Should an Airbag Inflate?
on
page 2‑48
.
Wearing your safety belt during a crash helps
reduce your chance of hitting things inside the
vehicle or being ejected from it. Airbags are
“supplemental restraints” to the safety belts.
Everyone in your vehicle should wear a safety belt
properly —whether or not there is an airbag for
that person.
2-44
Page 80 of 472
Where Are the Airbags?
The driver frontal airbag is in the middle of the
steering wheel.
The right front passenger frontal airbag is in the
instrument panel on the passenger's side.
2-46
Page 81 of 472
Driver Side shown, Passenger Side similar
The seat-mounted side impact airbags for the driver and
right front passenger are in the side of the seatbacks
closest to the door.
{WARNING:
If something is between an occupant and an
airbag, the airbag might not inflate properly or it
might force the object into that person causing
severe injury or even death. The path of an
inflating airbag must be kept clear. Do not put
anything between an occupant and an airbag,
and do not attach or put anything on the steering
wheel hub or on or near any other airbag
covering.
Do not use seat accessories that block the
inflation path of a seat-mounted side impact
airbag.
2-47
Page 84 of 472
What Makes an Airbag Inflate?
In a deployment event, the sensing system sends an
electrical signal triggering a release of gas from the
inflator. Gas from the inflator fills the airbag causing the
bag to break out of the cover and deploy. The inflator,
the airbag, and related hardware are all part of the
airbag module.
Frontal airbag modules are located inside the
steering wheel and instrument panel. For vehicles
with seat-mounted side impact airbags, there are airbag
modules in the side of the front seatbacks closest to
the door.
How Does an Airbag Restrain?
In moderate to severe frontal or near frontal collisions,
even belted occupants can contact the steering wheel
or the instrument panel. In moderate to severe side
collisions, even belted occupants can contact the inside
of the vehicle.
Airbags supplement the protection provided by safety
belts. Frontal airbags distribute the force of the impact
more evenly over the occupant's upper body, stopping
the occupant more gradually. Seat-mounted side impact
airbags distribute the force of the impact more evenly
over the occupant's upper body.
But airbags would not help in many types of collisions,
primarily because the occupant's motion is not toward
those airbags. See When Should an Airbag Inflate?
on
page 2‑48for more information.
Airbags should never be regarded as anything more
than a supplement to safety belts.
2-50
Page 93 of 472
Adding Equipment to Your
Airbag-Equipped Vehicle
Q: Is there anything I might add to or change about the vehicle that could keep the airbags from
working properly?
A: Yes. If you add things that change your vehicle's
frame, bumper system, height, front end or side
sheet metal, they may keep the airbag system from
working properly. Changing or moving any parts of
the front seats, safety belts, the airbag sensing and
diagnostic module, steering wheel, instrument panel,
the inside review mirror, front sensors, or airbag
wiring can affect the operation of the airbag system.
In addition, the vehicle has a passenger sensing
system for the right front passenger position, which
includes sensors that are part of the passenger seat.
The passenger sensing system may not operate
properly if the original seat trim is replaced with
non-GM covers, upholstery or trim, or with
GM covers, upholstery or trim designed for a
different vehicle. Any object, such as an aftermarket
seat heater or a comfort enhancing pad or device,
installed under or on top of the seat fabric, could also interfere with the operation of the passenger
sensing system. This could either prevent proper
deployment of the passenger airbag(s) or prevent
the passenger sensing system from properly turning
off the passenger airbag(s). See
Passenger Sensing
System
on page 2‑53.
If you have any questions about this, you should
contact Customer Assistance before you modify
your vehicle. The phone numbers and addresses
for Customer Assistance are in Step Two of the
Customer Satisfaction Procedure in this manual.
See Customer Satisfaction Procedure on page 8‑2.
Q: Because I have a disability, I have to get my vehicle modified. How can I find out whether this
will affect my airbag system?
A: If you have questions, call Customer Assistance.
The phone numbers and addresses for Customer
Assistance are in Step Two of the Customer
Satisfaction Procedure in this manual. See
Customer Satisfaction Procedure on page 8‑2.
Your dealer/retailer and the service manual have
information about the location of the airbag sensors,
sensing and diagnostic module and airbag wiring.
2-59
Page 102 of 472

Keyless Trunk Opening
Press the hatch/trunk release button located on the rear
of the hatch/trunk lid above the license plate to open the
trunk if the keyless access transmitter is within range.
See Hatch
on page 3‑14for additional information.
There are other conditions that can affect the
performance of the transmitter. See Keyless Access
System
on page 3‑5Keyless Access System.
This vehicle comes with
two transmitters.
Q(Lock): Press once to lock the doors. WhenQis
pressed twice, the lights flash and the horn sounds to
confirm locking.
K(Unlock): Press once to unlock only the driver door.
Press
Ktwice within five seconds to unlock both doors.
The interior lamps may come on.
Pressing
Kalso recalls the memory settings.
See Memory Seat, Mirrors and Steering Wheel
on
page 2‑4for more information.
}(Hatch/Trunk): Press and hold for about
one second to unlock the hatch/trunk. If the engine
is running, the shift lever must be in P (Park) for an
automatic transmission. For a manual transmission,
the shift lever must be in NEUTRAL with the parking
brake set.
L(Panic): Press to sound the horn. Press any other
button on the keyless access transmitter to stop it.
The vehicle comes with two transmitters. Each
transmitter will have a number on top of it, “1”or“2”.
These numbers correspond to the driver of the vehicle.
For example, the memory seat position for driver 1 will
be recalled when using the transmitter labeled “1”,
if enabled through the DIC. See Memory Seat, Mirrors
and Steering Wheel
on page 2‑4and DIC Vehicle
Personalizationon page 4‑71for more information.
3-6
Page 111 of 472
Hatch/Trunk Lid Release
There are several ways to release the hatch/trunk lid.
If your vehicle has an automatic transmission, the shift
lever must be in P (Park). For manual transmission
vehicles, the parking brake must be set when the
ignition is started for the hatch/trunk release to operate.
The parking brake does not need to be set when the
ignition is off for the hatch/trunk release to operate.
See Parking Brake on page 3‑34.
V (Hatch/Trunk) : Press the hatch/trunk lid release
button, located on the instrument panel to the left of the
steering wheel. The theft-deterrent alarm system must
not be armed.
} (Hatch/Trunk) : Press the hatch/trunk lid release
button on the keyless access transmitter. See Keyless
Access System on page 3‑5.
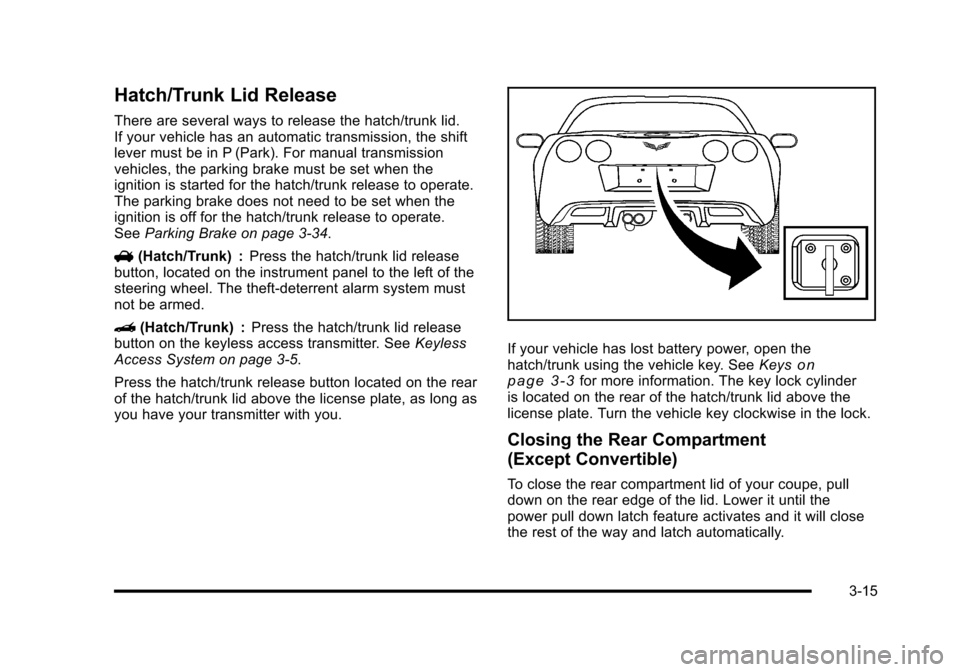
Press the hatch/trunk release button located on the rear
of the hatch/trunk lid above the license plate, as long as
you have your transmitter with you.
If your vehicle has lost battery power, open the
hatch/trunk using the vehicle key. See Keyson
page 3‑3for more information. The key lock cylinder
is located on the rear of the hatch/trunk lid above the
license plate. Turn the vehicle key clockwise in the lock.
Closing the Rear Compartment
(Except Convertible)
To close the rear compartment lid of your coupe, pull
down on the rear edge of the lid. Lower it until the
power pull down latch feature activates and it will close
the rest of the way and latch automatically.
3-15
Page 122 of 472
Stopping the Engine
If the vehicle has an automatic transmission, move
the shift lever to P (Park) and press and hold the
Acc. (Off/Accessory) button, located on the instrument
panel, until the engine shuts off. If the shift lever is not
in P (Park), the engine shuts off and the vehicle goes
into the Accessory Mode. The DIC displays SHIFT
TO PARK. Once the shifter is moved to P (Park),
the vehicle turns off. If the vehicle has a manual
transmission, it is recommended that you move the
shift lever to R (Reverse) and set the parking brake
after you turn off the engine by pressing and holding
the Acc. (Off/Accessory) button.
If the keyless access transmitter is not detected inside
the vehicle when it is turned to off, the DIC displays
NO FOB –OFF OR RUN?.
See DIC Warnings and Messages
on page 4‑52for
more information.
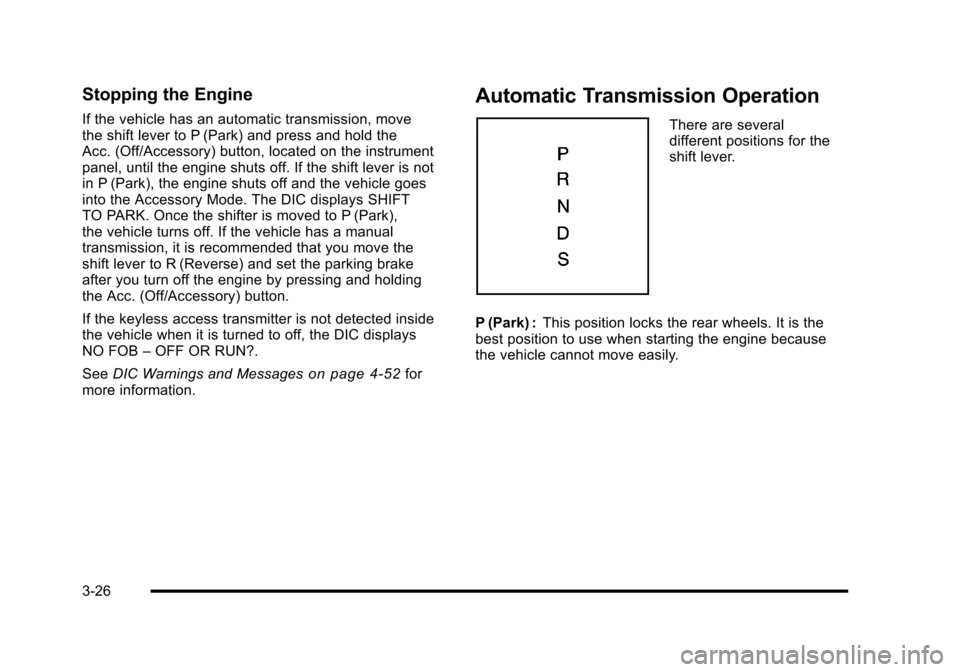
Automatic Transmission Operation
There are several
different positions for the
shift lever.
P (Park) : This position locks the rear wheels. It is the
best position to use when starting the engine because
the vehicle cannot move easily.
3-26