2010 CHEVROLET CORVETTE wheel
[x] Cancel search: wheelPage 27 of 472
Power Outlets
The accessory power outlet can be used to connect
electrical equipment, such as a cellular phone.
The accessory power outlet is located inside the center
console storage compartment, on the forward left side.
To use the outlet, remove the tethered cap.
See Accessory Power Outlet(s) on page 4‑20.
Roof Panel
On vehicles with a removable roof panel, there are
three release latches. Two are located on the front of
the roof panel and the other is located on the back of
the roof panel. See Removing the Roof Panel
on
page 3‑54.
Until you are sure you can remove the roof panel by
yourself, have someone help you. Once removed, the
roof panel should always be stored properly in the rear
storage compartment.
For more information, see:
.Storing the Roof Panel on page 3‑56.
.Installing the Roof Panel on page 3‑58.
Convertible
If equipped, the convertible top can be lowered and
stowed under the tonneau cover behind the seats.
For step-by-step instructions, see Convertible Top
(Manual)
on page 3‑59or Convertible Top (Power)on
page 3‑66.
Performance and Maintenance
Traction Control System (TCS)
The traction control system limits wheel spin.
The system turns on automatically every time the
vehicle is started.
.To turn off traction control, press and releasedon
the console.
dilluminates and the appropriate
DIC message displays. See DIC Warnings and
Messages on page 4‑52.
.Press and release the button again to turn on
traction control.
See Traction Control System (TCS) on page 5‑6.
The vehicle has an Active Handling System that helps
maintain directional control of the vehicle in difficult
driving conditions. See Active Handling System
on
page 5‑8.
1-21
Page 28 of 472

The vehicle may have Competitive Driving Mode
(except ZR1), Performance Traction Management
(ZR1), and Launch Control systems designed to
allow increased performance while accelerating and
cornering. See Competitive Driving Mode on page 5‑9.
Towing
The vehicle was neither designed nor intended to be
towed with any of its wheels on the ground.
See Towing Your Vehicle
on page 5‑33and
Recreational Vehicle Towing on page 5‑33.
Tire Pressure Monitor
This vehicle may have a Tire Pressure Monitor
System (TPMS).
The Tire Pressure Monitor
alerts you when a
significant reduction in
pressure occurs in one or
more of the vehicle’s tires
by illuminating the low tire
pressure warning light on
the instrument cluster. The warning light will remain on until the tire pressure is
corrected. The proper tire pressures for your vehicle are
listed on the Tire and Loading Information label located
on the driver side center pillar (B pillar). See
Loading
the Vehicle
on page 5‑28.
You may notice during cooler conditions that the low tire
pressure warning light will appear when the vehicle is
first started and then turn off as you drive. This may be
an early indicator that your tire pressures are getting
low and the tires need to be inflated to the proper
pressure.
Note: The Tire Pressure Monitor can alert you about
low tire pressure, but it does not replace normal monthly
tire maintenance. It is the driver ’s responsibility to
maintain correct tire pressures.
See Tire Pressure Monitor System
on page 6‑72and
Tire Pressure Monitor Operation on page 6‑74.
1-22
Page 29 of 472
Z06, Z16, and ZR1 Features
Checking Engine Oil
ZO6, Z16 (Grand Sport), and ZR1 models have a high
performance dry sump lubrication system. This system
operates differently than a standard engine lubrication
system. See Engine Oil on page 6‑19.
You should check the oil level only after the engine has
been thoroughly warmed up and then shut off for at
least five minutes. This ensures that the oil level
reading obtained will be accurate.
Jump Starting the Battery
The battery of ZO6, Z16 (Grand Sport), and
ZR1 models is in the rear of the vehicle. You do not
need to access the battery for jump starting. There are
remote positive (+) and negative (−) terminals under the
hood for this purpose. See Battery
on page 6‑49and
Jump Starting on page 6‑50.
Brake Noise
Under certain weather or operating conditions,
occasional brake noise might be heard with the
vehicle's performance braking system. This brake
system is designed for superior fade resistance and
consistent operation using high performance brake
pads. Brake noise is normal and does not affect system
performance. See Braking on page 5‑4.
Car Wash Guidelines
Automatic car washes are not recommended for this
vehicle. Some car washes cause damage to the
vehicle, the wheels, and the convertible top, if the
vehicle is so equipped.
If you drive the vehicle through an automatic
car wash that does not have enough clearance for
the undercarriage and/or wide rear tires and wheels,
you could damage the vehicle. Verify with the manager
of the car wash that the vehicle will fit before entering
the car wash or use a touchless car wash. See
Washing Your Vehicle on page 6‑94.
1-23
Page 33 of 472

Location information about the vehicle is only available
if the GPS satellite signals are unobstructed and
available.
The vehicle must have a working electrical system,
including adequate battery power, for the OnStar
equipment to operate. There are other problems OnStar
cannot control that may prevent OnStar from providing
OnStar service at any particular time or place. Some
examples are damage to important parts of the vehicle
in a crash, hills, tall buildings, tunnels, weather or
wireless phone network congestion.
OnStar Steering Wheel Controls
This vehicle may have a Talk/Mute button that can
be used to interact with OnStar hands-free calling.
See Audio Steering Wheel Controls
on page 4‑107for
more information.
On some vehicles, the mute button can be used to dial
numbers into voice mail systems, or to dial phone
extensions. See the OnStar Owner's Guide for more
information.
Your Responsibility
Increase the volume of the radio if the OnStar advisor
cannot be heard.
If the light next to the OnStar buttons is red, the system
may not be functioning properly. Press
Qand request a
vehicle diagnostic. If the light appears clear (no light is
appearing), your OnStar subscription has expired and
all services have been deactivated. Press
Qto confirm
that the OnStar equipment is active.
1-27
Page 35 of 472
Section 2 Seats and Restraint System
Front Seats. . . . . . . . . . . . . . . . . . . . . . . . . . . . . . . . . . . . . . . . . 2-2
Manual Seats . . . . . . . . . . . . . . . . . . . . . . . . . . . . . . . . . . . 2-2
Power Seats . . . . . . . . . . . . . . . . . . . . . . . . . . . . . . . . . . . . 2-3
Power Lumbar and Side Bolsters . . . . . . . . . . . . . . . 2-3
Heated Seats . . . . . . . . . . . . . . . . . . . . . . . . . . . . . . . . . . . 2-4
Memory Seat, Mirrors and Steering Wheel . . . . . . 2-4
Reclining Seatbacks . . . . . . . . . . . . . . . . . . . . . . . . . . . . 2-6
Seatback Latches . . . . . . . . . . . . . . . . . . . . . . . . . . . . . . . 2-8
Safety Belts . . . . . . . . . . . . . . . . . . . . . . . . . . . . . . . . . . . . . . . . 2-9
Safety Belts: They Are for Everyone . . . . . . . . . . . . 2-9
How to Wear Safety Belts Properly . . . . . . . . . . . . 2-14
Lap-Shoulder Belt . . . . . . . . . . . . . . . . . . . . . . . . . . . . . 2-23
Safety Belt Use During Pregnancy . . . . . . . . . . . . . 2-25
Safety Belt Extender . . . . . . . . . . . . . . . . . . . . . . . . . . . 2-26
Child Restraints . . . . . . . . . . . . . . . . . . . . . . . . . . . . . . . . . . 2-26
Older Children . . . . . . . . . . . . . . . . . . . . . . . . . . . . . . . . . 2-26
Infants and Young Children . . . . . . . . . . . . . . . . . . . . 2-29
Child Restraint Systems . . . . . . . . . . . . . . . . . . . . . . . 2-33 Lower Anchors and Tethers for Children
(LATCH) (Coupe and Convertible
Models Only) . . . . . . . . . . . . . . . . . . . . . . . . . . . . . . . . 2-35
Lower Anchors and Tethers for Children (LATCH) (Z06 and ZR1 Models Only) . . . . . . . . 2-36
Securing a Child Restraint in the Right Front Seat Position . . . . . . . . . . . . . . . . . . . . . . . . . . . . . . . . 2-40
Airbag System . . . . . . . . . . . . . . . . . . . . . . . . . . . . . . . . . . . . 2-44
Where Are the Airbags? . . . . . . . . . . . . . . . . . . . . . . . 2-46
When Should an Airbag Inflate? . . . . . . . . . . . . . . . 2-48
What Makes an Airbag Inflate? . . . . . . . . . . . . . . . . 2-50
How Does an Airbag Restrain? . . . . . . . . . . . . . . . . 2-50
What Will You See After an Airbag Inflates? . . . 2-51
Passenger Sensing System . . . . . . . . . . . . . . . . . . . 2-53
Servicing Your Airbag-Equipped Vehicle . . . . . . . 2-58
Adding Equipment to Your Airbag-Equipped Vehicle . . . . . . . . . . . . . . . . . . . . . . . . . . . . . . . . . . . . . . 2-59
Restraint System Check . . . . . . . . . . . . . . . . . . . . . . . . . 2-60
Checking the Restraint Systems . . . . . . . . . . . . . . . 2-60
Replacing Restraint System Parts After a Crash . . . . . . . . . . . . . . . . . . . . . . . . . . . . . . . . . . . . . . . . 2-61
2-1
Page 37 of 472
Power Seats
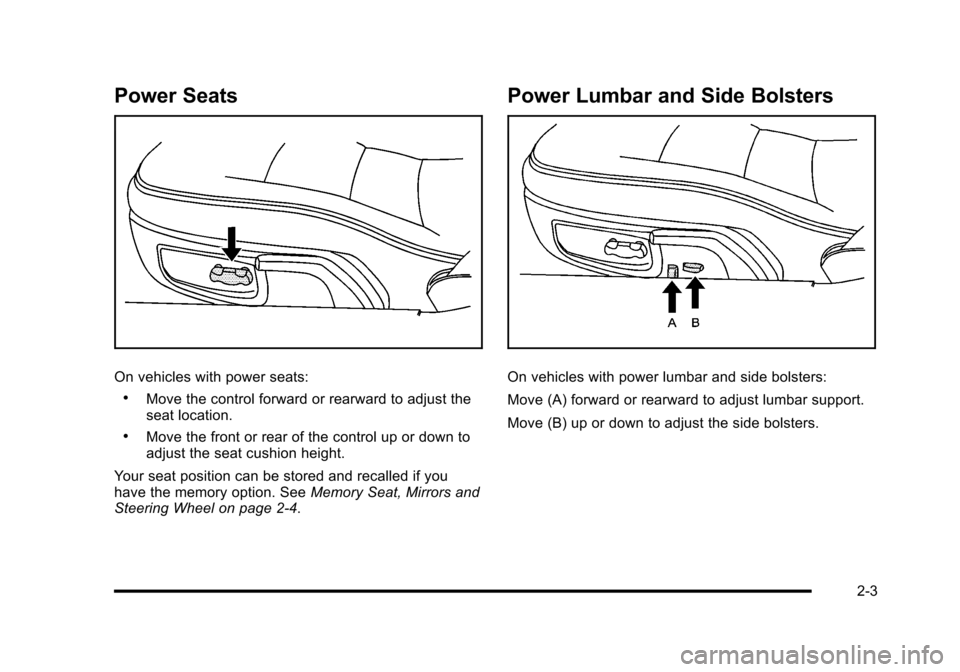
On vehicles with power seats:
.Move the control forward or rearward to adjust the
seat location.
.Move the front or rear of the control up or down to
adjust the seat cushion height.
Your seat position can be stored and recalled if you
have the memory option. See Memory Seat, Mirrors and
Steering Wheel on page 2‑4.
Power Lumbar and Side Bolsters
On vehicles with power lumbar and side bolsters:
Move (A) forward or rearward to adjust lumbar support.
Move (B) up or down to adjust the side bolsters.
2-3
Page 38 of 472

Heated Seats
On vehicles with heated seats, the buttons are located
on the center console.
The ignition must be on for this feature to work.
L: Press to turn the seat on at the high setting.
Press again to turn it to the low setting
9: Press to turn the system off.
Memory Seat, Mirrors and Steering
Wheel
On vehicles with the memory package, the controls are
located on the driver's door.
1 : Saves the seating position for driver 1.
2 : Saves the seating position for driver 2.
B:Recalls the easy exit position. The numbers on the back of the keyless access
transmitters correspond to the numbers on the
memory buttons.
To save seating positions in the memory:
1. Adjust the driver's seat, both outside mirrors, and the telescopic steering column to a comfortable
driving position.
2. Press and hold button 1 until two beeps let you know that the position has been stored in the
memory.
A second seating, mirror, and telescopic steering
column position can be set by repeating the above
steps and pressing button 2.
2-4
Page 44 of 472
In most states and in all Canadian provinces, the law
requires wearing safety belts. Here is why:
You never know if you will be in a crash. If you do have
a crash, you do not know if it will be a serious one.
A few crashes are mild, and some crashes can be
so serious that even buckled up, a person would not
survive. But most crashes are in between. In many of
them, people who buckle up can survive and sometimes
walk away. Without safety belts, they could have been
badly hurt or killed.
After more than 40 years of safety belts in vehicles,
the facts are clear. In most crashes buckling up does
matter ... a lot!Why Safety Belts Work
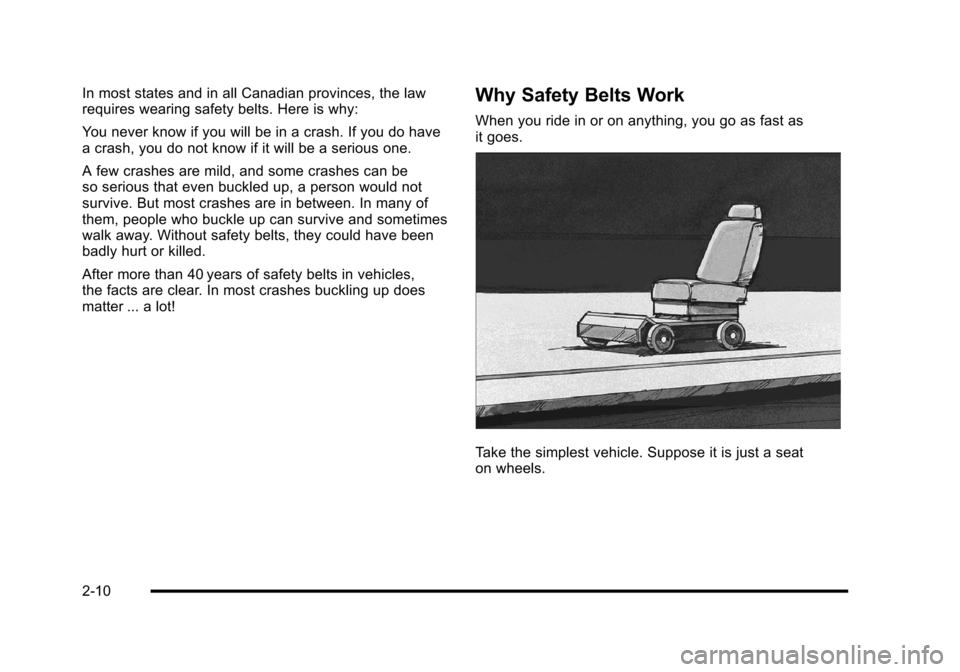
When you ride in or on anything, you go as fast as
it goes.
Take the simplest vehicle. Suppose it is just a seat
on wheels.
2-10