2010 CHEVROLET CORVETTE manual radio set
[x] Cancel search: manual radio setPage 116 of 472
Testing the Alarm
To test the system: 1. Make sure the trunk lid/hatch is latched.
2. Lower the window on the driver door.
3. Manually arm the system.
4. Close the doors and wait 30 seconds.
5. Reach through the open window and manually pull the release lever on the floor.
6. Press the unlock button on the transmitter to turn off the alarm.
If the alarm does not sound, check to see if the horn
works. The horn fuse may be blown. See Fuses and
Circuit Breakers
on page 6‑101. If the horn works, but
the alarm does not go off, see your dealer/retailer.
Disarming the System
Press the unlock button on the keyless access
transmitter or squeeze the door handle sensor while
the transmitter is near the vehicle to unlock a door.
Unlocking a door any other way sets off the alarm.
If the alarm sounds, press the unlock button on the
keyless access transmitter to disarm it.
Do not leave the key or device that disarms or
deactivates the theft deterrent system in the vehicle.
Immobilizer
See Radio Frequency Statementon page 8‑20for information regarding Part 15 of the Federal
Communications Commission (FCC) Rules and
RSS-210/211 of Industry Canada.
Immobilizer Operation
The vehicle has a passive theft-deterrent system.
The system is automatically armed when the ignition is
turned off.
The immobilization system is disarmed when the
ignition is turned to OFF/ACCESSORY or START and
a valid transmitter is found in the vehicle.
You do not have to manually arm or disarm the system.
The security light comes on if there is a problem with
arming or disarming the theft-deterrent system.
The system has one or more keyless access
transmitters that are matched to an immobilizer control
unit in the vehicle. Only a correctly matched keyless
access transmitter starts the vehicle. The vehicle may
not start if the keyless access transmitter is damaged.
If the engine does not start and the security light comes
on, there may be a problem with the immobilizer
system. Press the START button again.
3-20
Page 164 of 472
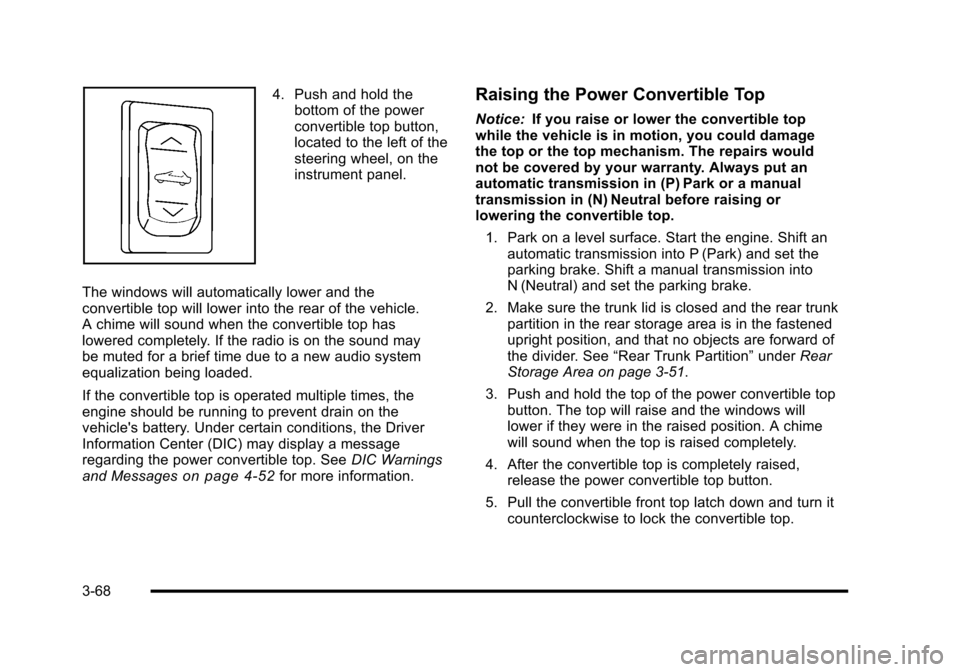
4. Push and hold the bottom of the power
convertible top button,
located to the left of the
steering wheel, on the
instrument panel.
The windows will automatically lower and the
convertible top will lower into the rear of the vehicle.
A chime will sound when the convertible top has
lowered completely. If the radio is on the sound may
be muted for a brief time due to a new audio system
equalization being loaded.
If the convertible top is operated multiple times, the
engine should be running to prevent drain on the
vehicle's battery. Under certain conditions, the Driver
Information Center (DIC) may display a message
regarding the power convertible top. See DIC Warnings
and Messages
on page 4‑52for more information.
Raising the Power Convertible Top
Notice: If you raise or lower the convertible top
while the vehicle is in motion, you could damage
the top or the top mechanism. The repairs would
not be covered by your warranty. Always put an
automatic transmission in (P) Park or a manual
transmission in (N) Neutral before raising or
lowering the convertible top.
1. Park on a level surface. Start the engine. Shift an automatic transmission into P (Park) and set the
parking brake. Shift a manual transmission into
N (Neutral) and set the parking brake.
2. Make sure the trunk lid is closed and the rear trunk partition in the rear storage area is in the fastened
upright position, and that no objects are forward of
the divider. See “Rear Trunk Partition” underRear
Storage Area on page 3‑51.
3. Push and hold the top of the power convertible top button. The top will raise and the windows will
lower if they were in the raised position. A chime
will sound when the top is raised completely.
4. After the convertible top is completely raised, release the power convertible top button.
5. Pull the convertible front top latch down and turn it counterclockwise to lock the convertible top.
3-68
Page 250 of 472
Audio Settings
Press and holdOewhen no tone or speaker control
is displayed to adjust all tone and speaker controls to
the middle position. AUDIO SETTINGS CENTERED
displays.
Adjusting the Tone (Bass/Treble)
O e(Bass/Treble): To adjust the Bass or Treble:
Press and release
O euntil BASS or TREBLE
displays.
.Turn theO eknob to increase or to decrease
the level.
.Press and hold theO eknob until the level
changes to the middle position.
Adjusting the Speakers (Balance/Fade)
O e(Balance/Fade): To adjust the Balance:
Press and release
O euntil BALANCE displays.
.Turn theOeknob to move the sound toward the
right or the left speakers.
.Press and hold theO eknob until the level
changes to the middle position. To adjust the Fade:
Press and release
O
euntil FADE displays
.Turn theOeknob to move the sound toward the
front or the rear speakers.
.Press and hold theO eknob until the level
changes to the middle position.
AUTO EQ (Automatic Equalization) : The radio saves
separate AUTO EQ settings for each preset and source.
For vehicles without the Bose
®sound system:
.Press AUTO EQ to select equalization settings
designed for CLASSICAL, POP, ROCK, JAZZ,
TALK, and COUNTRY.
.Selecting CUSTOM or changing bass or treble,
returns the EQ to the manual bass and treble
settings.
For vehicles with the Bose
®sound system:
.Press AUTO EQ to select equalization settings
from EQ1 through EQ6.
.Selecting CUSTOM or changing bass or treble,
returns the EQ to the manual bass and treble
settings.
4-82
Page 257 of 472
Six-Disc CD Radio:
Press Xto eject the CD that is currently playing.
To eject multiple CDs: 1. Press and hold Xfor two seconds. A beep sounds
and EJECT ALL displays.
2. The ejected CD can be removed when REMOVE DISC displays.
To stop ejecting the CDs, press the
MorX.
The CD is automatically pulled back into the player if
the CD is not removed after 25 seconds. Pushing a CD
back into the player, before the 25 second time period is
complete causes the player to sense an error and the
CD player tries to eject the CD several times before
stopping.
Wait for the timer to expire before pressing
Xagain.
Pressing
Xrepeatedly after trying to push a CD in
manually causes the CD players 25-second eject timer
to reset.
RPT (Repeat) : Press to hear a track or an entire CD
over again.
Single CD Radio:
Press RPT to hear a track over again, REPEAT
displays. Press again to turn off repeat, REPEAT OFF
displays. Six-Disc CD Radio:
.Press RPT until REPEAT displays to repeat a
track.
.Press RPT until REPEAT ONE DISC displays to
repeat an entire CD
.Press RPT until REPEAT OFF displays to turn off
repeat.
RDM (Random) : Press to hear the tracks in random,
rather than sequential order, on one CD or all of the
loaded CDs.
Single CD Radio:
Press and release RDM, until RANDOM DISC PLAY
displays. Press and release the RDM until RANDOM
OFF displays to turn off random play.
Six-Disc CD Radio:
.Press and release RDM until RANDOM DISC
PLAY displays to play the tracks on one CD in
random order. Once all tracks on this disc have
played, RANDOM DISC PLAY will repeat.
.Press and release RDM until RANDOM ALL
DISCS displays to play the tracks on all of the CDs
that are loaded in random order.
.Press and release RDM until RANDOM OFF
displays to turn off random play.
4-89
Page 362 of 472
Jump Starting
If your battery has run down, you may want to use
another vehicle and some jumper cables to start your
vehicle. Be sure to use the following steps to do it
safely.
{WARNING:
Batteries can hurt you. They can be dangerous
because:
.They contain acid that can burn you.
.They contain gas that can explode or ignite.
.They contain enough electricity to burn you.
If you do not follow these steps exactly, some or
all of these things can hurt you.
Notice: If you try to start your vehicle by pushing or
pulling it, you could damage your vehicle. Do not
push or pull your vehicle to start it; instead, use the
jump starting procedure in this manual to start your
vehicle when the battery has run down.
1. Check the other vehicle. It must have a 12-volt battery with a negative ground system. Notice:
If the other vehicle's system is not a 12-volt
system with a negative ground, both vehicles can
be damaged. Only use vehicles with 12-volt systems
with negative grounds to jump start your vehicle.
2. Get the vehicles close enough so the jumper cables can reach, but be sure the vehicles are not
touching each other. If they are, it could cause a
ground connection you do not want. You would
not be able to start your vehicle, and the bad
grounding could damage the electrical systems.
To avoid the possibility of the vehicles rolling, set
the parking brake firmly on both vehicles involved
in the jump start procedure. Put an automatic
transmission in P (Park) or a manual transmission
in Neutral before setting the parking brakes.
Notice: If you leave the radio or other accessories
on during the jump starting procedure, they could
be damaged. The repairs would not be covered by
the warranty. Always turn off the radio and other
accessories when jump starting the vehicle.
3. Turn off the ignition on both vehicles. Unplug unnecessary accessories plugged into the
cigarette lighter or the accessory power outlet.
Turn off the radio and all lamps that are not
needed. This will avoid sparks and help save
both batteries. And it could save the radio!
6-50
Page 460 of 472

Ashtray . . . . . . . . . . . . . . . . . . . . . . . . . . . . . . . . . . . . . . . . . . . . 4-21
Assistance Program, Roadside . . . . . . . . . . . . . . . . . . . . . .8-7
Audio System . . . . . . . . . . . . . . . . . . . . . . . . . . . . . . . . . . . . . . 4-80Audio Steering Wheel Controls . . . . . . . . . . . . . . . . . .4-107
Navigation/Radio System, see NavigationManual . . . . . . . . . . . . . . . . . . . . . . . . . . . . . . . . . . . . . . . . . . 4-96
Radio Reception . . . . . . . . . . . . . . . . . . . . . . . . . . . . . . . . .4-108
Setting the Clock . . . . . . . . . . . . . . . . . . . . . . . . . . . . . . . . . 4-80
Theft-Deterrent Feature . . . . . . . . . . . . . . . . . . . . . . . . . .4-106
XM™ Satellite Radio Antenna System . . . . . . . . . . .4-109
Audio System(s) . . . . . . . . . . . . . . . . . . . . . . . . . . . . . . . . . . . 4-81
Automatic Door Lock . . . . . . . . . . . . . . . . . . . . . . . . . . . . . . 3-13
Automatic Transmission
Fluid . . . . . . . . . . . . . . . . . . . . . . . . . . . . . . . . . . . . . . . . . . . . . . 6-31
Operation . . . . . . . . . . . . . . . . . . . . . . . . . . . . . . . . . . . . . . . . . 3-26
Axle, Rear . . . . . . . . . . . . . . . . . . . . . . . . . . . . . . . . . . . . . . . . . 6-55
B
Battery . . . . . . . . . . . . . . . . . . . . . . . . . . . . . . . . . . . . . . . . . . . . 6-49
Exterior Lighting Battery Saver . . . . . . . . . . . . . . . . . . . 4-15
Run-Down Protection . . . . . . . . . . . . . . . . . . . . . . . . . . . . . 4-16
Belt Routing, Engine . . . . . . . . . . . . . . . . . . . . . . . . . . . . . . . 7-13
Bluetooth
®. . . . . . . . . . . . . . . . . . . . . . . . . . . . . . . . . . . . . . . . . 4-96
Boost Gauge . . . . . . . . . . . . . . . . . . . . . . . . . . . . . . . . . . . . . . 4-47
Brake Emergencies . . . . . . . . . . . . . . . . . . . . . . . . . . . . . . . . . . . . . . 5-6 Brakes . . . . . . . . . . . . . . . . . . . . . . . . . . . . . . . . . . . . . . . . . . . . . 6-43
Antilock . . . . . . . . . . . . . . . . . . . . . . . . . . . . . . . . . . . . . . . . . . . . 5-5
Parking . . . . . . . . . . . . . . . . . . . . . . . . . . . . . . . . . . . . . . . . . . . 3-34
System Warning Light . . . . . . . . . . . . . . . . . . . . . . . . . . . . 4-36
Braking . . . . . . . . . . . . . . . . . . . . . . . . . . . . . . . . . . . . . . . . . . . . . .5-4
Braking in Emergencies . . . . . . . . . . . . . . . . . . . . . . . . . . . . .5-6
Break-In, New Vehicle . . . . . . . . . . . . . . . . . . . . . . . . . . . . . 3-21
Bulb Replacement . . . . . . . . . . . . . . . . . . . . . . . . . . . . . . . . . 6-58 Fog Lamps . . . . . . . . . . . . . . . . . . . . . . . . . . . . . . . . . . . . . . . 4-13
Halogen Bulbs . . . . . . . . . . . . . . . . . . . . . . . . . . . . . . . . . . . . 6-56
Headlamp Aiming . . . . . . . . . . . . . . . . . . . . . . . . . . . . . . . . . 6-55
Headlamps . . . . . . . . . . . . . . . . . . . . . . . . . . . . . . . . . . . . . . . 6-56
Headlamps, Front Turn Signal, and ParkingLamps . . . . . . . . . . . . . . . . . . . . . . . . . . . . . . . . . . . . . . . . . . 6-56
High Intensity Discharge (HID) Lighting . . . . . . . . . . . 6-56
Taillamps, Turn Signal and Stoplamps . . . . . . . . . . . . 6-58
Buying New Tires . . . . . . . . . . . . . . . . . . . . . . . . . . . . . . . . . . 6-77
C
Calibration . . . . . . . . . . . . . . . . . . . . . . . . . . . . . . . . . . . . . . . . . 3-39
California Perchlorate Materials Requirements . . . . . . . . . . . . . . . 6-4
Warning . . . . . . . . . . . . . . . . . . . . . . . . . . . . . . . . . . . . . . . . . . . 6-4
California Fuel . . . . . . . . . . . . . . . . . . . . . . . . . . . . . . . . . . . . . . .6-7
Canadian Owners . . . . . . . . . . . . . . . . . . . . . . . . . . . . . . . . . . . . iii
Capacities and Specifications . . . . . . . . . . . . . . . . . . . . . 6-108
i - 2
Page 468 of 472

Passenger Airbag Status Indicator . . . . . . . . . . . . . . . . . 4-34
Passenger Compartment Air Filter . . . . . . . . . . . . . . . . . 4-28
Passenger Sensing System . . . . . . . . . . . . . . . . . . . . . . . 2-53
Passing . . . . . . . . . . . . . . . . . . . . . . . . . . . . . . . . . . . . . . . . . . . . 5-18
Perchlorate Materials Requirements, California . . . . . .6-4
Phone Bluetooth
®. . . . . . . . . . . . . . . . . . . . . . . . . . . . . . . . . . . . . . . . 4-96
Power Door Locks . . . . . . . . . . . . . . . . . . . . . . . . . . . . . . . . . . . . . . . 3-12
Electrical System . . . . . . . . . . . . . . . . . . . . . . . . . . . . . . . .6-100
Lumbar and Side Bolsters . . . . . . . . . . . . . . . . . . . . . . . . . 2-3
Retained Accessory (RAP) . . . . . . . . . . . . . . . . . . . . . . . 3-24
Seat . . . . . . . . . . . . . . . . . . . . . . . . . . . . . . . . . . . . . . . . . . . . . . . 2-3
Steering Fluid . . . . . . . . . . . . . . . . . . . . . . . . . . . . . . . . . . . . . 6-41
Windows . . . . . . . . . . . . . . . . . . . . . . . . . . . . . . . . . . . . . . . . . 3-17
Pregnancy, Using Safety Belts . . . . . . . . . . . . . . . . . . . . . 2-25
Privacy . . . . . . . . . . . . . . . . . . . . . . . . . . . . . . . . . . . . . . . . . . . . 8-18
Navigation System . . . . . . . . . . . . . . . . . . . . . . . . . . . . . . . . 8-19
OnStar . . . . . . . . . . . . . . . . . . . . . . . . . . . . . . . . . . . . . . . . . . . 8-19
Radio Frequency Identification (RFID) . . . . . . . . . . . . 8-20
Program
Courtesy Transportation . . . . . . . . . . . . . . . . . . . . . . . . . . 8-10
Programmable Automatic Door Unlock . . . . . . . . . . . . 3-13
Proposition 65 Warning, California . . . . . . . . . . . . . . . . . . .6-4
R
Racing or Other Competitive Driving . . . . . . . . . . . . . . . 5-19
Radio Frequency Identification (RFID) . . . . . . . . . . . . . . . . . . . . . . . . . . . . . . 8-20
Statement . . . . . . . . . . . . . . . . . . . . . . . . . . . . . . . . . . . . . . . . 8-20
Radio(s) . . . . . . . . . . . . . . . . . . . . . . . . . . . . . . . . . . . . . . . . . . . 4-81
Radios Navigation/Radio System, see NavigationManual . . . . . . . . . . . . . . . . . . . . . . . . . . . . . . . . . . . . . . . . . . 4-96
Reception . . . . . . . . . . . . . . . . . . . . . . . . . . . . . . . . . . . . . . .4-108
Setting the Clock . . . . . . . . . . . . . . . . . . . . . . . . . . . . . . . . . 4-80
Theft-Deterrent . . . . . . . . . . . . . . . . . . . . . . . . . . . . . . . . . .4-106
Reading Lamps . . . . . . . . . . . . . . . . . . . . . . . . . . . . . . . . . . . . 4-15
Rear Axle . . . . . . . . . . . . . . . . . . . . . . . . . . . . . . . . . . . . . . . . . . 6-55 Limited-Slip . . . . . . . . . . . . . . . . . . . . . . . . . . . . . . . . . . . . . . . 5-14
Rear Storage . . . . . . . . . . . . . . . . . . . . . . . . . . . . . . . . . . . . . . 3-51
Rearview Mirrors
Automatic Dimming . . . . . . . . . . . . . . . . . . . . . . . . . . . . . . . 3-39
Reclining Seatbacks . . . . . . . . . . . . . . . . . . . . . . . . . . . . . . . . .2-6
Recommended Fluids and Lubricants . . . . . . . . . . . . . 7-10
Recreational Vehicle Towing . . . . . . . . . . . . . . . . . . . . . . . 5-33
Reimbursement Program, GM Mobility . . . . . . . . . . . . . . .8-7
Remote, Keyless Access System . . . . . . . . . . . . . . . . . . . .3-5
Removing the Roof Panel . . . . . . . . . . . . . . . . . . . . . . . . . 3-54
i - 10