2010 CHEVROLET CORVETTE brake light
[x] Cancel search: brake lightPage 9 of 472

A.Outlet Adjustment on page 4‑27.
B. Head-Up Display (HUD)
on page 4‑16(If Equipped).
C. Turn Signal/Multifunction Lever
on page 4‑4.
Cruise Controlon page 4‑7. Fog Lampson
page 4‑13. Exterior Lamps on page 4‑11.
D. Manual Shift Paddles (If Equipped). See Automatic
Transmission Operation on page 3‑26.
E. Driver Information Center (DIC) on page 4‑47.
F. Instrument Panel Cluster on page 4‑30.
G. Windshield Wipers
on page 4‑6and Windshield
Washer on page 4‑6.
H. DIC Operation and Displays on page 4‑47.
I. Hazard Warning Flashers on page 4‑3.
J. Audio System(s) on page 4‑80.
K. Dual Automatic Climate Control System
on
page 4‑22.
L. Fuel Door Release Button. See Filling the
Tank
on page 6‑9. Hatch/Trunk Release Button.
See “Hatch/Trunk Lid Release” underHatchon
page 3‑14.
M. Instrument Panel Brightness on page 4‑15.
N. Power Folding Top Switch (If Equipped). See Convertible Top (Manual)
on page 3‑59orConvertible Top (Power) on page 3‑66. O.
Bluetooth
®on page 4‑96(If Equipped).
Audio Steering Wheel Controlson page 4‑107(If Equipped).
P. Tilt Wheel on page 4‑3.
Q. Horn on page 4‑3.
R. Telescopic Wheel Button (If Equipped). See Tilt Wheel on page 4‑3.
S. Ignition Positions on page 3‑23.
T. Heated Seats
on page 2‑4(If Equipped).
U. Shift Lever (Automatic Shown). See Automatic
Transmission Operation
on page 3‑26or Manual
Transmission Operation on page 3‑32.
V. Active Handling System on page 5‑8.
W. Accessory Power Outlet(s) on page 4‑20.
X. Selective Ride Control on page 5‑14.
Y. Cupholders on page 3‑50.
Z. Ashtray(s) and Cigarette Lighter on page 4‑21.
AA. Parking Brake on page 3‑34.
AB. Glove Box on page 3‑50.
AC. Instrument Panel Fuse Block on page 6‑101.
1-3
Page 102 of 472

Keyless Trunk Opening
Press the hatch/trunk release button located on the rear
of the hatch/trunk lid above the license plate to open the
trunk if the keyless access transmitter is within range.
See Hatch
on page 3‑14for additional information.
There are other conditions that can affect the
performance of the transmitter. See Keyless Access
System
on page 3‑5Keyless Access System.
This vehicle comes with
two transmitters.
Q(Lock): Press once to lock the doors. WhenQis
pressed twice, the lights flash and the horn sounds to
confirm locking.
K(Unlock): Press once to unlock only the driver door.
Press
Ktwice within five seconds to unlock both doors.
The interior lamps may come on.
Pressing
Kalso recalls the memory settings.
See Memory Seat, Mirrors and Steering Wheel
on
page 2‑4for more information.
}(Hatch/Trunk): Press and hold for about
one second to unlock the hatch/trunk. If the engine
is running, the shift lever must be in P (Park) for an
automatic transmission. For a manual transmission,
the shift lever must be in NEUTRAL with the parking
brake set.
L(Panic): Press to sound the horn. Press any other
button on the keyless access transmitter to stop it.
The vehicle comes with two transmitters. Each
transmitter will have a number on top of it, “1”or“2”.
These numbers correspond to the driver of the vehicle.
For example, the memory seat position for driver 1 will
be recalled when using the transmitter labeled “1”,
if enabled through the DIC. See Memory Seat, Mirrors
and Steering Wheel
on page 2‑4and DIC Vehicle
Personalizationon page 4‑71for more information.
3-6
Page 130 of 472

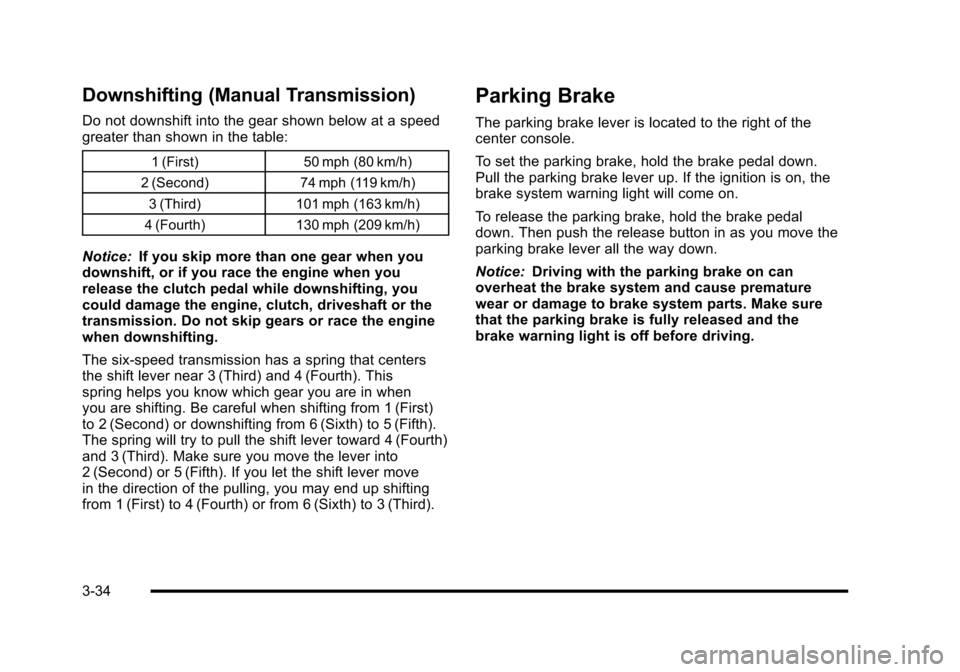
Downshifting (Manual Transmission)
Do not downshift into the gear shown below at a speed
greater than shown in the table:
1 (First)50 mph (80 km/h)
2 (Second) 74 mph (119 km/h)
3 (Third) 101 mph (163 km/h)
4 (Fourth) 130 mph (209 km/h)
Notice: If you skip more than one gear when you
downshift, or if you race the engine when you
release the clutch pedal while downshifting, you
could damage the engine, clutch, driveshaft or the
transmission. Do not skip gears or race the engine
when downshifting.
The six-speed transmission has a spring that centers
the shift lever near 3 (Third) and 4 (Fourth). This
spring helps you know which gear you are in when
you are shifting. Be careful when shifting from 1 (First)
to 2 (Second) or downshifting from 6 (Sixth) to 5 (Fifth).
The spring will try to pull the shift lever toward 4 (Fourth)
and 3 (Third). Make sure you move the lever into
2 (Second) or 5 (Fifth). If you let the shift lever move
in the direction of the pulling, you may end up shifting
from 1 (First) to 4 (Fourth) or from 6 (Sixth) to 3 (Third).
Parking Brake
The parking brake lever is located to the right of the
center console.
To set the parking brake, hold the brake pedal down.
Pull the parking brake lever up. If the ignition is on, the
brake system warning light will come on.
To release the parking brake, hold the brake pedal
down. Then push the release button in as you move the
parking brake lever all the way down.
Notice: Driving with the parking brake on can
overheat the brake system and cause premature
wear or damage to brake system parts. Make sure
that the parking brake is fully released and the
brake warning light is off before driving.
3-34
Page 169 of 472

Section 4 Instrument Panel
Instrument Panel Overview. . . . . . . . . . . . . . . . . . . . . . . . 4-3
Hazard Warning Flashers . . . . . . . . . . . . . . . . . . . . . . . 4-3
Horn . . . . . . . . . . . . . . . . . . . . . . . . . . . . . . . . . . . . . . . . . . . . 4-3
Tilt Wheel . . . . . . . . . . . . . . . . . . . . . . . . . . . . . . . . . . . . . . . 4-3
Turn Signal/Multifunction Lever . . . . . . . . . . . . . . . . . . 4-4
Turn and Lane-Change Signals (Auto Signal) . . . 4-5
Headlamp High/Low-Beam Changer . . . . . . . . . . . . 4-5
Flash-to-Pass . . . . . . . . . . . . . . . . . . . . . . . . . . . . . . . . . . . 4-5
Windshield Wipers . . . . . . . . . . . . . . . . . . . . . . . . . . . . . . 4-6
Windshield Washer . . . . . . . . . . . . . . . . . . . . . . . . . . . . . 4-6
Cruise Control . . . . . . . . . . . . . . . . . . . . . . . . . . . . . . . . . . 4-7
Exterior Lamps . . . . . . . . . . . . . . . . . . . . . . . . . . . . . . . . . 4-11
Wiper Activated Headlamps . . . . . . . . . . . . . . . . . . . 4-12
Headlamps on Reminder . . . . . . . . . . . . . . . . . . . . . . 4-12
Daytime Running Lamps (DRL) . . . . . . . . . . . . . . . . 4-12
Fog Lamps . . . . . . . . . . . . . . . . . . . . . . . . . . . . . . . . . . . . 4-13
Twilight Sentinel
®. . . . . . . . . . . . . . . . . . . . . . . . . . . . . . 4-14
Exterior Lighting Battery Saver . . . . . . . . . . . . . . . . . 4-15
Instrument Panel Brightness . . . . . . . . . . . . . . . . . . . 4-15
Courtesy Lamps . . . . . . . . . . . . . . . . . . . . . . . . . . . . . . . 4-15
Entry/Exit Lighting . . . . . . . . . . . . . . . . . . . . . . . . . . . . . 4-15
Reading Lamps . . . . . . . . . . . . . . . . . . . . . . . . . . . . . . . . 4-15
Battery Run-Down Protection . . . . . . . . . . . . . . . . . . 4-16
Head-Up Display (HUD) . . . . . . . . . . . . . . . . . . . . . . . 4-16
Accessory Power Outlet(s) . . . . . . . . . . . . . . . . . . . . . 4-20
Ashtray(s) and Cigarette Lighter . . . . . . . . . . . . . . . 4-21 Climate Controls
. . . . . . . . . . . . . . . . . . . . . . . . . . . . . . . . . . 4-22
Dual Automatic Climate Control System . . . . . . . 4-22
Outlet Adjustment . . . . . . . . . . . . . . . . . . . . . . . . . . . . . . 4-27
Passenger Compartment Air Filter . . . . . . . . . . . . . 4-28
Warning Lights, Gauges, and Indicators . . . . . . . . 4-29
Instrument Panel Cluster . . . . . . . . . . . . . . . . . . . . . . . 4-30
Speedometer and Odometer . . . . . . . . . . . . . . . . . . . 4-32
Tachometer . . . . . . . . . . . . . . . . . . . . . . . . . . . . . . . . . . . . 4-32
Safety Belt Reminders . . . . . . . . . . . . . . . . . . . . . . . . . 4-32
Airbag Readiness Light . . . . . . . . . . . . . . . . . . . . . . . . 4-33
Passenger Airbag Status Indicator . . . . . . . . . . . . . 4-34
Voltmeter Gauge . . . . . . . . . . . . . . . . . . . . . . . . . . . . . . . 4-35
One-to-Four Shift Light (Manual Transmission) . . . . . . . . . . . . . . . . . . . . . . . . . . . . . . . 4-36
Brake System Warning Light . . . . . . . . . . . . . . . . . . . 4-36
Antilock Brake System (ABS) Warning Light . . . . . . . . . . . . . . . . . . . . . . . . . . . . . . . 4-37
Traction Control System (TCS) Warning Light . . . . . . . . . . . . . . . . . . . . . . . . . . . . . . . . 4-38
Active Handling System Light . . . . . . . . . . . . . . . . . . 4-39
Engine Coolant Temperature Gauge . . . . . . . . . . . 4-40
Tire Pressure Light . . . . . . . . . . . . . . . . . . . . . . . . . . . . 4-40
Malfunction Indicator Lamp . . . . . . . . . . . . . . . . . . . . 4-41
Engine Oil Pressure Gauge . . . . . . . . . . . . . . . . . . . . 4-44
Security Light . . . . . . . . . . . . . . . . . . . . . . . . . . . . . . . . . . 4-45
4-1
Page 178 of 472

Using Cruise Control on Hills
How well the cruise control works on hills depends upon
the vehicle's speed, load, and the steepness of the hills.
When going up steep hills, you might want to step on
the accelerator pedal to maintain the vehicle's speed.
When going downhill, you might have to brake or shift
to a lower gear to keep the vehicle's speed down. When
the brakes are applied the cruise control turns off.
Cruise Control in Sport and Manual Paddle
Shift Gear Selection
When the vehicle is in S (Sport) and the manual paddle
shift controls are not being used, cruise control
operates in the same manner as D (Drive).
When the vehicle is in S (Sport) and the manual paddle
shift controls are being used, cruise control operates as
follows:
.If cruise control is active and a gear is selected
with the manual paddle shift controls, the vehicle
speed is maintained in the driver selected gear
and will not automatically up-shift or down-shift
the transmission while the driver ’s gear selection
is active.
.If driving in hilly terrain, cruise control may not be
able to maintain vehicle speed if an up-shift or
down-shift is not selected by the driver. While
driving on hilly terrain and cruise control is active
with a manual paddle shift gear selection, the
driver must select the proper gear for the terrain or
select D (Drive) on the gear range selector for full
automatic transmission operation.
Ending Cruise Control
To end a cruise control session, step lightly on the
brake pedal. If the vehicle has a manual transmission,
lightly tapping the clutch will also end a cruise control
session.
Move the cruise control switch to
9to turn the system
completely off.
When cruise control is disengaged, the CRUISE
DISENGAGED message displays on the Driver
Information Center (DIC). See DIC Warnings and
Messages on page 4‑52.
Erasing Speed Memory
The cruise control set speed memory is erased when
the cruise control or the ignition is turned off.
4-10
Page 179 of 472

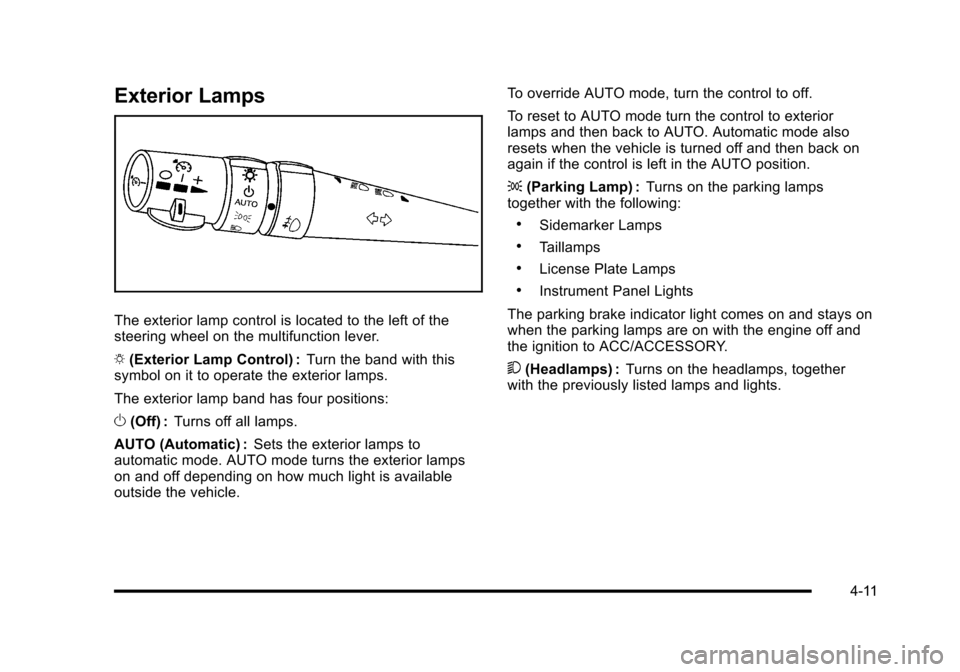
Exterior Lamps
The exterior lamp control is located to the left of the
steering wheel on the multifunction lever.
O (Exterior Lamp Control) : Turn the band with this
symbol on it to operate the exterior lamps.
The exterior lamp band has four positions:
O (Off) : Turns off all lamps.
AUTO (Automatic) : Sets the exterior lamps to
automatic mode. AUTO mode turns the exterior lamps
on and off depending on how much light is available
outside the vehicle. To override AUTO mode, turn the control to off.
To reset to AUTO mode turn the control to exterior
lamps and then back to AUTO. Automatic mode also
resets when the vehicle is turned off and then back on
again if the control is left in the AUTO position.
;
(Parking Lamp) : Turns on the parking lamps
together with the following:
.Sidemarker Lamps
.Taillamps
.License Plate Lamps
.Instrument Panel Lights
The parking brake indicator light comes on and stays on
when the parking lamps are on with the engine off and
the ignition to ACC/ACCESSORY.
5 (Headlamps) : Turns on the headlamps, together
with the previously listed lamps and lights.
4-11
Page 180 of 472

Wiper Activated Headlamps
This feature activates the headlamps and parking
lamps after the windshield wipers have been in use for
approximately 15 seconds and deactivates and returns
to ambient lighting conditions 15 seconds after the
wipers are turned off.
If the exterior lamp control has been turned off or is in
the parking lamp position while the wiper control is
active in any position, the HEADLAMPS SUGGESTED
message appears on the Driver Information Center
(DIC). See DIC Warnings and Messages on page 4‑52.
When the ignition is turned off, the wiper-activated
headlamps will immediately turn off.
Headlamps on Reminder
A warning chime will sound if the exterior lamp control
is left on in either the headlamp or parking lamp position
and the driver's door is opened with the ignition off.
Daytime Running Lamps (DRL)
Daytime Running Lamps (DRL) can make it easier for
others to see the front of your vehicle during the day.
Fully functional daytime running lamps are required on
all vehicles first sold in Canada.
The DRL system makes the front turn signal lamps
come on when the following conditions are met:
.It is still daylight and the ignition is on.
.The exterior lamp control is in the AUTO position.
.The transmission is not in P (Park) or the parking
brake is off.
.The parking brake is off or the vehicle speed is
greater than 8 mph (13 km/h).
When DRL are on, only the front turn signal lamps will
be on. The parking lamps, taillamps, instrument panel
lights, or other exterior lamps will not be on when the
DRL are being used.
When it is dark enough outside, the front turn signal
lamps turn off and the normal low-beam headlamps
turn on.
4-12
Page 204 of 472

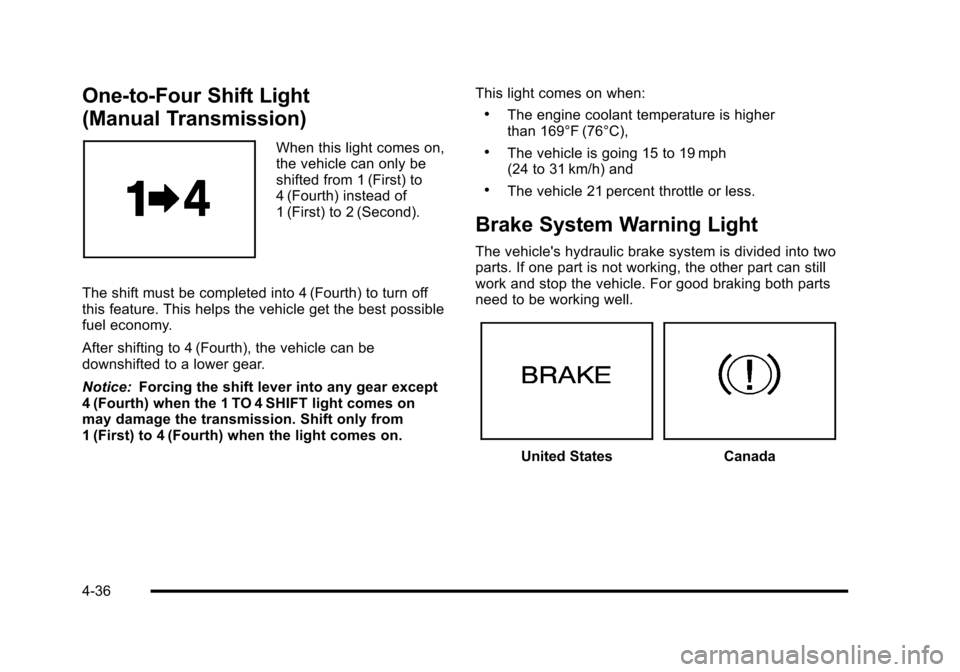
One-to-Four Shift Light
(Manual Transmission)
When this light comes on,
the vehicle can only be
shifted from 1 (First) to
4 (Fourth) instead of
1 (First) to 2 (Second).
The shift must be completed into 4 (Fourth) to turn off
this feature. This helps the vehicle get the best possible
fuel economy.
After shifting to 4 (Fourth), the vehicle can be
downshifted to a lower gear.
Notice: Forcing the shift lever into any gear except
4 (Fourth) when the 1 TO 4 SHIFT light comes on
may damage the transmission. Shift only from
1 (First) to 4 (Fourth) when the light comes on. This light comes on when:
.The engine coolant temperature is higher
than 169°F (76°C),
.The vehicle is going 15 to 19 mph
(24 to 31 km/h) and
.The vehicle 21 percent throttle or less.
Brake System Warning Light
The vehicle's hydraulic brake system is divided into two
parts. If one part is not working, the other part can still
work and stop the vehicle. For good braking both parts
need to be working well.
United StatesCanada
4-36