2010 CHEVROLET CORVETTE radio
[x] Cancel search: radioPage 7 of 472

Section 1 In Brief
Instrument Panel. . . . . . . . . . . . . . . . . . . . . . . . . . . . . . . . . . . 1-2
Initial Drive Information . . . . . . . . . . . . . . . . . . . . . . . . . . . 1-4
Remote Keyless Entry (RKE) System . . . . . . . . . . . 1-4
Door Locks . . . . . . . . . . . . . . . . . . . . . . . . . . . . . . . . . . . . . 1-5
Trunk Release . . . . . . . . . . . . . . . . . . . . . . . . . . . . . . . . . . 1-6
Windows . . . . . . . . . . . . . . . . . . . . . . . . . . . . . . . . . . . . . . . . 1-6
Seat Adjustment . . . . . . . . . . . . . . . . . . . . . . . . . . . . . . . . 1-7
Safety Belt . . . . . . . . . . . . . . . . . . . . . . . . . . . . . . . . . . . . . . 1-9
Sensing System for Passenger Airbag . . . . . . . . . 1-10
Mirror Adjustment . . . . . . . . . . . . . . . . . . . . . . . . . . . . . . 1-11
Steering Wheel Adjustment . . . . . . . . . . . . . . . . . . . . 1-12
Interior Lighting . . . . . . . . . . . . . . . . . . . . . . . . . . . . . . . . 1-13
Exterior Lighting . . . . . . . . . . . . . . . . . . . . . . . . . . . . . . . 1-13
Windshield Wiper/Washer . . . . . . . . . . . . . . . . . . . . . . 1-14
Climate Controls . . . . . . . . . . . . . . . . . . . . . . . . . . . . . . . 1-15
Transmission . . . . . . . . . . . . . . . . . . . . . . . . . . . . . . . . . . 1-15
Vehicle Features . . . . . . . . . . . . . . . . . . . . . . . . . . . . . . . . . . 1-16
Radio(s) . . . . . . . . . . . . . . . . . . . . . . . . . . . . . . . . . . . . . . . 1-16
Satellite Radio . . . . . . . . . . . . . . . . . . . . . . . . . . . . . . . . . 1-17 Portable Audio Devices . . . . . . . . . . . . . . . . . . . . . . . . 1-18
Steering Wheel Controls . . . . . . . . . . . . . . . . . . . . . . . 1-18
Bluetooth
®. . . . . . . . . . . . . . . . . . . . . . . . . . . . . . . . . . . . . 1-18
Navigation System . . . . . . . . . . . . . . . . . . . . . . . . . . . . . 1-19
Driver Information Center (DIC) . . . . . . . . . . . . . . . . 1-19
Cruise Control . . . . . . . . . . . . . . . . . . . . . . . . . . . . . . . . . 1-20
Power Outlets . . . . . . . . . . . . . . . . . . . . . . . . . . . . . . . . . 1-21
Roof Panel . . . . . . . . . . . . . . . . . . . . . . . . . . . . . . . . . . . . 1-21
Convertible . . . . . . . . . . . . . . . . . . . . . . . . . . . . . . . . . . . . 1-21
Performance and Maintenance . . . . . . . . . . . . . . . . . . 1-21
Traction Control System (TCS) . . . . . . . . . . . . . . . . 1-21
Towing . . . . . . . . . . . . . . . . . . . . . . . . . . . . . . . . . . . . . . . . . 1-22
Tire Pressure Monitor . . . . . . . . . . . . . . . . . . . . . . . . . . 1-22
Z06, Z16, and ZR1 Features . . . . . . . . . . . . . . . . . . . 1-23
Engine Oil Life System . . . . . . . . . . . . . . . . . . . . . . . . 1-24
Driving for Better Fuel Economy . . . . . . . . . . . . . . . 1-24
Battery . . . . . . . . . . . . . . . . . . . . . . . . . . . . . . . . . . . . . . . . . 1-24
Roadside Assistance Program . . . . . . . . . . . . . . . . . 1-25
OnStar
®. . . . . . . . . . . . . . . . . . . . . . . . . . . . . . . . . . . . . . . 1-25
1-1
Page 22 of 472
The Manual Paddle Shift system can be deactivated
by moving the shifter from S (Sport Mode) back to
D (Drive), or by holding the up‐shift button for more
than one second.
The Manual Paddle Shift system will not allow either an
up-shift or a down-shift, if the vehicle speed is too fast
or too slow, nor will it allow a start from 4 (Fourth) or
higher gear
See Automatic Transmission Operation on page 3‑26.
One to Four Shift Light
(Manual Transmission)
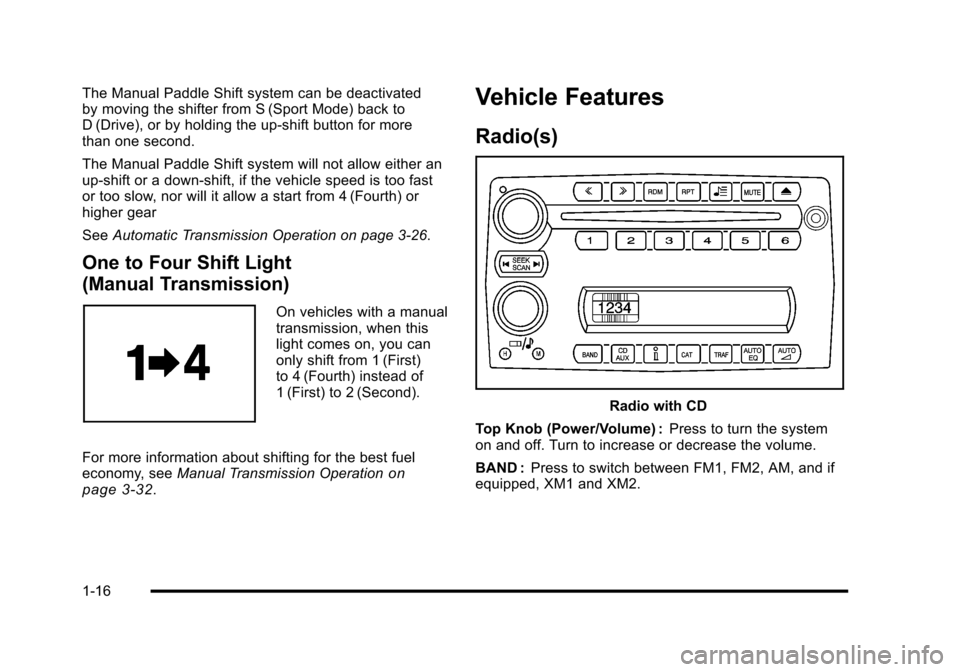
On vehicles with a manual
transmission, when this
light comes on, you can
only shift from 1 (First)
to 4 (Fourth) instead of
1 (First) to 2 (Second).
For more information about shifting for the best fuel
economy, see Manual Transmission Operation
on
page 3‑32.
Vehicle Features
Radio(s)
Radio with CD
Top Knob (Power/Volume) : Press to turn the system
on and off. Turn to increase or decrease the volume.
BAND : Press to switch between FM1, FM2, AM, and if
equipped, XM1 and XM2.
1-16
Page 23 of 472

Oe:Turn to select radio stations.
tSEEKu:Press to seek stations.
tSCANu: Press and hold to scan stations.
4:Press to change the information that shows on
the display while listening to the radio.
For more information about these and other radio
features, see Audio System(s)
on page 4‑80and
Radio(s) on page 4‑81.
Setting Preset Stations
Up to 30 stations (six FM1, six FM2, and six AM, and if
equipped, six XM1, and six XM2) can be programmed.
To program presets:
1. Turn the radio on.
2. Press BAND to select FM1, FM2, AM, or XM1 or XM2.
3. Tune in the desired station.
4. Press AUTO EQ to select the equalization.
5. Press and hold one of the six numbered pushbuttons until the radio beeps once.
6. Repeat the steps for each pushbutton.
See Radio(s) on page 4‑81.
Setting the Clock
To set the clock:
1. Press and hold H until the correct hour displays.
2. Press and hold M until the correct minute displays.
See Setting the Clock on page 4‑80.
Satellite Radio
XM is a satellite radio service that is based in the
48 contiguous United States and 10 Canadian
provinces. XM satellite radio has a wide variety
of programming and commercial-free music,
coast-to-coast, and in digital-quality sound.
A fee is required to receive the XM service.
For more information, refer to:
.www.xmradio.com or call 1-800-929-2100 (U.S.)
.www.xmradio.ca or call 1-877-438-9677 (Canada)
See “XM Satellite Radio Service” underRadio(s)
on
page 4‑81.
1-17
Page 24 of 472
Portable Audio Devices
This vehicle may have an auxiliary input jack, located
on the audio faceplate. External devices such as iPod®,
MP3 players, etc. can be connected to the auxiliary
input jack using a 3.5 mm (1/8 in) input jack cable.
See “Using the Auxiliary Input Jack” underRadio(s)
on
page 4‑81.
Steering Wheel Controls
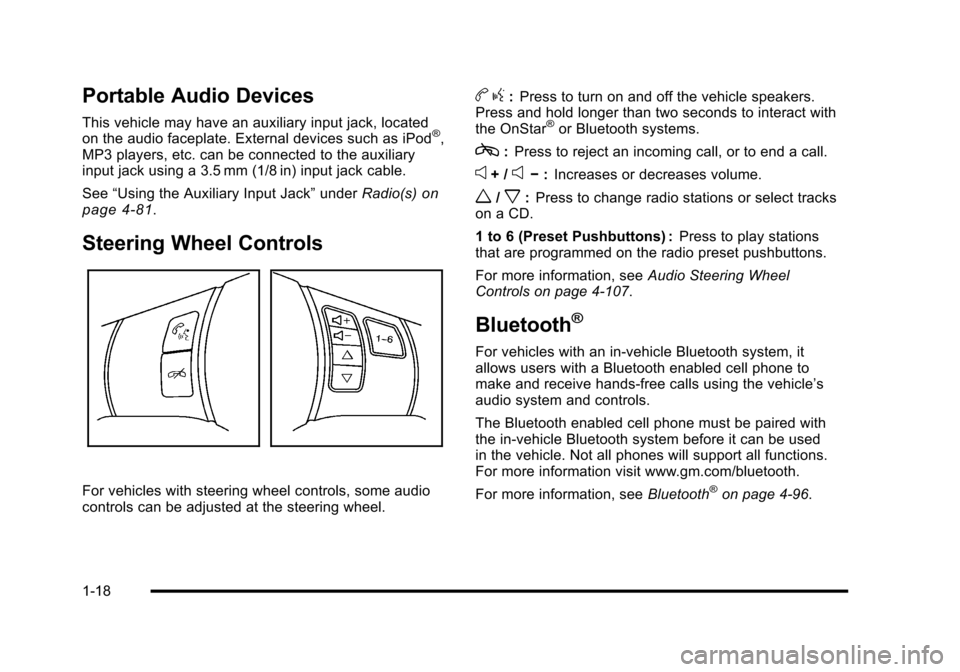
For vehicles with steering wheel controls, some audio
controls can be adjusted at the steering wheel.
b g:Press to turn on and off the vehicle speakers.
Press and hold longer than two seconds to interact with
the OnStar
®or Bluetooth systems.
c: Press to reject an incoming call, or to end a call.
e+ /e− :Increases or decreases volume.
w/x:Press to change radio stations or select tracks
on a CD.
1 to 6 (Preset Pushbuttons) : Press to play stations
that are programmed on the radio preset pushbuttons.
For more information, see Audio Steering Wheel
Controls on page 4‑107.
Bluetooth®
For vehicles with an in-vehicle Bluetooth system, it
allows users with a Bluetooth enabled cell phone to
make and receive hands-free calls using the vehicle’s
audio system and controls.
The Bluetooth enabled cell phone must be paired with
the in-vehicle Bluetooth system before it can be used
in the vehicle. Not all phones will support all functions.
For more information visit www.gm.com/bluetooth.
For more information, see Bluetooth
®on page 4‑96.
1-18
Page 33 of 472

Location information about the vehicle is only available
if the GPS satellite signals are unobstructed and
available.
The vehicle must have a working electrical system,
including adequate battery power, for the OnStar
equipment to operate. There are other problems OnStar
cannot control that may prevent OnStar from providing
OnStar service at any particular time or place. Some
examples are damage to important parts of the vehicle
in a crash, hills, tall buildings, tunnels, weather or
wireless phone network congestion.
OnStar Steering Wheel Controls
This vehicle may have a Talk/Mute button that can
be used to interact with OnStar hands-free calling.
See Audio Steering Wheel Controls
on page 4‑107for
more information.
On some vehicles, the mute button can be used to dial
numbers into voice mail systems, or to dial phone
extensions. See the OnStar Owner's Guide for more
information.
Your Responsibility
Increase the volume of the radio if the OnStar advisor
cannot be heard.
If the light next to the OnStar buttons is red, the system
may not be functioning properly. Press
Qand request a
vehicle diagnostic. If the light appears clear (no light is
appearing), your OnStar subscription has expired and
all services have been deactivated. Press
Qto confirm
that the OnStar equipment is active.
1-27
Page 101 of 472
Keyless Access System
SeeRadio Frequency Statementon page 8‑20for information regarding Part 15 of the Federal
Communications Commission (FCC) Rules and
RSS-210/211 of Industry Canada.
Changes or modifications to this system by other than
an authorized service facility could void authorization to
use this equipment.
If there is a decrease in the RKE operating range,
try this:
.Check the distance. The transmitter may be too
far from the vehicle. Stand closer during rainy or
snowy weather.
.Check the location. Other vehicles or objects may
be blocking the signal. Take a few steps to the left
or right, hold the transmitter higher, and try again.
.Check the transmitter's battery. See “Battery
Replacement” later in this section.
.If the transmitter is still not working correctly, see
your dealer/retailer or a qualified technician for
service.
Keyless Access System Operation
The Keyless Access System transmitter functions work
up to 30 m (100 feet) away from the vehicle.
Keyless Unlocking
Press the door handle sensor to unlock and open the
doors if the keyless access transmitter is within range.
See Door Locks
on page 3‑10and“Passive Door
Unlock” underDIC Vehicle Personalizationon
page 4‑71for additional information.
Keyless Locking
The doors lock after several seconds if all doors are
closed and at least one keyless access transmitter
has been removed from the interior of the vehicle.
To customize whether the doors automatically lock
when exiting the vehicle, see “Passive Door Locking”
under DIC Vehicle Personalization
on page 4‑71for
additional information.
3-5
Page 116 of 472
Testing the Alarm
To test the system: 1. Make sure the trunk lid/hatch is latched.
2. Lower the window on the driver door.
3. Manually arm the system.
4. Close the doors and wait 30 seconds.
5. Reach through the open window and manually pull the release lever on the floor.
6. Press the unlock button on the transmitter to turn off the alarm.
If the alarm does not sound, check to see if the horn
works. The horn fuse may be blown. See Fuses and
Circuit Breakers
on page 6‑101. If the horn works, but
the alarm does not go off, see your dealer/retailer.
Disarming the System
Press the unlock button on the keyless access
transmitter or squeeze the door handle sensor while
the transmitter is near the vehicle to unlock a door.
Unlocking a door any other way sets off the alarm.
If the alarm sounds, press the unlock button on the
keyless access transmitter to disarm it.
Do not leave the key or device that disarms or
deactivates the theft deterrent system in the vehicle.
Immobilizer
See Radio Frequency Statementon page 8‑20for information regarding Part 15 of the Federal
Communications Commission (FCC) Rules and
RSS-210/211 of Industry Canada.
Immobilizer Operation
The vehicle has a passive theft-deterrent system.
The system is automatically armed when the ignition is
turned off.
The immobilization system is disarmed when the
ignition is turned to OFF/ACCESSORY or START and
a valid transmitter is found in the vehicle.
You do not have to manually arm or disarm the system.
The security light comes on if there is a problem with
arming or disarming the theft-deterrent system.
The system has one or more keyless access
transmitters that are matched to an immobilizer control
unit in the vehicle. Only a correctly matched keyless
access transmitter starts the vehicle. The vehicle may
not start if the keyless access transmitter is damaged.
If the engine does not start and the security light comes
on, there may be a problem with the immobilizer
system. Press the START button again.
3-20
Page 119 of 472
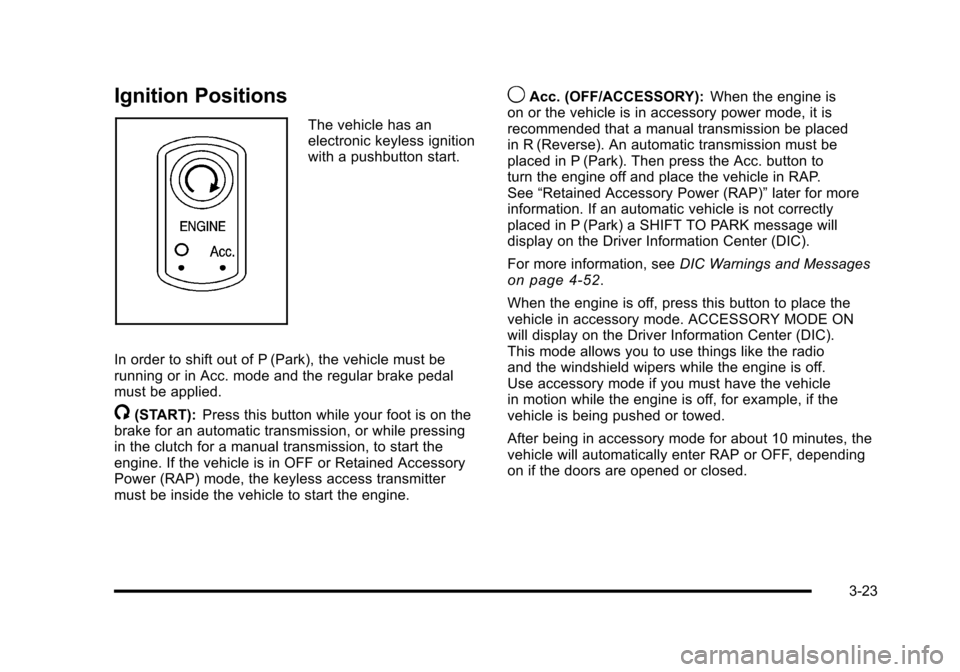
Ignition Positions
The vehicle has an
electronic keyless ignition
with a pushbutton start.
In order to shift out of P (Park), the vehicle must be
running or in Acc. mode and the regular brake pedal
must be applied.
/(START): Press this button while your foot is on the
brake for an automatic transmission, or while pressing
in the clutch for a manual transmission, to start the
engine. If the vehicle is in OFF or Retained Accessory
Power (RAP) mode, the keyless access transmitter
must be inside the vehicle to start the engine.
9Acc. (OFF/ACCESSORY): When the engine is
on or the vehicle is in accessory power mode, it is
recommended that a manual transmission be placed
in R (Reverse). An automatic transmission must be
placed in P (Park). Then press the Acc. button to
turn the engine off and place the vehicle in RAP.
See “Retained Accessory Power (RAP)” later for more
information. If an automatic vehicle is not correctly
placed in P (Park) a SHIFT TO PARK message will
display on the Driver Information Center (DIC).
For more information, see DIC Warnings and Messages
on page 4‑52.
When the engine is off, press this button to place the
vehicle in accessory mode. ACCESSORY MODE ON
will display on the Driver Information Center (DIC).
This mode allows you to use things like the radio
and the windshield wipers while the engine is off.
Use accessory mode if you must have the vehicle
in motion while the engine is off, for example, if the
vehicle is being pushed or towed.
After being in accessory mode for about 10 minutes, the
vehicle will automatically enter RAP or OFF, depending
on if the doors are opened or closed.
3-23