Page 17 of 84

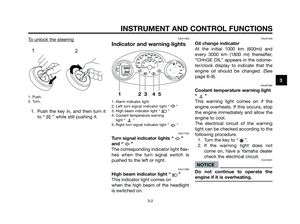
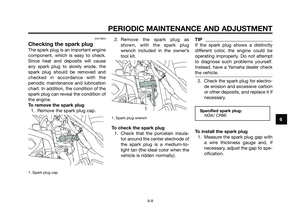
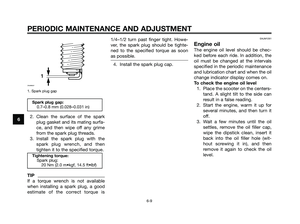
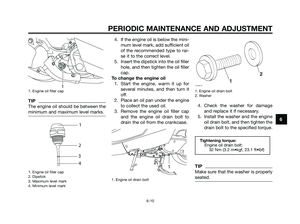
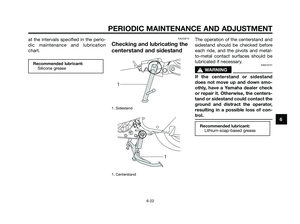
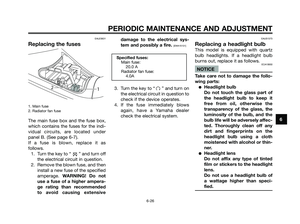
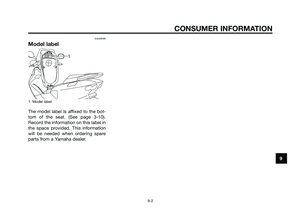
To unlock the steering
1. Push.
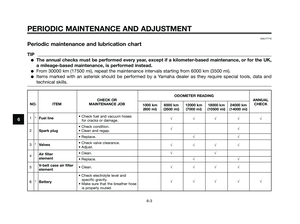
2. Turn.
1. Push the key in, and then turn it
to “ ” while still pushing it.
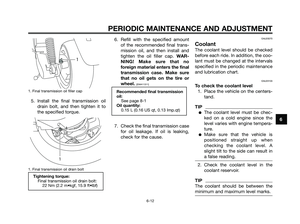
EAU11003
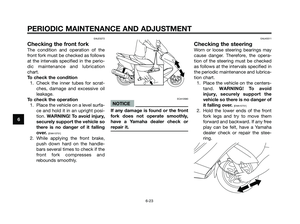
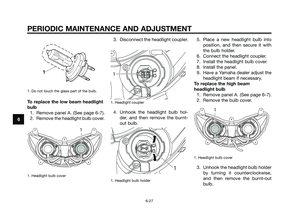
Indicator and warning lights
1. Alarm indicator light
2. Left turn signal indicator light “ ”
3. High beam indicator light “ ”
4. Coolant temperature warning
light “ ”
5. Right turn signal indicator light “ ”
EAU11030
Turn signal indicator lights “ ”
and “ ”
The corresponding indicator light flas-
hes when the turn signal switch is
pushed to the left or right.
EAU11080
High beam indicator light “ ”
This indicator light comes on
when the high beam of the headlight
is switched on.
EAUS1450
Oil change indicator
At the initial 1000 km (600mi) and
every 3000 km (1800 mi) thereafter,
“CHnGE OIL” appears in the odome-
ter/clock display to indicate that the
engine oil should be changed. (See
page 6-9).
EAUM1082
Coolant temperature warning light
“”
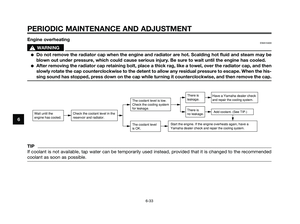
This warning light comes on if the
engine overheats. If this occurs, stop
the engine immediately and allow the
engine to cool.
The electrical circuit of the warning
light can be checked according to the
following procedure.
1. Turn the key to “ ”.
2. If the warning light does not
come on, have a Yamaha dealer
check the electrical circuit.
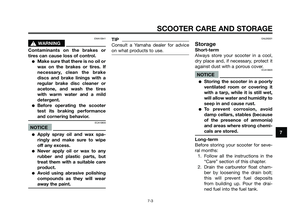
ECA10021
NOTICE
Do not continue to operate the
engine if it is overheating.
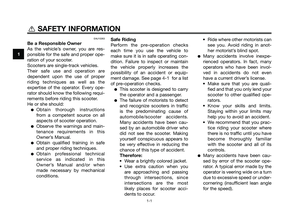
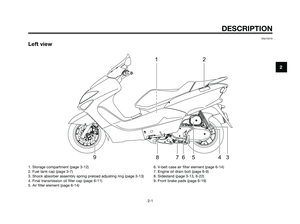
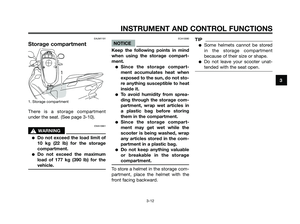
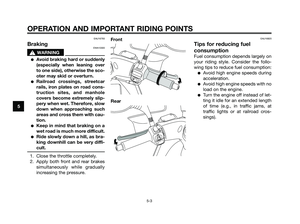
Fuel
Battery
TOTALTRIP
123 45
1
2
INSTRUMENT AND CONTROL FUNCTIONS
3-2
3
5D8-F8199-E1.QXD 10/7/08 07:39 Página 17
Page 18 of 84
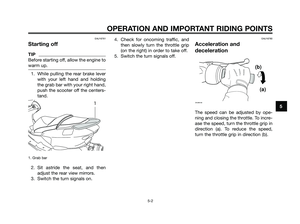
 automati-
cally switch on or off according to
the coolant temperature in the
radiator.
●If the engine overheats, see page
6-32 for fu")
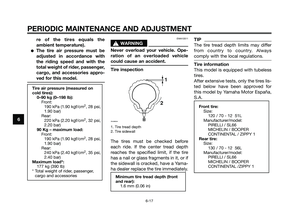
TIP
●For radiator-fan-equipped vehi-
cles, the radiator fan(s) automati-
cally switch on or off according to
the coolant temperature in the
radiator.
●If the engine overheats, see page
6-32 for further instructions.
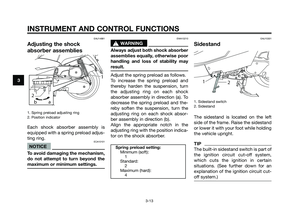
EAUS1362
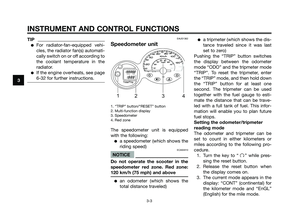
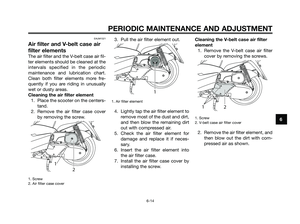
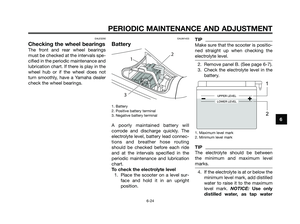
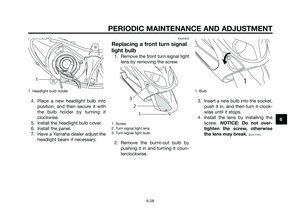
Speedometer unit
1. “TRIP” button/“RESET” button
2. Multi-function display
3. Speedometer
4. Red zone
The speedometer unit is equipped
with the following:
●a speedometer (which shows the
riding speed)
ECAS0010
NOTICE
Do not operate the scooter in the
speedometer red zone. Red zone:
120 km/h (75 mph) and above
●an odometer (which shows the
total distance traveled)
●a tripmeter (which shows the dis-
tance traveled since it was last
set to zero)
Pushing the “TRIP” button switches
the display between the odometer
mode “ODO” and the tripmeter mode
“TRIP”. To reset the tripmeter, enter
the “TRIP” mode, and then hold down
the “TRIP” button for at least one
second. The tripmeter can be used
together with the fuel gauge to esti-
mate the distance that can be trave-
led with a full tank of fuel. This infor-
mation will enable you to plan future
fuel stops.
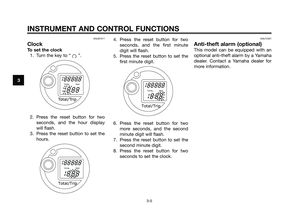
Setting the odometer/tripmeter
reading mode
The odometer and tripmeter can be
set to count in either kilometers or
miles according to the following pro-
cedure.
1. Turn the key to “ ” while pres-
sing the reset button.
2. Release the reset button when
the display comes on.
3. The current mode appears in the
display: “CONT” (continental) for
the kilometer mode and “EnGL”
(English) for the mile mode.
TOTALTRIP
1
2
34
INSTRUMENT AND CONTROL FUNCTIONS
3-3
3
5D8-F8199-E1.QXD 10/7/08 07:39 Página 18
Page 19 of 84

4. Press the reset button to switch
the mode.
5. Press the reset button for two
seconds to confirm the setting.
TIP
●The odometer/tripmeter reading
mode can be changed any num-
ber of times while the odometer
reading is below 10 (kilometers or
miles), but it cannot be changed
anymore after the reading has
reached 10 (kilometers or miles).
●Switching between the kilometer
mode and the mile mode does
not change or convert the current
odometer/tripmeter reading.
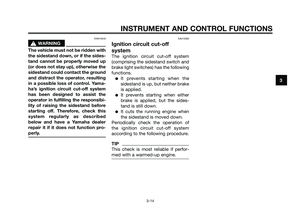
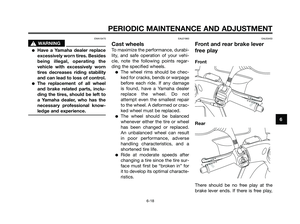
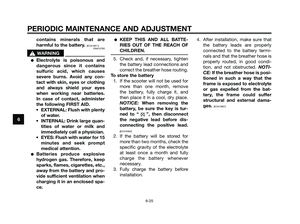
EAUS1460
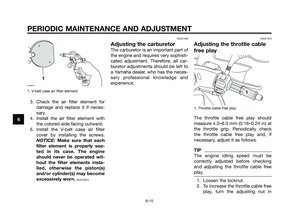
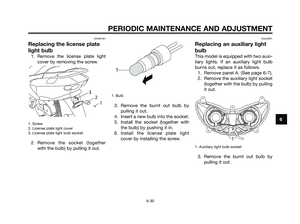
Fuel and battery voltage
gauge
1. Fuel gauge
2. Battery voltage
When the key is turned to “ ”, the
battery voltage is indicated
for two seconds, and then the amount
of fuel in the fuel tank is indicated.
NOTICE: If the needle drops to the
“10V” (low) mark, have a Yamaha
dealer check the battery.
[ECAS0030]
TIP
●The needle moves towards “E”
(empty) as the fuel level decrea-
ses.
●When the needle reaches “E”,
refuel as soon as possible.Fuel
Battery
1
2
INSTRUMENT AND CONTROL FUNCTIONS
3-4
3
5D8-F8199-E1.QXD 10/7/08 07:39 Página 19
Page 20 of 84
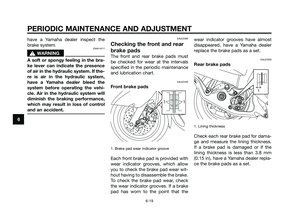
EAUS1211
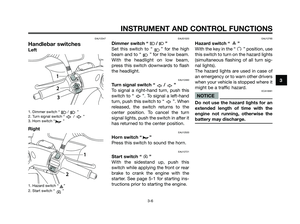
Clock
To set the clock
1. Turn the key to “ ”.
2. Press the reset button for two
seconds, and the hour display
will flash.
3. Press the reset button to set the
hours.4. Press the reset button for two
seconds, and the first minute
digit will flash.
5. Press the reset button to set the
first minute digit.
6. Press the reset button for two
more seconds, and the second
minute digit will flash.
7. Press the reset button to set the
second minute digit.
8. Press the reset button for two
seconds to set the clock.
EAU12331
Anti-theft alarm (optional)
This model can be equipped with an
optional anti-theft alarm by a Yamaha
dealer. Contact a Yamaha dealer for
more information.
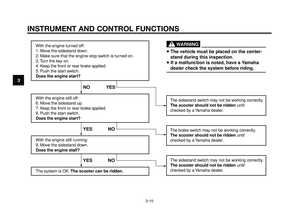
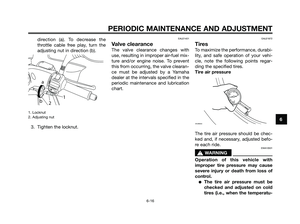
Total/Trip
TOTAL TRIP
Total/Trip
TOTAL TRIP
Total/Trip
TOTAL TRIP
INSTRUMENT AND CONTROL FUNCTIONS
3-5
3
5D8-F8199-E1.QXD 10/7/08 07:39 Página 20
Page 21 of 84

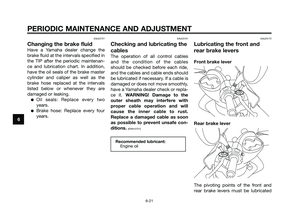
EAU12347
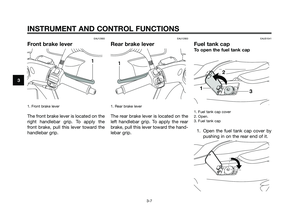
Handlebar switches
Left
1. Dimmer switch “ / ”
2. Turn signal switch “ / ”
3. Horn switch “ ”
Right
1. Hazard switch “ ”
2. Start switch “ ”
EAUS1020
Dimmer switch “ / ”
Set this switch to “ ” for the high
beam and to “ ” for the low beam.
With the headlight on low beam,
press this switch downwards to flash
the headlight.
EAU12460
Turn signal switch “ / ”
To signal a right-hand turn, push this
switch to “ ”. To signal a left-hand
turn, push this switch to “ ”. When
released, the switch returns to the
center position. To cancel the turn
signal lights, push the switch in after it
has returned to the center position.
EAU12500
Horn switch “ ”
Press this switch to sound the horn.
EAU12721
Start switch “ ”
With the sidestand up, push this
switch while applying the front or rear
brake to crank the engine with the
starter. See page 5-1 for starting ins-
tructions prior to starting the engine.
EAU12765
Hazard switch “ ”
With the key in the “ ” position, use
this switch to turn on the hazard lights
(simultaneous flashing of all turn sig-
nal lights).
The hazard lights are used in case of
an emergency or to warn other drivers
when your vehicle is stopped where it
might be a traffic hazard.
ECA10061
NOTICE
Do not use the hazard lights for an
extended length of time with the
engine not running, otherwise the
battery may discharge.
11
22
11
22
33
INSTRUMENT AND CONTROL FUNCTIONS
3-6
3
5D8-F8199-E1.QXD 10/7/08 07:39 Página 21
Page 22 of 84
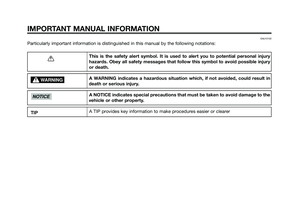
EAU12900
Front brake lever
1. Front brake lever
The front brake lever is located on the
right handlebar grip. To apply the
front brake, pull this lever toward the
handlebar grip.
EAU12950
Rear brake lever
1. Rear brake lever
The rear brake lever is located on the
left handlebar grip. To apply the rear
brake, pull this lever toward the hand-
lebar grip.
EAUS1041
Fuel tank cap
To open the fuel tank cap
1. Fuel tank cap cover
2. Open.
3. Fuel tank cap
1. Open the fuel tank cap cover by
pushing in on the rear end of it.
13
2
1111
INSTRUMENT AND CONTROL FUNCTIONS
3-7
3
5D8-F8199-E1.QXD 10/7/08 07:39 Página 22
Page 23 of 84

2. Insert the key in the lock and turn
it clockwise.
To close the fuel tank cap
1. Align the match marks, and then
push the fuel tank cap into the
original position.
2. Turn the key counterclockwise
and remove it.
3. Close the fuel tank cover.
EWA11091
s s
WARNING
Make sure that the fuel tank cap is
properly closed after filling fuel.
Leaking fuel is a fire hazard.
EAU13221
Fuel
Make sure there is sufficient gasoline
in the tank.
EWA10881
s s
WARNING
Gasoline and gasoline vapors are
extremely flammable. To avoid fires
and explosions and to reduce the
risk of injury when refueling, follow
these instructions.
1. Before refueling, turn off the engi-
ne and be sure that no one is sit-
ting on the vehicle. Never refuel
while smoking, or while in the
vicinity of sparks, open flames, or
other sources of ignition such as
the pilot lights of water heaters
and clothes dryers.
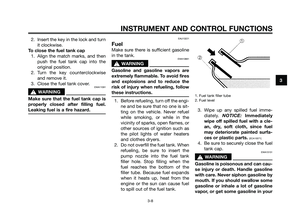
2. Do not overfill the fuel tank. When
refueling, be sure to insert the
pump nozzle into the fuel tank
filler hole. Stop filling when the
fuel reaches the bottom of the
filler tube. Because fuel expands
when it heats up, heat from the
engine or the sun can cause fuel
to spill out of the fuel tank.
1. Fuel tank filler tube
2. Fuel level
3. Wipe up any spilled fuel imme-
diately. NOTICE: Immediately
wipe off spilled fuel with a cle-
an, dry, soft cloth, since fuel
may deteriorate painted surfa-
ces or plastic parts.
[ECA10071]
4. Be sure to securely close the fuel
tank cap.
EWA15151
s s
WARNING
Gasoline is poisonous and can cau-
se injury or death. Handle gasoline
with care. Never siphon gasoline by
mouth. If you should swallow some
gasoline or inhale a lot of gasoline
vapor, or get some gasoline in your
INSTRUMENT AND CONTROL FUNCTIONS
3-8
3
5D8-F8199-E1.QXD 10/7/08 07:39 Página 23
Page 24 of 84

eyes, see your doctor immediately.
If gasoline spills on your skin, wash
with soap and water. If gasoline
spills on your clothing, change your
clothes.
EAU13320
ECA11400
NOTICE
Use only unleaded gasoline. The
use of leaded gasoline will cause
severe damage to internal engine
parts, such as the valves and piston
rings, as well as to the exhaust sys-
tem.
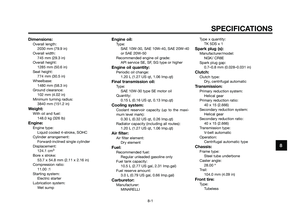
Your Yamaha engine has been desig-
ned to use regular unleaded gasoline
with a research octane number of 91
or higher. If knocking (or pinging)
occurs, use a gasoline of a different
brand or premium unleaded fuel. Use
of unleaded fuel will extend spark
plug life and reduce maintenance
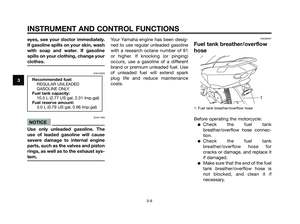
costs.EAU39451
Fuel tank breather/overflow
hose
1. Fuel tank breather/overflow hose
Before operating the motorcycle:
●Check the fuel tank
breather/overflow hose connec-
tion.
●Check the fuel tank
breather/overflow hose for
cracks or damage, and replace it
if damaged.
●Make sure that the end of the fuel
tank breather/overflow hose is
not blocked, and clean it if
necessary.
1
Recommended fuel:
REGULAR UNLEADED
GASOLINE ONLY
Fuel tank capacity:
10.5 L (2.77 US gal, 2.31 Imp.gal)
Fuel reserve amount:
3.0 L (0.79 US gal, 0.66 Imp.gal)
INSTRUMENT AND CONTROL FUNCTIONS
3-9
3
5D8-F8199-E1.QXD 10/7/08 07:39 Página 24