Page 57 of 224
 Owners Manual Lights and Visibility
56
Windshield wiper and wash systemWindshield wiper You can operate the windscreen wipers and automatic wipe/wash using the windscreen wiper lever.The windscreen wiper lever
�")
Lights and Visibility
56
Windshield wiper and wash systemWindshield wiper You can operate the windscreen wipers and automatic wipe/wash using the windscreen wiper lever.The windscreen wiper lever
⇒
fig. 55
has the following positions:
Finger-operated wiping – If you wish to wipe the windscreen only
briefly
, push the lever into the
sprung position .
Intermittent wiping – Position the lever up into position . – Set with the switch the desired break between the individual wiper
strokes
Slow wipe – Position the lever up into position .
Fast wipe – Position the lever up into position . Automatic wipe/wash for windscreen – Pull the lever towards the steering wheel into the spring-tensioned
position , the windscreen wiper and wash system will operate immediately.
– Release the lever. The windscreen wash system stops and the wiper
continues for another 1 - 3 wiper strokes (depending on the period of spraying of the windscreen).
Rain sensor* – Move the lever into position . – You can set the sensitivity of the
sensor individually with switch .
– After switching off the ignition, you must then once again activate the
sensor by moving the lever into po
sition , and then back into posi-
tion .
Wiping the rear window pane* – Push the lever away from the steering wheel into position - the
widescreen wiper will operate every 6 seconds.
Automatic wipe/wash for the rear window pane* – Push the lever away from the steering wheel into the spring-tensioned
position , the windscreen wiper and wash system will operate. As long as you hold the lever in this position, the wiper and the wash system operate - spring-tensioned position.
– Letting go of the lever will cause th
e windscreen wash system to stop
and the wiper to continue for anothe
r 1 - 3 wiper strokes (depending
on the period of spraying of the windscreen).
The lever will stay in
position after releasing it
.
Fig. 55 Windscreen wiper lever
A4
A1
AA
A2
A3
A5
A1
AA
A0
A1
A6
A7
A6
s2g8.b.book Page 56 Tuesday, April 7, 2009 8:53 AM
Page 58 of 224
 Owners Manual Lights and Visibility
57
Using the system
Safety
Driving Tips
General Maintenance
Breakdown assistance
Technical Data
Switching windscreen wipers off – Move the lever back into its home position .T")
Lights and Visibility
57
Using the system
Safety
Driving Tips
General Maintenance
Breakdown assistance
Technical Data
Switching windscreen wipers off – Move the lever back into its home position .The windscreen wipers and the windscreen washer system only operate if the igni- tion is switched on. The rain sensor* automatically regulates
the break between the individual wiper
strokes depending on the intensity of the rain. The windscreen washer nozzles are heated* when the ignition is switched on.Top up with wash liquid
⇒page 172.
WARNING
•
Properly maintained windscreen wiper
blades are essential for clear visi-
bility and safe driving
⇒page 57, “Replacing wiper blades for the wind-
screen wipers”.•
Do not use the windscreen washer sy
stem at low temperatures, without
heating the windscreen beforehand. Otherwise the window cleaner could freeze on the windscreen and re
strict the view to the front.
•
The rain sensor only operates as a
support. The driver is not released
from the responsibility to set the function of the windscreen wipers manu- ally depending on the visibility conditions.
Caution
In frosty weather, please first of all check whether the windscreen wiper blades are not frozen to the windscreen before swit
ching them on. Switching on windscreen
wipers when the blades are frozen to the windscreen may result in damage both to the blades and the motor of the windscreen wipers!
Replacing wiper blades for the windscreen wipersTaking off the wiper blade – Fold windscreen wiper arm out from
the windscreen and position the
wiper blade at right angles to the wiper arm
⇒
.
– Press the securing spring in the direction of arrow and press the
wiper blade at the same time to th
e windscreen - Warning, danger
of breaking the windscreen.
⇒
fig. 56
⇒
.
Attaching a wiper blade – Clip the securing spring until it is
heard to lock in the windscreen wiper
arm.
– Check whether the wiper blade is correctly attached.Wiper blades in proper condition are esse
ntial to obtain good visibility. Wiper
blades should not be allowed to become
dirtied by dust, insect remains and
preserving wax. Juddering or smearing of the wiper blades
could then be due to wax residues left
on the windscreen by vehicle washing in
automatic vehicle wash systems. It is
therefore important to
degrease
the lips of the wiper blades after every pass
through an
automatic vehicle wash system
.
A0
Fig. 56 Wiper blade for the windscreen wiper
AA
AB
s2g8.b.book Page 57 Tuesday, April 7, 2009 8:53 AM
Page 59 of 224
 Owners Manual Lights and Visibility
58
WARNING
•
If the windscreen wipers are handled carelessly, there is a risk of damage
to the windscreen.•
You should clean the wiper blades regularly with a windscreen cl")
Lights and Visibility
58
WARNING
•
If the windscreen wipers are handled carelessly, there is a risk of damage
to the windscreen.•
You should clean the wiper blades regularly with a windscreen cleaner in
order to avoid any smears. Clean a wiper bl
ade with a sponge or cloth if it is
very dirty, for example
from insect residues.
•
Replace the wiper blades once or twice a year for safety reasons. The
wiper blades are available from specialist garages.Replacing the wiper blade for rear window (Octavia)*Taking off the wiper blade – Fold the window wiper arm away
⇒
fig. 57
.
– Hold the window wiper arm at the top end with one hand.– Take hold of the wiper blade in the middle with the other hand and
take off the wiper blade by mo
ving in direction of arrow .
Attaching a wiper blade – Interlock the wiper blade into the window wiper arm - see arrow .
– Check whether the wiper blade is correctly attached.The same remarks apply here as for
⇒page 57, “Replacing wi
per blades for the
windscreen wipers”.Rear-view mirrorManual dimming interior rear-view mirrorAdjust the rear mirror before commencin
g to drive so that there is a clear
view to the rear. Basic setting – Pull the lever on the bottom edge of the mirror forward. Dimming mirror – Pull the lever on the bottom edge of the mirror back.Exterior mirror
Fig. 57 Wiper blade for rear window
AB
AA
Fig. 58 Inner part of door: Rotary knob
s2g8.b.book Page 58 Tuesday, April 7, 2009 8:53 AM
Page 60 of 224
 Owners Manual Lights and Visibility
59
Using the system
Safety
Driving Tips
General Maintenance
Breakdown assistance
Technical Data
The heating of the external mirror functions only when ignition is switched on.El")
Lights and Visibility
59
Using the system
Safety
Driving Tips
General Maintenance
Breakdown assistance
Technical Data
The heating of the external mirror functions only when ignition is switched on.Electrically adjustable exterior mirrors* Carry out the adjustment at the set button
next to the inner door handle when the
ignition is switched on
⇒page 58, fig. 58
.
Position
Heating of the exterior mirrors (only on vehicles with electrically operated power windows). Position L Operating the left and right mirrors at the same time (valid for vehicles with electri- cally operated power windows). Operating the left mirror (valid for vehicles without electrically operated power windows). Position R Operating the right mirror.
WARNING
•
Convex (curved outward) or spherical (differently curved) exterior
mirrors increase the vision field. They do, however, make objects appear smaller in the mirror. These mirrors are only of limited use, therefore, for estimating distances to the following vehicles.•
Use whenever possible the interior rear mirror, for estimating the
distances to the following vehicles.
Note
•
Do not touch the surfaces of the exterior mirrors if the exterior mirror heater is
switched on.•
You can set the exterior mirrors by hand, if
the power setting function fails at any
time by pressing on the edge of the mirror surface.
•
Contact your specialist garage if a fault exists with the power setting of the exte-
rior mirrors.
s2g8.b.book Page 59 Tuesday, April 7, 2009 8:53 AM
Page 61 of 224
 Owners Manual Seats and Storage
60
Seats and StorageFront seatsBasic informationThe front seats have a wide range of different settings and can thus be matched to the physical characteristics of the driver and fro")
Seats and Storage
60
Seats and StorageFront seatsBasic informationThe front seats have a wide range of different settings and can thus be matched to the physical characteristics of the driver and front passenger. Correct adjustment of the seats is particularly important for:•
safely and quickly reaching the controls;
•
a relaxed, fatigue-free body position;
•
achieving the maximum protection offere
d by the seat belts and the airbag
system.
WARNING
•
Never transport more occupants than the maximum seating in the
vehicle.•
Each occupant must correctly fasten
the seat belt belonging to the seat.
Children must be fastened
⇒page 123, “Transporting children safely” with
a suitable restraint system.•
The front seats and the head restraints must always be adjusted to match
the body size of the seat occupant as well as the seat belts must always be correctly fastened in order to provide an optimal protection for you and your occupants.•
Always keep your feet in the footwel
l when the vehicle is being driven -
never place your feet on the instrument panel, out of the window or on the surfaces of the seats. This is particularly important for the front seat passenger. You will be exposed to increased risk of injury if it becomes necessary to apply the brake or in the event of an accident. If an airbag is deployed, you may suffer fatal injuries
when adopting an incorrect seated
position!•
It is important for the driver and front passenger to maintain a distance
of at least 25 cm from the steering wheel
or dash panel. Not maintaining this
minimum distance will mean that the airbag system will not be able to prop- erly protect you - hazard! The front
seats and the head restraints must
always also be correctly adjusted to match the body size of the occupant.•
Ensure that there are no objects in
the footwell as any objects may get
behind the pedals during a driving or
braking manoeuvre. You would then
no longer be able to operate the clutch, to brake or accelerate.Adjusting the front seatsAdjusting a seat in a forward/back direction – Pull the lever
⇒
fig. 59
up and push the seat into the desired posi-
tion.
– Release the lever and push the seat further until the lock is heard
to engage.
Adjusting height of seat* – Lift the seat if required by pulling or pumping lever upwards.
WARNING (continued)
Fig. 59 Controls at seat
A1
A1
A2
s2g8.b.book Page 60 Tuesday, April 7, 2009 8:53 AM
Page 62 of 224
 Owners Manual Seats and Storage
61
Using the system
Safety
Driving Tips
General Maintenance
Breakdown assistance
Technical Data
– Lower the seat if required by pushing or pumping lever down-
wards.
Adjust the")
Seats and Storage
61
Using the system
Safety
Driving Tips
General Maintenance
Breakdown assistance
Technical Data
– Lower the seat if required by pushing or pumping lever down-
wards.
Adjust the angle of the seat backrest – Relieve any pressure on the seat backrest (do not lean on it) and turn
the handwheel
⇒
page 60, fig. 59
to adjust the desired angle of the
backrest.
Adjusting lumbar support* – Turn the wheel until you have set the most comfortable curvature
of the seat upholstery in the area of your spine.
The driver's seat should be adjusted in
such a way that the pedals can be fully
pressed to the floor with slightly bent legs. The seat backrest on the driver's seat sh
ould be adjusted in such a way that the
upper point of the steering wheel can be
easily reached with slightly bent arms.
WARNING
•
Only adjust the driver seat when the ve
hicle is stationary - risk of injury!
•
Take care when adjusting the seat! Adjusting the seat without care can
lead to bruises or injuries.•
The seat backrests must not be angled too far back when driving other-
wise this will affect proper operation of the seat belts and of the airbag system - risk of injury!
Adjusting front seats electrically*Adjusting seatsAdjusting seat – Adopt the correct seated position
⇒
page 60.
– Press the switch or in the direction of the desired setting
⇒
fig. 60
.
Adjusting lumbar support – Adjust the lumbar support mechanically by turning the rotary knob
.
Switch is operated in order to move the seat up/down and forward/back, while switch is operated in order to move the seat backrest forward or back.
WARNING
•
Only adjust the driver seat when the vehicle is stationary - risk of injury!
•
Caution when adjusting the seat! You ma
y suffer injuries or bruises as a
result of adjusting the seat without paying proper attention.
A2
A3A4
Fig. 60 Side view: Controls for adjusting the seat
AA
AB
ACAAAB
s2g8.b.book Page 61 Tuesday, April 7, 2009 8:53 AM
Page 63 of 224
 Owners Manual Seats and Storage
62
•
In view of the fact that the seats can
also be adjusted when the ignition is
switched off (even when ignition key withdrawn), you should never leave children unattended in")
Seats and Storage
62
•
In view of the fact that the seats can
also be adjusted when the ignition is
switched off (even when ignition key withdrawn), you should never leave children unattended in the vehicle.•
The seat backrests must not be angl
ed too far back when driving other-
wise this will affect proper operation of the seat belts and of the airbag system - risk of injury!
Note
If the movement of the seat is inadverten
tly interrupted during an adjustment, once
again press the switch in the appropriate
direction and continue with the adjust-
ment of the seat to the end.Storing settingStoring seat and exterior mirror settings for driving forward – Switch on the ignition. – Adjust the seat
⇒
page 61.
– Adjust both exterior mirrors
⇒
page 58.
– Press one of the memory buttons and hold the button pressed for
about 3 seconds until an audible sign
al confirms that the setting has
been stored. The setting of this button was stored.
Storing exterior mirror setting for reversing* – Switch on the ignition. – Turn the exterior mirror control to position
⇒
page 58.
– Engage the reverse gear.– Move the right exterior mirror into the desired position
⇒
page 58.
– Press one of the memory buttons and hold the button pressed for
about 3 seconds until an audible sign
al confirms that the setting has
been stored. The setting of the selected button was stored.
The memory system can be
deactivated at any time with the button . The seat
and the exterior mirrors can also be manually operated. Memory buttons Memory for the seat offers the possibility to store the individual driver seat and external mirror position. An individual position can be allocated to each of the three memory buttons
⇒fig. 61
, that is three in total. By pressing the appropriate
memory button the seat and external mi
rror will automatica
lly move into the
position allocated to this button
⇒page 63.
Note
•
When storing settings with the memory buttons, we recommend that you begin
with the front button and assign a memory button to each additional driver.•
Each new setting stored with the same
button erases the previous setting.
•
Each time you store the seat and exterior mirror settings for driving forward you
also have to re-store the individual settin
g of the exterior mirror on the passenger
side for reversing.
WARNING (continued)
Fig. 61 Driver seat: Memory buttons and the button MEM OFF
ADAD
AE
ADAD
s2g8.b.book Page 62 Tuesday, April 7, 2009 8:53 AM
Page 64 of 224
 Owners Manual Seats and Storage
63
Using the system
Safety
Driving Tips
General Maintenance
Breakdown assistance
Technical Data
Assigning radio remote control* to the memory buttonsAfter storing the settings of the")
Seats and Storage
63
Using the system
Safety
Driving Tips
General Maintenance
Breakdown assistance
Technical Data
Assigning radio remote control* to the memory buttonsAfter storing the settings of the seat
and exterior mirrors, you have 10
seconds in order to assign the radio remote control to the appropriate memory button. – Withdraw the ignition key. – Press the release button
⇒
page 42 and hold it pressed for 1 second
until an audible signal confirms that the setting has been stored. The setting is stored with the memory button which you have selected.
If you wish to be able to retrieve the settings which are stored in the memory by also using the radio remote control, you have
to assign the radio remote control to a
memory button in each case. If you wish, you can obtain an additional re
mote control key from a specialist garage
and then assign the remote control key to another memory button.
Note
•
If the radio remote control had previous
ly been assigned to another memory
button, this setting is then erased by the new assignment.•
If you assign the radio remote control
to a memory button which has already
been assigned to a radio remote control,
the old assignment is also replaced by a
new assignment in this case.•
The assignment of the radio remote control to a memory button is retained,
however, after reassigning the seats and exterior mirrors.Retrieving seat and exterior mirror settings for driving forward You can retrieve the stored settings
either with the memory button
or also with the radio remote control*.
Retrieving the settings of the seat and mirrors can only be carried out when the ignition is switched off
for safety reasons. Retrieving the
settings can be carried out in two different ways:
Retrieving settings with memory buttons –
By pressing briefly:
with the door open, operate the desired memory
button
⇒
page 62, fig. 61
with one-touch. The seat and the exte-
rior mirrors now move automatically into the stored position.
–
By pressing for a long period of time:
with the driver door open or
closed, press and hold the desired memory button until the seat and the exterior mirrors have moved into the stored position.
Retrieving settings with remote control* – If the driver door is closed and the ignition is switched off, briefly press
the unlock button of the radio remote control
⇒
page 42 and then
open the driver door.
– The seat and exterior mirrors now
move automatically into the stored
positions.
Retrieving setting of exterior mirror for reversing* – Turn the rotary knob for the exterior mirror setting into the position
⇒
page 58 before engaging the reverse gear.
Emergency Off – Press any button on the driver seat.
Note
If the memory button is pressed once again
during the automatic setting of the seat
and the exterior mirrors, the setting operation is interrupted. After repeated pressing of the same button, the setting operation is continued to the end. If one of the two remaining memory buttons is pressed, the stored setting of this button is retrieved.
AD
AD
AD
s2g8.b.book Page 63 Tuesday, April 7, 2009 8:53 AM
 1
1 2
2 3
3 4
4 5
5 6
6 7
7 8
8 9
9 10
10 11
11 12
12 13
13 14
14 15
15 16
16 17
17 18
18 19
19 20
20 21
21 22
22 23
23 24
24 25
25 26
26 27
27 28
28 29
29 30
30 31
31 32
32 33
33 34
34 35
35 36
36 37
37 38
38 39
39 40
40 41
41 42
42 43
43 44
44 45
45 46
46 47
47 48
48 49
49 50
50 51
51 52
52 53
53 54
54 55
55 56
56 57
57 58
58 59
59 60
60 61
61 62
62 63
63 64
64 65
65 66
66 67
67 68
68 69
69 70
70 71
71 72
72 73
73 74
74 75
75 76
76 77
77 78
78 79
79 80
80 81
81 82
82 83
83 84
84 85
85 86
86 87
87 88
88 89
89 90
90 91
91 92
92 93
93 94
94 95
95 96
96 97
97 98
98 99
99 100
100 101
101 102
102 103
103 104
104 105
105 106
106 107
107 108
108 109
109 110
110 111
111 112
112 113
113 114
114 115
115 116
116 117
117 118
118 119
119 120
120 121
121 122
122 123
123 124
124 125
125 126
126 127
127 128
128 129
129 130
130 131
131 132
132 133
133 134
134 135
135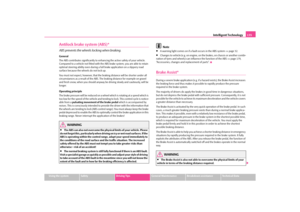 136
136 137
137 138
138 139
139 140
140 141
141 142
142 143
143 144
144 145
145 146
146 147
147 148
148 149
149 150
150 151
151 152
152 153
153 154
154 155
155 156
156 157
157 158
158 159
159 160
160 161
161 162
162 163
163 164
164 165
165 166
166 167
167 168
168 169
169 170
170 171
171 172
172 173
173 174
174 175
175 176
176 177
177 178
178 179
179 180
180 181
181 182
182 183
183 184
184 185
185 186
186 187
187 188
188 189
189 190
190 191
191 192
192 193
193 194
194 195
195 196
196 197
197 198
198 199
199 200
200 201
201 202
202 203
203 204
204 205
205 206
206 207
207 208
208 209
209 210
210 211
211 212
212 213
213 214
214 215
215 216
216 217
217 218
218 219
219 220
220 221
221 222
222 223
223