Page 177 of 224
 Owners Manual Wheels and Tyres
176
The date of manufacture
is a lso s tated on the tyre wal l (poss ibly o nl y on the
inside
of wheel):
DOT ... 50 08...
means, for example, that the tyre was manufactured")
Wheels and Tyres
176
The date of manufacture
is a lso s tated on the tyre wal l (poss ibly o nl y on the
inside
of wheel):
DOT ... 50 08...
means, for example, that the tyre was manufactured in the 50th week of the year 2008. If the
spare wheel*
differs from the tyres fitted to the vehicle (e.g. winter tyres or
low-profile tyres), the spare wheel* should only be used for a short time in the event of a puncture and when adopting an
appropriately cautious style of driving.
It should be replaced as quickl
y as possible by a normal wheel.
WARNING
•
Only use those tyres or wheel rims
which have been approved for your
model of Škoda Auto vehicle. Failure to observe this instruction will adversely affect the road safety of your vehicle - risk of accident! Approval and licencing of your vehicle on public roads may also become void as a result.•
You must on no account drive at a higher speed than is permissible for
y our t yre s - ris k of a n ac cid e n t re su lti ng fro m ty re d a m ag e a nd lo ss o f c ont rol over your vehicle.•
Tyres which are 6 years old or more should only be fitted in exceptional
cases and when adopting an appropriately cautious style of driving.•
Never fit tyres which have already been used without having adequate
knowledge of their previous history. Ty
res age even if they have not been
used at all or only very little. A spare tyre must only be used in exceptional cases and only then when adopting an appropriately cautious style of driving.•
Do not, where possible, replace indivi
dual tyres but at least replace them
on both wheels of a given axle at the same time. Always fit the tyres with the deeper tread depth to the front wheels.
For the sake of the environment
Old tyres must be disposed
of in conformity with the appropriate regulations.
Note
It is not normally possible to fit wheels
from other models of cars for technical
reasons. This may also apply in certain
circumstances to the wheels of the same
type of vehicle.Wheel boltsWheels and
wheel bolts
are matched to each other in
terms of design. Each time
you fit other wheels - e.g. light alloy wheels
or wheels with winter tyres - you must
therefore also use the matching wheel bolts of the correct length and shape of spherical cap. This is essent
ial to ensure that the wheels are tightly fitted and that
the brake system operates properly. If you retrofit
wheel trims
(or have this done), please also ensure that an adequate
flow of air remains assured for cooling the brake system. The specialist garages are informed abou
t the technical possibilities which exist
regarding converting or retrofitti
ng wheels, tyres and wheel trims.
WARNING
•
In case of incorrect treatment of th
e wheel bolts, the
wheel can loosen
when the car is moving - risk of accident!•
The wheel bolts must be clean and must
turn easily. However, they must
never be treated with grease or oil.•
If the wheel bolts are tightened to a too low tightening torque, the rim
can lossen when the car is moving - risk of accident! A tightening torque which is too high can damage the bolts and threads and this can result in permanent deformation of the contact surfaces on the rims.
Caution
The prescribed tightening torque of the wh
eel bolts for steel and light alloy wheels
is 120 Nm.
s2g8.b.book Page 176 Tuesday, April 7, 2009 8:53 AM
Page 178 of 224
 Owners Manual Wheels and Tyres
177
Using the system
Safety
Driving Tips
General Maintenance
Breakdown assistance
Technical Data
Winter tyresThe handling of your vehicle will be significantly improved when driving o")
Wheels and Tyres
177
Using the system
Safety
Driving Tips
General Maintenance
Breakdown assistance
Technical Data
Winter tyresThe handling of your vehicle will be significantly improved when driving on wintry roads if you fit winter tyres. Summer tyres do not offer the same grip on ice, snow and at temperatures below 7 °C because of
their construction (width, rubber blend,
tread pattern). This partic
ularly applies to vehicles
which are equipped with
low-
profile tyres
or high-speed tyres
(code index H or V on wall of tyre).
Winter tyres must be mounted on all four wheels to obtain the best handling char- acteristics. You must only fit those types of winter tyre which are approved for your vehicle. The permissible
sizes of winter tyres
are stated in your vehicle documents. Approvals
may differ because of national legislation. Please remember that the tyres should be in
flated to 20 kPa (0.2 bar) more than is
the case for summer tyres
⇒page 173, fig. 159
.
Winter tyres no longer
offer the same winter performance once the
tyre tread
has
worn down to a depth of about 4 mm. Ageing
also causes winter tyres to lose most of their winter performance properties
- even in cases where the remaining tread depth is still clearly more than 4 mm. Speed restrictions
apply to winter tyres as well as to summer tyres
⇒page 175,
⇒
.
You can fit winter tyres of a lower speed ca
tegory to your vehicle provided that you
also do not drive faster than the permis
sible maximum speed fo
r such tyres, even
if the possible maximum speed of your ve
hicle is higher. The corresponding tyre
category can damage the tyres when ex
ceeding the permissi
ble maximum speed.
Please pay attention to the notes if
you decide to fit winter tyres
⇒page 173.
You can also fit so-called “all-year tyres” instead of winter tyres.Please contact your specialist garage if
there are any points which are not clear who
will be able to provide you with information regarding the maximum speed for your tyres.
WARNING
You must on no account drive your car at more than the permissible maximum speed for your winter tyres - risk of an accident resulting from tyre damage and loss of control over your car.
For the sake of the environment
Fit your summer tyres on again in good ti
me since summer tyres offer you better
grip and handling on roads which are free of snow and ice as well as ar tempera-tures below 7 °C - the braking distance is shorter, there is less tyre noise, tyre wear is reduced and fuel consumption is reduced.
Note
Please observe the various differing legal requirements regarding tyres.Snow chainsSnow chains must only be mounted on the front wheels. When driving on wintry roads, snow chains
improve not only traction, but also the
braking performance. For technical reasons, it is only permissi
ble to fit snow chains with the following
wheel/tyre combinations: Only use
fine-link snow chains
. They must not project more than 15 mm -
including the chain lock. Remove the
full wheel trims
if you wish to fit snow
chains to the wheels.
Wheel size
Depth (D)
Ty re s i z e
6J x 14
38 mm
175/80
6J x 15
38 mm
195/65
5.5J x 16
36 mm
205/55
s2g8.b.book Page 177 Tuesday, April 7, 2009 8:53 AM
Page 179 of 224
Wheels and Tyres
178
Observe the national legal requirements
relating to the maximum vehicle speed
with snow chains.
WARNING
Please pay attention to the information in the supplied fitting instructions of the snow chain manufacturer.
Caution
You must take the chains off as soon as you drive on roads which are free of snow. They adversely affect the handling of your
vehicle, damage the tyres and are rapidly
destroyed.
Note
We recommend that you use snow chains
from the Škoda genuine accessories.
s2g8.b.book Page 178 Tuesday, April 7, 2009 8:53 AM
Page 180 of 224
 Owners Manual Accessories, changes and
replacement of parts
179
Using the system
Safety
Driving Tips
General Maintenance
Breakdown assistance
Technical Data
Accessories, changes and replacement of partsAccessories")
Accessories, changes and
replacement of parts
179
Using the system
Safety
Driving Tips
General Maintenance
Breakdown assistance
Technical Data
Accessories, changes and replacement of partsAccessories and replacement partsŠkoda vehicles have been bu
ilt according to the latest discoveries in safety engi-
neering. Thus one should no
t change the condition in which the vehicle was deliv-
ered from the manufacturer without some thought. The following guidelines should be observed when a vehicle is to be retrofitted with accessories, have technical ch
anges made to it or a par t has to be replaced at some
time in the future.•
Advise should always be obtained from a specialist garage
before
buying any
accessories and
before
making any technical changes
⇒
.
•
This is particularly the case when acce
ssories are bought in a foreign country.
•
Škoda Genuine Accessories which have b
een released for use and Skoda orig-
inal parts can be bought from specialist
garages that professionally undertake the
assembly of parts which were purchased there.•
All Škoda original accessories which are listed in the catalogue of original acces-
sories such as sliding/tilting roofs, sp
oilers, wheel rims et
c. are homologized.
•
Radios, aerials and other electrical acce
ssories should only be installed by a
specialist garage.•
The guidelines issued by Škoda Auto must be observed when making technical
changes.•
This is to ensure that no technical damage
occurs to the vehicle, that travelling
and operating safety are maintained and that the chnages are permissible. The specialist garages also undertake this work professionally or refer it to another specialist garage in special cases. Any damage which is done caused by technical changes made without consulting a Skoda dealer is
excluded from the guarantee.
WARNING
•
We advise you, in your own interest, to only use Škoda Genuine Accesso-
ries and Škoda original parts which have
been expressly approved for use on
your Škoda. Reliability, safety and su
itabiliity have been established for
these Škoda original parts.•
We cannot guarantee suitability of installation into your vehicle of other
products despite keeping a constant ey
e on market developments (also not
in the case where there is an attestation or permission can be produced).Technical changesInterference on the electronic components and their software can lead to opera-tional faults. This interference can also impair not directly affected systems because of the networking of the electronic co
mponents. This means that the operating
safety of your vehicle can
be considerably jeopardized,
a greater wear of vehicle
parts can occur and finally the vehi
cle registration documents expire.
We trust that you will understand that
Škoda Auto cannot be liable for damage
resulting from unprofessional work. We therefore recommend that you have all work carried out with Škoda original parts at specialist garages.
WARNING
Work or modifications on your vehicle, which have been carried out unpro-fessionally, can cause operational faults - risk of accident!Vehicles of the group N1The vehicle of the group N1 is a box car wh
ich is designed and manufactured for the
transportation of goods.
WARNING (continued)
s2g8.b.book Page 179 Tuesday, April 7, 2009 8:53 AM
Page 181 of 224
Accessories, changes and replacement of parts
180
s2g8.b.book Page 180 Tuesday, April 7, 2009 8:53 AM
Page 182 of 224
 Owners Manual Breakdown assistance
181
Using the system
Safety
Driving Tips
General Maintenance
Breakdown assistance
Technical Data
Breakdown assistanceBreakdown assistanceFirst-aid box*, Warning triangle* and bulb")
Breakdown assistance
181
Using the system
Safety
Driving Tips
General Maintenance
Breakdown assistance
Technical Data
Breakdown assistanceBreakdown assistanceFirst-aid box*, Warning triangle* and bulb set*A space for stowing the first-aid box and the bulb set is located in a well of the plastic part under th
e floor covering of the luggage compartment behind the spare
wheel. A space for the warning triangle is located in the luggage compartment.
Note
•
Pay attention to the use-by-date of the contents of the first-aid box.
•
If you equip your vehi
cle additionally with a warning
triangle or with a first-aid
box, you can purchase these from the range of Škoda Original Accessories.Fire extinguisher*The fire extinguisher is attached with st
raps in a holder under the driver seat.
Please read carefully the
instructions which are atta
ched to the fire extin-
guisher. The fire extinguisher must be checked by an authorised person or company annu- ally (please observe the differing legal requirements).
WARNING
If the fire extinguisher
is not correctly attached,
in case of sudden manoeu-
vres or an accident it can be “thrown” through the interior compartment and cause injuries.
Note
•
The fire extinguisher must comply with
the relevant and valid legal require-
ments.•
Pay attention to the expiration date of the fire extinguisher. If the fire extin-
guisher is used after the expiration date,
its proper function is
no longer assured.
•
The fire extinguisher is only supplied in certain countries within the scope of
delivery.
Fig. 162 Placement of fire extinguisher
s2g8.b.book Page 181 Tuesday, April 7, 2009 8:53 AM
Page 183 of 224
 Owners Manual Breakdown assistance
182
Vehicle tool kitThe vehicle tool kit and the lifting jack* are stowed in a box in the spare wheel* ⇒ fig. 163
; there is also space here for the de
tachable ball head of th")
Breakdown assistance
182
Vehicle tool kitThe vehicle tool kit and the lifting jack* are stowed in a box in the spare wheel* ⇒ fig. 163
; there is also space here for the de
tachable ball head of the towing
device*. The box is attached with a strap on the spare wheel*. The vehicle tool kit contains the following parts (depending on equipment fitted):•
Wire clamps for removing
the full wheel trims,
•
Screwdriver,
•
Plastic clip for a wheel bolt cover,
•
Wheel wrench*,
•
Towing eye,
•
Adapter for the safety wheel bolts*.
Before placing the lifting jack* back in its
storage area, screw in the arm of the lifting
jack fully.
WARNING
•
The factory-supplied lifting jack* is
only intended for your model of
vehicle. On no account attempt to lift
a heavier vehicle or other loads - risk
of injury!•
Ensure that the vehicle tool kit is safely attached in the luggage compart-
ment.
Note
Ensure that the box is alwa
ys secured with the strap.
Spray for repairing a tyre*The spray for repairing a tyre is intended fo
r rapid repair of small defects in a tyre
consisting of a damage up to a si
ze of up to 5 mm. The spray is
not at all intended
to replace a permanent repair on the tyre
; this repair serves to reach the work-
shop. The repair can be undertaken on the vehicl
e immediately. Please read the attached
instructions carefully before the repair. The spray for repairing a tyre is located in
the right front well of the plastic part
behind the spare wheel.Tyre repair kitThe tyre repair kit is intended for the repair of minor tyre defects. The tyre repair kit contains a compressor, inflation bottle, operating instructions and accessories. The repair with the
tyre repair kit is
not at all intended to replace
a permanent
repair on the tyre, this repair only serves
to reach the next specialist garage. The
Fig. 163 Luggage compart- ment: storage compartment for vehicle tool kit
Fig. 164 Vehicle tool kit: Spray for repairing a tyre
s2g8.b.book Page 182 Tuesday, April 7, 2009 8:53 AM
Page 184 of 224
 Owners Manual Breakdown assistance
183
Using the system
Safety
Driving Tips
General Maintenance
Breakdown assistance
Technical Data
repair can be undertaken on
the vehicle immediately.
Please read the attached")
Breakdown assistance
183
Using the system
Safety
Driving Tips
General Maintenance
Breakdown assistance
Technical Data
repair can be undertaken on
the vehicle immediately.
Please read the attached
instructions carefully before the repair. The spray for repairing a tyre is located in
the right front well of the plastic part
behind the spare wheel.Spare wheel*The spare wheel lies in a well under the floor covering of the luggage compartment and is fixed in place using special screws
⇒fig. 165
.
Before removing the spare wheel, you must take out the box with the vehicle tool kit box
⇒page 182, fig. 163
.
One should check the inflation pressure in the spare wheel (at best when generally checking the tyre air pressures - see sign on the fuel filler flap
⇒page 173) to
ensure that the spare wheel is always ready to use. Temporary spare wheel A warning label displayed on the rim of the temporary spare wheel indicates that your vehicle is equipped with a temporary spare wheel. Please observe the following notes when driving with a temporary spare wheel:
•
The warning label must not be covered after installing the wheel.
•
Do not drive faster than 80 km/h with th
is spare wheel and pay particular atten-
tion while driving. Avoid accelerating at full throttle, sharp braking and fast cornering.•
The inflation pressure for this spare wheel is identical to the inflation pressure
of the standard tyres.•
Use this spare wheel only to reach the nearest specialist garage as it is not
intended for continuous use.Changing a wheelPreliminary workThe following steps should be carried out before actually changing the wheel. – If it is necessary to change a wheel, park the vehicle as far away as
possible from the traffic flow. The place you choose should be
level
.
–Have
all the occupants get out.
While changing a wheel, the occu-
pants of the vehicle should not stan
d on the road (e.g. behind a crash
barrier).
– Apply the
handbrake
firmly.
– Shift up into the
1st gear
.
– If a trailer is coupled, uncouple it. – Take the
vehicle tool kit
⇒
page 182 and the
spare wheel*
⇒
page 183 out of the luggage compartment.WARNING
•
If you find yourself in flowing traffic switch on the hazard warning lights
system and place the warning triangle
on the side of the road at the
Fig. 165 Luggage compart- ment: Spare wheel
s2g8.b.book Page 183 Tuesday, April 7, 2009 8:53 AM
 1
1 2
2 3
3 4
4 5
5 6
6 7
7 8
8 9
9 10
10 11
11 12
12 13
13 14
14 15
15 16
16 17
17 18
18 19
19 20
20 21
21 22
22 23
23 24
24 25
25 26
26 27
27 28
28 29
29 30
30 31
31 32
32 33
33 34
34 35
35 36
36 37
37 38
38 39
39 40
40 41
41 42
42 43
43 44
44 45
45 46
46 47
47 48
48 49
49 50
50 51
51 52
52 53
53 54
54 55
55 56
56 57
57 58
58 59
59 60
60 61
61 62
62 63
63 64
64 65
65 66
66 67
67 68
68 69
69 70
70 71
71 72
72 73
73 74
74 75
75 76
76 77
77 78
78 79
79 80
80 81
81 82
82 83
83 84
84 85
85 86
86 87
87 88
88 89
89 90
90 91
91 92
92 93
93 94
94 95
95 96
96 97
97 98
98 99
99 100
100 101
101 102
102 103
103 104
104 105
105 106
106 107
107 108
108 109
109 110
110 111
111 112
112 113
113 114
114 115
115 116
116 117
117 118
118 119
119 120
120 121
121 122
122 123
123 124
124 125
125 126
126 127
127 128
128 129
129 130
130 131
131 132
132 133
133 134
134 135
135 136
136 137
137 138
138 139
139 140
140 141
141 142
142 143
143 144
144 145
145 146
146 147
147 148
148 149
149 150
150 151
151 152
152 153
153 154
154 155
155 156
156 157
157 158
158 159
159 160
160 161
161 162
162 163
163 164
164 165
165 166
166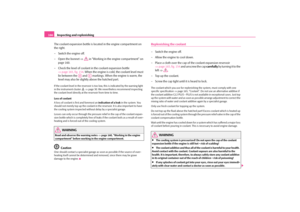 167
167 168
168 169
169 170
170 171
171 172
172 173
173 174
174 175
175 176
176 177
177 178
178 179
179 180
180 181
181 182
182 183
183 184
184 185
185 186
186 187
187 188
188 189
189 190
190 191
191 192
192 193
193 194
194 195
195 196
196 197
197 198
198 199
199 200
200 201
201 202
202 203
203 204
204 205
205 206
206 207
207 208
208 209
209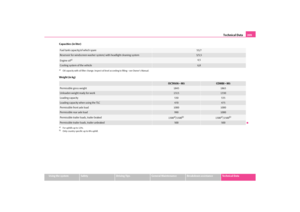 210
210 211
211 212
212 213
213 214
214 215
215 216
216 217
217 218
218 219
219 220
220 221
221 222
222 223
223 Owners Manual Wheels and Tyres
178
Observe the national legal requirements
relating to the maximum vehicle speed
with snow chains.
WARNING
Please pay attention to the information in the supplied fitting instruct")
 Owners Manual Accessories, changes and replacement of parts
180
s2g8.b.book Page 180 Tuesday, April 7, 2009 8:53 AM")