2009 MERCEDES-BENZ GL SUV light
[x] Cancel search: lightPage 87 of 309
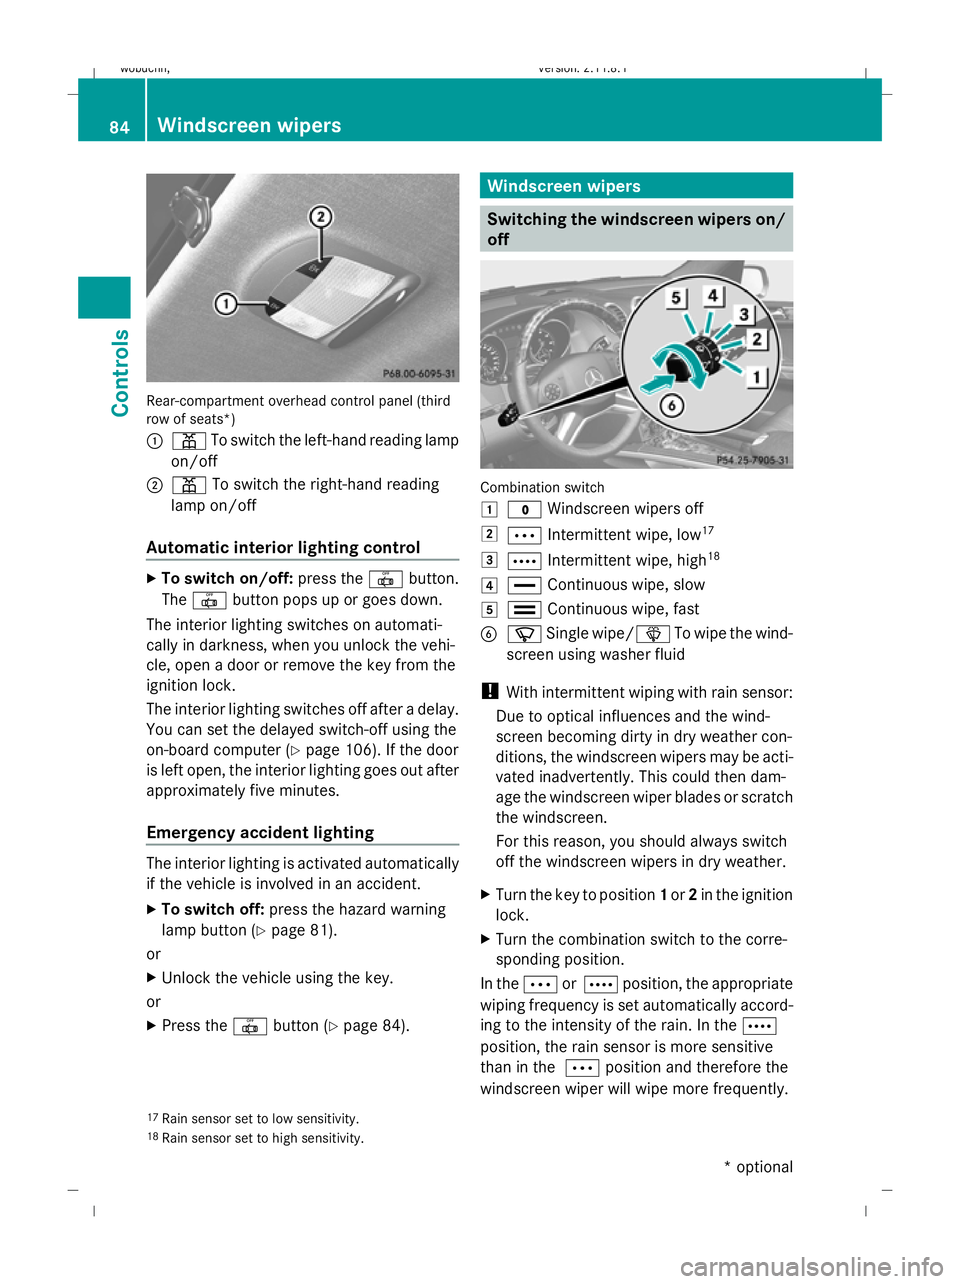
Rear-compartment overhead control panel (third
row of seats*)
:
p To switch the left-hand reading lamp
on/off
; p To switch the right-hand reading
lamp on/off
Automatic interior lighting control X
To switch on/off: press the|button.
The | button pops up or goes down.
The interior lighting switches on automati-
cally in darkness, when you unlock the vehi-
cle, open a door or remove the key from the
ignition lock.
The interior lighting switches off after a delay.
You can set the delayed switch-off using the
on-board computer (Y page 106). If the door
is left open, the interior lighting goes out after
approximately five minutes.
Emergency accident lighting The interior lighting is activated automatically
if the vehicle is involved in an accident.
X To switch off: press the hazard warning
lamp button (Y page 81).
or
X Unlock the vehicle using the key.
or
X Press the |button (Y page 84). Windscreen wipers
Switching the windscreen wipers on/
off Combination switch
1
$ Windscreen wipers off
2 Ä Intermittent wipe, low 17
3 Å Intermittent wipe, high 18
4 ° Continuous wipe, slow
5 ¯ Continuous wipe, fast
B í Single wipe/ îTo wipe the wind-
screen using washer fluid
! With intermittent wiping with rain sensor:
Due to optical influences and the wind-
screen becoming dirty in dry weather con-
ditions, the windscreen wipers may be acti-
vated inadvertently. This could then dam-
age the windscreen wiper blades or scratch
the windscreen.
For this reason, you should always switch
off the windscreen wipers in dry weather.
X Turn the key to position 1or 2in the ignition
lock.
X Turn the combination switch to the corre-
sponding position.
In the ÄorÅ position, the appropriate
wiping frequency is set automatically accord-
ing to the intensity of the rain. In the Å
position, the rain sensor is more sensitive
than in the Äposition and therefore the
windscreen wiper will wipe more frequently.
17 Rain sensor set to low sensitivity.
18 Rain sensor set to high sensitivity. 84
Windscreen wipersCont
rols
* optional
X164_AKB; 2; 3, en-GB
wobuchh,
Version: 2.11.8.1 2009-03-31T14:14:58+02:00 - Seite 84
Dateiname: 6515431202_buchblock.pdf; erzeugt am 01. Apr 2009 00:17:08; WK
Page 89 of 309
R
disabling the controls in the rear com-
partment (override feature) (Y page 49)
R automatic closing of the side windows
(PRE-SAFE ®
*) (Y page 40) :
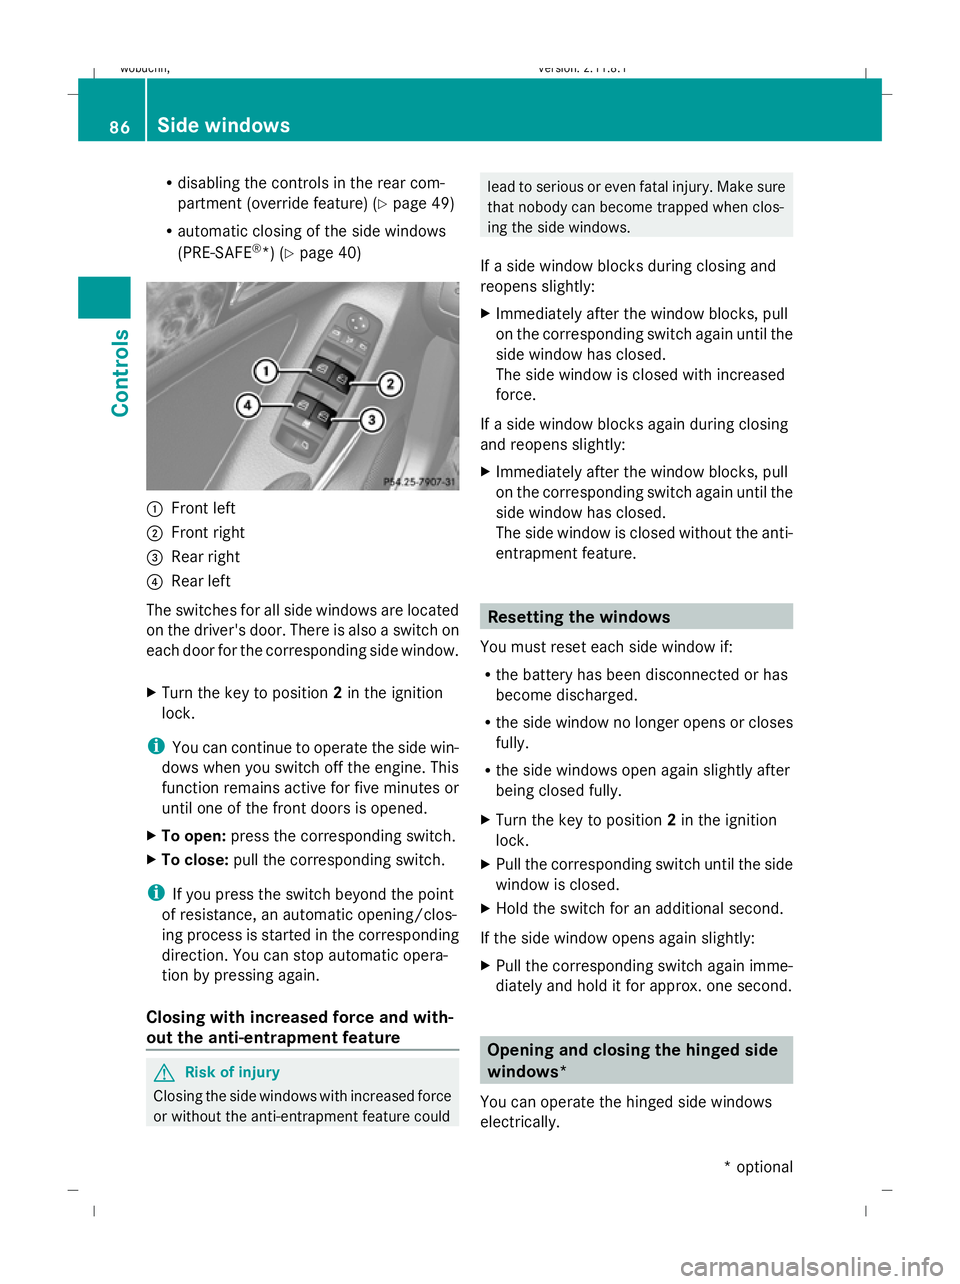
Front left
; Front right
= Rear right
? Rear left
The switches for all side windows are located
on the driver's door. There is also a switch on
each door for the corresponding side window.
X Turn the key to position 2in the ignition
lock.
i You can continue to operate the side win-
dows when you switch off the engine. This
function remains active for five minutes or
until one of the front doors is opened.
X To open: press the corresponding switch.
X To close: pull the corresponding switch.
i If you press the switch beyond the point
of resistance, an automatic opening/clos-
ing process is started in the corresponding
direction. You can stop automatic opera-
tion by pressing again.
Closing with increased force and with-
out the anti-entrapment feature G
Risk of injury
Closing the side windows with increased force
or without the anti-entrapment feature could lead to serious or even fatal injury. Make sure
that nobody can become trapped when clos-
ing the side windows.
If a side window blocks during closing and
reopens slightly:
X Immediately after the window blocks, pull
on the corresponding switch again until the
side window has closed.
The side window is closed with increased
force.
If a side window blocks again during closing
and reopens slightly:
X Immediately after the window blocks, pull
on the corresponding switch again until the
side window has closed.
The side window is closed without the anti-
entrapment feature. Resetting the windows
You must reset each side window if:
R the battery has been disconnected or has
become discharged.
R the side window no longer opens or closes
fully.
R the side windows open again slightly after
being closed fully.
X Turn the key to position 2in the ignition
lock.
X Pull the corresponding switch until the side
window is closed.
X Hold the switch for an additional second.
If the side window opens again slightly:
X Pull the corresponding switch again imme-
diately and hold it for approx. one second. Opening and closing the hinged side
windows*
You can operate the hinged side windows
electrically. 86
Side windowsControls
* optional
X164_AKB; 2; 3, en-GB
wobuchh,
Version: 2.11.8.1 2009-03-31T14:14:58+02:00 - Seite 86
Dateiname: 6515431202_buchblock.pdf; erzeugt am 01. Apr 2009 00:17:09; WK
Page 92 of 309
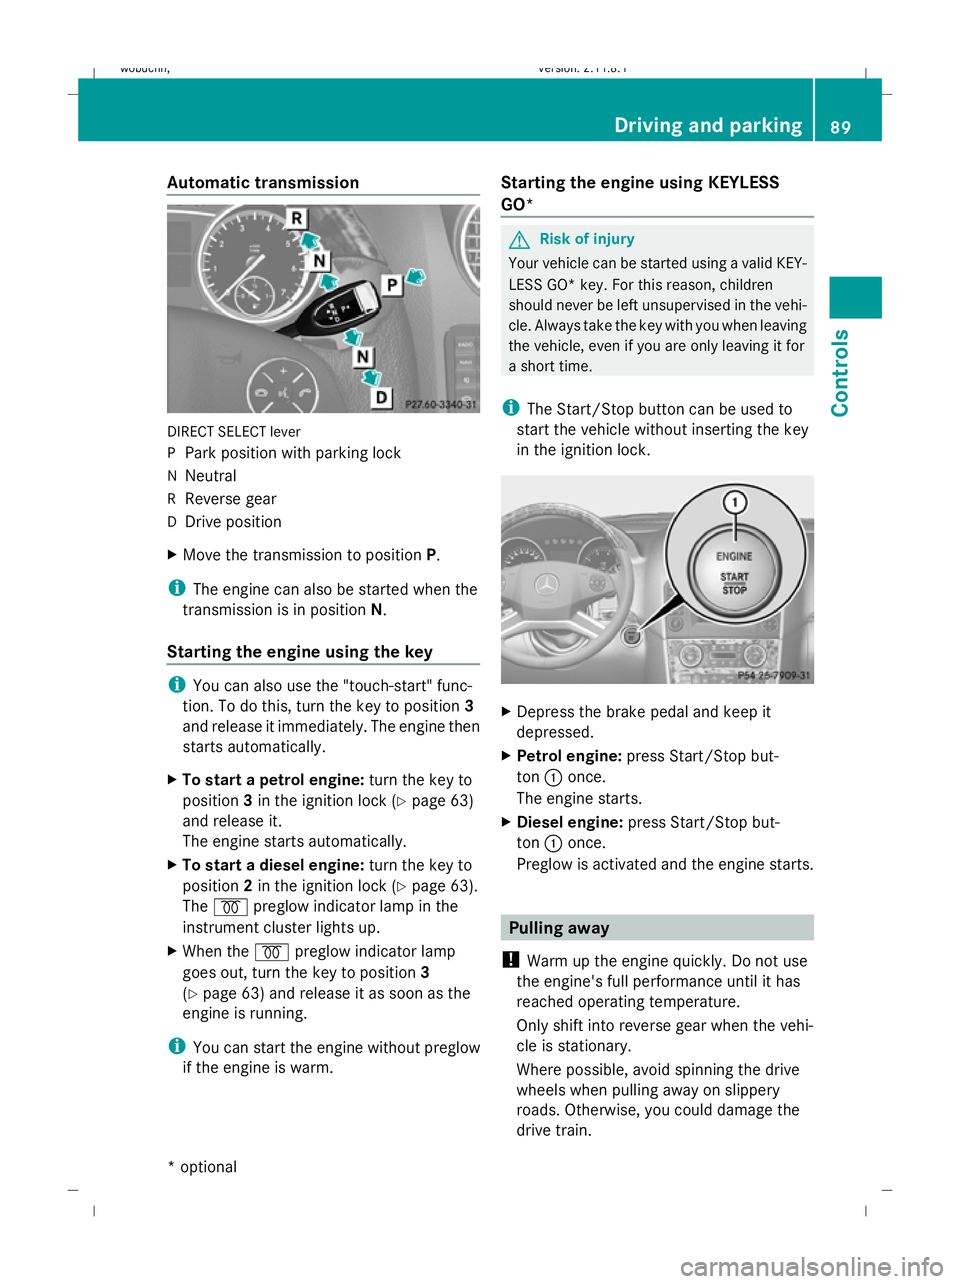
Automatic transmission
DIRECT SELECT lever
P
Park position with parking lock
N Neutral
R Reverse gear
D Drive position
X Move the transmission to position P.
i The engine can also be started when the
transmission is in position N.
Starting the engine using the key i
You can also use the "touch-start" func-
tion. To do this, turn the key to position 3
and release it immediately. The engine then
starts automatically.
X To start a petrol engine: turn the key to
position 3in the ignition lock (Y page 63)
and release it.
The engine starts automatically.
X To start a diesel engine: turn the key to
position 2in the ignition lock (Y page 63).
The % preglow indicator lamp in the
instrument cluster lights up.
X When the %preglow indicator lamp
goes out, turn the key to position 3
(Y page 63) and release it as soon as the
engine is running.
i You can start the engine without preglow
if the engine is warm. Starting the engine using KEYLESS
GO* G
Risk of injury
Your vehicle can be started using a valid KEY-
LESS GO* key. For this reason, children
should never be left unsupervised in the vehi-
cle. Always take the key with you when leaving
the vehicle, even if you are only leaving it for
a short time.
i The Start/Stop button can be used to
start the vehicle without inserting the key
in the ignition lock. X
Depress the brake pedal and keep it
depressed.
X Petrol engine: press Start/Stop but-
ton :once.
The engine starts.
X Diesel engine: press Start/Stop but-
ton :once.
Preglow is activated and the engine starts. Pulling away
! Warm up the engine quickly. Do not use
the engine's full performance until it has
reached operating temperature.
Only shift into reverse gear when the vehi-
cle is stationary.
Where possible, avoid spinning the drive
wheels when pulling away on slippery
roads. Otherwise, you could damage the
drive train. Driving and parking
89Controls
* optional
X164_AKB; 2; 3, en-GB
wobuchh,
Version: 2.11.8.1 2009-03-31T14:14:58+02:00 - Seite 89 Z
Dateiname: 6515431202_buchblock.pdf; erzeugt am 01. Apr 2009 00:17:11; WK
Page 94 of 309
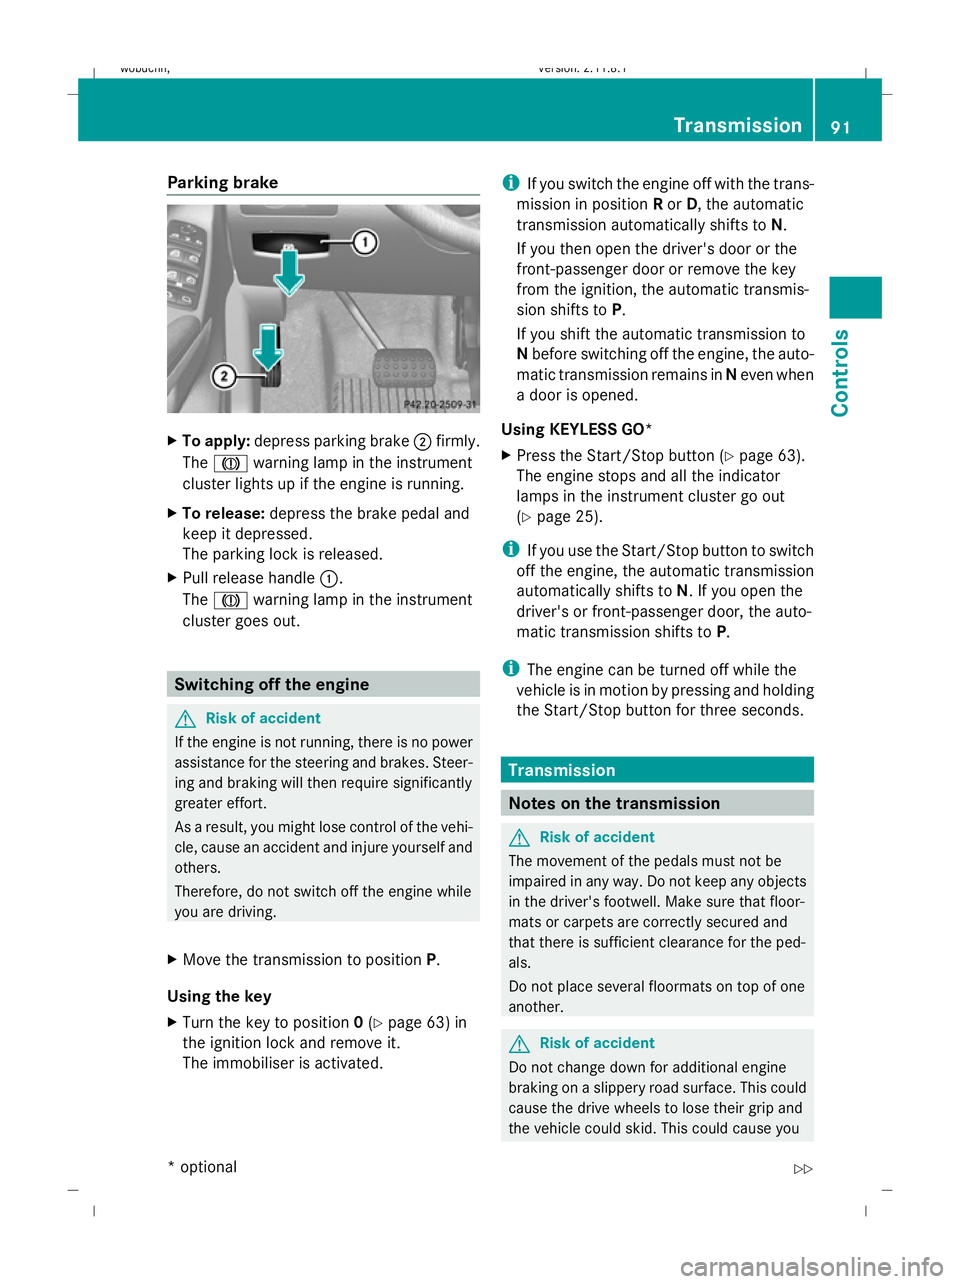
Parking brake
X
To apply: depress parking brake ;firmly.
The J warning lamp in the instrument
cluster lights up if the engine is running.
X To release: depress the brake pedal and
keep it depressed.
The parking lock is released.
X Pull release handle :.
The J warning lamp in the instrument
cluster goes out. Switching off the engine
G
Risk of accident
If the engine is not running, there is no power
assistance for the steering and brakes. Steer-
ing and braking will then require significantly
greater effort.
As a result, you might lose control of the vehi-
cle, cause an accident and injure yourself and
others.
Therefore, do not switch off the engine while
you are driving.
X Move the transmission to position P.
Using the key
X Turn the key to position 0(Y page 63) in
the ignition lock and remove it.
The immobiliser is activated. i
If you switch the engine off with the trans-
mission in position Ror D, the automatic
transmission automatically shifts to N.
If you then open the driver's door or the
front-passenger door or remove the key
from the ignition, the automatic transmis-
sion shifts to P.
If you shift the automatic transmission to
N before switching off the engine, the auto-
matic transmission remains in Neven when
a door is opened.
Using KEYLESS GO*
X Press the Start/Stop button (Y page 63).
The engine stops and all the indicator
lamps in the instrument cluster go out
(Y page 25).
i If you use the Start/Stop button to switch
off the engine, the automatic transmission
automatically shifts to N. If you open the
driver's or front-passenger door, the auto-
matic transmission shifts to P.
i The engine can be turned off while the
vehicle is in motion by pressing and holding
the Start/Stop button for three seconds. Transmission
Notes on the transmission
G
Risk of accident
The movement of the pedals must not be
impaired in any way. Do not keep any objects
in the driver's footwell. Make sure that floor-
mats or carpets are correctly secured and
that there is sufficient clearance for the ped-
als.
Do not place several floormats on top of one
another. G
Risk of accident
Do not change down for additional engine
braking on a slippery road surface. This could
cause the drive wheels to lose their grip and
the vehicle could skid. This could cause you Transmission
91Controls
* optional
X164_AKB; 2; 3, en-GB
wobuchh,
Version: 2.11.8.1 2009-03-31T14:14:58+02:00 - Seite 91 Z
Dateiname: 6515431202_buchblock.pdf; erzeugt am 01. Apr 2009 00:17:11; WK
Page 100 of 309
Speedometer with segments
The segments in the speedometer indicate
which speed range is available.
Distronic* mode:
One or two segments around the stored
speed light up. Rev counter
The red band in the rev counter indicates the
engine's overrevving range. The fuel supply is
interrupted to protect the engine when the
red band is reached.
! Do not drive in the overrevving range.
Doing so will damage the engine. Outside temperature display
G
Risk of accident
At temperatures just above freezing point, the
road could be icy, particularly in wooded areas
or on bridges. The vehicle could start skidding
if you fail to adapt your driving style. You
should therefore always adapt your driving
style and speed to suit the weather condi-
tions.
Changes in the outside temperature are dis-
played after a short delay. On-board computer
Points to remember
The on-board computer is activated as soon
as you turn the key to position 1in the ignition
lock. G
Risk of accident
Only use the on-board computer when road
and traffic conditions permit. You would oth-
erwise be distracted and unable to concen-
trate properly on driving, and could cause an
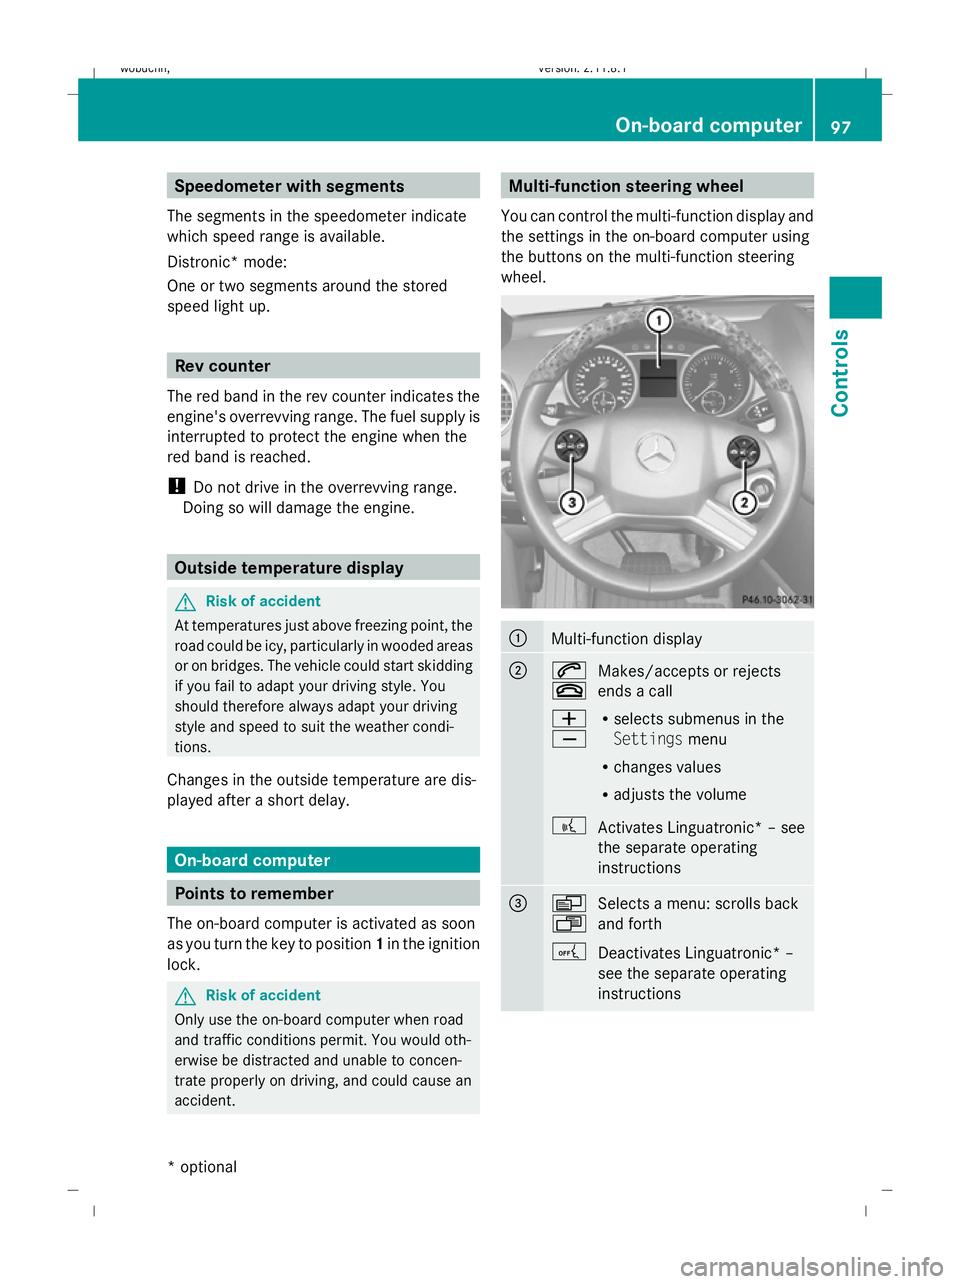
accident. Multi-function steering wheel
You can control the multi-function display and
the settings in the on-board computer using
the buttons on the multi-function steering
wheel. :
Multi-function display
;
6
~
Makes/accepts or rejects
ends a call
W
X R
selects submenus in the
Settings menu
R changes values
R adjusts the volume
? Activates Linguatronic* – see
the separate operating
instructions =
V
U
Selects a menu: scrolls back
and forth
A Deactivates Linguatronic* –
see the separate operating
instructions On-board computer
97Controls
* optional
X164_AKB; 2; 3, en-GB
wobuchh,
Version: 2.11.8.1 2009-03-31T14:14:58+02:00 - Seite 97 Z
Dateiname: 6515431202_buchblock.pdf; erzeugt am 01. Apr 2009 00:17:14; WK
Page 101 of 309
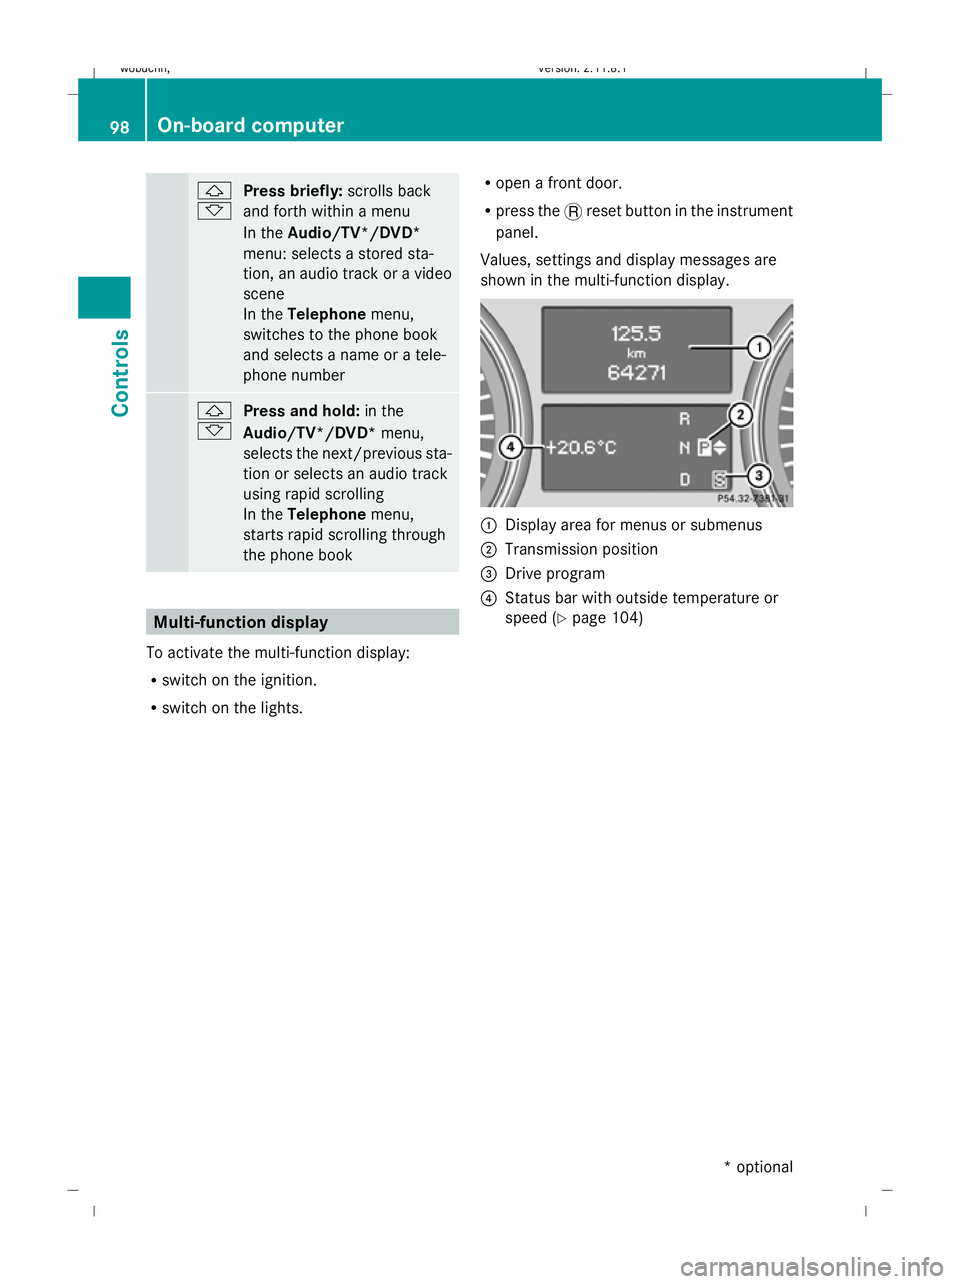
&
*
Press briefly:
scrolls back
and forth within a menu
In the Audio/TV*/DVD*
menu: selects a stored sta-
tion, an audio track or a video
scene
In the Telephone menu,
switches to the phone book
and selects a name or a tele-
phone number &
* Press and hold:
in the
Audio/TV*/DVD* menu,
selects the next/previous sta-
tion or selects an audio track
using rapid scrolling
In the Telephone menu,
starts rapid scrolling through
the phone book Multi-function display
To activate the multi-function display:
R switch on the ignition.
R switch on the lights. R
open a front door.
R press the .reset button in the instrument
panel.
Values, settings and display messages are
shown in the multi-function display. :
Display area for menus or submenus
; Transmission position
= Drive program
? Status bar with outside temperature or
speed (Y page 104) 98
On-board computerControls
* optional
X164_AKB; 2; 3, en-GB
wobuchh,
Version: 2.11.8.1 2009-03-31T14:14:58+02:00 - Seite 98
Dateiname: 6515431202_buchblock.pdf; erzeugt am 01. Apr 2009 00:17:14; WK
Page 102 of 309

Menus and submenus
Function
:
Standard display
menu
(Y page 99)
R tyre pressure loss warning
(Y page 182) or tyre pressure mon-
itor* (Y page 183)
R ASSYST PLUS service interval dis-
play
R checking engine oil level*
(Y page 176) ;
Audio/TV*/DVD*
menu
(Y page 100) =
Navigation*
menu (Ypage 102) ?
Off-road*
menu (Ypage 102)
R off-road level (Y page 129)
R compass display (Y page 166)
R differential locks (status indicator)
(Y page 116) A
Distronic*
menu (Ypage 119) Function
B
Message memory
menu19
(Y page 211) C
Settings
menu (Ypage 103) D
Additional functions
menu
(Y page 109) E
Trip computer
menu (Ypage 110) F
Telephone
menu (Ypage 111) The number of menus shown depends on the
optional equipment in the vehicle.
Depending on the audio system fitted, the
Audio, Navigation* and Telephonemenus
are slightly different. The examples given in
this Owner's Manual apply to vehicles equip-
ped with COMAND APS*. Standard display menu
Use the buttons on the multi-function steer-
ing wheel.
19 The menu is only visible when there is a display message. On-board computer
99Controls
* optional
X164_AKB; 2; 3, en-GB
wobuchh,
Version: 2.11.8.1 2009-03-31T14:14:58+02:00 - Seite 99 Z
Dateiname: 6515431202_buchblock.pdf; erzeugt am 01. Apr 2009 00:17:15; WK
Page 106 of 309
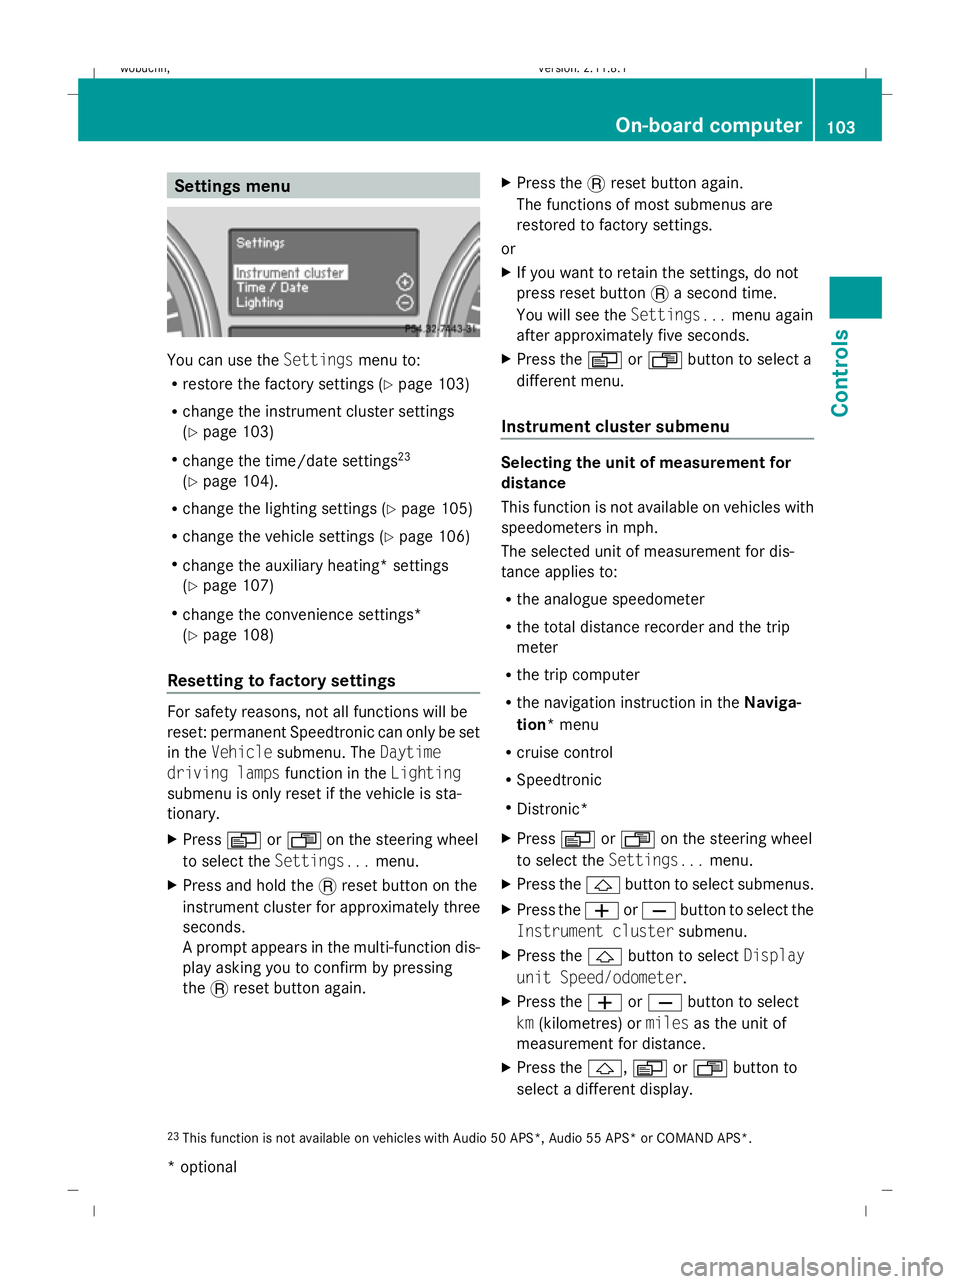
Settings menu
You can use the
Settingsmenu to:
R restore the factory settings (Y page 103)
R change the instrument cluster settings
(Y page 103)
R change the time/date settings 23
(Y page 104).
R change the lighting settings (Y page 105)
R change the vehicle settings (Y page 106)
R change the auxiliary heating* settings
(Y page 107)
R change the convenience settings*
(Y page 108)
Resetting to factory settings For safety reasons, not all functions will be
reset: permanent Speedtronic can only be set
in the Vehicle submenu. The Daytime
driving lamps function in theLighting
submenu is only reset if the vehicle is sta-
tionary.
X Press VorU on the steering wheel
to select the Settings... menu.
X Press and hold the .reset button on the
instrument cluster for approximately three
seconds.
A prompt appears in the multi-function dis-
play asking you to confirm by pressing
the .reset button again. X
Press the .reset button again.
The functions of most submenus are
restored to factory settings.
or
X If you want to retain the settings, do not
press reset button .a second time.
You will see the Settings...menu again
after approximately five seconds.
X Press the VorU button to select a
different menu.
Instrument cluster submenu Selecting the unit of measurement for
distance
This function is not available on vehicles with
speedometers in mph.
The selected unit of measurement for dis-
tance applies to:
R
the analogue speedometer
R the total distance recorder and the trip
meter
R the trip computer
R the navigation instruction in the Naviga-
tion* menu
R cruise control
R Speedtronic
R Distronic*
X Press VorU on the steering wheel
to select the Settings... menu.
X Press the &button to select submenus.
X Press the WorX button to select the
Instrument cluster submenu.
X Press the &button to select Display
unit Speed/odometer.
X Press the WorX button to select
km (kilometres) or milesas the unit of
measurement for distance.
X Press the &,VorU button to
select a different display.
23 This function is not available on vehicles with Audio 50 APS*, Audio 55 APS* or COMAND APS*. On-board computer
103Controls
* optional
X164_AKB; 2; 3, en-GB
wobuchh,
Version: 2.11.8.1 2009-03-31T14:14:58+02:00 - Seite 103 Z
Dateiname: 6515431202_buchblock.pdf; erzeugt am 01. Apr 2009 00:17:16; WK