2009 MERCEDES-BENZ GL SUV change time
[x] Cancel search: change timePage 4 of 309
Welcome to the world of Mercedes-Benz
Before you drive off, familiarise yourself with
your vehicle and read this manual. This will
help you to obtain the maximum pleasure
from your vehicle and to avoid endangering
yourself and others.
Items of optional equipment are marked with
an asterisk *.
The equipment or product designation of your
vehicle may vary depending on the:
R model
R order
R country specification
R availability
Some warning and indicator lamps may have
no function.
The illustrations in this manual show a left-
hand-drive vehicle. In right-hand-drive vehi-
cles, the arrangement and location of vehicle
parts and controls differ accordingly.
Mercedes-Benz is constantly updating its
vehicles to the state of the art.
Mercedes-Benz therefore reserves the right
to introduce changes in the following areas:
R design
R equipment
R technical features
You cannot therefore base any claims on the
illustrations or descriptions in this manual.
The following are integral parts of the vehicle:
R Owner's Manual
R Brief Instructions
R Service Booklet
R Supplements relating to vehicle equipment
Keep these documents in the vehicle at all
times. When you sell the vehicle, always pass
the documents on to the new owner.
i You can get to know the important fea-
tures of your vehicle in German and in Eng- lish in the interactive Owner's Manual on
the Internet at:
www.mercedes-benz.de/
betriebsanleitung
The technical documentation team at
Daimler AG wishes you safe and pleasant
motoring.
1645842083Z102 É1645842083Z102GËÍ
X164_AKB; 2; 3, en-GB
wobuchh,
Version: 2.11.8.1 2009-03-31T14:14:58+02:00 - Seite 1Dateiname: 6515431202_buchblock.pdf; erzeugt am 01. Apr 2009 00:16:29; WK
Page 9 of 309

C
Calling up a fault see Display message .....................211
Care
Automatic car wash .......................201
Care products ................................ 201
Cleaning agents ............................. 201
Dashboard ..................................... 204
Display ........................................... 204
Exterior .......................................... 201
Headlamps ..................................... 203
High-pressure cleaners ..................202
Interior ........................................... 204
Paintwork ...................................... 202
Plastic trim .................................... 205
Reversing camera ..........................203
Seat covers .................................... 204
Sensors ......................................... 203
Steering wheel boss ......................204
Tail pipes ....................................... 203
Trailer tow hitch ............................. 203
Trim strips ..................................... 205
Wheels ........................................... 202
Windows ........................................ 202
Wiper blades .................................. 202
Wooden trim .................................. 205
Care products .................................... 201
CD player/CD changer Operating (on-board computer) .....101
Central locking
Automatic locking (on-board com-
puter) ............................................. 107
Key .................................................. 58
Central locking/unlocking button .....59
Central unlocking Key .................................................. 58
Centre console
Overview .......................................... 29
Changing a wheel
see Flat tyre
Checklist (off-road driving) ..............189
Child-proof locks Rear doors ....................................... 49
Children
in the vehicle ................................... 41
Restraint systems ............................ 41Child seat
Automatic recognition .....................43
Automatic recognition (malfunc-
tion) ............................................... 234
Child seat lock ................................ 47
Display message ............................ 216
ISOFIX .............................................. 47
On the front-passenger sea t............ 42
Recommendations ...........................46
Suitable positions ............................ 44
TopTether ........................................ 48
Child seat lock ..................................... 47
Cigarette lighter ................................ 163
Cleaning agents ................................. 201
Cleaning the sensors ........................203
Climate control Cooling with air dehumidification ..141
Misted up windows ........................146
Cockpit
Overview .......................................... 23
Collapsible wheel
Technical data ............................... 297
COMAND display
Cleaning ......................................... 204
Compass ............................................ 166
Display message ............................ 216
Constant headlamp mode
see Daytime driving lights ..............105
Consumption statistics (on-board
computer) .......................................... 110
Convenience closing ...........................87
Convenience opening ..........................87
Coolant Checking the level .........................177
Display mes-
sage ...................................... .219, 224
Mixture ratio .................................. 291
Temperature gauge ........................ 100
Cornering lights
Display message ............................ 225
Cruise control .................................... 117
Display message .................... 218, 219
Cup holder ......................................... 1536
Index X164_AKB; 2; 3, en-GB
wobuchh,
Version: 2.11.8.1 2009-03-31T14:14:58+02:00 - Seite 6Dateiname: 6515431202_buchblock.pdf; erzeugt am 01. Apr 2009 00:16:29; WK
Page 20 of 309
Protection of the environment
H
Environmental note
Daimler's declared policy is one of integrated
environmental protection.
The objectives are for the natural resources
which form the basis of our existence on this
planet to be used sparingly and in a manner
which takes the requirements of both nature
and humanity into account.
You too can help to protect the environment
by operating your vehicle in an environmen-
tally-responsible manner.
Fuel consumption and the rate of engine,
transmission, brake and tyre wear depend on
the following factors:
R operating conditions of your vehicle
R your personal driving style
You can influence both factors.
You should bear the following in mind:
Operating conditions
R avoid short trips as these increase fuel con-
sumption.
R make sure that the tyre pressures are
always correct.
R do not carry any unnecessary weight.
R keep an eye on the vehicle's fuel consump-
tion.
R remove roof racks once you no longer need
them.
R a regularly serviced vehicle will contribute
to environmental protection. You should
therefore adhere to the service intervals.
R always have maintenance work carried out
at a qualified specialist workshop, e.g. a
Mercedes-Benz Service Centre. Personal driving style
R
do not depress the accelerator pedal when
starting the engine.
R do not warm up the engine with the vehicle
stationary.
R drive carefully and maintain a safe distance
from the vehicle in front.
R avoid frequent, sudden acceleration.
R change gear in good time and use each gear
only up to 2
/ 3of its maximum engine speed.
R switch off the engine in stationary traffic. Returning used vehicles
Mercedes-Benz will take back your
Mercedes-Benz to dispose of it in an environ-
mentally-responsible manner, in accordance
with the European Union (EU) End of Life
Vehicles Directive.
The End of Life Vehicles Directive applies to
vehicles of up to 3.5 t gross vehicle weight, in
accordance with national regulations. For
several years, Mercedes-Benz has been
meeting all the legal requirements for a
design which allows for recycling and re-use.
There is a network of return points and dis-
assembly plants which can recycle your vehi-
cle in an environmentally-responsible man-
ner. The options for recycling vehicles and
parts are constantly being developed and
improved. This means that your Mercedes-
Benz will also continue to meet even the
increased recycling quotas in the future in
good time. You can obtain further information
from your national Mercedes-Benz homepage
or your national hotline number. Introduction
17X164_AKB; 2; 3, en-GB
wobuchh,
Version: 2.11.8.1 2009-03-31T14:14:58+02:00 - Seite 17 ZDateiname: 6515431202_buchblock.pdf; erzeugt am 01. Apr 2009 00:16:30; WK
Page 78 of 309
Setting and storing the parking position
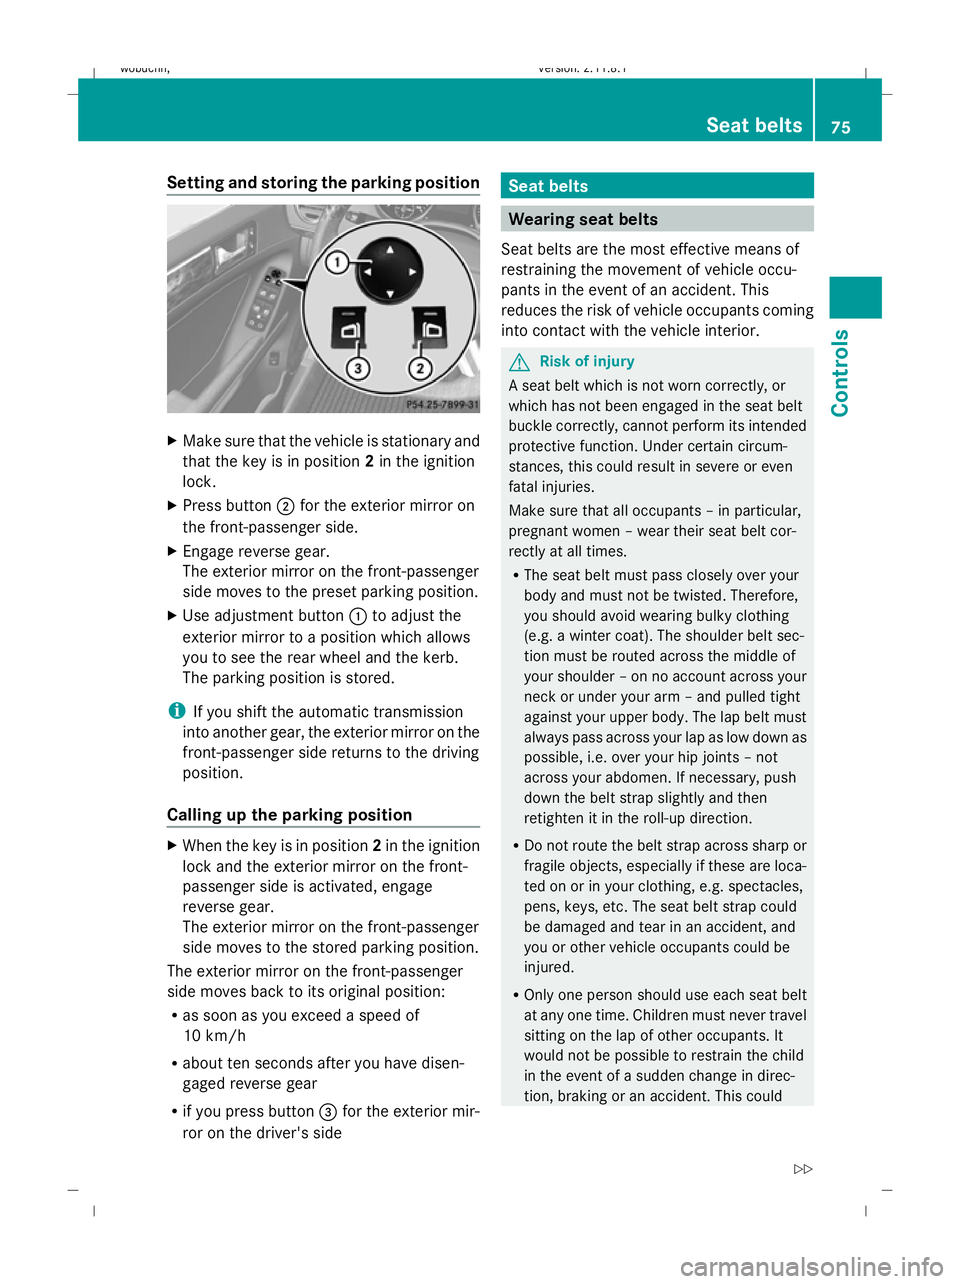
X
Make sure that the vehicle is stationary and
that the key is in position 2in the ignition
lock.
X Press button ;for the exterior mirror on
the front-passenger side.
X Engage reverse gear.
The exterior mirror on the front-passenger
side moves to the preset parking position.
X Use adjustment button :to adjust the
exterior mirror to a position which allows
you to see the rear wheel and the kerb.
The parking position is stored.
i If you shift the automatic transmission
into another gear, the exterior mirror on the
front-passenger side returns to the driving
position.
Calling up the parking position X
When the key is in position 2in the ignition
lock and the exterior mirror on the front-
passenger side is activated, engage
reverse gear.
The exterior mirror on the front-passenger
side moves to the stored parking position.
The exterior mirror on the front-passenger
side moves back to its original position:
R as soon as you exceed a speed of
10 km/h
R about ten seconds after you have disen-
gaged reverse gear
R if you press button =for the exterior mir-
ror on the driver's side Seat belts
Wearing seat belts
Seat belts are the most effective means of
restraining the movement of vehicle occu-
pants in the event of an accident. This
reduces the risk of vehicle occupants coming
into contact with the vehicle interior. G
Risk of injury
A seat belt which is not worn correctly, or
which has not been engaged in the seat belt
buckle correctly, cannot perform its intended
protective function. Under certain circum-
stances, this could result in severe or even
fatal injuries.
Make sure that all occupants – in particular,
pregnant women – wear their seat belt cor-
rectly at all times.
R The seat belt must pass closely over your
body and must not be twisted. Therefore,
you should avoid wearing bulky clothing
(e.g. a winter coat). The shoulder belt sec-
tion must be routed across the middle of
your shoulder – on no account across your
neck or under your arm – and pulled tight
against your upper body. The lap belt must
always pass across your lap as low down as
possible, i.e. over your hip joints – not
across your abdomen. If necessary, push
down the belt strap slightly and then
retighten it in the roll-up direction.
R Do not route the belt strap across sharp or
fragile objects, especially if these are loca-
ted on or in your clothing, e.g. spectacles,
pens, keys, etc. The seat belt strap could
be damaged and tear in an accident, and
you or other vehicle occupants could be
injured.
R Only one person should use each seat belt
at any one time. Children must never travel
sitting on the lap of other occupants. It
would not be possible to restrain the child
in the event of a sudden change in direc-
tion, braking or an accident. This could Seat belts
75Controls
X164_AKB; 2; 3, en-GB
wobuchh, Version: 2.11.8.1 2009-03-31T14:14:58+02:00 - Seite 75 Z
Dateiname: 6515431202_buchblock.pdf; erzeugt am 01. Apr 2009 00:17:04; WK
Page 84 of 309
X
Turn the key to position 2in the ignition
lock.
X To switch on: turn the light switch to
L orT. If the light switch is set to
Ã, you cannot switch on the foglamp.
X Pull the light switch out to the first detent.
The green Nindicator lamp on the light
switch lights up.
X To switch off: press the light switch in as
far as it will go.
The green Nindicator lamp on the light
switch goes out.
Rear foglamp On vehicles with foglamps
X Turn the key to position 2in the ignition
lock.
X To switch on: turn the light switch to
L orT. When the light switch is set
to à you cannot switch on the rear fog-
lamp.
X Pull the light switch out to the second stop.
The R yellow indicator lamp on the light
switch lights up.
X To switch off: press the light switch in as
far as it will go.
The R yellow indicator lamp on the light
switch goes out.
On vehicles without foglamps
X Turn the key to position 2in the ignition
lock.
X To switch on: turn the light switch to
L. When the light switch is set to
à you cannot switch on the rear fog-
lamp.
X Pull the light switch out to the stop.
The R yellow indicator lamp on the light
switch lights up.
X To switch off: press the light switch in as
far as it will go.
The R yellow indicator lamp on the light
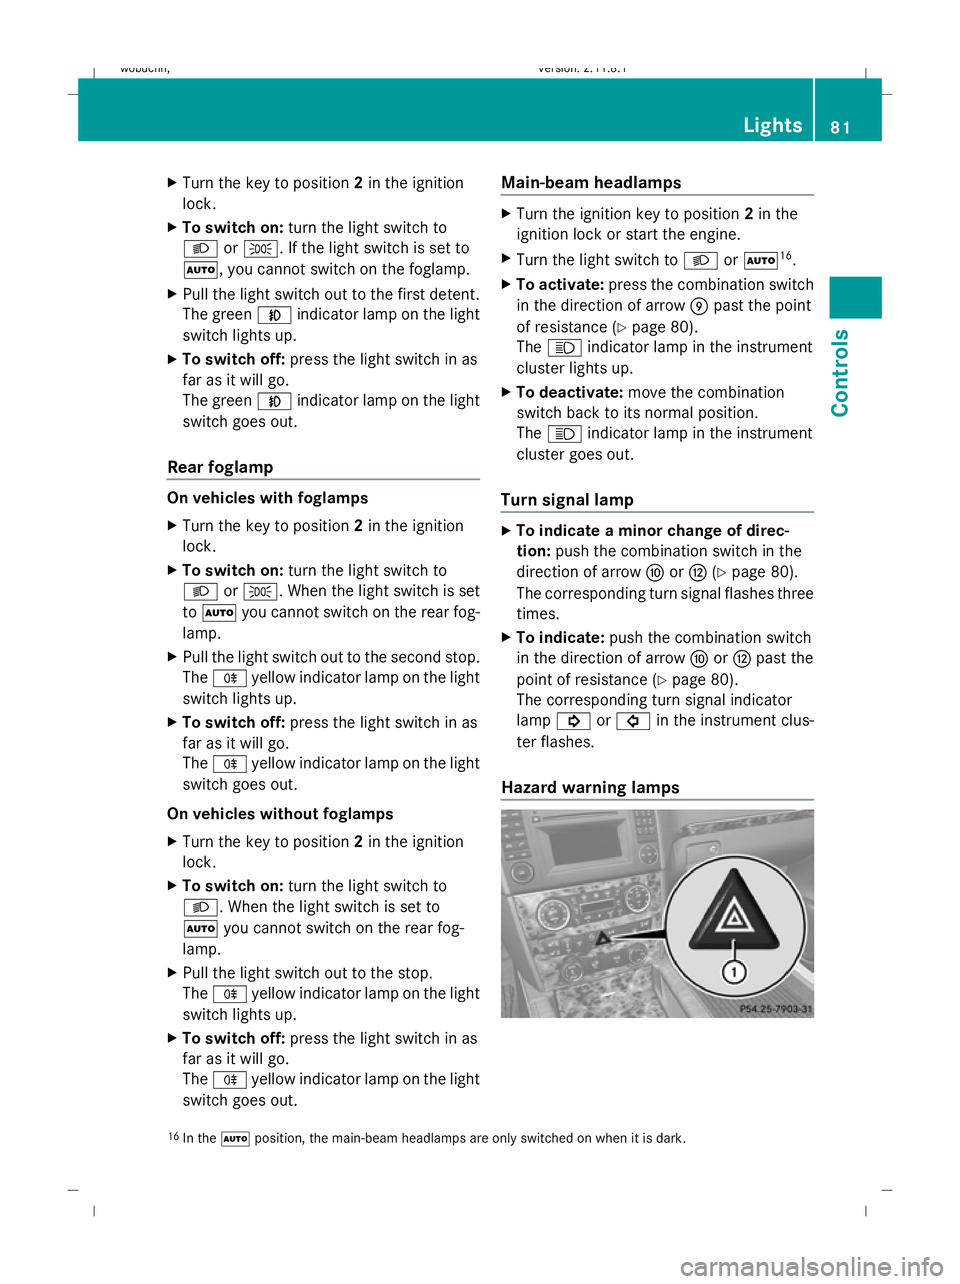
switch goes out. Main-beam headlamps X
Turn the ignition key to position 2in the
ignition lock or start the engine.
X Turn the light switch to Lorà 16
.
X To activate: press the combination switch
in the direction of arrow Epast the point
of resistance (Y page 80).
The K indicator lamp in the instrument
cluster lights up.
X To deactivate: move the combination
switch back to its normal position.
The K indicator lamp in the instrument
cluster goes out.
Turn signal lamp X
To indicate a minor change of direc-
tion: push the combination switch in the
direction of arrow ForH (Ypage 80).
The corresponding turn signal flashes three
times.
X To indicate: push the combination switch
in the direction of arrow ForH past the
point of resistance (Y page 80).
The corresponding turn signal indicator
lamp ! or# in the instrument clus-
ter flashes.
Hazard warning lamps 16
In the Ãposition, the main-beam headlamps are only switched on when it is dark. Lights
81Controls
X164_AKB; 2; 3, en-GB
wobuchh, Version: 2.11.8.1 2009-03-31T14:14:58+02:00 - Seite 81 Z
Dateiname: 6515431202_buchblock.pdf; erzeugt am 01. Apr 2009 00:17:07; WK
Page 106 of 309
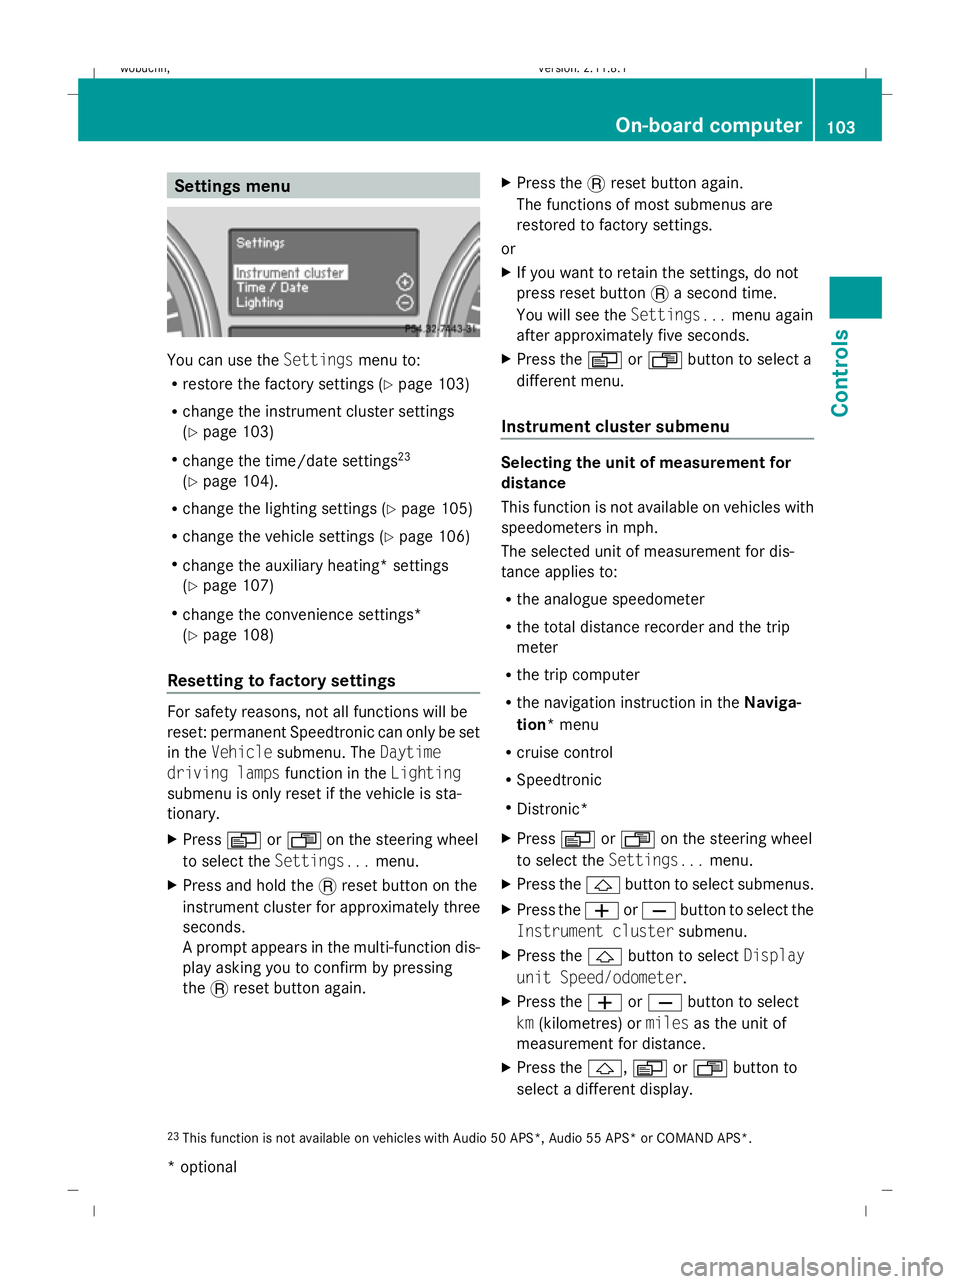
Settings menu
You can use the
Settingsmenu to:
R restore the factory settings (Y page 103)
R change the instrument cluster settings
(Y page 103)
R change the time/date settings 23
(Y page 104).
R change the lighting settings (Y page 105)
R change the vehicle settings (Y page 106)
R change the auxiliary heating* settings
(Y page 107)
R change the convenience settings*
(Y page 108)
Resetting to factory settings For safety reasons, not all functions will be
reset: permanent Speedtronic can only be set
in the Vehicle submenu. The Daytime
driving lamps function in theLighting
submenu is only reset if the vehicle is sta-
tionary.
X Press VorU on the steering wheel
to select the Settings... menu.
X Press and hold the .reset button on the
instrument cluster for approximately three
seconds.
A prompt appears in the multi-function dis-
play asking you to confirm by pressing
the .reset button again. X
Press the .reset button again.
The functions of most submenus are
restored to factory settings.
or
X If you want to retain the settings, do not
press reset button .a second time.
You will see the Settings...menu again
after approximately five seconds.
X Press the VorU button to select a
different menu.
Instrument cluster submenu Selecting the unit of measurement for
distance
This function is not available on vehicles with
speedometers in mph.
The selected unit of measurement for dis-
tance applies to:
R
the analogue speedometer
R the total distance recorder and the trip
meter
R the trip computer
R the navigation instruction in the Naviga-
tion* menu
R cruise control
R Speedtronic
R Distronic*
X Press VorU on the steering wheel
to select the Settings... menu.
X Press the &button to select submenus.
X Press the WorX button to select the
Instrument cluster submenu.
X Press the &button to select Display
unit Speed/odometer.
X Press the WorX button to select
km (kilometres) or milesas the unit of
measurement for distance.
X Press the &,VorU button to
select a different display.
23 This function is not available on vehicles with Audio 50 APS*, Audio 55 APS* or COMAND APS*. On-board computer
103Controls
* optional
X164_AKB; 2; 3, en-GB
wobuchh,
Version: 2.11.8.1 2009-03-31T14:14:58+02:00 - Seite 103 Z
Dateiname: 6515431202_buchblock.pdf; erzeugt am 01. Apr 2009 00:17:16; WK
Page 110 of 309
Setting the display when the ignition is
switched off
The
Display when ignition off function
allows you to set which display you see in the
multi-function display after removing the key
from the ignition lock.
X Press VorU on the steering wheel
to select the Settings... menu.
X Press the &button to select submenus.
X Press the WorX button to select the
Vehicle submenu.
X Press the &button to select Display
when ignition off.
X Press the WorX button to select
Interior motion sensor, Tow-away
protection orMiles/km.
X Press the &,VorU button to
select a different display.
Activating/deactivating the automatic
door locking feature
When you activate the Automatic door
locking function, your vehicle will be cen-
trally locked above a speed of approximately
15 km/h.
i For more information on the automatic
door locking feature, see (Y page 60).
X Press VorU on the steering wheel
to select the Settings... menu.
X Press the &button to select submenus.
X Press the WorX button to select the
Vehicle submenu.
X Press the &button to select Auto‐
matic door locking.
X Press the WorX button to activate
or deactivate the Automatic door lock‐
ing feature.
X Press the &,VorU button to
select a different display. Heating submenu Auxiliary heating* departure time
Only vehicles with auxiliary heating have this
function.
The
Aux.heating departure time function
allows you to select a stored departure time
or change the departure time for which the
vehicle with auxiliary heating is preheated.
The auxiliary heating timer function calcu-
lates the switch-on time according to the out-
side temperature so that the vehicle is pre-
heated by the departure time. When the
departure time is reached, the auxiliary heat-
ing continues to heat for a further five
minutes and then switches off. The auxiliary
heating adopts the temperature settings
selected for Thermatic 2-zone automatic cli-
mate control or Thermotronic luxury multi-
zone automatic climate control*.
You can switch off the auxiliary heating by
using the remote control or the auxiliary heat-
ing button on the centre console. G
Risk of poisoning
Exhaust fumes are produced when the auxili-
ary heating is in operation. Inhaling these
exhaust fumes can be poisonous. You should
therefore switch off the auxiliary heating in
confined spaces without an extraction sys-
tem, e.g. a garage. G
Risk of fire
When the auxiliary heating is in operation,
parts of the vehicle can become very hot.
Make sure that the exhaust system does
not under any circumstances come into con-
tact with highly flammable materials such as
dry grass or fuels. The highly flammable mate-
rial could otherwise ignite and set the vehicle
alight. Select your parking space accordingly.
Operating the auxiliary heating is therefore
prohibited at filling stations or when your vehi-
cle is being refuelled. Always switch off the
auxiliary heating at filling stations. On-board computer
107Controls
* optional
X164_AKB; 2; 3, en-GB
wobuchh,
Version: 2.11.8.1 2009-03-31T14:14:58+02:00 - Seite 107 Z
Dateiname: 6515431202_buchblock.pdf; erzeugt am 01. Apr 2009 00:17:17; WK
Page 111 of 309
Selecting the departure time or deactivat-
ing a selected departure time
You can call up the Aux.heating depar‐
ture time function directly.
X Turn the key to position 1or 2in the ignition
lock.
X Press the button for the auxiliary heating on
the centre console (Y page 147).
or
X Press VorU on the steering wheel
to select the Settings... menu.
X Press the &button to select submenus.
X Press the WorX button to select the
Heater submenu.
X Press the &button to select Aux.heat‐
ing departure time.
You will see the selected setting.
X Press the WorX button to select
one of the three departure times or Timer
off (no timer active).
When a switch-on time is selected, the yel-
low indicator lamp lights up in the auxiliary
heating button.
Changing the departure time
X Press VorU on the steering wheel
to select the Settings... menu.
X Press the &button to select submenus.
X Press the WorX button to select the
Heater submenu.
X Press the &button to select Aux.heat‐
ing departure time.
X Press WorX to select Time 1,
Time 2 orTime 3 to be changed.
X Press &to select Departure time
X Set hour.
X Press the WorX button to set the
hour.
X Press the &button to select Depar‐
ture time X Set minutes. X
Press the WorX button to set the
minutes.
X Press the *button to select a different
display.
After changing from one menu to another,
the new time setting is stored. The yellow
indicator lamp lights up on the button for
the auxiliary heating on the centre console.
Convenience submenu* Activating or deactivating the easy-entry/
exit feature*
G
Risk of injury
The steering wheel moves when the EASY-
ENTRY/EXIT feature is active. There is a risk
of occupants becoming trapped. Before acti-
vating the EASY-ENTRY/EXIT feature, make
sure that nobody can become trapped.
Do not leave children unsupervised in the
vehicle, even if they are secured in a child
restraint system. The children could open the
driver's door and thereby unintentionally acti-
vate the EASY-ENTRY/EXIT feature and
become trapped.
X Press VorU on the steering wheel
to select the Settings... menu.
X Press the &button to select submenus.
X Press the WorX button to select the
Convenience submenu.
X Press the &button to select the EASY-
ENTRY feature.
X Press the WorX button to activate
or deactivate the EASY-ENTRY system.
X Press the &,VorU button to
select a different display.
Switching the belt adjustment on/off
X Press VorU on the steering wheel
to select the Settings... menu.
X Press the WorX button to select the
Convenience submenu. 108
On-board computerControls
* optional
X164_AKB; 2; 3, en-GB
wobuchh,
Version: 2.11.8.1 2009-03-31T14:14:58+02:00 - Seite 108
Dateiname: 6515431202_buchblock.pdf; erzeugt am 01. Apr 2009 00:17:17; WK