2008 MERCEDES-BENZ E-CLASS ESTATE ignition
[x] Cancel search: ignitionPage 139 of 401
On-board computer
136
X
Press the jbutton to select the Sur-
round lighting function.
X Press the æorç button to switch
the Surround lighting function on or
off.
X Press the j,èorÿ button to
select a different display.
Setting the ambient lighting* X
Press the èor· button to select the
Settings... menu.
X Press the jbutton to call up the selec-
tion of submenus.
X Press the æorç button to select the
Lighting submenu.
X Press the jbutton to select Ambient
light.
X Press the æorç button to adjust the
brightness to any level from 0(off) to 5
(bright).
X Press the j,èorÿ button to
select a different display. Activating/deactivating the exterior
lighting delayed switch-off You can set whether the exterior lighting
should remain on for 15 seconds after the
doors are closed when it is dark using the
Headlamps delayed switch-off function.
If none of the doors are opened after the
engine is switched off or if an open door is not
closed, the exterior lighting goes out after
60 seconds.
When you have set a delayed switch-off time
and then switch off the engine, the following
remain lit:
R the side lamps
R the tail lamps
R the licence plate lighting
R the front foglamps
X Press èor· to select the Set-
tings... menu.
X Press the jbutton to call up the selec-
tion of submenus.
X Press the æorç button to select the
Lighting submenu.
X Press the jbutton to select Headlamps
delayed switch-off. X
Press the æorç button to activate
or deactivate the Headlamps delayed
switch-off feature.
X Press the j,èorÿ button to
select a different display.
To temporarily deactivate the delayed switch-
off:
X Before leaving the vehicle, turn the key to
position 0in the ignition lock.
X Turn the key to position 2in the ignition
lock and back to position 0.
Delayed switch-off is deactivated. It is reac-
tivated as soon as you start the engine
again.
Activating/deactivating the interior
lighting delayed switch-off The
Interior lighting delayed switch-
off function allows you to set whether the
interior lighting should remain on for 10 sec-
onds after the key is removed from the igni-
tion lock when it is dark.
X Press the èor· button to select the
Settings... menu.
X Press the jbutton to call up the selec-
tion of submenus. Controls
* optional
211_AKB; 2; 5, en-GB
mkalafa,
Version: 2.9.4 2008-02-29T16:57:07+01:00 - Seite 136Dateiname: 6515_3416_02_buchblock.pdf; preflight
Page 141 of 401
On-board computer
138 G
Risk of fire and poisoning
The operation of the auxiliary heating pro-
duces hot, toxic exhaust fumes. The fuel
vapours produced during refuelling could
ignite on the hot exhaust system.
Do not switch on the auxiliary heating at
filling stations or in enclosed spaces, for
instance, a garage, if there is no air extrac-
tion system.
You could otherwise endanger yourself and
others.
The Auxiliary heat. function can be called
up directly.
X Turn the key to position 1or 2in the ignition
lock.
X Press the button for the auxiliary heating on
the centre console (Y page 178).
or
X Press the èor· button to select the
Settings... menu.
X Press the jbutton to call up the selec-
tion of submenus.
X Press the æorç button to select the
Heater submenu.
X Press the jbutton to select Auxiliary
heat.. X
Press the æorç button to select
one of the three switch-on times or Timer
off (auxiliary heating switched off).
When a switch-on time is selected, the yel-
low indicator lamp lights up in the auxiliary
heating button.
X Press the j,èorÿ button to
select a different display.
Changing the switch-on time for the
auxiliary heating* This function is only displayed if you have
selected a switch-on time. Here you can enter
the time at which the auxiliary heating is to
be switched on.
X
Press the èor· button to select the
Settings... menu.
X Press the jbutton to call up the selec-
tion of submenus.
X Press the æorç button to select the
Heater submenu.
X Press the jbutton to select Switch-on
time X Set hours.
X Press the æorç button to set the
hour. X
Press the jbutton to select Switch-on
time X Set minutes .
X Press the æorç button to set the
minutes.
After changing from one menu to another,
the new time setting is stored. The yellow
indicator lamp lights up on the button for
the auxiliary heating on the centre console.
X Press the j,èorÿ button to
select a different display.
Activating/deactivating the easy-
entry/exit feature* i
For more information on the easy-entry/
exit feature, see (Y page 90). G
Risk of injury
When the easy-entry/exit feature is active,
the steering wheel moves. There is a risk of
occupants becoming trapped. Before acti-
vating the easy-entry/exit feature, make
sure that nobody can become trapped.
Do not leave children unsupervised in the
vehicle, even if they are secured in a child
restraint system. The children could open
the driver's door and thereby unintention- Controls
* optional
211_AKB; 2; 5, en-GB
mkalafa,
Version: 2.9.4 2008-02-29T16:57:07+01:00 - Seite 138Dateiname: 6515_3416_02_buchblock.pdf; preflight
Page 142 of 401
On-board computer
139ally activate the easy-entry/exit feature
and become trapped.
X Press the èor· button to select the
Settings... menu.
X Press the jbutton to call up the selec-
tion of submenus.
X Press the æorç button to select the
Convenience submenu.
X Press the jbutton to select the EASY-
ENTRY system.
X Press the æorç button to activate
or deactivate the EASY-ENTRY system.
X Press the j,èorÿ button to
select a different display.
Activating/deactivating the Fold in mir-
rors when locking* function The
Fold in mirrors when locking func-
tion allows you to determine whether the
exterior mirrors should fold in when you lock
the vehicle. When you switch on the ignition,
the exterior mirrors fold out again.
If you have switched the function on and you
fold in the exterior mirrors using the button
on the door (Y page 92), they will not fold out automatically. The exterior mirrors can then
only be folded out using the button on the
door.
X
Press the èor· button to select the
Settings... menu.
X Press the jbutton to call up the selec-
tion of submenus.
X Press the æorç button to select the
Convenience submenu.
X Press the jbutton to select Fold in
mirrors when locking .
X Press the æorç button to activate
or deactivate the Fold in mirrors when
locking feature.
X Press the j,èorÿ button to
select a different display.
Selecting a setting for the dynamic driv-
ing seat* i
For more information on the dynamic driv-
ing seat, see (Y page 84).
X Press the èor· button to select the
Settings... menu.
X Press the jbutton to call up the selec-
tion of submenus. X
Press the æorç button to select the
Driving dynamics seat adjustment
submenu.
X Press the jbutton to select Driving
dyn. seat adjust., driver orDriving
dyn. seat adjust., front-pass..
X Press the æorç button to select the
desired seat setting: Gentlefor a soft seat
setting or Vigorous for a hard seat setting.
X Press the j,èorÿ button to
select a different display. Trip computer menu
You can use the Trip computermenu to call
up or reset statistical data for your vehicle.
i You can select kmormiles as the unit of
measurement for distance (Y page 133).
i Menu overview: see (Y page 124).
Use the buttons on the multi-function steer-
ing wheel.
Consumption statistics from start The values refer to the start of the journey. Controls
* optional
211_AKB; 2; 5, en-GB
mkalafa,
Version: 2.9.4
2008-02-29T16:57:07+01:00 - Seite 139 ZDateiname: 6515_3416_02_buchblock.pdf; preflight
Page 143 of 401
On-board computer
140
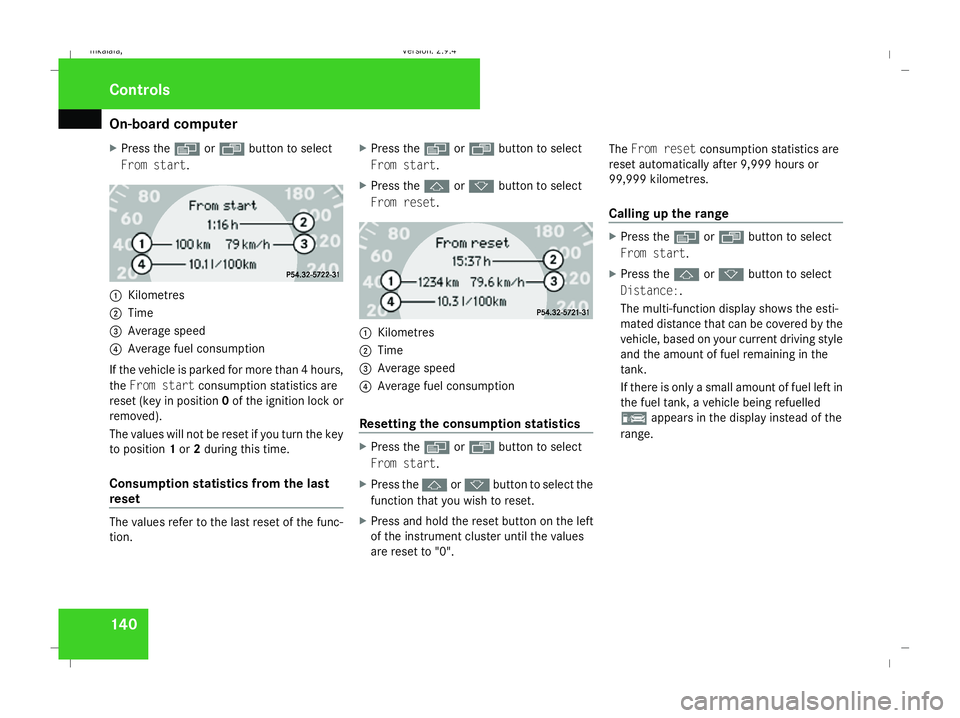
X
Press the èor· button to select
From start. 1
Kilometres
2 Time
3 Average speed
4 Average fuel consumption
If the vehicle is parked for more than 4 hours,
the From start consumption statistics are
reset (key in position 0of the ignition lock or
removed).
The values will not be reset if you turn the key
to position 1or 2during this time.
Consumption statistics from the last
reset The values refer to the last reset of the func-
tion. X
Press the èor· button to select
From start.
X Press the jork button to select
From reset. 1
Kilometres
2 Time
3 Average speed
4 Average fuel consumption
Resetting the consumption statistics X
Press the èor· button to select
From start.
X Press the jork button to select the
function that you wish to reset.
X Press and hold the reset button on the left
of the instrument cluster until the values
are reset to "0". The
From reset consumption statistics are
reset automatically after 9,999 hours or
99,999 kilometres.
Calling up the range X
Press the èor· button to select
From start.
X Press the jork button to select
Distance:.
The multi-function display shows the esti-
mated distance that can be covered by the
vehicle, based on your current driving style
and the amount of fuel remaining in the
tank.
If there is only a small amount of fuel left in
the fuel tank, a vehicle being refuelled
¿ appears in the display instead of the
range. Controls
211_AKB; 2; 5, en-GB
mkalafa, Version: 2.9.4 2008-02-29T16:57:07+01:00 - Seite 140Dateiname: 6515_3416_02_buchblock.pdf; preflight
Page 159 of 401
Driving sys
tems 156 R
HOLD is deactivated by depressing the
accelerator pedal or the brake pedal
R there is a malfunction in the system or an
interruption in the power supply, e.g. bat-
tery failure
R the electrical system in the engine com-
partment, the battery or the fuses are
tampered with
R the battery is disconnected G
Risk of accident
If you wish to leave the vehicle or park it,
deactivate HOLD and secure the vehicle
against rolling away.
You will see a warning message in the multi-
function display if HOLD is activated and:
R the driver's door is opened and you release
the seat belt
R the ignition is switched off
R the bonnet is opened
Vehicles with manual transmission:
Brake immediately
X Immediately depress the brake pedal firmly
until the warning message in the multi-
function display goes out. This deactivates
HOLD. Vehicles with automatic transmission*:
Selector lever in park position
X Move the selector lever to Pto prevent the
vehicle from rolling away.
HOLD is deactivated. The warning message
in the multi-function display goes out.
A horn will also sound at regular intervals if
HOLD is activated and you:
R stop the engine and open the driver's door
R open the bonnet
The horn draws your attention to the fact that
the vehicle has been parked while HOLD is
still activated. The sound becomes louder if
you attempt to lock the vehicle. The vehicle
is not locked until HOLD is deactivated.
i If the ignition has been switched off, the
engine cannot be restarted until HOLD is
deactivated.
If there is a fault in the system or power supply
while HOLD is activated, the Brake immedi-
ately message appears in the multi-function
display. Immediately depress the brake firmly
until the warning message disappears from
the multi-function display, or in vehicles with
automatic transmission*, move the selector
lever to P. This deactivates HOLD. AIRMATIC DC*
Vehicle level Your vehicle automatically adjusts its ride
height to reduce petrol consumption and
improve driving safety.
The following vehicle levels are possible:
R
Normal
R Raised
R Lowered
The "Normal" and "Raised" vehicle levels can
be set manually.
The "Lowered" vehicle level is set automati-
cally:
R at speeds above 140 km/h
R if you have selected "Sports tuning I or
II" (Y page 157)
Setting the vehicle level manually
Select the "Normal" setting for normal road
surfaces and "Raised" for driving with snow
chains or on particularly poor road surfaces. G
Risk of injury
Make sure that nobody is in the vicinity of
the wheel housing or under the vehicle Controls
* optional
211_AKB; 2; 5, en-GB
mkalafa
,V ersion: 2.9.4
2008-02-29T16:57:07+01:00 - Seite 156 Dateiname: 6515_3416_02_buchblock.pdf; preflight
Page 160 of 401
Driving sys
tems 157while lowering the vehicle when it is sta-
tionary. Otherwise, limbs could become
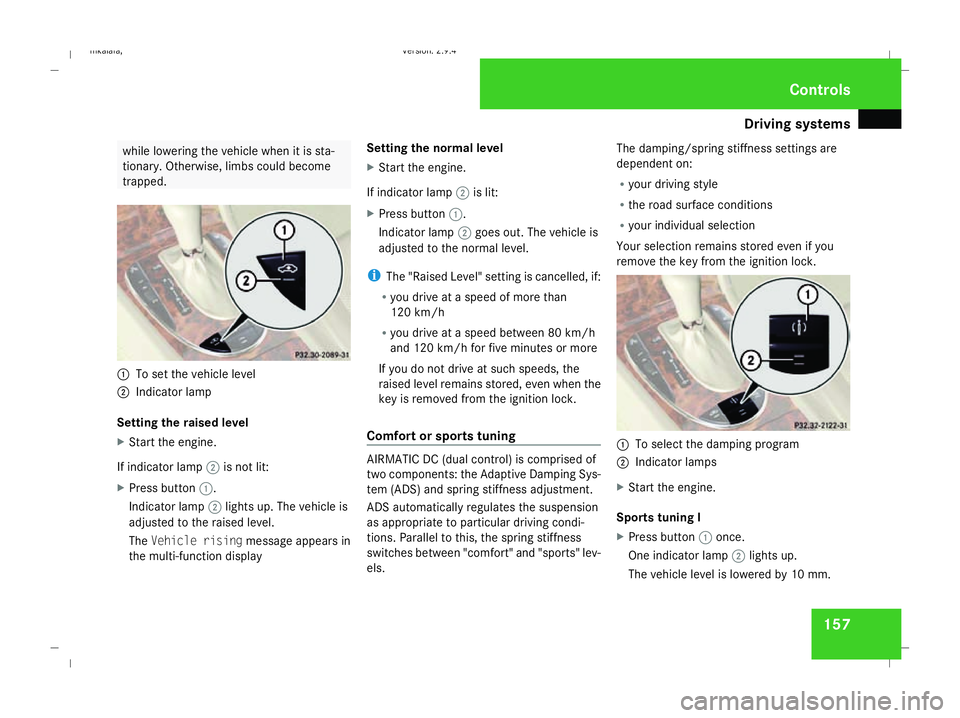
trapped. 1
To set the vehicle level
2 Indicator lamp
Setting the raised level
X Start the engine.
If indicator lamp 2is not lit:
X Press button 1.
Indicator lamp 2lights up. The vehicle is
adjusted to the raised level.
The Vehicle rising message appears in
the multi-function display Setting the normal level
X
Start the engine.
If indicator lamp 2is lit:
X Press button 1.
Indicator lamp 2goes out. The vehicle is
adjusted to the normal level.
i The "Raised Level" setting is cancelled, if:
R you drive at a speed of more than
120 km/h
R you drive at a speed between 80 km/h
and 120 km/ hfor five minutes or more
If you do not drive at such speeds, the
raised level remains stored, even when the
key is removed from the ignition lock.
Comfort or sports tuning AIRMATIC DC (dual control) is comprised of
two components: the Adaptive Damping Sys-
tem (ADS) and spring stiffness adjustment.
ADS automatically regulates the suspension
as appropriate to particular driving condi-
tions. Parallel to this, the spring stiffness
switches between "comfort" and "sports" lev-
els.The damping/spring stiffness settings are
dependent on:
R
your driving style
R the road surface conditions
R your individual selection
Your selection remains stored even if you
remove the key from the ignition lock. 1
To select the damping program
2 Indicator lamps
X Start the engine.
Sports tuning I
X Press button 1once.
One indicator lamp 2lights up.
The vehicle level is lowered by 10 mm. Controls
211_AKB; 2; 5, en-GB
mkalafa
, Version: 2.9.4 2008-02-29T16:57:07+01:00 - Seite 157 ZDateiname: 6515_3416_02_buchblock.pdf; preflight
Page 161 of 401
Driving sys
tems 158
Sports tuning II
X
Press button 1twice.
Two indicator lamps 2light up.
The vehicle level is lowered by 15 mm.
Comfort tuning
X Press button 1repeatedly until indicator
lamps 2go out.
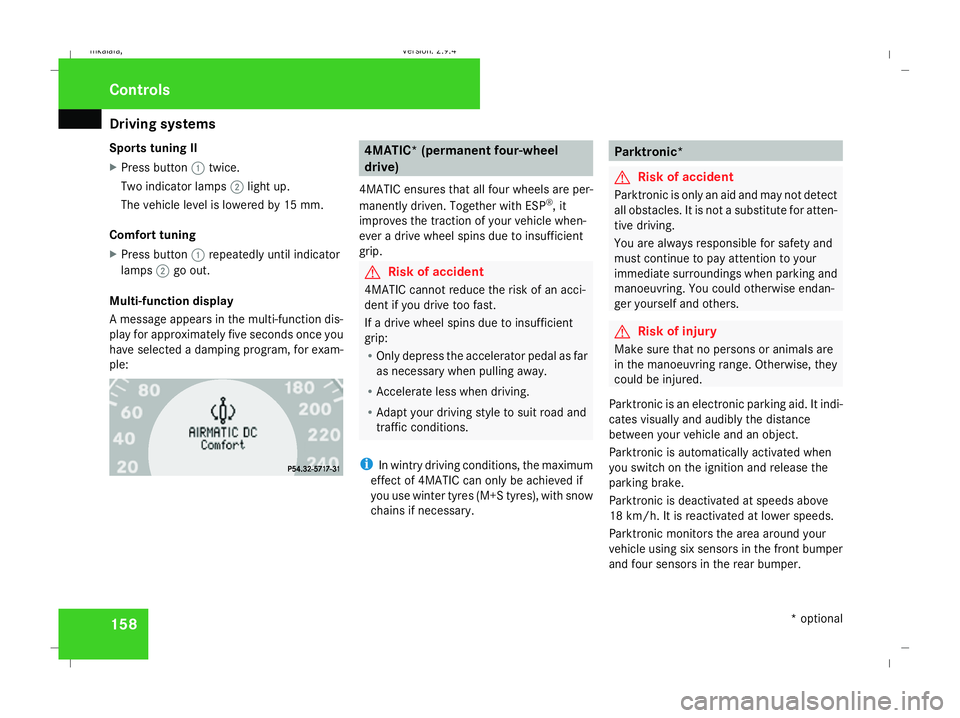
Multi-function display
A message appears in the multi-function dis-
play for approximately five seconds once you
have selected a damping program, for exam-
ple: 4MATIC* (permanent four-wheel
drive)
4MATIC ensures that all four wheels are per-
manently driven. Together with ESP ®
, it
improves the traction of your vehicle when-
ever a drive wheel spins due to insufficient
grip. G
Risk of accident
4MATIC cannot reduce the risk of an acci-
dent if you drive too fast.
If a drive wheel spins due to insufficient
grip:
R Only depress the accelerator pedal as far
as necessary when pulling away.
R Accelerate less when driving.
R Adapt your driving style to suit road and
traffic conditions.
i In wintry driving conditions, the maximum
effect of 4MATIC can only be achieved if
you use winter tyres (M+S tyres), with snow
chains if necessary. Parktronic*
G
Risk of accident
Parktronic is only an aid and may not detect
all obstacles. It is not a substitute for atten-
tive driving.
You are always responsible for safety and
must continue to pay attention to your
immediate surroundings when parking and
manoeuvring. You could otherwise endan-
ger yourself and others. G
Risk of injury
Make sure that no persons or animals are
in the manoeuvring range. Otherwise, they
could be injured.
Parktronic is an electronic parking aid. It indi-
cates visually and audibly the distance
between your vehicle and an object.
Parktronic is automatically activated when
you switch on the ignition and release the
parking brake.
Parktronic is deactivated at speeds above
18 km/h. It is reactivated at lower speeds.
Parktronic monitors the area around your
vehicle using six sensors in the front bumper
and four sensors in the rear bumper. Controls
* optional
211_AKB; 2; 5, en-GB
mkalafa
, Version: 2.9.4 2008-02-29T16:57:07+01:00 - Seite 158Dateiname: 6515_3416_02_buchblock.pdf; preflight
Page 164 of 401
Driving sys
tems 161
i
Parktronic is automatically activated
when you turn the key to position 2in the
ignition lock.
Trailer towing* Parktronic is deactivated for the rear area
when you establish an electrical connection
between your vehicle and the trailer.
!
Fold in the ball coupling if the trailer tow
hitch is not required. Parktronic measures
the minimum detection range to an obsta-
cle from the bumper, not the ball coupling. Controls
* optional
211_AKB; 2; 5, en-GB
mkalafa
,V ersion: 2.9.4
2008-02-29T16:57:07+01:00 - Seite 161 ZDateiname: 6515_3416_02_buchblock.pdf; preflight