Page 305 of 404

The label on the inside of the fuel filler flap tells you the correct fuel
for your vehicle . For more information about fuel specifications, see
=> page 301.
Your vehicle fuel tank has an onboard refuelling vapor recovery
system. This feature helps to prevent fuel vapors from escaping
from the tank and polluting the environment while you refuel your
vehicle. In order to fill the tank properly while protecting the envi
ronment, please follow this refueling procedure carefully.
& WARNING
Under normal operating conditions , never carry additional fuel
containers in your car. Gas canisters and other containers used to
transport fuel can be dangerous . Such containers , full or empty,
may leak and could cause a fire in a collision . If you must transport
fuel to use for your lawn mower , snow blower, etc., be very careful
and always observe local and state laws regarding the use, trans
portation and storage of such fuel containers. Make certain the
container meets industry standards (ANSI/ASTM F852 -861.
0 Note
Never drive your vehicle until the fuel tank is completely empty. The
irregular supp ly of fuel can cause misfiring. Gasoline could enter
the exhaust system and damage the catalytic converter. •
Fuel supply and filling your fuel tank
Refuelling
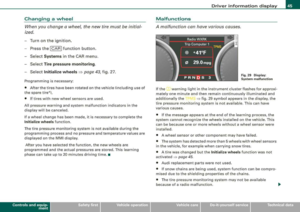
The fuel filler flap is unlocked from a button in the driver's
door.
,-..
"'
Fig . 255 Driver 's door :
Unlocking fuel filler
flap
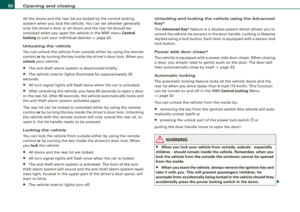
Fig . 256 Fuel cap
hooked on the opened
fuel filler flap
When adding fuel, the ignition and any cellular phones in
the vehicle must be switched
off.
Taking the fuel cap off
To open the fuel filler flap, press the button ~ fig. 255.
Unscrew fuel filler cap counter-clockwise and hang it on
the fuel filler
flap ~ fig. 256. .,,_
Vehic le care I I irechnical data
Page 306 of 404

Fuel supply and filling your fuel tank
Refuelling procedure
- Insert the fuel nozzle from the gasoline pump into the
fuel filler neck as far as it will go.
- Select a medium refuelling rate so that the nozzle switches off automatically when the tank is full.
Putting the fuel cap back on
-After filling your tank, twist the fuel filler cap clockwise
until you hear a definite click.
- Close the fuel filler flap.
To avoid fuel spilling or evaporating from the fuel tank always close
fuel filler cap properly and completely. An improperly closed fuel
filler cap may also cause the MIL
lamp=> page 27 to come on.
& WARNING
Improper refueling or handling of fuel can cause fire, explosion
and severe burns.
• Fuel is highly flammable and can cause severe burns and other
injuries.
• Failure to shut the engine off while refueling and/or to insert
the pump nozzle fully into the fuel filler neck could cause fuel to spray out of filler neck or to overflow. Fuel spray and overflowing
fuel can cause a fire.
• Never use a cellular telephone while refueling. The electromag
netic radiation can cause sparks that can ignite fuel vapors and
cause a fire.
• Never get back into your vehicle while refueling. If in excep
tional circumstances you must get back in your vehicle while refu
eling, make certain that you close the door and touch metal to
discharge static electricity before touching the filler nozzle again.
Static electricity can cause sparks that can ignite fuel vapors
released during refueling .
& WARNING (continued)
• Never smoke or have an open flame anywhere in or near your
vehicle when refueling or filling a portable fuel container.
• For your safety, we strongly recommend that you do not travel
with a portable fuel container in your vehicle. The container, full or
empty may leak and could cause a fire, especially in a crash.
• If, under exceptional circumstances, you must transport a
portable fuel container, please observe the following:
-Never fill a portable fuel container while it is anywhere in or
on the vehicle (for example, in the luggage compartment, or on
the trunk). Static electricity can build up while filling and can
ignite fuel vapors causing a fire.
- Always place a portable fuel container on the ground before
filling.
- Always keep the filler nozzle completely inside the portable
container before and during filling.
- If filling a portable container made of metal, the filler nozzle
must always be in contact with the container. This will help
prevent static electricity from discharging and cause a fire.
- Never spill fuel inside the vehicle or luggage compartment. Fuel vapors are highly flammable .
- Always observe local and state/provincial laws regarding the
use, storage and transportation of fuel containers.
- Make certain the fuel container meets industry standards
(ANSI / ASTM F852-86).
0 Note
If any fuel has spilled onto the car, it should be removed immedi-
ately to prevent damage to the paint.
~
Page 307 of 404

<£' For the sake of the environment
As soon as the correctly operated nozzle switches off automatically
for the first time, the tank is full. Do not try to add more fuel because
fuel may spill out . In addition, the expansion space in the fuel tank
will be filled
-causing the fuel to overflow when it becomes warm
and pollute the environment .
[ i ] Tips
• Running your engine while refuelling may cause vapors to
escape or even cause fuel to spill out of the tank. This would then
shut off the fue l nozzle before the tank is full.
• Do not refuel your vehicle with the ignition turned on. The fuel
gauge may otherwise not indicate the correct fuel level after
refuelling. •
Unlocking the fuel filler flap by hand
You can open the fuel filler flap by hand if the power
locking system should fail.
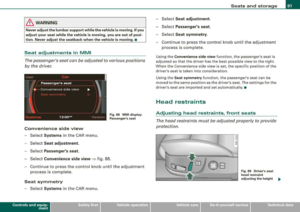
Fig. 257 Luggage
compartment : Right
side storage area
Fuel supply and filling your fuel tank
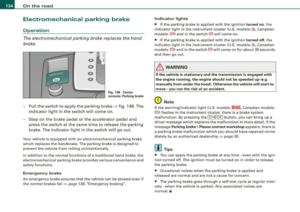
Fig. 258 Luggage
compartment : Emer
gency opening of fuel
filler flap
-Rotate the two pins @ to the vertical pos ition to open
the s torage area.
~ fig. 257.
-Unclip the loop@ and move it to position ©~fig. 258.
-Pull the loop down to position © to unlock the fuel filler
flap. •
Vehic le care I I irechnical data
Page 308 of 404

111'1...__C_ h_ e_c _k _ i_n ..::g ,_ a_n_ d_ f_il _li _n....: g=-- --------------------------------------------
Checking and filling
Engine hood
Releasing the engine hood
The engine hood is released from inside the vehicle.
Fig. 259 Driver's side
footwell: engine hood
release lever
-Pull the release lever on the left under the instrument
panel ~ fig. 259 in the direct ion of the arrow.
The hood pops up slight ly under spring pressure. •
Opening the engine hood
Fig. 260 Release lever
under the engine hood
Before opening the engine hood, make sure that the wind
shie ld wipers are flat against the windshield. Otherwise,
they could damage the paint on the hood.
Li ft the hood
slightly~ &.
-Pull up on the release under the hood:=} fig. 260. Thi s
releases the catch.
-Open the hood all the way.
The hood is kept in the open position by two gas struts.
& WARNING
Hot engine coolant can burn you.
• To reduce the risk of being burned , never open the hood if you
see or hear steam or coolant escaping from the engine compart
ment . Wait until no steam or coolant can be seen or heard before
carefully opening the hood . •
Page 309 of 404

___________________________________________ C=..:...: h:.:e :.: c:.: k.:.: i.:.: n :3:g ~ a:.:.n .:.: d::......:. f..:..:il ..:..:li .:.:n3g !._ _9I
•
Closing the engine hood
- Pull the hood down until the pressure from the struts is
reduced .
- Let the hood
drop down and latch in place. Do not try to
push it shut;
it may fail to engage =>& .
& WARNING
A hood that is not completely latched could fly up and block your
view while driving.
• When you close the engine hood, check it to make sure the
safety catch has properly engaged. The hood should be flush with
the surrounding vehicle body parts.
• If you notice while driving that the hood is not secured prop
erly, stop at once and close it. •
Working in the engine compartment
Be especially careful whenever you work in the engine
compartment.
Whenever you must perform any work in the engine compartment,
for example checking and filling different fluids, there is a risk of injury, burns and accidents. To prevent personal injury always
observe the following WARNINGS. The engine compartment of any
vehicle is a hazardous area
~ & .
& WARNING
To help avoid injury, before you check anything under the hood :
• Turn off the engine. • Remove the ignition key.
• Apply the parking brake.
• I I • • I
& WARNING (continued)
• Move selector lever to "P" (Park).
• Always let the engine cool down. Hot components will burn
skin on contact.
• To reduce the risk of being burned, never open the hood if you
see or hear steam or coolant escaping from the engine compart
ment. Wait until no steam or coolant can be seen or heard before
carefully opening the hood.
• Keep children away from the engine compartment .
• Never spill fluids on hot engine components. They can cause a
fire.
• Never touch the radiator fan. The auxiliary electric fan is
temperature controlled and can switch on suddenly.
• Never open the coolant reservoir cap when the engine is still
warm. The coolant system is pressurized and hot coolant could spray out.
• Protect your face, hands and arm from steam or hot engine
coolant by placing a thick rag over the cap when you open the
coolant reservoir.
• If work on the fuel system or the electrical system is necessary:
- Always disconnect the battery.
- Never smoke or work near heaters or open flames . Fluids in
the engine compartment could start a fire.
- Keep an approved fire extinguisher immediately available.
• To avoid electrical shock and personal injury while the engine
is running or being started, never touch:
-Ignition cables
- Other components of the high voltage electronic ignition system.
• If you must perform a check or repair with the engine running: -First, fully apply the parking brake, move selector lever to
"P"
(Park). .,_
Vehicle care
Page 310 of 404

111'1...__C_ h_ e_c _k _ i_n ..::g ,_ a_n_ d_ f_il _li _n....: g=-- --------------------------------------------
& WAR N ING (continued )
-Always use extreme caution to prevent clothing , jewelry, or
long ha ir from getting caught in the radiator fan , V -belts o r
other moving parts , or from contacting hot parts . Tie back hair
before starting , and do not wear clothing that will hang or
droop into the engine .
• Minimize exposure to emis sion and chemi cal hazards
=> & .
& WARNING
Californ ia Proposition 65 W arning :
• Engine exhaust , some of its constituents , and certain vehicle
c omponents conta in or emit chemicals known to the State of Cali
fornia to cause cancer and birth defects and reproductive harm. In addition , ce rtain fluids contained in vehi cles and certa in products
of component wear contain or emit chemicals known to the State
of California to cause cancer and birth defects or other reprodu c
tive harm.
• Battery posts , terminals and related accessories contain lead
and lead compounds , chemicals known to the State of California
to cause cancer and reproductive harms. Wash hands after
handling.
0 Note
When adding f luids, always make sure that they are poured into the
proper container or filler opening, othe rwise serious damage to
vehicle systems wi ll occur.
For the sake of the environment
To detect leaks in time, inspect the vehicle floor pan from under
n eath regu larly. If you see spots from oil o r o ther ve hicle flu ids, have
your vehicle ins pected
by an autho rized Audi dea ler. •
Engine compartment
Ap plies to vehi cles : wi th 8 -cy lind er e ngi ne
Engine compartment overview : 8-cylinder
engine
T hese are the m ost i mpor tant i tems th at yo u c an ch eck .
Fig. 261 Typical l ayout for containe rs, engine o il d ip stic k a nd engine oil fille r
c a p
G) Winds hield/headlight washer containe r(~ ) ...... . .
© Brake fluid reservo ir ( ) ) . . .. .. .. ...... .... ... .. .
© En gine oi l filler cap ("t::r.) .. .. .... ...... ....... . _.
© Eng ine oil d ipstick (orange) .... ..... ....... ... .. .
© Power steering reservoir ...... ....... .... .. ... .. .
© Coolant expansion tank (_ L J ... ...... .... ... .... . .
323
317
312
3 11
2 7 3
315
..
Page 311 of 404

_____________________________________________ C_h_ e_ c
_ k_in --= g'-a
_ n_d _ f_il _li _n ..::g ::.-__.ffllll
& WARNING
B efor e you che ck an ything in the eng ine comp artm ent, a lw ays
read and heed all WARN ING S
~ & in "W orkin g in the engin e
c omp artment " on
page 30 7. •
Appl ies to vehicles: with 12- cy linder engine
Engine compartment overview : 1 2-cyl inder
engine
These are the most important items that you can check.
F ig . 262 Ty pi cal layout for c ontain ers, en gine oil dip st ic k a nd e ngine o il filler
ca p
G) Windshield/head light washer container ( Q ) . . . . . . . . 323
@ Brake fluid reservoir ( ) . . . . . . . . . . . . . . . . . . . . . . . . 317
© Engine oi l dipstick (orange) . . . . . . . . . . . . . . . . . . . . . . 311
© Engine oil filler cap ('t=:11) .. ...... .... ... ... ... .. . .
© Coolant expansion tank (- L l ..................... .
& WARNING
Before you check anything in th e engine co mpartment , alway s
read and he ed all W ARNI NGS
~ & in "Wo rking in t he engin e
c ompartm ent " on
page 307.
[ i ] Tip s
The coolant expansion tank is located under a cover .•
Engine oil
Engine oil specifications
312
315
The engine oil us ed in your Audi needs the right kind of
oil.
The engine in your Audi is a sophisticated powerplant that was built
to exacting specifications. This engine needs the right kind of engine oil that meets specifications regarding quality and viscosity
so that it can run smoothly and re liably. Choosing the righ t oil and
changing oil within the time and mileage interva ls printed in your
vehicle's Warranty
& Ma intenance book let matters a lo t more today
than it did years ago. Audi has developed a special quality standard
for engine oil that wil l help assure that your vehicle's engine wi ll get
the lubrication it needs for proper operation .
Mode rn engine lubrication has taken a quantum leap in the last few
years . Many syn thetic oils available today provide better engine
lubrication that can outlast traditional petroleum-based oils,
making them a smart choice for use throughout the life of your Audi.
Whether you use synthetic or petroleum -based engine oil, the oi l
that you use must conform to Audi's oi l qua lity standard VW 502 00
..,
Vehic le care I I irechnical data
Page 312 of 404

___ C_ h_e _c _ k_ i_ n ~g~ a_ n_ d_ f_ i_ll _in _g~--------------------------------------------
to help keep your vehicle's engine running smoothly and help
prevent the formation of harmfu l deposits, sometimes called
"sludge, " that over time can lead to expensive repairs .
At the time of printing, engine oils available in the U.S. and Canada
that meet the exacting specificat ions of Audi oil standard VW 502 00
are synthetic engine oils. This does not mean, however, that every
synthetic engine oil will meet Audi oi l standard VW 502 00. So
a lways b e sur e that you use an approved oil.
To help prevent the formation of harmful deposits use only oi l with
the following specifications printed on the oil container :
Audi oil sta nda rd VW 502 00
Oil container labels may carry the specification singly or in combi
nation with other designations and oil quality standards.
V iscosi ty
Engine oi ls are graded according to their viscosity . The proper
viscosi ty grade oi l for your engin e depends on climactic or seasonal
conditions where you drive . You can use o il with a v iscosity grade of
SAE 5W40 across all temperature ranges for normal driving condi
tions.
However , if eng ine oil viscosity grade SAE 5W40 is not available, you
can a lso use viscosity grade SAE 5W -30 or SAE 0W -40 as long as it
meets Audi oil quality standard VW 502 00 specifications.
B ecause engin e oil that meets the Audi oi l standard may not be
avai lable everywhere when you need it, we strongly recommend
that you a lways carry with you an extra quart !liter) of oil that
express ly conforms to t he VW 502 00 specification, in case you have
to top off the oil while on the road.
Only if th e level of the oil is at or be low the minimum mark on the
oi l dipstick -and no oil that express ly conforms to Audi oi l standard
VW 502 00 specifications is avai lable -may you top off with a high
quality engine oi l, preferably synthetic -based, that meets ACEA A3,
ACEA A5 or ACEA B5, API SL or ILSAC GF -3 specifications , but even
t hen, only in viscosity grades SAE 5W -40, SAE 5W -30, or SAE 0W -40.
However, during the entire time betwe en oil change int erva ls, nev er top off with more than a total of 0
.5 qt/ liter engine oil that does not
conform to Audi oil specifica tion VW 502 00.
For more information about engine oil that has been approved for
your vehic le, please contact either your authorized Audi dealer or
Aud i Customer Relat ions at 1 (800) 822-2834 or v isit our web s ite at
www.audiusa.com or www.audicanada.ca. Here you will also find a
current list of o ils (manufacturers, brand names
etc.I that conform
to Audi oi l standard VW 502 00.
Ch an g in g t he en gin e oil
The engine oil and o il filter must be changed according to the
mileage (ki lometers) and time intervals specified in your vehic le 's
Warranty & Maintenance booklet . Do not exceed these intervals -
harmful deposits from old engin e oil can reduce engin e perfor
mance and can lead to expensive eng ine repa irs.
Changing the oil at the recommended intervals is so very impor tant
because the lubricating properties of oi l decrease gradua lly during
normal vehicle use. If you are not sure when you have your o il
changed, ask your authorized Audi Service Advisor.
Under some circumstances the eng ine oil should even be changed
mor e frequen tly . Change oil more oft en if you drive most ly short
distances, operate the vehicle in dusty areas or mostly under stop
and -go traffic conditions, or when you use your vehicle where
t emperatures stay be low freezing po int for long per iods .
Detergent add it ives in the oi l wi ll make fresh oil look dark after the
engine has be en running for a short time. This is normal and is not
a reason to change the oi l more often than recommended .
Dam age or malfun ction s du e to lack of m aint enan ce
It is essential that you change your oil at the recommended interva ls
using on ly engine oil that complies with Audi oil standard
VW 502 00. Your Limited New Vehicle Warranty does not cover
damage or malfunctions due to fai lure to follow recommended
maintenance and use requirements as set forth in the Audi Owner's
Manual and Warranty
& Maintenance booklet. Your dea ler wi ll have
to deny warranty coverage un less you pr esent to the dea ler proof in
.,_