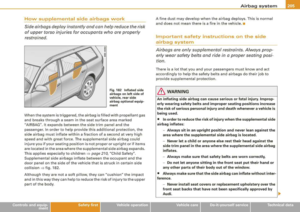
Page 129 of 368

Warm and cold -
----------------
Button(s) Function L..:.:.:..:..::...:.:..:..:..:.... _______ ___. _____ _
IAUTOI Automatic operation => page 127
88 Temperature controls for
!left and driver's side and passenger's side => page 127
right)
~ Air recirculation => page 128
(ECON) Switches off air conditioning
Switches off air conditioning (rather
IOFFI => page 128
than using l ~I )
~ Switches off the air recirculation
(rather than using
I OFF))
88
(in the cen- Adjusts fan speed => page 129
ter)
Air directed to the windows
=> page 130
@) Air directed to the footwells => page 130
@ Air from dashboard outlets => page 130
00 Windshield defroster/defogger => page 131
~ Rear window defroster/defogger
The buttons I-0- 1, (@I, and (,o,) can be selected individually or in
combination. •
Controls and equip
ment
.
I
Automatic mode [AU TO]
The automatic mode is the standard setting for all
seasons .
Switching on AUTO
- Select temperature between 64 °F (+18 °C) and 84 °F
(+29 °C).
Press [AUTO ]
=> page 126, fig. 137.
AUTO only works when you set the inside temperature between
64 °F (18 °C) and 84 °F (29 °C). If you select a temperature below
64 °F (18 °C),
LO will appear in the display. If you select a tempera
ture above 84 °F (29 °C),
HI will appear in the display.
The system automatically compensates for changes in outside
temperature and for the intensity of the sunlight.
[ i] Tips
By keeping the (AUTO I button on the driver's side pressed for
severa l seconds, the temperature of the passenger's side can be
synchronized to the temperature of the driver's side or vice versa.
The new temperature setting will be shown in the display .•
Setting the temperature
Separate temperatures can be selected for the driver's
and front passenger's side.
- Press the 8 button or the G button under each display
=> page 126, fig. 137 until the desired temperature is
reached.
The selected temperature setting appears in the display above the
buttons . ..,
Page 130 of 368

_L_W:...:._: a::..:_: rm:....:...:..~ a::..: n~ d~ c~o :.:l.:::d :.._ _______________________________________________ _
By pressing both !AUTO l buttons for several seconds, the tempera
ture on the passenger's side can be set to the temperature of the
driver's side or vice versa . The new temperature set ting will be
shown in the display. The old temperature setting can be restored
by resetting the display as required. •
Switching between Fahrenheit and
Centigrade
You can change the temperature display from °F (Fahren
heit) to
°C (Centigrade) and vice versa.
- Press and hold[ ~] and press the plus button on the
driver's side temperature
switch ~ page 126, fig. 137 . •
Air recircul ation [~]
The air recirculation prevents exhaust fumes or other
pollution from entering the vehicle.
Switching on the air recirculation
-Press[ ~]~ page 126, fig. 137 ~ &
Switching off the air recirculation
-Press~ again, or
- press [AUTO], or
press[ ®].
In the air recirculation mode , the air in the passenger compartment
is recirculated to prevent exhaust fumes and other pollution from
entering the vehicle. We recommend that you use the manual air recirculation under the following conditions:
• when driving through tunnels
• in a tra ffic jam.
& WARNING
Do not use this setting for extended periods of time . The windows
could fog up since no fresh air can enter the vehicle.
If the
windows fog up, press the air recirculation button again immedi ately to switch off the air recirculation function or select defrost. •
ECON [ECON]
Using ECON helps save fuel
- Press [ECON] to activate ~ page 126, fig. 137.
Press [ECON] again or press [AUTO] to switch off.
In ECON mode the air conditioner is shut off and heating and venti
lation are automatically controlled . "ECON" translates "Economy"
since driving with the air conditioning compressor disengaged
improves your mileage noticeably.
When operating in ECON mode make sure the temperature inside
the vehicle is not lower than the outside temperature. The air is
nei ther cooled nor dehumidified, so there is a risk that the windows
can fog up .•
Switching the air conditioning on and off [ OFF]
Switching the air conditioning off
-Press [ OFF] to turn the air conditioner off and block
outside air from entering the vehicle.
Switching the air conditioning on
-Press [ OFF] again (indicator light comes on again), or
- Press [AUTO], or
- Press one of the following buttons:
[O J,[@!] or [-0, ].
Page 131 of 368

_______________________________________________ W_ a_ r_ m __ a_n _ d_ c_ o_ ld __ lJIII
Moreover, the a ir conditioning switches on again whenever you
press the fan speed or temperature buttons. •
Automatic air recirculation [@, I
If outside air is polluted, an air quality sensor in the
vehicle will automatically switch on the air recirculation .
Switching on air re circul ation
-Press[ ~)~ page 126, fig. 137 .
Swit ching off air r ecircul ati on
-Press~ again, or
- press [AUTO), or
-
press[ ®].
The automat ic air recirculation mode should normally be left
switched on at a ll times.
The system is ready to operate approximately 30 seconds after you
tu rn on the ignition or start the vehicle . Fresh air enters the vehicle
only during this initialization period .
If the
a ir quality sen sor in the air condit ion ing system detects
exhaust fumes in the outside air, the contro l unit wil l either pass the
incom ing a ir throug h the pol lution filter, or automat ical ly switch on
the air recirculation.
The air conditioning system wi ll automatically switch on the air
recirculation if it senses that the outside air is very po lluted . At the
same time, it will not allow any outside air to enter the vehic le until
the air quality has improved .
The air recircula tion opera tes for a maximum of
12 minu tes. If th e
windows start to fog up whi le the a ir rec irculation is on, press
[ @1
Under certain operating conditions (for example, if [@ ) or [Qi] are
pressed) the air recircu lation automatically switches off. If "ECON"
Controls and equip
ment
is pressed, or if the temperature is below 18° F (-8 °C), the air recir
culat ion will operate only for
1 2 seco nds .•
Adjusting the fan speed 8 G
The automatically selected fan speed can be increased or
decreased.
D
D
D
D
D
D
F ig . 138 Fa n sp ee d
but tons a nd di spl ay
indi cation
- Press the 8 or G b uttons in the center of the contr ol
pane l~ fi g. 1 38 to adjus t the fa n speed to yo ur comfor t.
The air condit ioning system automa tica lly regu lates the fan speed
in response to the interior tempera ture . However, you can also
adjust the fan speed manua lly . A lin e of sma ll bars in the center
display above the fan control buttons will retreat or extend to reflect
your adjustments to the fan speed. •
Page 132 of 368

___ w_ a_ rm __ a_ n_ d_ c_o _l_d ________________________________________________ _
Air distribution
The automatically c ontrolled air distribution can be
changed manually.
You can use the [-0- 1, j@fill or j,O,I buttons separately or together in
combination . To sw itch back to the auto matic a ir distribution
setting, either switch off the buttons you previously selected, or
press [AUTO
I.
Each of the three buttons has its own specific function (the refer
ence numbers refer to t he air
outlets) ~ page 131, fig. 139.
Air dir ecte d to the wind ows [-0- 1
A ll the a ir is directed to outlets G) ,@ and G) . Contrary to when [@I
is pressed, the amount of air remains the same .
Air directed to the driver /fron t passenger l~ I
All the air is directed to outlets @,© and © in the instrument
panel. Air also is d irected t hroug h the center console in t he rear .
Air dir ect ed to th e footw ells I-0-1
A ll the a ir is directed to out lets © and to the out lets u nder the front
seats .•
Page 133 of 368

Warm and cold -
-----------------'
Air outl ets
-. .. ~.
Fig. 1 39 Instr umen t pan el: air outlet locat ions and a irflow direc tion s
The air outlets G) and 0 on top of t he instrument panel are
fixed. Outlets 0 and © con be adjusted.
Adjusting air outlets 0 and ©
- Turn the vertical thumbwheel beside the out let to
increase, reduce or shut down t he airflow from that
o utlet .
- Move the sm all tab in t he cen ter of the o utle t lo uver side
ways and up or dow n to adj ust the level and directio n of
air flow.
The supp ly of air to the outlets is contro lled eit her automatical ly or
manually depending on the operation mode selected. The airflow
from all outlets can be heated, unheated or coo led .
Controls and equip
ment
The heater outlets for the rear footwe lls are located under the front
seats. When you select outlets ©, air is also directed to the rear
footwel ls.
[ i ] Tip s
• When defrosting/defogging the windows, air flows from outlets
G),@ and G) . To defrost or defog the windows as rapidly as
possible , air outlets
G) should be opened fully with the adjuster
whee ls .
• When the air conditioner is working, cooled air will flow primarily
from
ou tlets @, G) and @. To assure adequa te cooling, out lets G)
and © should never be completely closed .•
Defrosting /defogging the windshield [@)
The windshield and side windows are quickly defrosted or
defogged
- Press [® I=> page 126, fig. 137.
-
Press[ ®] ag ain or press [AUTO] to switch off the
defroster .
The temperature is automatically contro lled. Maximum airflow is
primarily b lown in through out lets
G) , @ and G):::) page 131 .
Outlets @ can be opened and c losed with the controls behind
them. Outlets
@ and G) must be opened so the windows can be
defrosted as quickly as possible.
By pressing[ @), air recirculation and ECON are switched off .•
Defrosting /defogging the rear window Qii)
- Press the (ffi) switch to swi tc h the rear wind ow d efo gge r
o n an d off.
.,_
Technical data
Page 134 of 368

-
Warm and cold
----------------
The rear window defogger works only when the ignition is switched
on. The light in the switch will illuminate when the defogger is on .
When the outside temperature is warmer than 32 °F (O °Cl , the rear
window defogger switches off automatically after about ten minutes.
'£> F o r the sake of the environment
Switch off the defogger when the rear window is clear . When you
save e lectricity, you save fuel. •
Using the climate controls economically
Using the climate controls prudently can help save fuel .
When you use the air conditioner, engine power is reduced
and fuel consumption increases . To save fuel, you should
use the air conditioner only when necessary . Also please
note the following points:
-If you want to save fuel, activate ECON.
-If you are goi ng to drive w ith the windows open, use
ECON.
'£> For th e sake of the environment
By reducing the amount of fue l you use , you also reduce the amount
of pollutants emitted into the air. •
Key coded settings
When the ignition is switched on, the air conditioner
settings are automatically assigned to the key being used.
The air conditioner settings selected are automatically stored and
assigned to the key being used. When the vehicle is started, the air
conditioner automatically selects the settings assigned to that key.
This way every dr iver will ma intain his/her own personal settings
and does not have to reset them manually .
[ i ] Tip s
If a different driver uses your key and changes the air conditioner
set tings, the latest adjustments will erase and replace the settings
you have stored. •
App lies to ve hicles: w ith e lec tric ally heat ed front seats
Electrically heated front seats
With the ignition on, the seat cushion and backrest of the
front seats can be heated.
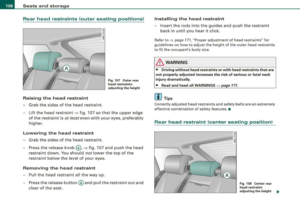
Fig . 140 Cente r
cons ole: thumb whe els
fo r fr ont seat heati ng
....
Page 135 of 368

Warm and cold -
-----------------'
Use the thumbwheels in the center conso le ::::::, page 132,
fig. 140 to turn on and adjust front seat heating. An infinite
range of pos itions are possible.
Driv er's s eat
Roll the thumbwheel G) from pos ition ( 0 ) upward in
order to activate the heating elements .
- Select the desired temperature setting from posit ions 1
through 6 .
Front pass eng er's se at
- Roll the thumbwheel 0 from pos ition ( 0 ) upward in
order to activate t he heating e lements .
When the heating element is activated, the numbers on the thumb
wheel will illum inate .
0 Note
To preven t possible damage to the hea ting elemen ts, do not kneel
on the seats or apply a heavy load to relative ly small areas of the
sea t.•
Controls and equip
ment
A pp lies to veh ic les: w ith e lectrically heated rea r seats
Electrically heated rear seats
The seat cushions and seat backs of the two outer rear
seats can be heated electrically .
Fig. 14 1 C enter
co nso le re ar: H ea ted
seats
- Rotate the thumb wheel © to turn on and adjust the
heating for the left rear seat.
- Rotate the thumb wheel ® to turn on and adjust the
heating for the right rear seat .
With the thumb wheel in the O position, heating for the sea ts is
turned off . The range of adjustment is from 1 to 6.
Th e re ar seat heating operat es only when the seats ar e occupied. I f
the rear seat is not occupied, you should turn the heating for the
sea ts o ff t o preven t unint ended heating of th e seating surfac es.
0 Note
To avoid damage to the heating elemen ts in the sea ts, do not kneel
on the seats or place heavy loads on a small area of the seat .•
irechnical data
Page 136 of 368

___ O_ n_ t
_ h_ e_ ro_ a_d __________________________________________________ _
On the road
Steering
Adjusting the steering wheel column
The height and reach of the steering wheel can be
adjusted.
Fig . 142 Lever under
the steering column
First, adjust the driver's seat correctly.
- Push the
lever => fig. 142 -Arrow- =>& .
Move the steering wheel to the desired position.
- Push the lever against the steering column unt il it locks.
There must be at least 10 inches (25 cm) between your breastbone
and the center of the steering wheel. If you cannot sit more than 10
inches (25 cm) from the steering wheel,
we recommend that you
investigate whether adaptive equipment is available to help you
reach the pedals and increase your seating distance from the
steering wheel. For detailed information on how to adjust the driver's seat, see
=> page 97, "Power seat adjustment"
.
& WARNING
Improper use of steering wheel adjustment and improper seating
position can cause serious personal injury .
• Adjust the steering wheel column only when the vehicle is not
moving to prevent loss of vehicle control.
• Always make sure that the adjustment lever is securely pushed
up so that the position of the steering wheel cannot be changed
unintentionally when the vehicle is moving.
• Adjust the driver's seat or steering wheel so that there is a
minimum of 10 inches (25 cm) between your breastbone and the
steering
wheel ~ page 168, fig. 162. If you cannot maintain this
minimum distance the airbag system cannot protect you properly.
• If physical limitations prevent you from sitting 10 inches (25
cm) or more from the steering wheel, check with your authorized
Audi dealer to see if adaptive equipment is available.
• Pointing the steering wheel toward your face decreases the
ability of the supplemental driver's airbag to protect you in an
accident. Always make sure that the steering wheel is pointed
towards your chest .
• Always hold the steering wheel on the outside of the steering
wheel rim with your hands at the 9 o'clock and 3 o'clock positions
to help reduce the risk of personal injury if the driver's airbag inflates.
• Never hold the steering wheel at the 12 o'clock position or with
your hands at other positions inside the steering wheel rim or on
the steering wheel hub. Holding the steering wheel the wrong way
can cause serious injuries to the hands, arms and head if the
driver's airbag inflates.
•