Page 1437 of 1575

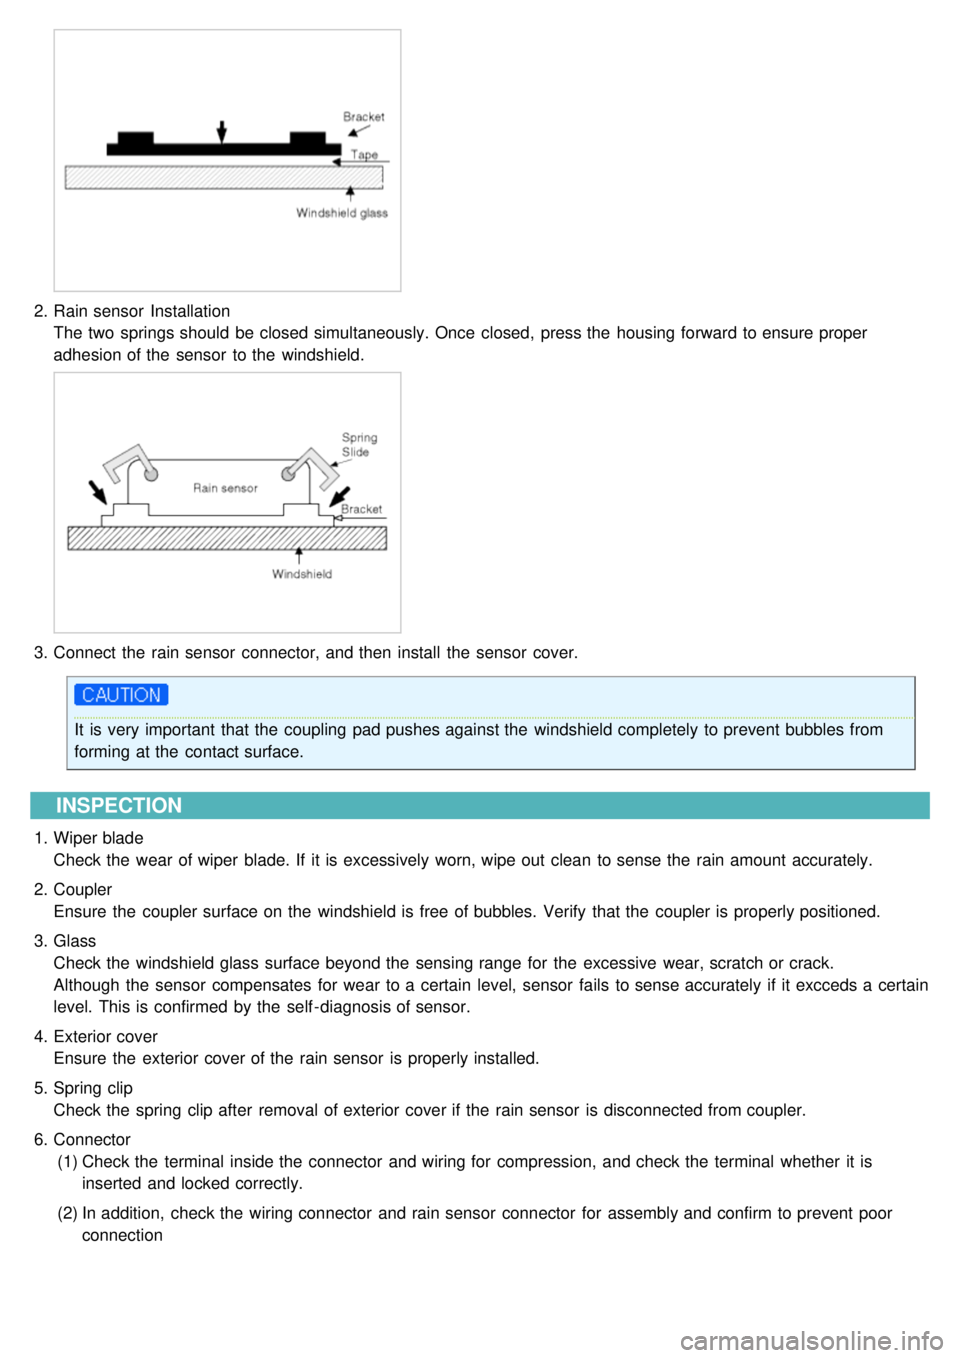
2.Rain sensor Installation
The two springs should be closed simultaneously. Once closed, press the housing forward to ensure proper
adhesion of the sensor to the windshield.
3.Connect the rain sensor connector, and then install the sensor cover.
It is very important that the coupling pad pushes against the windshield completely to prevent bubbles from
forming at the contact surface.
INSPECTION
1.Wiper blade
Check the wear of wiper blade. If it is excessively worn, wipe out clean to sense the rain amount accurately.
2. Coupler
Ensure the coupler surface on the windshield is free of bubbles. Verify that the coupler is properly positioned.
3. Glass
Check the windshield glass surface beyond the sensing range for the excessive wear, scratch or crack.
Although the sensor compensates for wear to a certain level, sensor fails to sense accurately if it excceds a certain
level. This is confirmed by the self - diagnosis of sensor.
4. Exterior cover
Ensure the exterior cover of the rain sensor is properly installed.
5. Spring clip
Check the spring clip after removal of exterior cover if the rain sensor is disconnected from coupler.
6. Connector
(1) Check the terminal inside the connector and wiring for compression, and check the terminal whether it is
inserted and locked correctly.
(2) In addition, check the wiring connector and rain sensor connector for assembly and confirm to prevent poor
connection
Page 1459 of 1575

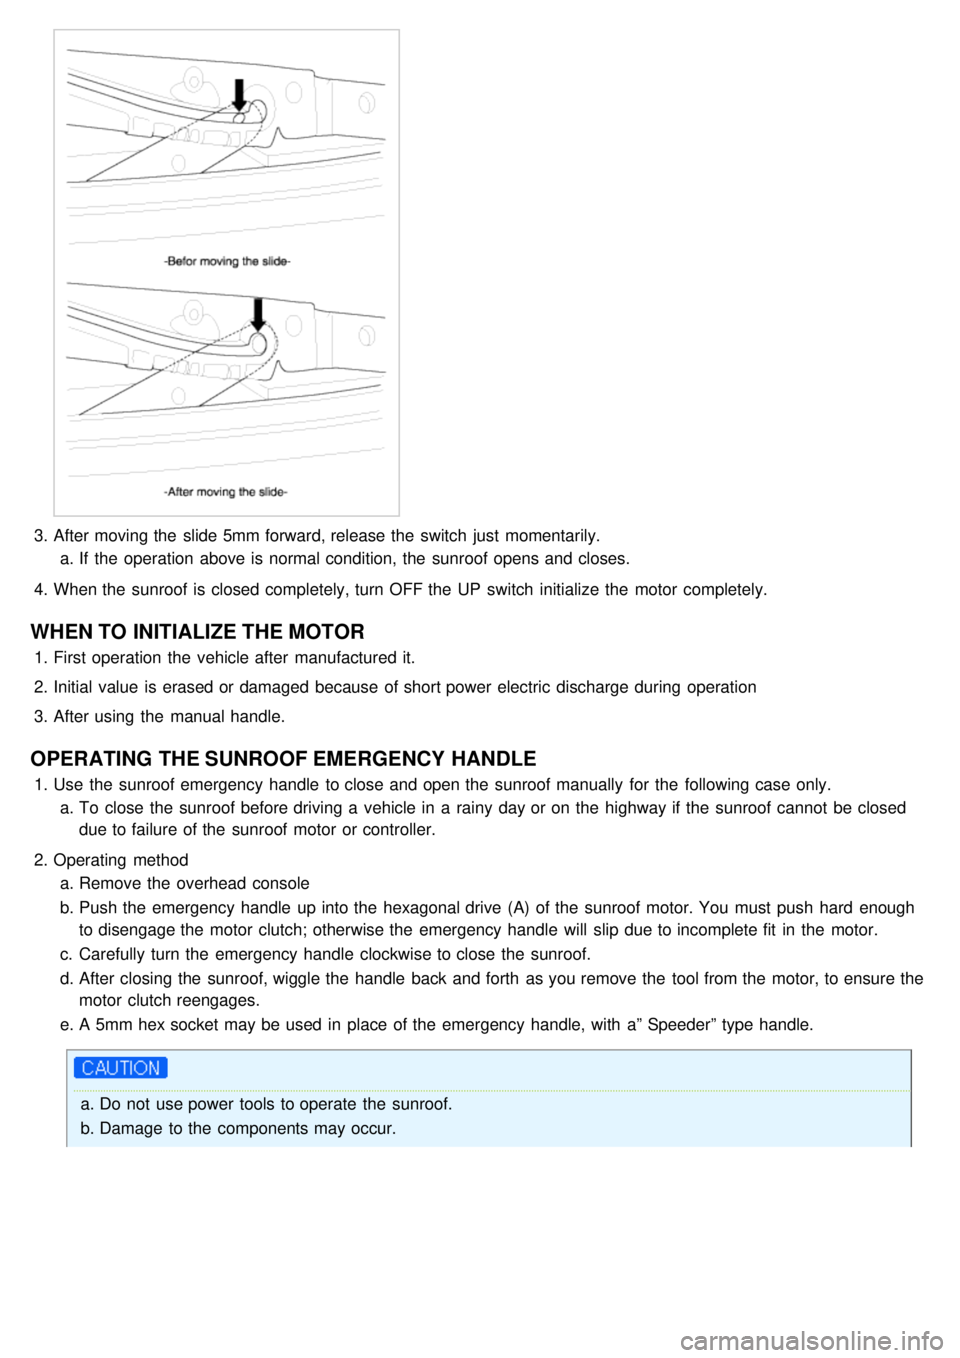
3.After moving the slide 5mm forward, release the switch just momentarily.
a. If the operation above is normal condition, the sunroof opens and closes.
4. When the sunroof is closed completely, turn OFF the UP switch initialize the motor completely.
WHEN TO INITIALIZE THE MOTOR
1.First operation the vehicle after manufactured it.
2. Initial value is erased or damaged because of short power electric discharge during operation
3. After using the manual handle.
OPERATING THE SUNROOF EMERGENCY HANDLE
1.Use the sunroof emergency handle to close and open the sunroof manually for the following case only.
a. To close the sunroof before driving a vehicle in a rainy day or on the highway if the sunroof cannot be closed
due to failure of the sunroof motor or controller.
2. Operating method
a. Remove the overhead console
b. Push the emergency handle up into the hexagonal drive (A) of the sunroof motor. You must push hard enough
to disengage the motor clutch; otherwise the emergency handle will slip due to incomplete fit in the motor.
c. Carefully turn the emergency handle clockwise to close the sunroof.
d. After closing the sunroof, wiggle the handle back and forth as you remove the tool from the motor, to ensure the
motor clutch reengages.
e. A 5mm hex socket may be used in place of the emergency handle, with a” Speeder” type handle.
a.Do not use power tools to operate the sunroof.
b. Damage to the components may occur.
Page 1474 of 1575
2007 > 2.7L V6 GASOLINE >
REPLACEMENT
FRONT TURN SIGNAL LAMP
1. Disconnect the negative ( - ) battery terminal.
2. Remove front lamp assembly.
3. Remove the socket in a counterclockwise direction.
4.Replace the bulb (A).
REAR TURN SIGNAL LAMP
1.Disconnect the negative ( - ) battery terminal.
2. Remove the rear lamp assembly (A) after removing the mounting screw (3EA) and connector.
3.Remove the socket in a counterclockwise direction and replace the bulbs.
SIDE TURN SIGNAL LAMP
1.Disconnect the negative ( - ) battery terminal.
2. Disconnect the connector after removing the lens.
Page 1475 of 1575
3.Remove the socket in a counterclockwise direction.
4.Replace the bulb.
Page 1483 of 1575
2007 > 2.7L V6 GASOLINE >
REPLACEMENT
1.Disconnect the negative ( - ) battery terminal.
2. Remove the front lamp assembly.
3. Remove connector and the socket in a counterclockwise direction.
4.Remove the bulb (A) and replace it with a new one.
Page 1505 of 1575
c.The antenna coil sends transponder signal to the SMARTRA.
It is located directly in front of the steering handle lock.
Page 1506 of 1575

2007 > 2.7L V6 GASOLINE >
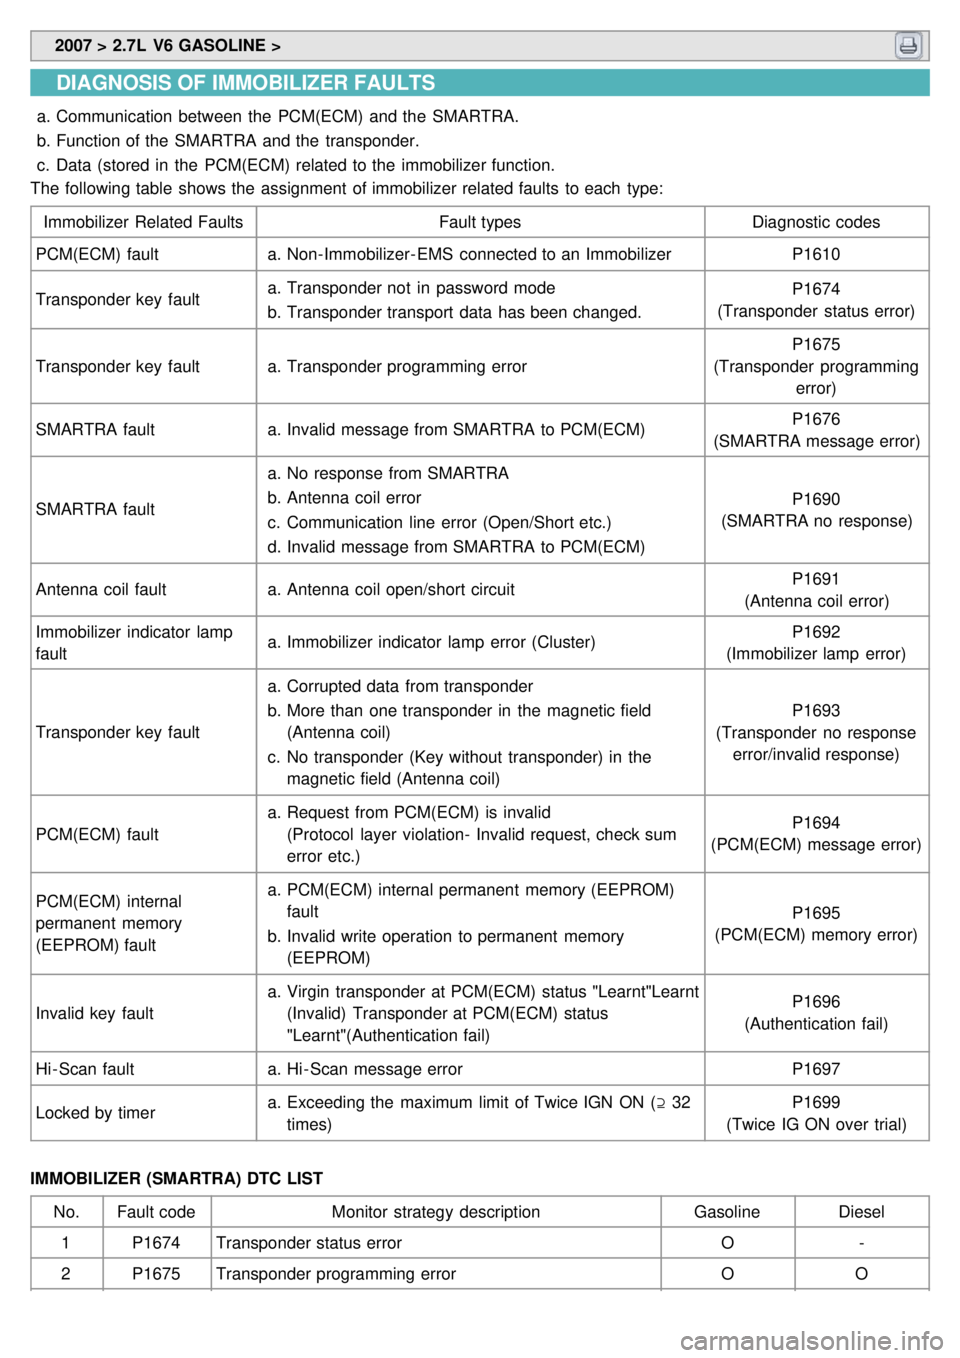
DIAGNOSIS OF IMMOBILIZER FAULTS
a.Communication between the PCM(ECM) and the SMARTRA.
b. Function of the SMARTRA and the transponder.
c. Data (stored in the PCM(ECM) related to the immobilizer function.
The following table shows the assignment of immobilizer related faults to each type:
Immobilizer Related Faults Fault typesDiagnostic codes
PCM(ECM) fault a.Non- Immobilizer- EMS connected to an Immobilizer P1610
Transponder key fault a.
Transponder not in password mode
b. Transponder transport data has been changed. P1674
(Transponder status error)
Transponder key fault a.Transponder programming error P1675
(Transponder programming error)
SMARTRA fault a.Invalid message from SMARTRA to PCM(ECM) P1676
(SMARTRA message error)
SMARTRA fault a.
No response from SMARTRA
b. Antenna coil error
c. Communication line error (Open/Short etc.)
d. Invalid message from SMARTRA to PCM(ECM) P1690
(SMARTRA no response)
Antenna coil fault a.Antenna coil open/short circuit P1691
(Antenna coil error)
Immobilizer indicator lamp
fault a.
Immobilizer indicator lamp error (Cluster) P1692
(Immobilizer lamp error)
Transponder key fault a.
Corrupted data from transponder
b. More than one transponder in the magnetic field
(Antenna coil)
c. No transponder (Key without transponder) in the
magnetic field (Antenna coil) P1693
(Transponder no response error/invalid response)
PCM(ECM) fault a.
Request from PCM(ECM) is invalid
(Protocol layer violation- Invalid request, check sum
error etc.) P1694
(PCM(ECM) message error)
PCM(ECM) internal
permanent memory
(EEPROM) fault a.
PCM(ECM) internal permanent memory (EEPROM)
fault
b. Invalid write operation to permanent memory
(EEPROM) P1695
(PCM(ECM) memory error)
Invalid key fault a.
Virgin transponder at PCM(ECM) status "Learnt"Learnt
(Invalid) Transponder at PCM(ECM) status
"Learnt"(Authentication fail) P1696
(Authentication fail)
Hi - Scan fault a.Hi - Scan message error P1697
Locked by timer a.
Exceeding the maximum limit of Twice IGN ON ( ⊇ 32
times) P1699
(Twice IG ON over trial)
IMMOBILIZER (SMARTRA) DTC LIST No. Fault code Monitor strategy description GasolineDiesel
1 P1674 Transponder status error O-
2 P1675 Transponder programming error OO
Page 1515 of 1575
LIMP HOME FUNCTION
1.LIMP HOME BY TESTER
If the PCM(ECM) detects the fault of the SMARTRA or transponder, the PCM(ECM) will allow limp home function of
the immobilizer. Limp home is only possible if the user password (4 digits) has been given to the PCM(ECM)
before. This password can be selected by the vehicle owner and is programmed at the service station.
The user password can be sent to the PCM(ECM) via the special tester menu.
Only if the PCM(ECM) is in status "learnt" and the user password status is "learnt" and the user password is
correct, the PCM(ECM) will be unlocked for a period of time (30 sec.). The engine can only be started during this
time. After the time has elapsed, engine start is not possible.
If the wrong user password is sent, the PCM(ECM) will reject the request of limp home for one hour. Disconnecting
the battery or any other action cannot reduce this time. After connecting the battery to the PCM(ECM), the timer
starts again for one hour.