2007 INFINITI QX56 ignition
[x] Cancel search: ignitionPage 1100 of 3061

PRECAUTIONS
EC-17
< SERVICE INFORMATION >
C
D
E
F
G
H
I
J
K
L
MA
EC
N
P O
PRECAUTIONS
Precaution for Supplemental Restraint System (SRS) "AIR BAG" and "SEAT BELT
PRE-TENSIONER"
INFOID:0000000003531580
The Supplemental Restraint System such as “AIR BAG” and “SEAT BELT PRE-TENSIONER”, used along
with a front seat belt, helps to reduce the risk or severity of injury to the driver and front passenger for certain
types of collision. This system includes seat belt switch inputs and dual stage front air bag modules. The SRS
system uses the seat belt switches to determine the front air bag deployment, and may only deploy one front
air bag, depending on the severity of a collision and whether the front occupants are belted or unbelted.
Information necessary to service the system safely is included in the SRS and SB section of this Service Man-
ual.
WARNING:
• To avoid rendering the SRS inoperative, which could increase the risk of personal injury or death in
the event of a collision which would result in air bag inflation, all maintenance must be performed by
an authorized NISSAN/INFINITI dealer.
• Improper maintenance, including incorrect removal and installation of the SRS, can lead to personal
injury caused by unintentional activation of the system. For removal of Spiral Cable and Air Bag
Module, see the SRS section.
• Do not use electrical test equipment on any circuit related to the SRS unless instructed to in this
Service Manual. SRS wiring harnesses can be identified by yellow and/or orange harnesses or har-
ness connectors.
On Board Diagnosis (OBD) System of Engine and A/TINFOID:0000000003531581
The ECM has an on board diagnostic system. It will light up the malfunction indicator lamp (MIL) to warn the
driver of a malfunction causing emission deterioration.
CAUTION:
• Be sure to turn the ignition switch OFF and disconnect the negative battery cable before any repair
or inspection work. The open/short circuit of related switches, sensors, solenoid valves, etc. will
cause the MIL to light up.
• Be sure to connect and lock the connectors securely after work. A loose (unlocked) connector will
cause the MIL to light up due to the open circuit. (Be sure the connector is free from water, grease,
dirt, bent terminals, etc.)
• Certain systems and components, especially those related to OBD, may use a new style slide-lock-
ing type harness connector. For description and how to disconnect, refer to PG-66
.
• Be sure to route and secure the harnesses properly after work. The interference of the harness with
a bracket, etc. may cause the MIL to light up due to the short circuit.
• Be sure to connect rubber tubes properly after work. A misconnected or disconnected rubber tube
may cause the MIL to light up due to the malfunction of the EVAP system or fuel injection system,
etc.
• Be sure to erase the unnecessary malfunction information (repairs completed) from the ECM and
TCM (Transmission control module) before returning the vehicle to the customer.
PrecautionINFOID:0000000003531582
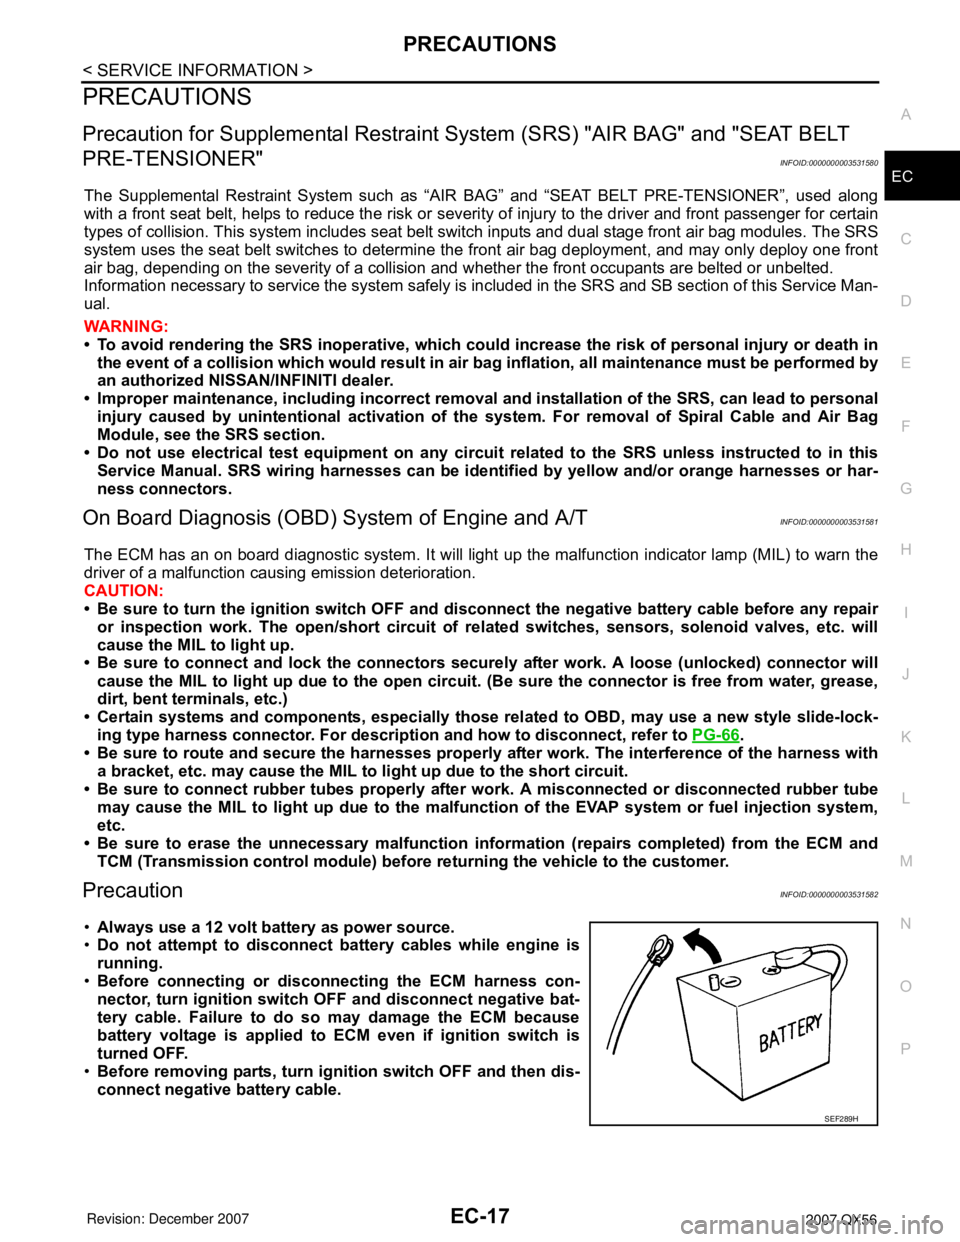
•Always use a 12 volt battery as power source.
•Do not attempt to disconnect battery cables while engine is
running.
•Before connecting or disconnecting the ECM harness con-
nector, turn ignition switch OFF and disconnect negative bat-
tery cable. Failure to do so may damage the ECM because
battery voltage is applied to ECM even if ignition switch is
turned OFF.
•Before removing parts, turn ignition switch OFF and then dis-
connect negative battery cable.
SEF289H
Page 1110 of 3061

ENGINE CONTROL SYSTEM
EC-27
< SERVICE INFORMATION >
C
D
E
F
G
H
I
J
K
L
MA
EC
N
P O
This system is used when the engine is being started and/or if the fail-safe system (CPU) is operating.
FUEL SHUT-OFF
Fuel to each cylinder is cut off during deceleration, operation of the engine at excessively high speeds or oper-
ation of the vehicle at excessively high speed.
Electronic Ignition (EI) SystemINFOID:0000000003531587
INPUT/OUTPUT SIGNAL CHART
*1: This signal is sent to the ECM through CAN communication line.
*2: ECM determines the start signal status by the signals of engine speed and battery voltage.
SYSTEM DESCRIPTION
Firing order: 1 - 8 - 7 - 3 - 6 - 5 - 4 -2
The ignition timing is controlled by the ECM to maintain the best air-fuel ratio for every running condition of the
engine. The ignition timing data is stored in the ECM.
The ECM receives information such as the injection pulse width and camshaft position sensor signal. Comput-
ing this information, ignition signals are transmitted to the power transistor.
During the following conditions, the ignition timing is revised by the ECM according to the other data stored in
the ECM.
• At starting
• During warm-up
•At idle
• At low battery voltage
• During acceleration
The knock sensor retard system is designed only for emergencies. The basic ignition timing is programmed
within the anti-knocking zone, if recommended fuel is used under dry conditions. The retard system does not
operate under normal driving conditions. If engine knocking occurs, the knock sensor monitors the condition.
The signal is transmitted to the ECM. The ECM retards the ignition timing to eliminate the knocking condition.
Fuel Cut Control (at No Load and High Engine Speed)INFOID:0000000003531588
INPUT/OUTPUT SIGNAL CHART
*: This signal is sent to the ECM through CAN communication line.Sensor Input signal to ECM ECM function Actuator
Crankshaft position sensor (POS)
Engine speed*
2
Piston position
Ignition timing
controlPower transistor Camshaft position sensor (PHASE)
Mass air flow sensor Amount of intake air
Engine coolant temperature sensor Engine coolant temperature
Throttle position sensor Throttle position
Accelerator pedal position sensor Accelerator pedal position
Knock sensor Engine knocking
Park/neutral position (PNP) switch Gear position
Battery
Battery voltage*
2
Wheel sensor
Vehicle speed*1
Sensor Input signal to ECM ECM function Actuator
Park/neutral position (PNP) switch Neutral position
Fuel cut control Fuel injector Accelerator pedal position sensor Accelerator pedal position
Engine coolant temperature sensor Engine coolant temperature
Crankshaft position sensor (POS)
Camshaft position sensor (PHASE)Engine speed
Wheel sensor Vehicle speed*
Page 1121 of 3061

EC-38
< SERVICE INFORMATION >
EVAPORATIVE EMISSION SYSTEM
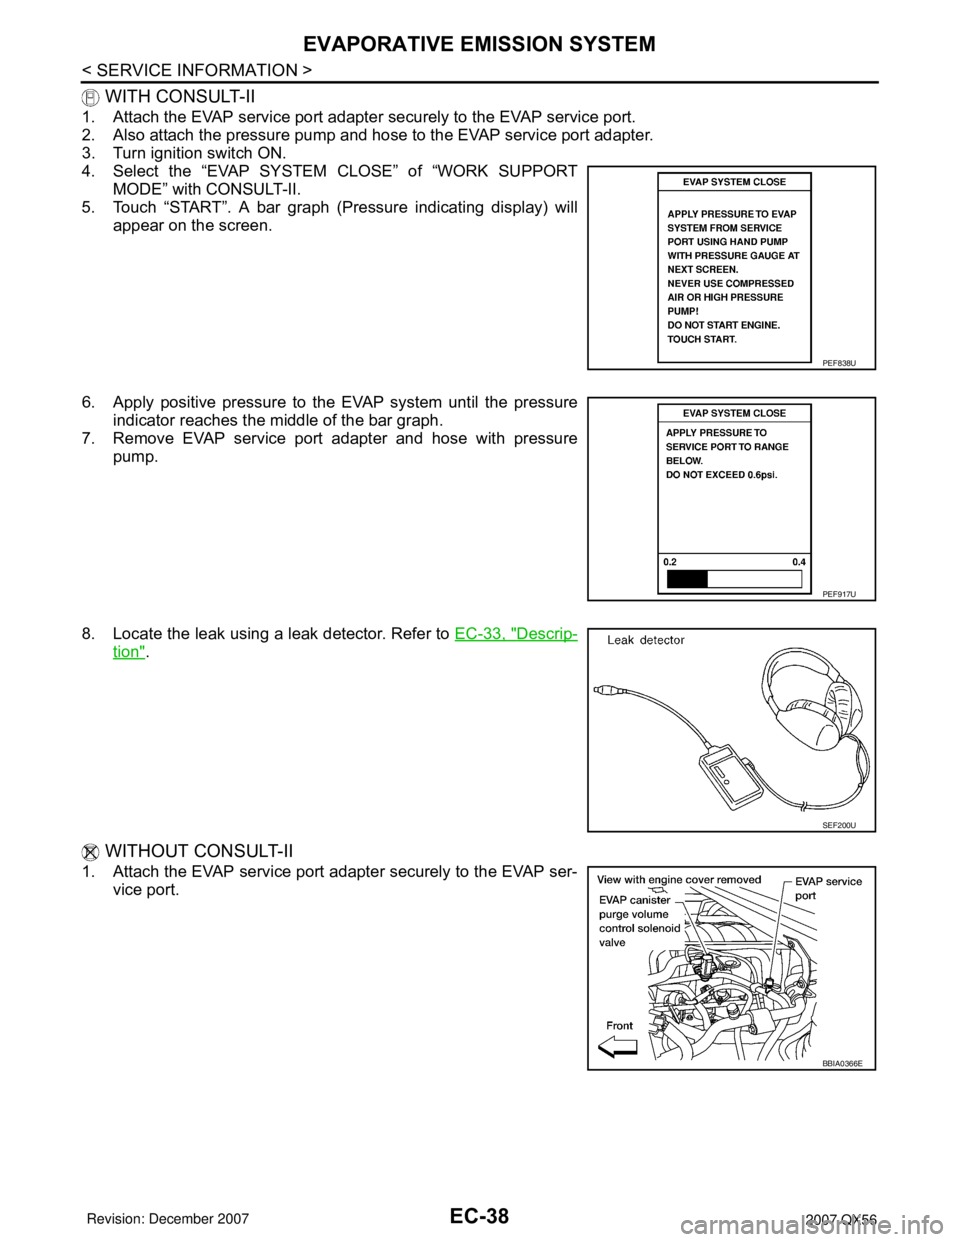
WITH CONSULT-II
1. Attach the EVAP service port adapter securely to the EVAP service port.
2. Also attach the pressure pump and hose to the EVAP service port adapter.
3. Turn ignition switch ON.
4. Select the “EVAP SYSTEM CLOSE” of “WORK SUPPORT
MODE” with CONSULT-II.
5. Touch “START”. A bar graph (Pressure indicating display) will
appear on the screen.
6. Apply positive pressure to the EVAP system until the pressure
indicator reaches the middle of the bar graph.
7. Remove EVAP service port adapter and hose with pressure
pump.
8. Locate the leak using a leak detector. Refer to EC-33, "
Descrip-
tion".
WITHOUT CONSULT-II
1. Attach the EVAP service port adapter securely to the EVAP ser-
vice port.
PEF838U
PEF917U
SEF200U
BBIA0366E
Page 1130 of 3061

IVIS (INFINITI VEHICLE IMMOBILIZER SYSTEM-NATS)
EC-47
< SERVICE INFORMATION >
C
D
E
F
G
H
I
J
K
L
MA
EC
N
P O
IVIS (INFINITI VEHICLE IMMOBILIZER SYSTEM-NATS)
DescriptionINFOID:0000000003531603
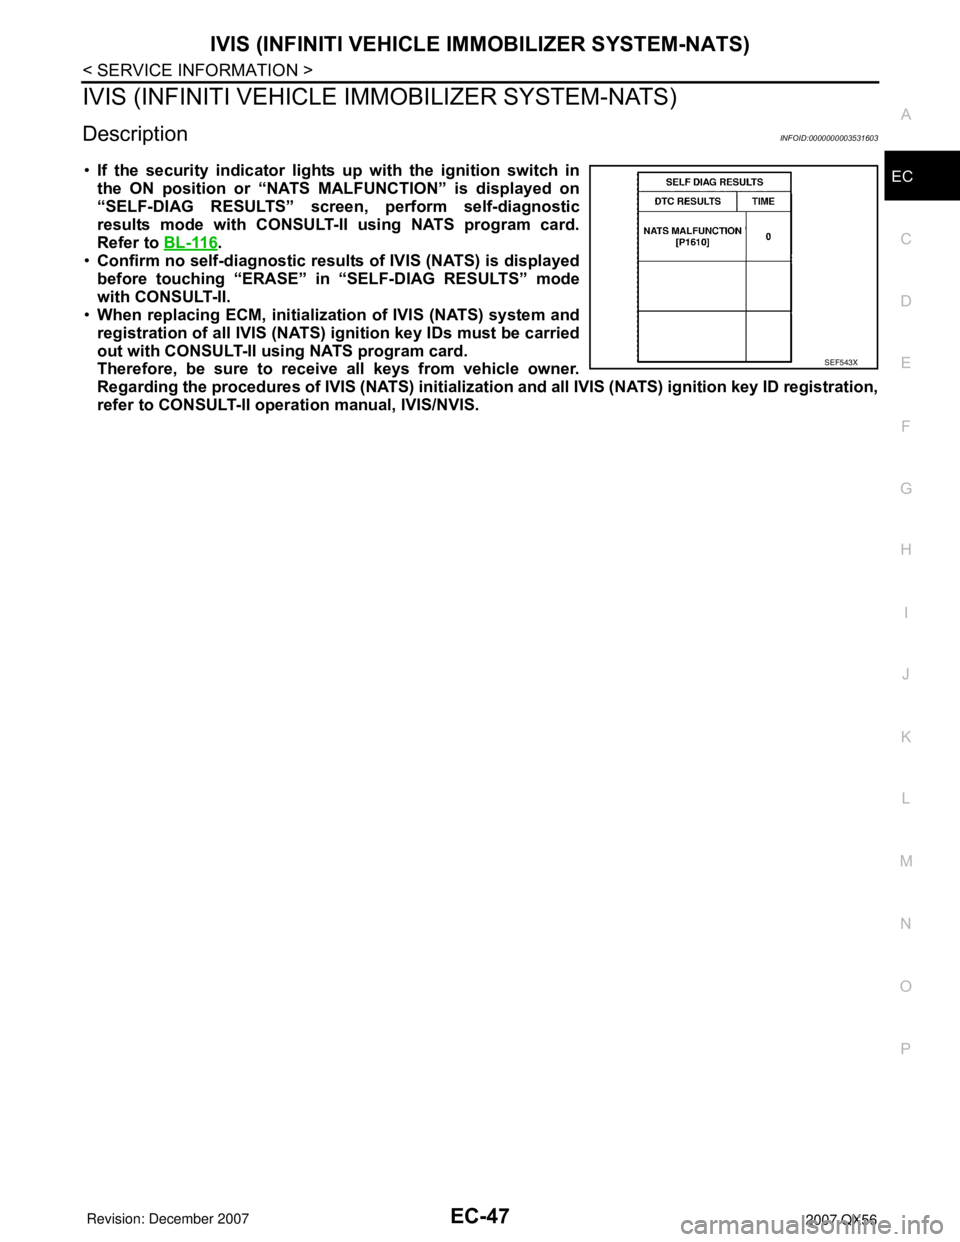
•If the security indicator lights up with the ignition switch in
the ON position or “NATS MALFUNCTION” is displayed on
“SELF-DIAG RESULTS” screen, perform self-diagnostic
results mode with CONSULT-II using NATS program card.
Refer to BL-116
.
•Confirm no self-diagnostic results of IVIS (NATS) is displayed
before touching “ERASE” in “SELF-DIAG RESULTS” mode
with CONSULT-II.
•When replacing ECM, initialization of IVIS (NATS) system and
registration of all IVIS (NATS) ignition key IDs must be carried
out with CONSULT-II using NATS program card.
Therefore, be sure to receive all keys from vehicle owner.
Regarding the procedures of IVIS (NATS) initialization and all IVIS (NATS) ignition key ID registration,
refer to CONSULT-II operation manual, IVIS/NVIS.
SEF543X
Page 1138 of 3061

ON BOARD DIAGNOSTIC (OBD) SYSTEM
EC-55
< SERVICE INFORMATION >
C
D
E
F
G
H
I
J
K
L
MA
EC
N
P O
NOTE:
The SRT will also indicate “INCMP” if the self-diagnosis memory is erased for any reason or if the ECM mem-
ory power supply is interrupted for several hours.
If, during the state emissions inspection, the SRT indicates “CMPLT” for all test items, the inspector will con-
tinue with the emissions test. However, if the SRT indicates “INCMP” for one or more of the SRT items the
vehicle is returned to the customer untested.
NOTE:
If MIL is ON during the state emissions inspection, the vehicle is also returned to the customer untested even
though the SRT indicates “CMPLT” for all test items. Therefore, it is important to check SRT (“CMPLT”) and
DTC (No DTCs) before the inspection.
SRT Item
The table below shows required self-diagnostic items to set the SRT to “CMPLT”.
*: If completion of several SRTs is required, perform driving patterns (DTC confirmation procedure), one by one based on the priority for
models with CONSULT-II.
SRT Set Timing
SRT is set as “CMPLT” after self-diagnosis has been performed one or more times. Completion of SRT is
done regardless of whether the result is OK or NG. The set timing is different between OK and NG results and
is shown in the table below.
OK: Self-diagnosis is carried out and the result is OK.
NG: Self-diagnosis is carried out and the result is NG.
—: Self-diagnosis is not carried out.SRT item
(CONSULT-II indication)Performance
Priority*Required self-diagnostic items to set the SRT to “CMPLT”Corresponding
DTC No.
CATALYST 2 Three way catalyst function P0420, P0430
EVAP SYSTEM 2 EVAP control system purge flow monitoring P0441
1 EVAP control system P0442
2 EVAP control system P0456
HO2S 2 Air fuel ratio (A/F) sensor 1 P0133, P0153
Heated oxygen sensor 2 P0137, P0157
Heated oxygen sensor 2 P0138, P0158
Heated oxygen sensor 2 P0139, P0159
Self-diagnosis resultExample
DiagnosisIgnition cycle
← ON → OFF ← ON → OFF ← ON → OFF ← ON →
All OK Case 1 P0400 OK (1) — (1) OK (2) — (2)
P0402 OK (1) — (1) — (1) OK (2)
P1402 OK (1) OK (2) — (2) — (2)
SRT of EGR “CMPLT” “CMPLT” “CMPLT” “CMPLT”
Case 2 P0400 OK (1) — (1) — (1) — (1)
P0402 — (0) — (0) OK (1) — (1)
P1402 OK (1) OK (2) — (2) — (2)
SRT of EGR “INCMP” “INCMP” “CMPLT” “CMPLT”
NG exists Case 3 P0400 OK OK — —
P0402 — — — —
P1402 NG — NGNG
(Consecutive
NG)
(1st trip)
DTC1st trip DTC — 1st trip DTCDTC
(= MIL ON)
SRT of EGR “INCMP” “INCMP” “INCMP” “CMPLT”
Page 1139 of 3061

EC-56
< SERVICE INFORMATION >
ON BOARD DIAGNOSTIC (OBD) SYSTEM
When all SRT related self-diagnoses showed OK results in a single cycle (Ignition OFF-ON-OFF), the SRT will
indicate “CMPLT”. → Case 1 above
When all SRT related self-diagnoses showed OK results through several different cycles, the SRT will indicate
“CMPLT” at the time the respective self-diagnoses have at least one OK result. → Case 2 above
If one or more SRT related self-diagnoses showed NG results in 2 consecutive cycles, the SRT will also indi-
cate “CMPLT”. → Case 3 above
The table above shows that the minimum number of cycles for setting SRT as “INCMP” is one (1) for each
self-diagnosis (Case 1 & 2) or two (2) for one of self-diagnoses (Case 3). However, in preparation for the state
emissions inspection, it is unnecessary for each self-diagnosis to be executed twice (Case 3) for the following
reasons:
• The SRT will indicate “CMPLT” at the time the respective self-diagnoses have one (1) OK result.
• The emissions inspection requires “CMPLT” of the SRT only with OK self-diagnosis results.
• When, during SRT driving pattern, 1st trip DTC (NG) is detected prior to “CMPLT” of SRT, the self-diagnosis
memory must be erased from ECM after repair.
• If the 1st trip DTC is erased, all the SRT will indicate “INCMP”.
NOTE:
SRT can be set as “CMPLT” together with the DTC(s). Therefore, DTC check must always be carried out
prior to the state emission inspection even though the SRT indicates “CMPLT”.
SRT Service Procedure
If a vehicle has failed the state emissions inspection due to one or more SRT items indicating “INCMP”, review
the flowchart diagnostic sequence on the next page.
Page 1141 of 3061

EC-58
< SERVICE INFORMATION >
ON BOARD DIAGNOSTIC (OBD) SYSTEM
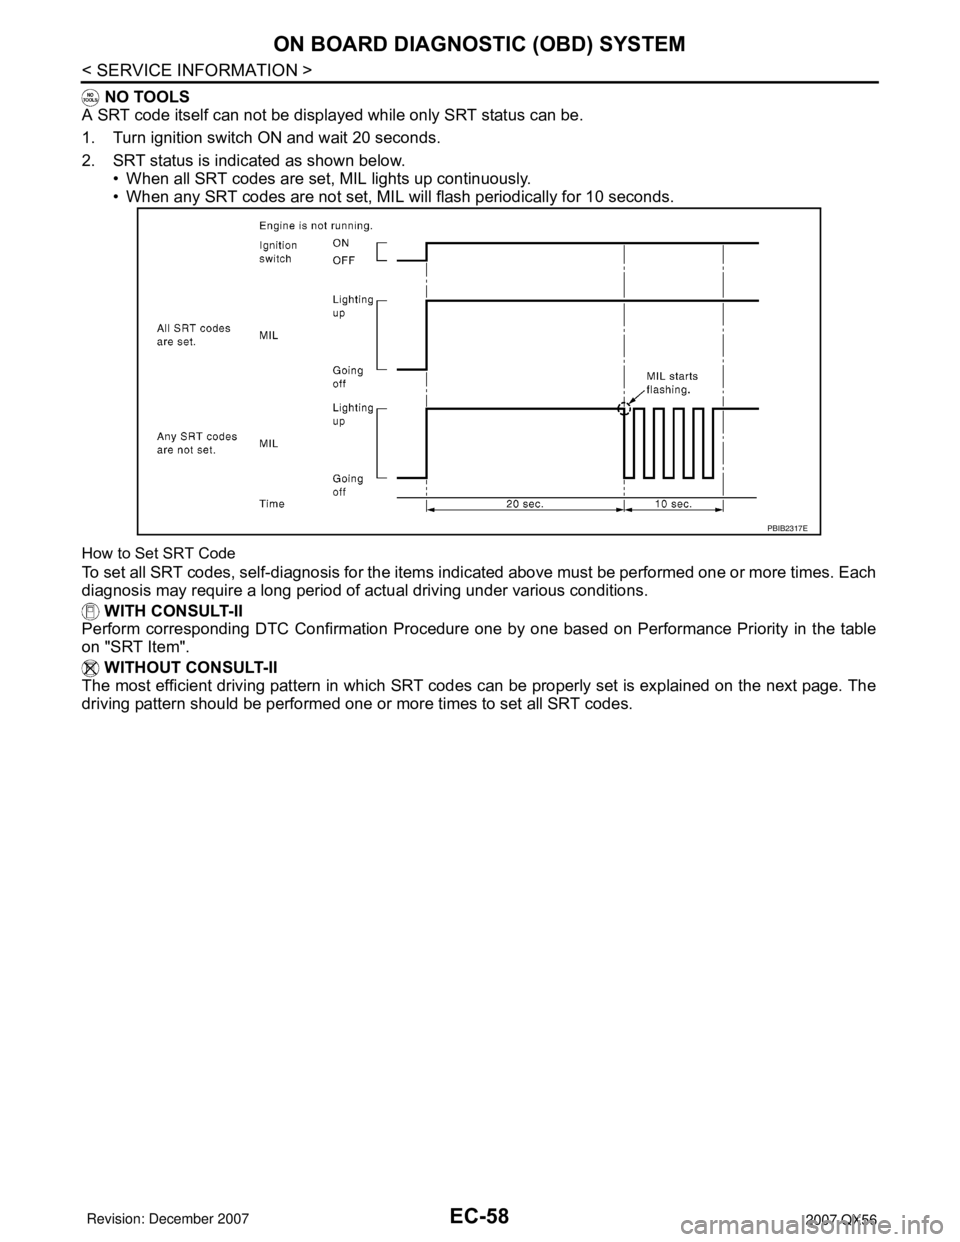
NO TOOLS
A SRT code itself can not be displayed while only SRT status can be.
1. Turn ignition switch ON and wait 20 seconds.
2. SRT status is indicated as shown below.
• When all SRT codes are set, MIL lights up continuously.
• When any SRT codes are not set, MIL will flash periodically for 10 seconds.
How to Set SRT Code
To set all SRT codes, self-diagnosis for the items indicated above must be performed one or more times. Each
diagnosis may require a long period of actual driving under various conditions.
WITH CONSULT-II
Perform corresponding DTC Confirmation Procedure one by one based on Performance Priority in the table
on "SRT Item".
WITHOUT CONSULT-II
The most efficient driving pattern in which SRT codes can be properly set is explained on the next page. The
driving pattern should be performed one or more times to set all SRT codes.
PBIB2317E
Page 1144 of 3061

ON BOARD DIAGNOSTIC (OBD) SYSTEM
EC-61
< SERVICE INFORMATION >
C
D
E
F
G
H
I
J
K
L
MA
EC
N
P O
HOW TO ERASE EMISSION-RELATED DIAGNOSTIC INFORMATION
How to Erase DTC
WITH CONSULT-II
The emission related diagnostic information in the ECM can be erased by selecting “ERASE” in the “SELF-
DIAG RESULTS” mode with CONSULT-II.
If DTCs are displayed for both ECM and TCM (Transmission control module), they need to be erased individu-
ally from the ECM and TCM (Transmission control module).
NOTE:
If the DTC is not for A/T related items (see EC-9
), skip steps 2 through 4.
1. If the ignition switch stays ON after repair work, be sure to turn ignition switch OFF once. Wait at least 10
seconds and then turn it ON (engine stopped) again.
2. Turn CONSULT-II ON and touch “A/T”.
3. Touch “SELF-DIAG RESULTS”.
HO2SAir fuel ratio (A/F) sensor 1 (Bank 1)P0131 41H 8EH Min. 5mV
P0132 42H 0EH Max. 5mV
P2A00 43H 0EH Max. 0.002
P2A00 44H 8EH Min. 0.002
P0133 45H 8EH Min. 0.002
P0130 46H 0EH Max. 5mV
P0130 47H 8EH Min. 5mV
P0133 48H 8EH Min. 0.002
Air fuel ratio (A/F) sensor 1 (Bank 2)P0151 4CH 8FH Min. 5mV
P0152 4DH 0FH Max. 5mV
P2A03 4EH 0FH Max. 0.002
P2A03 4FH 8FH Min. 0.002
P0153 50H 8FH Min. 0.002
P0150 51H 0FH Max. 5mV
P0150 52H 8FH Min. 5mV
P0153 53H 8FH Min. 0.002
Heated oxygen sensor 2 (Bank 1)P0139 19H 86H Min. 10mV/500 ms
P0137 1AH 86H Min. 10 mV
P0138 1BH 06H Max. 10 mV
P0138 1CH 06H Max. 10mV
Heated oxygen sensor 2 (Bank 2)P0159 21H 87H Min. 10 mV/500 ms
P0157 22H 87H Min. 10 mV
P0158 23H 07H Max. 10 mV
P0158 24H 07H Max. 10mV
HO2S
HTRA/F sensor 1 heater (Bank 1) P0032 57H 10H Max. 5 mV
P0031 58H 90H Min. 5 mV
A/F sensor 1 heater (Bank 2)P0052 59H 11H Max. 5 mV
P0051 5AH 91H Min. 5 mV
Heated oxygen sensor 2 heater (Bank 1)P0038 2DH 0AH Max. 20 mV
P0037 2EH 8AH Min. 20 mV
Heated oxygen sensor 2 heater (Bank 2)P0058 2FH 0BH Max. 20 mV
P0057 30H 8BH Min. 20 mV Item Self-diagnostic test item DTCTest value (GST display)
Test limit Conversion
TID CID