2006 LAND ROVER FRELANDER 2 seats
[x] Cancel search: seatsPage 2779 of 3229
59
Supplementary restraints system
R
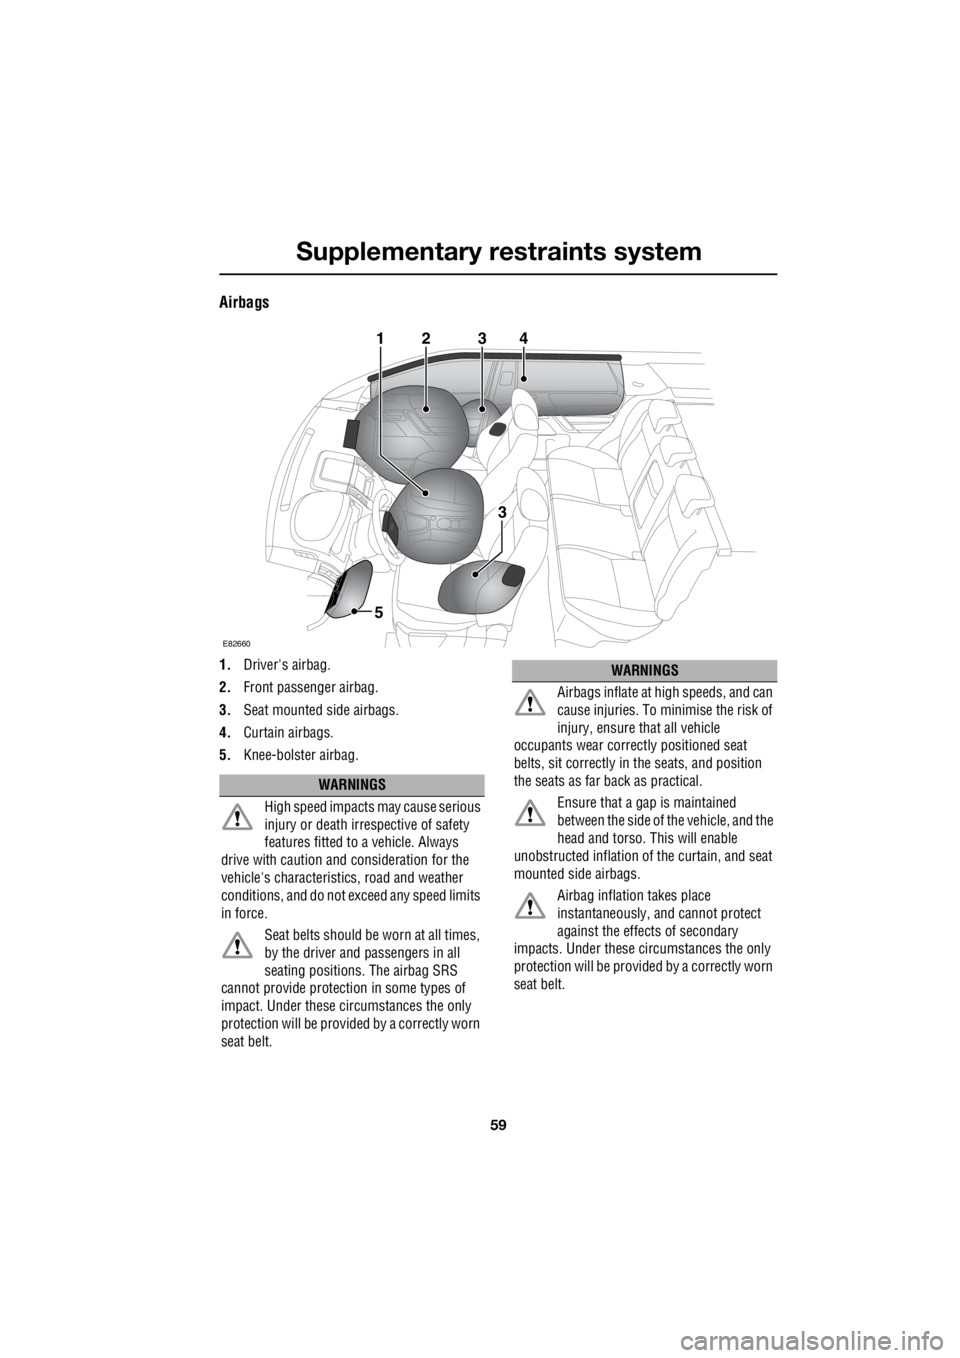
Airbags
1. Driver's airbag.
2. Front passenger airbag.
3. Seat mounted side airbags.
4. Curtain airbags.
5. Knee-bolster airbag.
E82660
34
3
5
21
WARNINGS
High speed impacts may cause serious
injury or death irre spective of safety
features fitted to a vehicle. Always
drive with caution and consideration for the
vehicle's characteristics, road and weather
conditions, and do not exceed any speed limits
in force.
Seat belts should be worn at all times,
by the driver and passengers in all
seating positions. The airbag SRS
cannot provide protection in some types of
impact. Under these circumstances the only
protection will be provided by a correctly worn
seat belt.
Airbags inflate at high speeds, and can
cause injuries. To minimise the risk of
injury, ensure that all vehicle
occupants wear correct ly positioned seat
belts, sit correctly in the seats, and position
the seats as far back as practical.
Ensure that a gap is maintained
between the side of the vehicle, and the
head and torso. This will enable
unobstructed inflation of the curtain, and seat
mounted side airbags.
Airbag inflation takes place
instantaneously, a nd cannot protect
against the effects of secondary
impacts. Under these circumstances the only
protection will be provided by a correctly worn
seat belt.
WARNINGS
Page 2784 of 3229
Child safety
64
L
Child safetyCHILD SEATS
It is very important for all infants and children
under 12 years of age to be restrained in a
suitable child safety seat appropriate to their
age and size. If it is essential that a child travels in the front
passenger seat, Land Ro ver recommends that
the following preparations are made before
fitting the child restraint.
• Disable the front pass enger airbag. See
DISABLING THE PASSENGER AIRBAG
(page 62).
• Adjust the front passenger seat fully
rearwards.
• Adjust the lumbar support to its minimum
support position.
• Adjust the seat cushion to its highest
position. If cushion rake adjustment is
possible, adjust it to its lowest position.
• Adjust the seat be lt adjustable upper
anchorage to its lowest position.
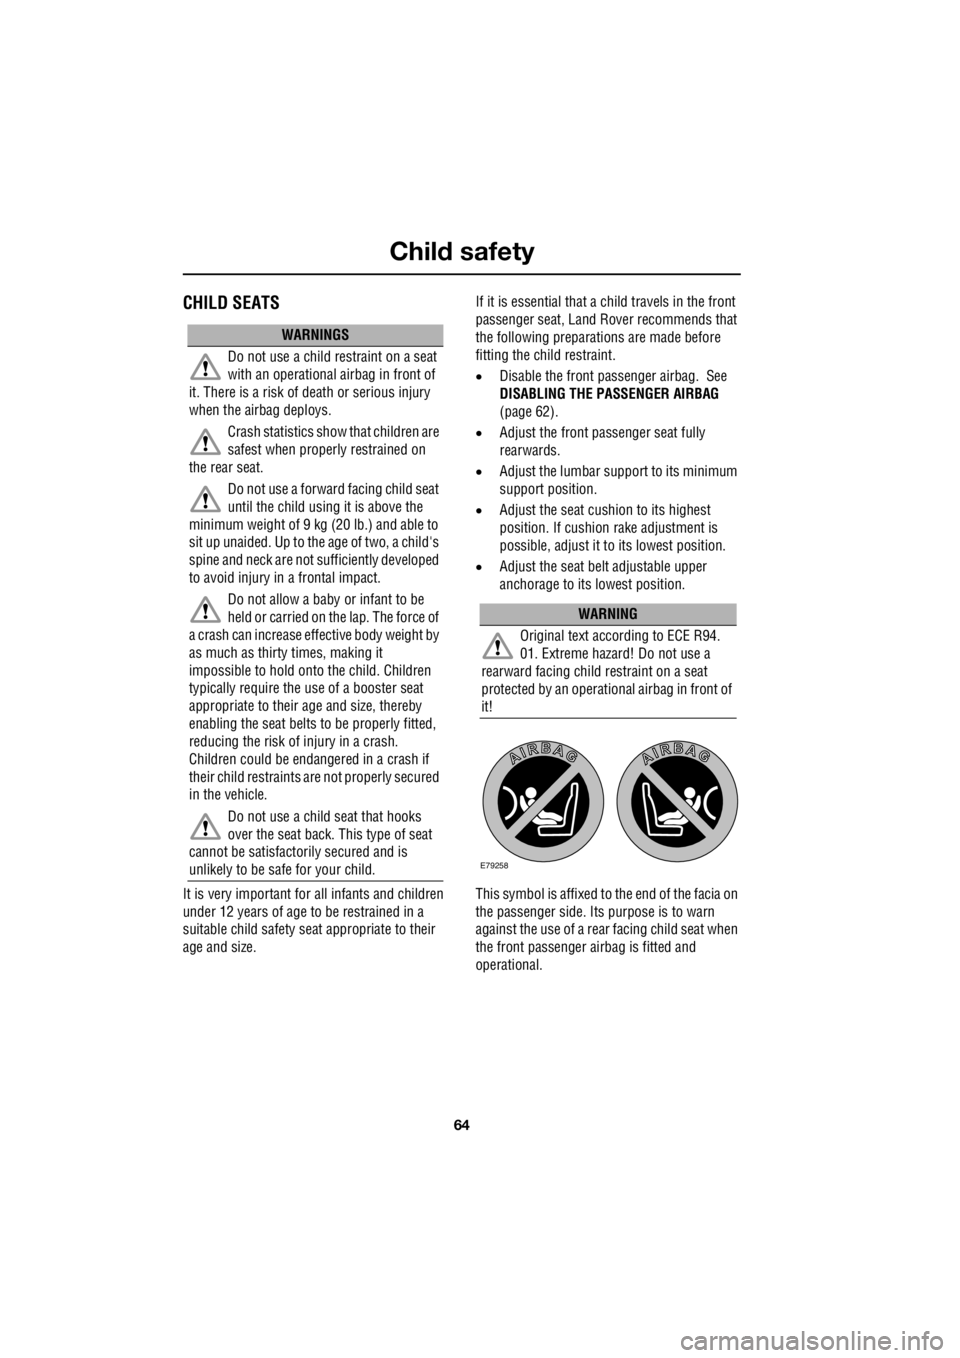
This symbol is affixed to the end of the facia on
the passenger side. Its purpose is to warn
against the use of a rear facing child seat when
the front passenger ai rbag is fitted and
operational.
WARNINGS
Do not use a child restraint on a seat
with an operational airbag in front of
it. There is a risk of death or serious injury
when the airbag deploys.
Crash statistics show that children are
safest when properly restrained on
the rear seat.
Do not use a forward facing child seat
until the child using it is above the
minimum weight of 9 kg (20 lb.) and able to
sit up unaided. Up to the age of two, a child's
spine and neck are not sufficiently developed
to avoid injury in a frontal impact.
Do not allow a baby or infant to be
held or carried on the lap. The force of
a crash can increase effective body weight by
as much as thirty times, making it
impossible to hold onto the child. Children
typically require the use of a booster seat
appropriate to their age and size, thereby
enabling the seat belts to be properly fitted,
reducing the risk of injury in a crash.
Children could be enda ngered in a crash if
their child restraints are not properly secured
in the vehicle.
Do not use a child seat that hooks
over the seat back. This type of seat
cannot be satisfactorily secured and is
unlikely to be safe for your child.
WARNING
Original text according to ECE R94.
01. Extreme hazard! Do not use a
rearward facing child restraint on a seat
protected by an operational airbag in front of
it!
E79258
Page 2787 of 3229
67
Child safety
R
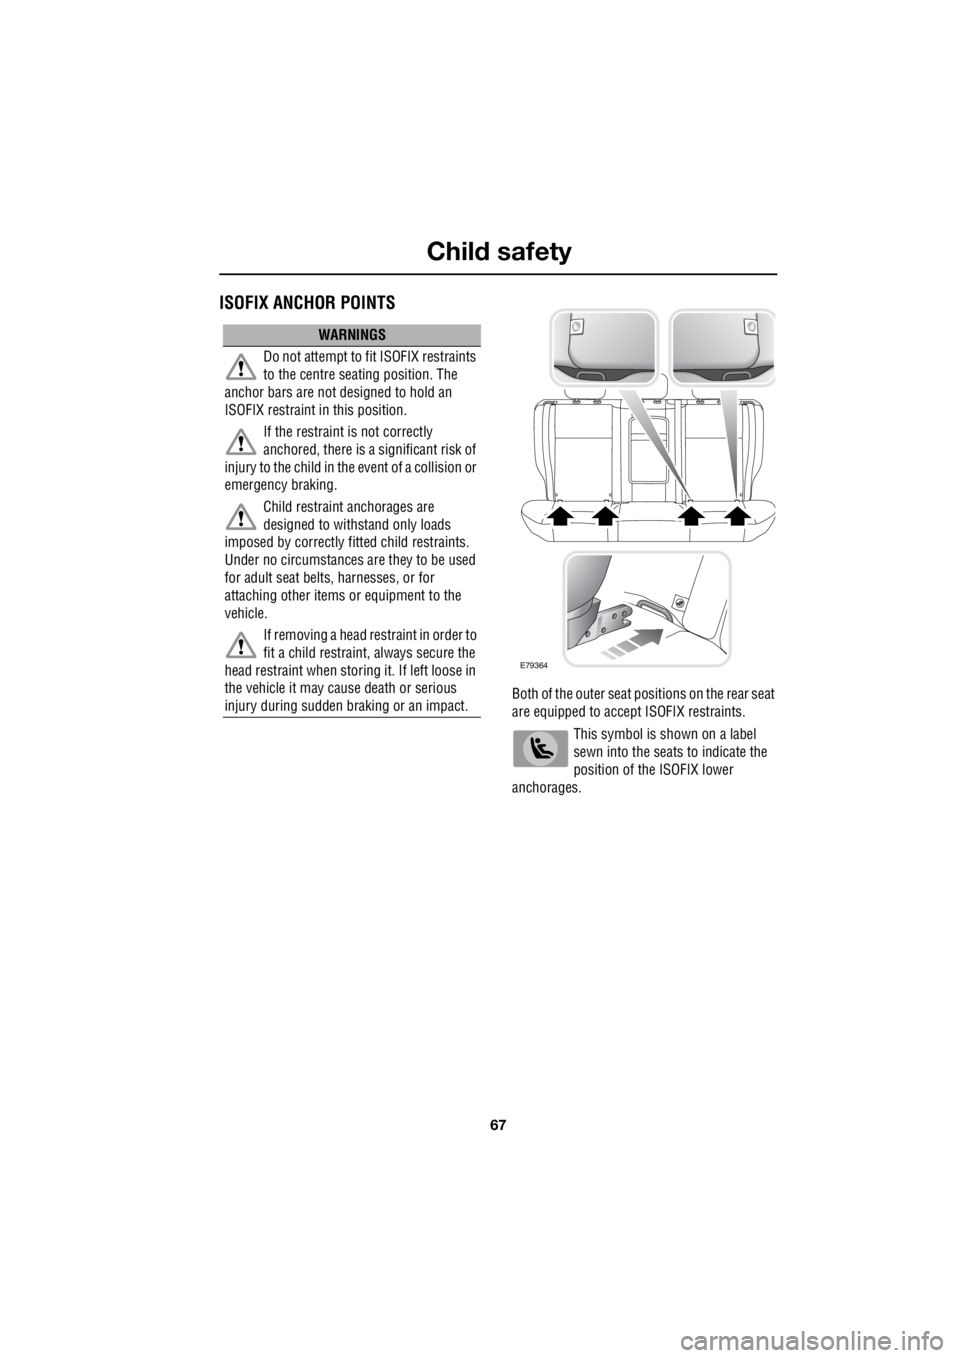
ISOFIX ANCHOR POINTS
Both of the outer seat pos itions on the rear seat
are equipped to accept ISOFIX restraints.
This symbol is shown on a label
sewn into the seats to indicate the
position of the ISOFIX lower
anchorages.
WARNINGS
Do not attempt to fit ISOFIX restraints
to the centre seating position. The
anchor bars are not designed to hold an
ISOFIX restraint in this position.
If the restraint is not correctly
anchored, there is a significant risk of
injury to the child in the event of a collision or
emergency braking.
Child restraint anchorages are
designed to withstand only loads
imposed by correctly fi tted child restraints.
Under no circumstances are they to be used
for adult seat belts, harnesses, or for
attaching other items or equipment to the
vehicle.
If removing a head restraint in order to
fit a child restraint, always secure the
head restraint when stor ing it. If left loose in
the vehicle it may cause death or serious
injury during sudden braking or an impact.
E79364
Page 2788 of 3229
Child safety
68
L
ISOFIX child seats
• IUF = Suitable for ISOFIX forward child
restraint systems of universal category
approved for use in the mass group.
• IL = These ISOFIX child restraint systems
are of the specific vehicle, restricted, or
semi-universal categories.
• * = Child seats suitable for use in these
locations are Britax Cosy-Tot, and Römer
Baby Safe ISOFIX.
Installing an ISOFIX child seat
To install an ISOFIX child seat :-
1. Raise or remove the head restraint.
2. Lift the velcro flap to expose the ISOFIX
locking mechanism.
3. Slide the child seat into the locking
mechanism.
4. Test the security of the child restraint. To
do this attempt to pull the restraint away
from the vehicle seat and twist the restraint
from side to side. Even if the restraint
appears secure you should still check the
anchor points visually to ensure correct
attachment.
Note: Always ensure that if an upper tether is
provided, it is fitted and tightened correctly.
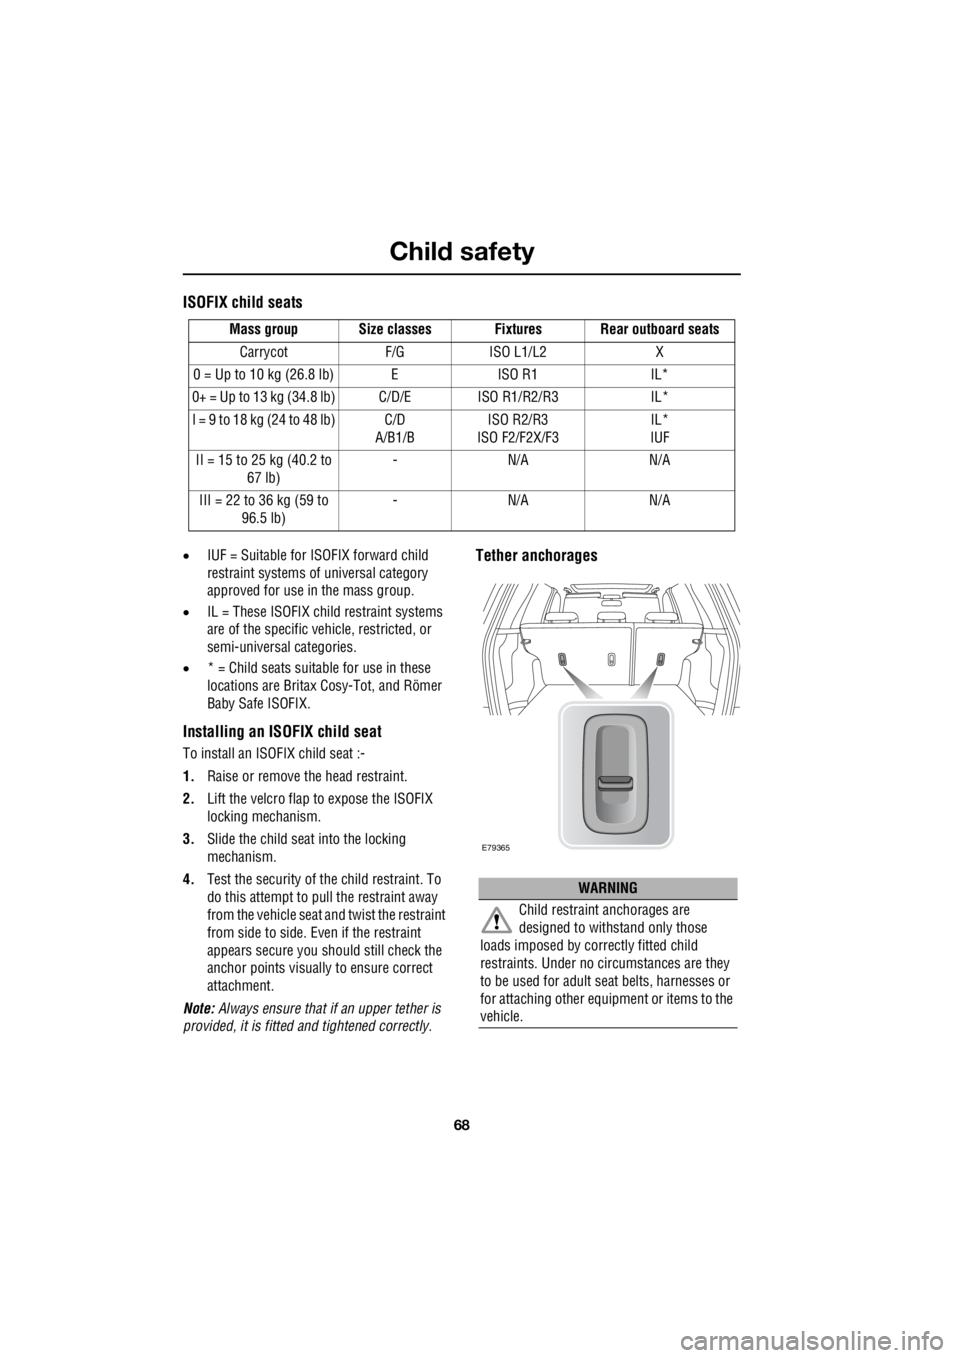
Tether anchorages
Mass group Size classes Fixtures Rear outboard seats
Carrycot F/G ISO L1/L2 X
0 = Up to 10 kg (26.8 lb) E ISO R1 IL*
0+ = Up to 13 kg (34.8 lb) C/D/E ISO R1/R2/R3 IL*
I = 9 to 18 kg (24 to 48 lb) C/D A/B1/B ISO R2/R3
ISO F2/F2X/F3 IL*
IUF
II = 15 to 25 kg (40.2 to 67 lb) -N/A N/A
III = 22 to 36 kg (59 to 96.5 lb) -N/A N/A
WARNING
Child restraint anchorages are
designed to withstand only those
loads imposed by correctly fitted child
restraints. Under no circumstances are they
to be used for adult se at belts, harnesses or
for attaching other equipment or items to the
vehicle.
E79365
Page 2793 of 3229
73
Lighting
R
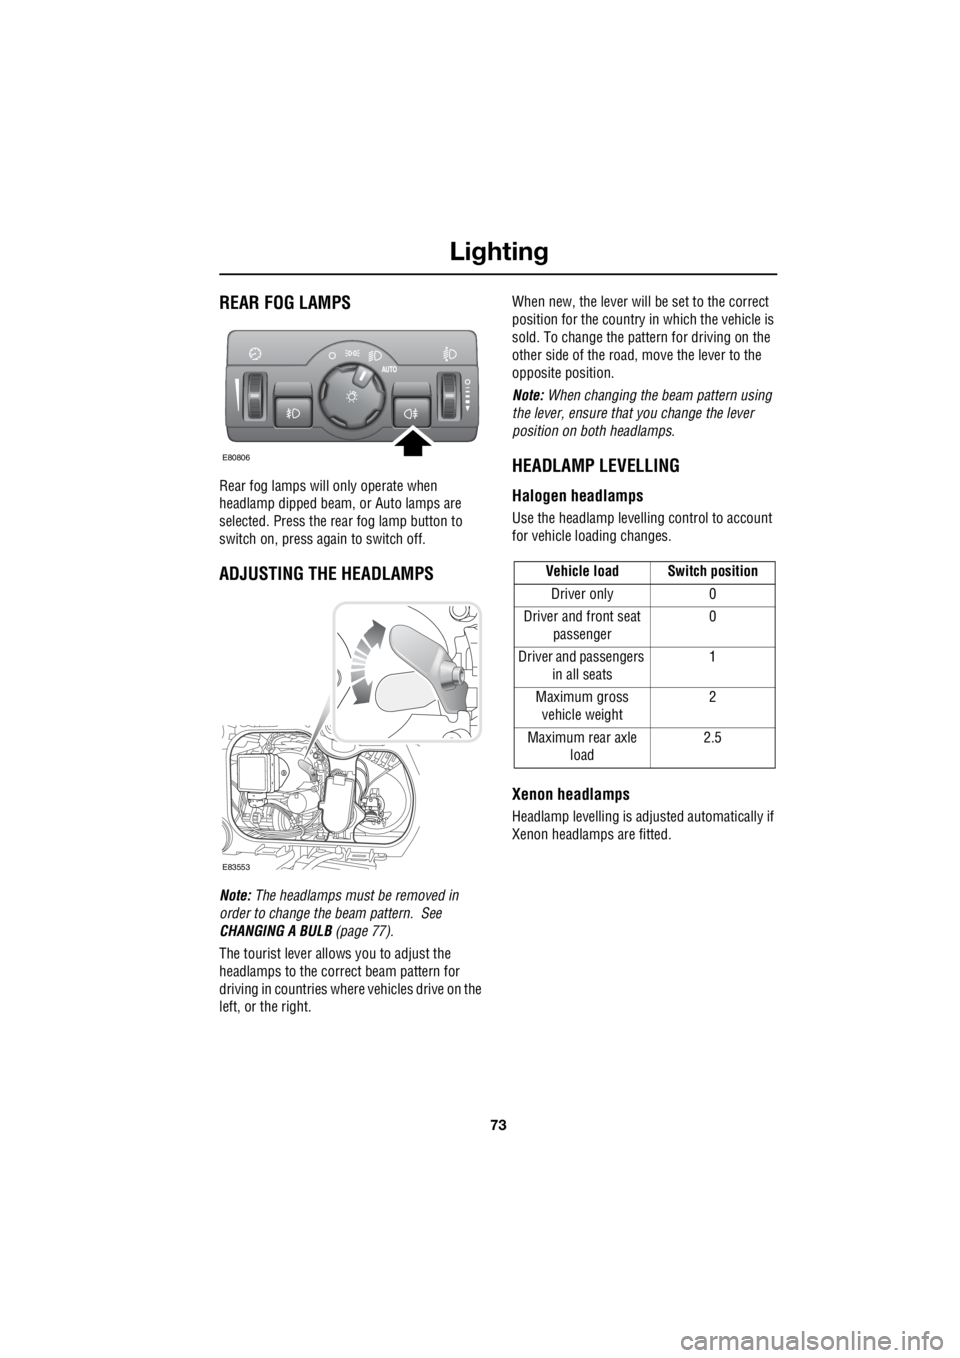
REAR FOG LAMPS
Rear fog lamps will only operate when
headlamp dipped beam, or Auto lamps are
selected. Press the rear fog lamp button to
switch on, press again to switch off.
ADJUSTING THE HEADLAMPS
Note: The headlamps must be removed in
order to change the beam pattern. See
CHANGING A BULB (page 77).
The tourist lever allows you to adjust the
headlamps to the correct beam pattern for
driving in countries where vehicles drive on the
left, or the right. When new, the lever will be set to the correct
position for the country in which the vehicle is
sold. To change the pattern for driving on the
other side of the road, move the lever to the
opposite position.
Note: When changing the beam pattern using
the lever, ensure that you change the lever
position on both headlamps.
HEADLAMP LEVELLING
Halogen headlamps
Use the headlamp levell ing control to account
for vehicle loading changes.
Xenon headlamps
Headlamp levelling is adju sted automatically if
Xenon headlamps are fitted.
E80806
E83553
Vehicle load Switch position
Driver only 0
Driver and front seat passenger 0
Driver and passengers in all seats 1
Maximum gross vehicle weight 2
Maximum rear axle load 2.5
Page 2814 of 3229
Windows and mirrors
94
L
Window reset
The windows will need to be reset if the battery
is disconnected, beco mes discharged, or
power supply is interrupted.
Reset as follows :-
1. Close the window fully.
2. Release the switch, then lift it to the close
position and hold for two seconds.
3. Open the window fully.
4. Release the switch, then push it to the
open position and hold for two seconds.
5. Lift and release the switch to operate the
one touch function.
6. Repeat the procedure on each window.
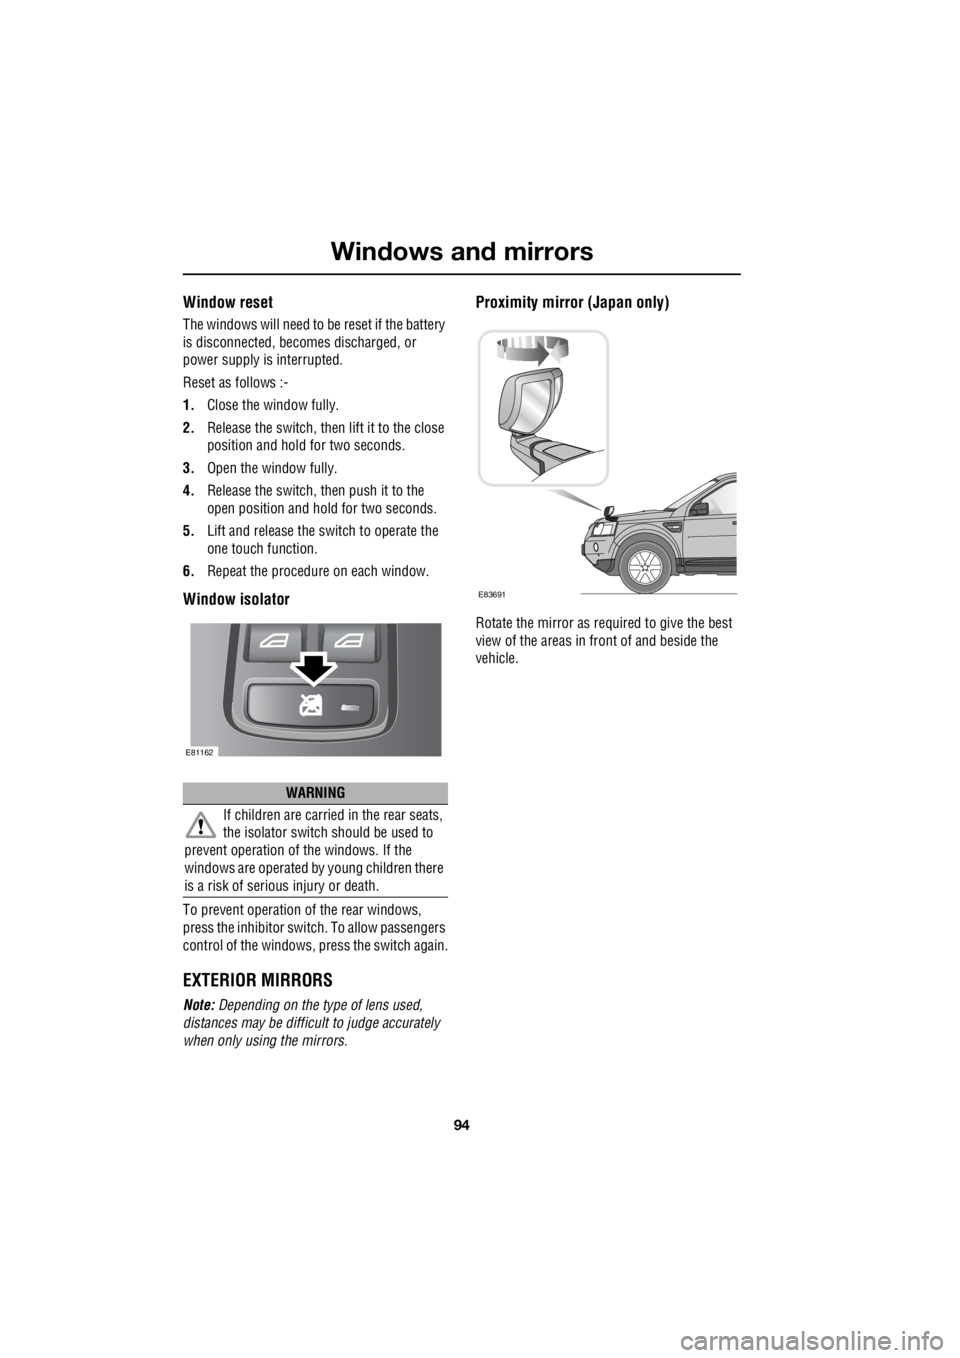
Window isolator
To prevent operation of the rear windows,
press the inhibitor switch. To allow passengers
control of the windows, press the switch again.
EXTERIOR MIRRORS
Note: Depending on the type of lens used,
distances may be difficu lt to judge accurately
when only using the mirrors.
Proximity mirror (Japan only)
Rotate the mirror as required to give the best
view of the areas in front of and beside the
vehicle.
WARNING
If children are carried in the rear seats,
the isolator switch should be used to
prevent operation of the windows. If the
windows are operated by young children there
is a risk of serious injury or death.
E81162
E83691
Page 2913 of 3229

193
Wheels and tyres
R
• Avoid tyre/vehicle damage by removing
the traction devices as soon as the
conditions allow.
TYRE GLOSSARY
Terms used
lbf/in² or psi
Pounds per square inch, an imperial unit of
measure for pressure.
kPa
Kilo Pascal, a metric unit of measure for
pressure.
Cold tyre pressure
The air pressure in a tyre which has been
standing in excess of th ree hours, or driven for
less than one mile.
Maximum inflation pressure
The maximum pressure to which the tyre
should be inflated. This pressure is given on
the tyre side wall in lbf/in² (psi) and kPa.
Note: This pressure is the maximum allowed
by the tyre manufacturer. It is not the pressure
recommended for use. See TECHNICAL
SPECIFICATIONS (page 194).
Kerb weight
The weight of a standa rd vehicle, including a
full tank of fuel, any optional equipment fitted,
and with the correct coolant and oil levels.
Gross vehicle weight
The maximum permissible weight of a vehicle
with driver, passengers, load, luggage,
equipment, and towbar load.
Accessory weight
The combined weight (in excess of those items
replaced) of items available as factory installed
equipment. Production options weight
The combined weight of options installed
which weigh in excess of 1.4 kg (3 lb) more
than the standard items that they replaced, and
are not already considered in kerb or accessory
weights. Items such as heavy duty brakes, high
capacity battery, special trim etc.
Vehicle capacity weight
The number of seats multiplied by 68 kg (150
lb) plus the rated amount of load/luggage.
Maximum loaded vehicle weight
The sum of kerb wei ght, accessory weight,
vehicle capacity weig ht, plus any production
option weights.
Rim
The metal support for a ty re, or tyre and tube,
upon which the tyre beads are seated.
Bead
The inner edge of a tyre th at is shaped to fit to
the rim and form an air tight seal. The bead is
constructed of steel wires which are wrapped,
or reinforced, by the ply cords.
Page 2925 of 3229
205
Status after a collision
R
Status after a collisionDRIVING AFTER A COLLISION
Before starting or driving
If the vehicle has been involved in an accident
it should be checke d thoroughly before
attempting to start the engine or drive the
vehicle.
Check for :-
• Fuel leaks.
• Fluid leaks.
• Battery damage.
• Damage to wiring.
• Damage to lights.
• Damage to steering, suspension, wheels
or tyres.
• Sharp or protruding bodywork.
• Operation of doors and locks.
• Condition and operation of seat belts and
SRS components.
• Condition of chil d seats and their
mounting/attach ment points.
Note: This list is not exhaustive.
Resetting the fuel cut-off
The fuel system cut-off forms part of the Safety
and Restraint System (SRS) fitted to your
vehicle. Following an im pact, and depending on
the severity, the fuel pump may be switched
off.
1. Switch the ignition off, and wait for one
minute.
2. Turn the ignition on for 30 seconds.
3. Check the vehicle thoroughly for fuel leaks.
If a leak is detected switch the ignition off
immediately.
• The vehicle must not be started if a leak
is present. Seek qualified advice, and
have the vehicle recovered.
4. If no leaks are detected, start the vehicle.
When driving
When driving a vehicle which has been
involved in a collision use caution and pay extra
attention to the operation of the vehicle. If any
changes in vehicle operati on after the collision
are noted when compared to it's operation
before the collision, do not continue to drive
the vehicle. Stop the vehicle as soon as it is
safe to do so, and have the vehicle recovered.
Pay particular attent ion to changes in :-
• Steering.
• Braking.
• Unusual noises.
• Warning lights or messages displayed.
• Problems with electrical systems.
WARNING
If the vehicle is involved in a collision it
should be checked by a Land Rover
Dealer/Authorised repairer, or suitably
qualified persons before starting or driving.
WARNING
The fuel cut-off s hould never be reset
if you can smell fuel , or a leak can be
seen. Doing so can lead to a fire which
may cause personal injury or death.