2006 LAND ROVER FRELANDER 2 heating
[x] Cancel search: heatingPage 2843 of 3229

123
Brakes
R
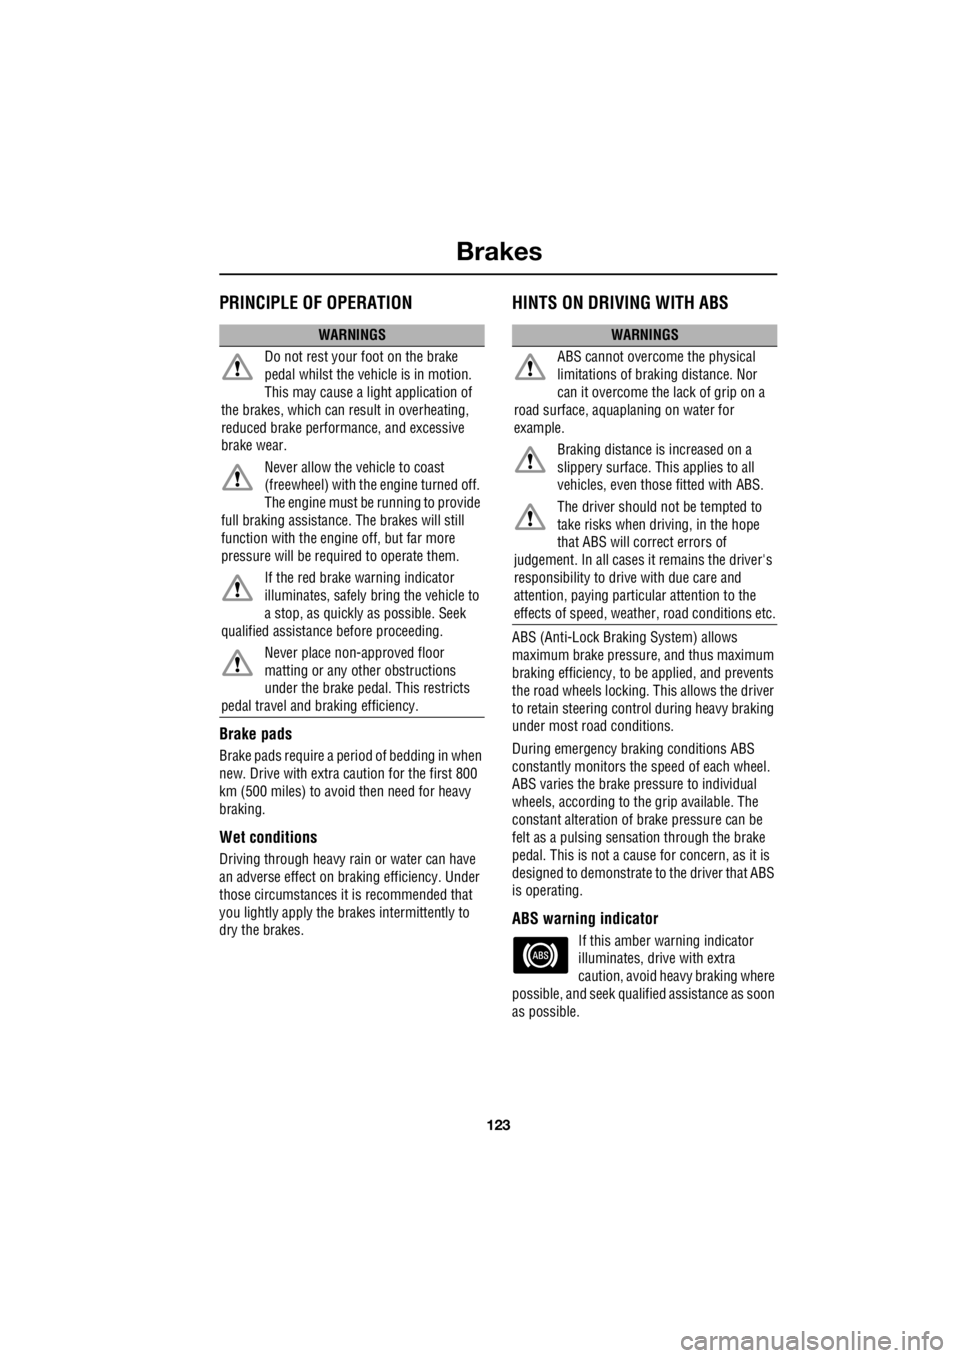
BrakesPRINCIPLE OF OPERATION
Brake pads
Brake pads require a period of bedding in when
new. Drive with extra caution for the first 800
km (500 miles) to avoi d then need for heavy
braking.
Wet conditions
Driving through heavy rain or water can have
an adverse effect on braking efficiency. Under
those circumstances it is recommended that
you lightly apply the brak es intermittently to
dry the brakes.
HINTS ON DRIVING WITH ABS
ABS (Anti-Lock Braki ng System) allows
maximum brake pressure, and thus maximum
braking efficiency, to be applied, and prevents
the road wheels locking. This allows the driver
to retain steering control during heavy braking
under most road conditions.
During emergency brak ing conditions ABS
constantly monitors the speed of each wheel.
ABS varies the brake pressure to individual
wheels, according to the grip available. The
constant alteration of brake pressure can be
felt as a pulsing sensat ion through the brake
pedal. This is not a cause for concern, as it is
designed to demonstrate to the driver that ABS
is operating.
ABS warning indicator
If this amber warning indicator
illuminates, driv e with extra
caution, avoid heavy braking where
possible, and seek qualified assistance as soon
as possible.
WARNINGS
Do not rest your foot on the brake
pedal whilst the vehicle is in motion.
This may cause a light application of
the brakes, which can re sult in overheating,
reduced brake performance, and excessive
brake wear.
Never allow the vehicle to coast
(freewheel) with the engine turned off.
The engine must be running to provide
full braking assistance. The brakes will still
function with the engine off, but far more
pressure will be required to operate them.
If the red brake warning indicator
illuminates, safely bring the vehicle to
a stop, as quickly as possible. Seek
qualified assistance before proceeding.
Never place non-approved floor
matting or any ot her obstructions
under the brake pedal. This restricts
pedal travel and braking efficiency.WARNINGS
ABS cannot overcome the physical
limitations of brak ing distance. Nor
can it overcome the lack of grip on a
road surface, aquaplaning on water for
example.
Braking distance is increased on a
slippery surface. This applies to all
vehicles, even those fitted with ABS.
The driver should not be tempted to
take risks when driving, in the hope
that ABS will correct errors of
judgement. In all cases it remains the driver's
responsibility to driv e with due care and
attention, paying partic ular attention to the
effects of speed, weather, road conditions etc.
Page 2875 of 3229

155
Vehicle care
R
Underbody maintenance
Corrosive materials used on highways to
control snow and ice, as well as accumulations
from off-road driving or wading in salt water,
can collect on the vehi cle's underbody. If these
materials are not removed accelerated
corrosion can occur. Regularly flush the
underbody with plain wate r, and pay particular
attention to areas where mud and debris
collect.
If damage or corrosion are detected, have the
vehicle checked by a Land Rover
Dealer/Authorised Re pairer as soon as
possible.
Glass and mirrors
The rear screen, and mi rror glass' should only
be cleaned using soapy water and a soft cloth.
This will avoid damaging the reflective surface
of the mirror, and the heating elements and
antenna in the rear screen.
Never use abrasive cleaning products, or metal
ice scrapers on the mirrors or the front/rear
screens.
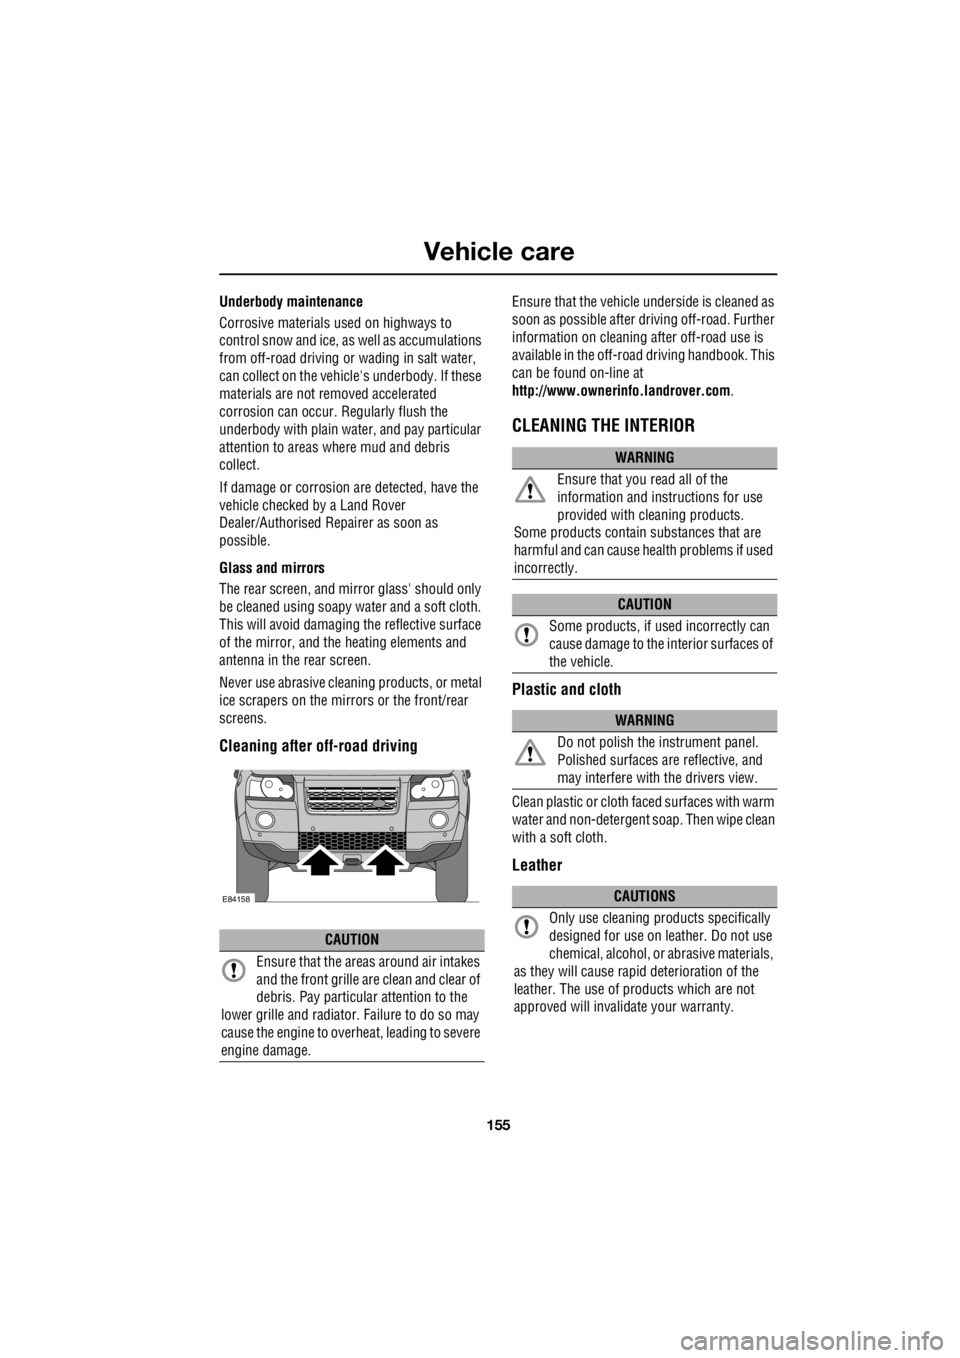
Cleaning after off-road driving
Ensure that the vehicle und erside is cleaned as
soon as possible after dr iving off-road. Further
information on cleaning af ter off-road use is
available in the off-road driving handbook. This
can be found on-line at
http://www.ownerinfo.landrover.com .
CLEANING THE INTERIOR
Plastic and cloth
Clean plastic or cloth faced surfaces with warm
water and non-detergent soap. Then wipe clean
with a soft cloth.
Leather
CAUTION
Ensure that the areas around air intakes
and the front grille ar e clean and clear of
debris. Pay particular attention to the
lower grille and radiator . Failure to do so may
cause the engine to overheat, leading to severe
engine damage.
E84158
WARNING
Ensure that you read all of the
information and inst ructions for use
provided with cleaning products.
Some products contain substances that are
harmful and can cause he alth problems if used
incorrectly.
CAUTION
Some products, if us ed incorrectly can
cause damage to the in terior surfaces of
the vehicle.
WARNING
Do not polish the instrument panel.
Polished surfaces are reflective, and
may interfere with the drivers view.
CAUTIONS
Only use cleaning pr oducts specifically
designed for use on le ather. Do not use
chemical, alcohol, or abrasive materials,
as they will cause rapi d deterioration of the
leather. The use of products which are not
approved will invalidate your warranty.
Page 2910 of 3229

Wheels and tyres
190
L
Using the Land Rover tyre repair kit
Note: All vehicle drivers and occupants should
be made aware that a temporary repair has
been made to a tyre fitted to the vehicle. They
should also be made aware of the special
driving conditions im posed when using a
repaired tyre. Repair procedure
1. Open the tyre repair kit and peel off the
maximum speed label. Attach the label to
the facia in the driver's field of view. Take
care not to obstruct any of the instruments
or warning lights.
2. Uncoil the compressor power cable and
the inflation hose.
3. Unscrew the orange cap from the sealant
bottle receiver, and the sealant bottle cap.
4. Screw the sealant bottle into the receiver
(clockwise) until tight.
• Screwing the bottle onto the receiver will
pierce the bottle's se al. Do not unscrew
a full, or partly us ed bottle from the
receiver. Doing so will result in the
sealant leaking from the bottle.
5. Remove the valve cap from the damaged
tyre.
6. Remove the protective cap from the
inflation hose, and c onnect the inflation
hose to the tyre valve. Ensure that the hose
is screwed on firmly.
7. Ensure that the compressor switch is in
the off ( O) position.
8. Insert the power cable connector into an
auxiliary power socket. See AUXILIARY
POWER SOCKETS (page 110).
9. Unless the vehicle is in an enclosed or
poorly ventilated area , start the engine.
10. Set the compressor switch to the on ( l)
position.
11. Inflate the tyre to a minimum of 1.8 bar (26
lb/in²) and a maximum of 3.5 bar (51
lb/in²).
†
WARNINGS
Avoid skin contact with the sealant
which contains natu ral rubber latex.
Do not unscrew the sealant bottle from the
receiver until it is empty, as sealant will leak
out.
If the tyre inflation pressure does not
reach 1.8 bar (26 lb/in²) within seven
minutes, the tyre may have suffered excessive
damage. A temporary repair will not be
possible, and the vehicle should not be driven
until the tyre has been replaced.
CAUTIONS
Before attempting a tyre repair, ensure
that the vehicle is parked safely, as far
away from passing traffic as possible.
Ensure that the parki ng brake is applied,
and P is selected if an automatic
transmission is fitted.
Do not attempt to remove foreign objects
such as nails, screws, etc from the tyre.
Always run the engine when using the
compressor, unless the vehicle is in an
enclosed, or poorly ventilated space.
To prevent overheating do not operate
the compressor continuously for longer
than ten minutes.
Page 2995 of 3229

Index
275
R
Preset buttons . . . . . . . . . . . . . . . . . . . . . 238 Recalling a preset channel . . . . . . . . . 239
Scrolling through presets . . . . . . . . . . 239
Storing channels as presets . . . . . . . . 238
Principle of operation Airbag deployment effects . . . . . . . . . . 61
Airbag operation . . . . . . . . . . . . . . . . . . 60
Airbags . . . . . . . . . . . . . . . . . . . . . . . . . 59
Before driving off-road . . . . . . . . . . . . 136
Brake pads . . . . . . . . . . . . . . . . . . . . . 123
Deployment and deflation . . . . . . . . . . . 60
Dynamic Stability Control (DSC) . . . . . 140
Gradient release control (GRC) . . . . . . 136
Introduction . . . . . . . . . . . . . . . . . . . . . 58
Roll stability control (RSC) . . . . . . . . . 140
Seat belt checks . . . . . . . . . . . . . . . . . . 55
Seat belt safety . . . . . . . . . . . . . . . . . . . 54
Seat belts . . . . . . . . . . . . . . . . . . . . . . . 54
Wet conditions . . . . . . . . . . . . . . . . . . 123
Priority programme type (PTY) . . . . . . . . 231 PTY search - Premium audio . . . . . . . 232
PTY seek - Standard audio . . . . . . . . . 233
PTY selection - Premium audio . . . . . 231Q
Quick start . . . . . . . . . . . . . . . . . . . . . . . . . . 7 Audio system . . . . . . . . . . . . . . . . . . . . . 27
Automatic transmission . . . . . . . . . . . . . 23
Bonnet . . . . . . . . . . . . . . . . . . . . . . . . . . . 9
CD autochanger . . . . . . . . . . . . . . . . . . . 30
CD OPERATION . . . . . . . . . . . . . . . . . . . 30
Clock setting . . . . . . . . . . . . . . . . . . . . . 31
Cruise control . . . . . . . . . . . . . . . . . . . . 24
DAB radio. . . . . . . . . . . . . . . . . . . . . . . . 29
Driving position memory . . . . . . . . . . . . 10
Engine starting . . . . . . . . . . . . . . . . . . . . . 8
Exterior lighting . . . . . . . . . . . . . . . . . . . 22
Facia. . . . . . . . . . . . . . . . . . . . . . . . . . . . 17
Gearshift interlocks . . . . . . . . . . . . . . . . 23
Heating and ventilation. . . . . . . . . . . . . . 14
Hill Descent Control (HDC) . . . . . . . . . . 25
Instrument pack . . . . . . . . . . . . . . . . . . . 19
Manual seat adjustment . . . . . . . . . . . . . 11
Master lock and unlock switches . . . . . . . 9
Overhead console . . . . . . . . . . . . . . . . . 12
Parking aid . . . . . . . . . . . . . . . . . . . . . . . 26
Passenger airbag deactivation . . . . . . . . 13
Power operated seat adjustment . . . . . . 10
Radio operation . . . . . . . . . . . . . . . . . . . 29
Remote control . . . . . . . . . . . . . . . . . . . . 7
Seat belts and Child restraints . . . . . . . . 13
Single CD player. . . . . . . . . . . . . . . . . . . 30
Steering column adjustment . . . . . . . . . 12
Steering column lock . . . . . . . . . . . . . . . 12
Tailgate . . . . . . . . . . . . . . . . . . . . . . . . . . 9
Telephone - Bluetooth system . . . . . . . . 31
Terrain Response system. . . . . . . . . . . . 25
Warning indicators (attention) . . . . . . . . 21
Warning indicators (information) . . . . . . 21
Windows and Door mirrors . . . . . . . . . . 11
Wipers and washers. . . . . . . . . . . . . . . . 22
R
Radio data system (RDS) . . . . . . . . . . . . . 228 Selecting RDS . . . . . . . . . . . . . . . . . . . 228
Radio reception . . . . . . . . . . . . . . . . . . . . 218
Rain sensor . . . . . . . . . . . . . . . . . . . . . . . . 87
Operation . . . . . . . . . . . . . . . . . . . . . . . . 88
Rear fog lamps . . . . . . . . . . . . . . . . . . . . . . 73
Page 3082 of 3229

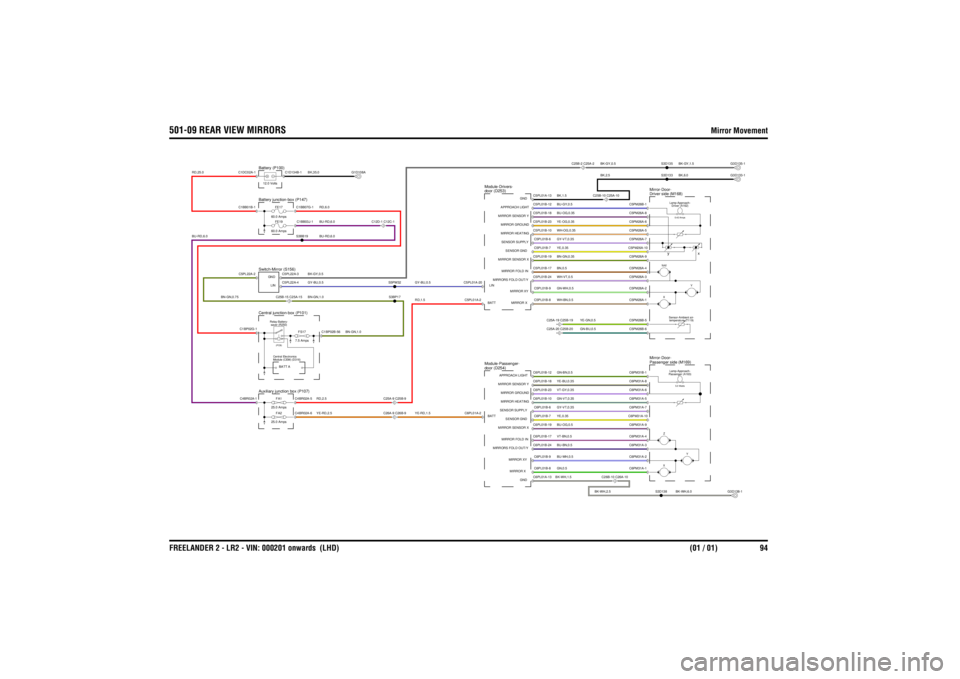
501-09 REAR VIEW MIRRORS
Mirror Movement
FREELANDER 2 - LR2 - VIN: 000201 onwards (LHD) (01 / 01) 94
Mirror Movement
BK-GY,0.5
RD,1.5
BU-RD,6.0
YE-RD,2.5RD,2.5
YE-RD,1.5
BN-GN,0.75
RD,6.0
RD,25.0
BN-GN,1.0
BN-GN,1.0
BU-RD,6.0BU-RD,6.0
GY-BU,0.5
GY-BU,0.5
BK,35.0
BK-WH,6.0
BU-BN,0.5BK-WH,1.5GN-BN,0.5GN-VT,0.35VT-GY,0.35GN,0.5BU-WH,0.5VT-BN,0.5BU-OG,0.5YE,0.35GY-VT,0.35YE-BU,0.35
BK-WH,2.5
BK-GY,1.5BK,6.0
BK,2.5
BU-GY,0.5WH-OG,0.35YE-OG,0.35WH-BN,0.5GN-WH,0.5WH-VT,0.5BN,0.5BN-GN,0.35YE,0.35GY-VT,0.35BU-OG,0.35BK,1.5
GN-BU,0.5YE-GN,0.5
BK-GY,0.5
Central junction-box (P101)
Module (CEM) (D316)
Central ElectronicsFA2
25.0 AmpsFA1
25.0 Amps
Auxiliary junction box (P107)
C26A-9 C26B-9C25A-9 C25B-9
FS17
7.5 Amps
FE19
60.0 AmpsFE17
60.0 Amps
Switch-Mirror (S156)
saver (R250)
Relay-Battery-(PCB)C25B-15 C25A-15
Battery junction-box (P147)
C12D-1 C12C-1
Battery (P100)12.0 Volts
Passenger (A163) Lamp-Approach-5.0 Watts
door (D254)
Module-Passenger-
Z
Passenger side (M169)
Mirror-Door-
C26B-10 C26A-10
X
Y
door (D253)
Module-Drivers-
Driver side (M168)
Mirror-Door-
Driver (A162)
Lamp-Approach-0.42 Amps
C25B-10 C25A-10
C25A-20 C25B-20C25A-19 C25B-19
foldtemperature (T119)
Sensor-Ambient air-
Y
Xy
x
C25B-2 C25A-2
C5PL01A-20
LINC5PL01A-2BATTC6PL01A-2BATT
C4BR02A-1
C4BR02A-6C4BR02A-5
BATT A
C1BP02G-1C1BB01B-1C1DC02A-1C5PL22A-2
C5PL22A-3
GNDC5PL22A-4
LIN
C1BP02B-56
C1BB03J-1C1BB07G-1S3BB19
S3BP17S5PW32
G1D108A
C1D134B-1
C6PL01B-24
MIRRORS FOLD OUT/YC6PL01B-8
MIRROR XC6PL01B-17
MIRROR FOLD INC6PL01B-9
MIRROR XYC6PL01A-13
GNDC6PL01B-12
APPROACH LIGHTC6PL01B-23
MIRROR GROUNDC6PL01B-10
MIRROR HEATINGC6PL01B-19
MIRROR SENSOR XC6PL01B-18
MIRROR SENSOR YC6PL01B-7
SENSOR GNDC6PL01B-6
SENSOR SUPPLY
S3D138
C6PM31A-1C6PM31A-2C6PM31A-3C6PM31A-4C6PM31A-6C6PM31A-9C6PM31A-10C6PM31A-5C6PM31A-7C6PM31B-1C6PM31A-8
G3D138-1
C5PL01B-17
MIRROR FOLD INC5PL01B-8
MIRROR XC5PL01B-9
MIRROR XYC5PL01B-24
MIRRORS FOLD OUT/YC5PL01B-12
APPROACH LIGHTC5PL01B-10
MIRROR HEATINGC5PL01B-23
MIRROR GROUNDC5PL01B-19
MIRROR SENSOR XC5PL01B-18
MIRROR SENSOR YC5PL01B-7
SENSOR GNDC5PL01B-6
SENSOR SUPPLYC5PL01A-13
GND
C5PM26A-4C5PM26B-6C5PM26B-5C5PM26A-2C5PM26A-1C5PM26A-3C5PM26A-5C5PM26A-10C5PM26A-9C5PM26A-7C5PM26A-6C5PM26A-8C5PM26B-1
S3D133S3D135
G3D133-1G3D135-1
Page 3187 of 3229

501-09 REAR VIEW MIRRORS
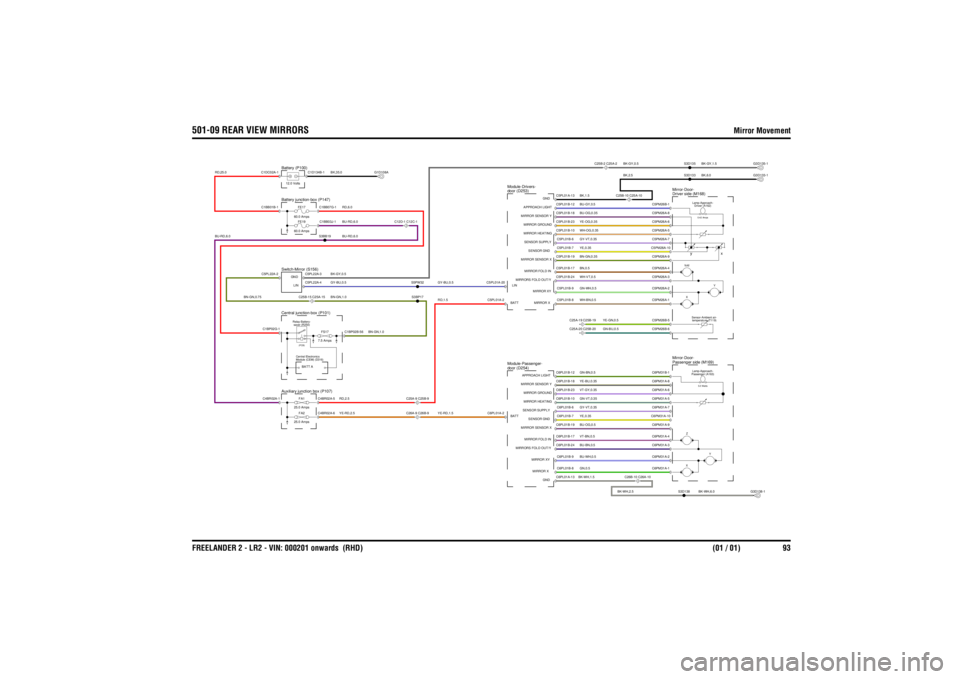
Mirror Movement
FREELANDER 2 - LR2 - VIN: 000201 onwards (RHD) (01 / 01) 93
Mirror Movement
BK-GY,0.5
RD,1.5
BU-RD,6.0
YE-RD,2.5RD,2.5
YE-RD,1.5
BN-GN,0.75
RD,6.0
RD,25.0
BN-GN,1.0
BN-GN,1.0
BU-RD,6.0BU-RD,6.0
GY-BU,0.5
GY-BU,0.5
BK,35.0
BK-WH,6.0
BU-BN,0.5BK-WH,1.5GN-BN,0.5GN-VT,0.35VT-GY,0.35GN,0.5BU-WH,0.5VT-BN,0.5BU-OG,0.5YE,0.35GY-VT,0.35YE-BU,0.35
BK-WH,2.5
BK-GY,1.5BK,6.0
BK,2.5
BU-GY,0.5WH-OG,0.35YE-OG,0.35WH-BN,0.5GN-WH,0.5WH-VT,0.5BN,0.5BN-GN,0.35YE,0.35GY-VT,0.35BU-OG,0.35BK,1.5
GN-BU,0.5YE-GN,0.5
BK-GY,0.5
Central junction-box (P101)
Module (CEM) (D316)
Central ElectronicsFA2
25.0 AmpsFA1
25.0 Amps
Auxiliary junction box (P107)
C26A-9 C26B-9C25A-9 C25B-9
FS17
7.5 Amps
FE19
60.0 AmpsFE17
60.0 Amps
Switch-Mirror (S156)
saver (R250)
Relay-Battery-(PCB)C25B-15 C25A-15
Battery junction-box (P147)
C12D-1 C12C-1
Battery (P100)12.0 Volts
Passenger (A163) Lamp-Approach-5.0 Watts
door (D254)
Module-Passenger-
Z
Passenger side (M169)
Mirror-Door-
C26B-10 C26A-10
X
Y
door (D253)
Module-Drivers-
Driver side (M168)
Mirror-Door-
Driver (A162)
Lamp-Approach-0.42 Amps
C25B-10 C25A-10
C25A-20 C25B-20C25A-19 C25B-19
foldtemperature (T119)
Sensor-Ambient air-
Y
Xy
x
C25B-2 C25A-2
C5PL01A-20
LINC5PL01A-2BATTC6PL01A-2BATT
C4BR02A-1
C4BR02A-6C4BR02A-5
BATT A
C1BP02G-1C1BB01B-1C1DC02A-1C5PL22A-2
C5PL22A-3
GNDC5PL22A-4
LIN
C1BP02B-56
C1BB03J-1C1BB07G-1S3BB19
S3BP17S5PW32
G1D108A
C1D134B-1
C6PL01B-24
MIRRORS FOLD OUT/YC6PL01B-8
MIRROR XC6PL01B-17
MIRROR FOLD INC6PL01B-9
MIRROR XYC6PL01A-13
GNDC6PL01B-12
APPROACH LIGHTC6PL01B-23
MIRROR GROUNDC6PL01B-10
MIRROR HEATINGC6PL01B-19
MIRROR SENSOR XC6PL01B-18
MIRROR SENSOR YC6PL01B-7
SENSOR GNDC6PL01B-6
SENSOR SUPPLY
S3D138
C6PM31A-1C6PM31A-2C6PM31A-3C6PM31A-4C6PM31A-6C6PM31A-9C6PM31A-10C6PM31A-5C6PM31A-7C6PM31B-1C6PM31A-8
G3D138-1
C5PL01B-17
MIRROR FOLD INC5PL01B-8
MIRROR XC5PL01B-9
MIRROR XYC5PL01B-24
MIRRORS FOLD OUT/YC5PL01B-12
APPROACH LIGHTC5PL01B-10
MIRROR HEATINGC5PL01B-23
MIRROR GROUNDC5PL01B-19
MIRROR SENSOR XC5PL01B-18
MIRROR SENSOR YC5PL01B-7
SENSOR GNDC5PL01B-6
SENSOR SUPPLYC5PL01A-13
GND
C5PM26A-4C5PM26B-6C5PM26B-5C5PM26A-2C5PM26A-1C5PM26A-3C5PM26A-5C5PM26A-10C5PM26A-9C5PM26A-7C5PM26A-6C5PM26A-8C5PM26B-1
S3D133S3D135
G3D133-1G3D135-1