Page 3032 of 3383
SECOND SEATSE-101
C
DE
F
G H
J
K L
M A
B
SE
Revision: November 2009 2006 QX56
Second Row Center
WIIA1366E
1. Seatback pad2. Armrest finisher 3. Headrest
4. Seat belt retractor cover 5. Seat belt bezel 6. RH headrest guide locking
Page 3033 of 3383
SE-102
SECOND SEAT
Revision: November 20092006 QX56
7. LH headrest guide free8. Seatback board 9. Seat bracket cover
10. Armrest pivot bracket cover 11. Seatback frame 12. Seat cushion frame
13. Latch assembly 14. Lower rear pivot bracket support 15. Outer hinge cover
16. Center seat base assembly 17. Link and pivot bracket apron 18. Seat cushion pad
19. Seat cushion trim cover 20. Cushion stop bumper 21. Inner lever cover
22. Seat hinge assembly 23. Seat lever assembly 24 Outer lever cover
25. Seat lock cover 26 Armrest cover 27 Armrest bracket
28 Armrest pad 29 Cup holder 30 Seatback trim cover
31. Seat belt retractor and belt assembly A. Refer to SB-6, "
Removal and Installation of Second Row Seat Belt"
Page 3038 of 3383

THIRD SEATSE-107
C
DE
F
G H
J
K L
M A
B
SE
Revision: November 2009 2006 QX56
RH Side SeatEIS007X0
REMOVAL
1. Remove the storage bin. Refer to EI-40, "LUGGAGE FLOOR TRIM" .
2. Remove the lower base trim covers.
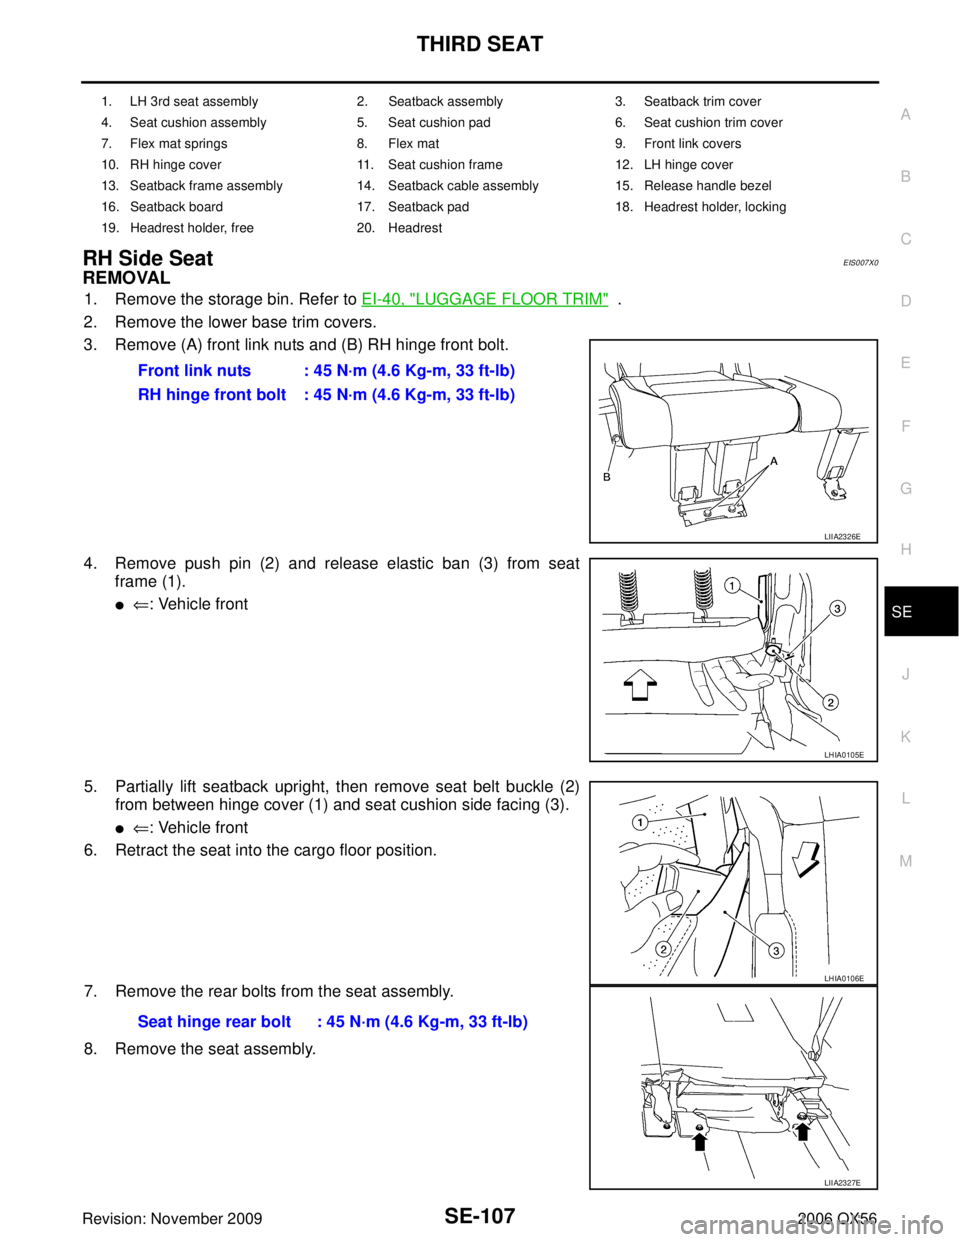
3. Remove (A) front link nuts and (B) RH hinge front bolt.
4. Remove push pin (2) and release elastic ban (3) from seat frame (1).
�⇐: Vehicle front
5. Partially lift seatback upright, then remove seat belt buckle (2) from between hinge cover (1) and seat cushion side facing (3).
�⇐: Vehicle front
6. Retract the seat into the cargo floor position.
7. Remove the rear bolts from the seat assembly.
8. Remove the seat assembly.
1. LH 3rd seat assembly 2. Seatback assembly 3. Seatback trim cover
4. Seat cushion assembly 5. Seat cushion pad 6. Seat cushion trim cover
7. Flex mat springs 8. Flex mat 9. Front link covers
10. RH hinge cover 11. Seat cushion frame 12. LH hinge cover
13. Seatback frame assembly 14. Seatback cable assembly 15. Release handle bezel
16. Seatback board 17. Seatback pad 18. Headrest holder, locking
19. Headrest holder, free 20. Headrest
Front link nuts : 45 N·m (4.6 Kg-m, 33 ft-lb)
RH hinge front bolt : 45 N·m (4.6 Kg-m, 33 ft-lb)
LIIA2326E
LHIA0105E
Seat hinge rear bolt : 45 N·m (4.6 Kg-m, 33 ft-lb)
LHIA0106E
LIIA2327E
Page 3041 of 3383
SE-110
THIRD SEAT
Revision: November 20092006 QX56
1. RH 3rd seat assembly2. Seatback assembly 3. Seatback pad
4. Seatback trim cover 5. Seat cushion assembly 6. Seat cushion trim cover
7. Seat cushion pad 8. Flex mat springs 9. Flex mat
10. Front link covers 11. Seat cushion frame 12. RH hinge cover
13. LH hinge cover 14. Seatback frame assembly 15. Seatback board
16. Seatback cable assembly 17. Release handle bezel 18. Headrest holder, locking
19. Headrest holder, free 20. Headrest
Page 3045 of 3383
SRS-4
PREPARATION
Revision: November 20092006 QX56
PREPARATIONPFP:00002
Special Service ToolsEHS0016E
The actual shapes of Kent-Moore tools may differ from those of special service tools illustrated here.
Commercial Service ToolsEHS0016F
Tool number
(Kent-Moore No.)
Tool nameDescription
—
(J-42057)
Air bag lock master key set Removing and installing air bag lock
LRS210
Tool name
(Kent-Moore No.)
Description
Steering wheel puller
(J-1859A) Removing steering wheel
Steering wheel puller legs
(J-42578) Removing steering wheel
LHIA0043E
LHIA0044E
Page 3048 of 3383

SUPPLEMENTAL RESTRAINT SYSTEM (SRS)SRS-7
C
DE
F
G
I
J
K L
M A
B
SRS
Revision: November 2009 2006 QX56
Passenger Air Bag Status Conditions
NOTE:
Passenger does not meet Occupant Classification System specifications for passenger air bag activation.
Direct-connect SRS Component ConnectorsEHS0016L
The following SRS components use direct-connect style harness connectors.
�Driver air bag module
�Front passenger air bag module
�LH side front curtain air bag module
�LH side rear curtain air bag module
�RH side front curtain air bag module
�RH side rear curtain air bag module
�Front LH seat belt pre-tensioner
�Front RH seat belt pre-tensioner
�Seat belt buckle pre-tensioner assembly LH
�Seat belt buckle pre-tensioner assembly RH
Always pull up to release black locking tab prior to removing connector from SRS component.
Always push down to lock black locking tab after installing connector
to SRS component. When locked, the black locking tab is level with
the connector housing.
Front Passenger Seat (Condition) PASS AIR BAG OFF Indicator
(Status) Passenger Air Bag Status
(Readiness) CONSULT-II Display
Seat occupied OFF Active (enabled) ON
Seat occupied
NOTEON Deactivated (disabled) OFF
Seat empty OFF Deactivated (disabled) OFF
WHIA0187E
WHIA0103E
Page 3085 of 3383

SRS-44
TROUBLE DIAGNOSIS
Revision: November 20092006 QX56
Trouble Diagnosis: “AIR BAG” Warning Lamp Does Not Turn OffEHS0016V
DIAGNOSTIC PROCEDURE 6
1. CHECK CONDITION OF AIR BAG MODULE
Inspect for any deployed air bag modules or seat belt pre-tensioners.
Are any air bag modules or seat belt pre-tensioners deployed?
Yes >> Refer to SRS-60, "COLLISION DIAGNOSIS" .
No >> GO TO 2.
2. CHECK THE AIR BAG FUSE
Check 10A fuse [No. 13, located in the fuse block (J/B)].
Refer to PG-4, "
POWER SUPPLY ROUTING CIRCUIT" .
OK or NG
OK >> GO TO 4.
NG >> GO TO 3.
3. CHECK AIR BAG FUSE AGAIN
Replace 10A fuse [No. 13, located in the fuse block (J/B)] and turn ignition switch ON.
Does the fuse blow again?
Yes >> Repair harness.
No >> Inspection End.
4. CHECK AIR BAG DIAGNOSIS SENSOR UNIT
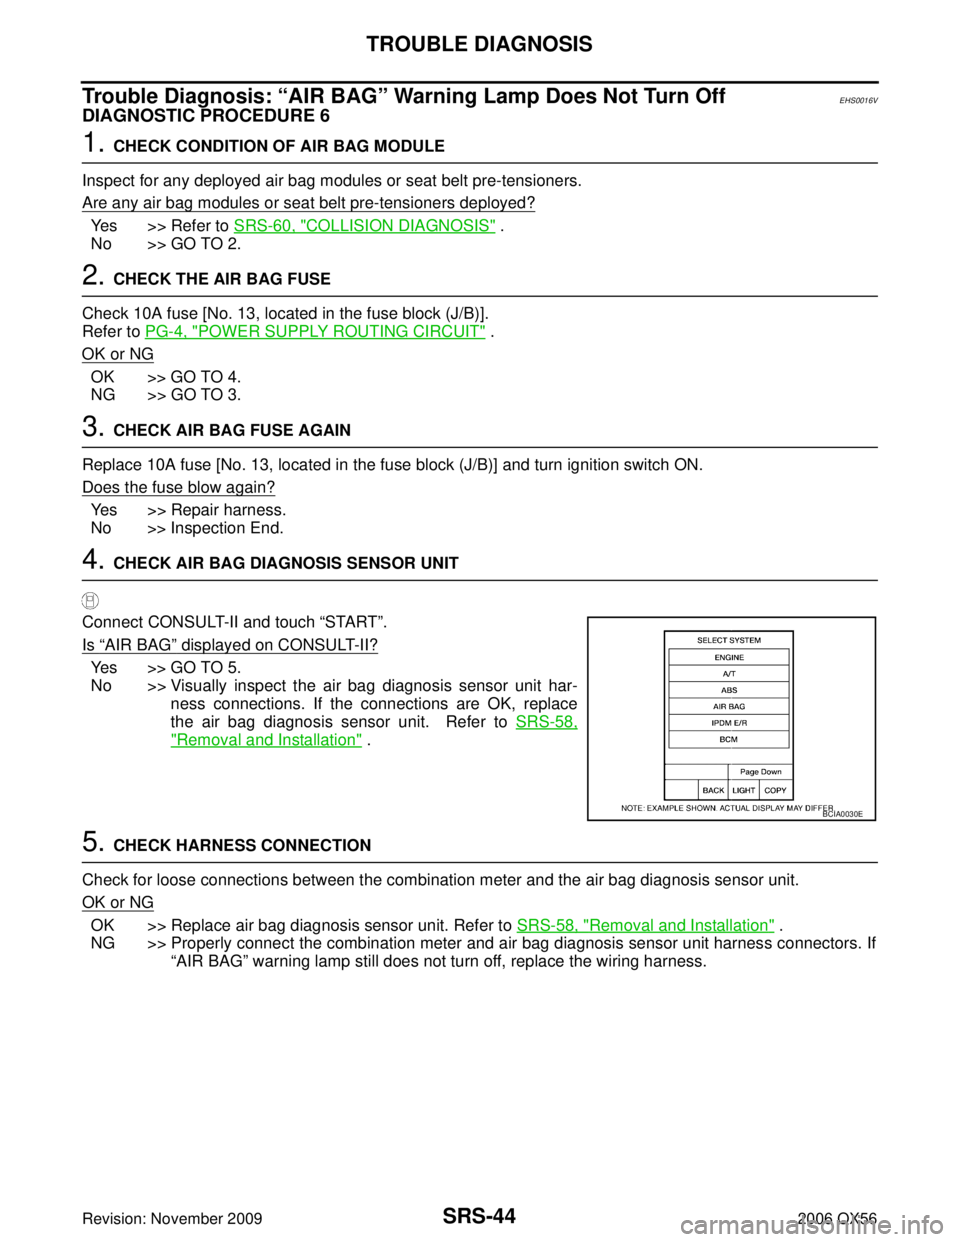
Connect CONSULT-II and touch “START”.
Is
“AIR BAG” displayed on CONSULT-II?
Yes >> GO TO 5.
No >> Visually inspect the air bag diagnosis sensor unit har- ness connections. If the connections are OK, replace
the air bag diagnosis sensor unit. Refer to SRS-58,
"Removal and Installation" .
5. CHECK HARNESS CONNECTION
Check for loose connections between the combination meter and the air bag diagnosis sensor unit.
OK or NG
OK >> Replace air bag diagnosis sensor unit. Refer to SRS-58, "Removal and Installation" .
NG >> Properly connect the combination meter and air bag diagnosis sensor unit harness connectors. If “AIR BAG” warning lamp still does not turn off, replace the wiring harness.
BCIA0030E
Page 3086 of 3383
TROUBLE DIAGNOSISSRS-45
C
DE
F
G
I
J
K L
M A
B
SRS
Revision: November 2009 2006 QX56
Trouble Diagnosis: “AIR BAG” Warning Lamp Does Not Turn OnEHS0016W
DIAGNOSTIC PROCEDURE 7
1. CHECK METER FUSE
Check the 10A fuse [No. 14, located in the fuse block (J/B)].
Refer to PG-4, "
POWER SUPPLY ROUTING CIRCUIT" .
OK or NG
OK >> GO TO 3.
NG >> GO TO 2.
2. CHECK METER FUSE AGAIN
Replace 10A fuse [No. 14, located in the fuse block (J/B)] and turn ignition switch ON.
Does the fuse blow again?
Yes >> Repair harness.
No >> Inspection End.
3. CHECK HARNESS CONNECTION BETWEEN AIR BAG DIAGNOSIS SENSOR UNIT AND COMBINA-
TION METER Disconnect the air bag diagnosis sensor unit harness connectors and turn ignition switch ON.
Does
“AIR BAG” warning lamp turn on?
Yes >> Replace the air bag diagnosis sensor unit. Refer to SRS-58, "Removal and Installation" .
No >> Check the combination meter ground circuits.