2006 INFINITI M35 engine
[x] Cancel search: enginePage 4620 of 5621
FRONT FOG LAMP
LT-193
C
D
E
F
G
H
I
J
L
MA
B
LT
Revision: 2006 January2006 M35/M45
FRONT FOG LAMPPFP:26150
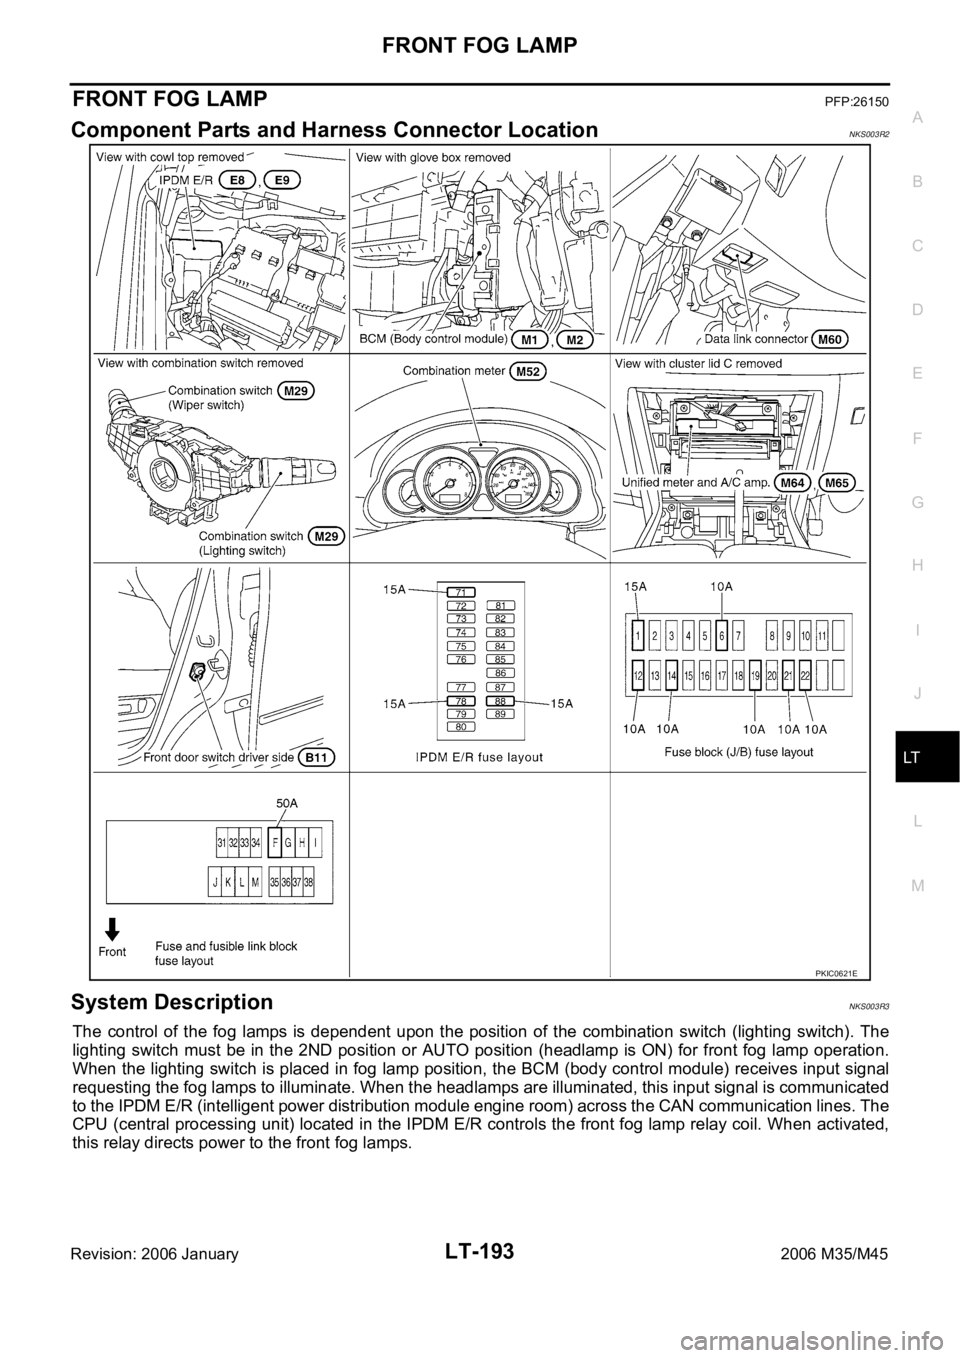
Component Parts and Harness Connector LocationNKS003R2
System DescriptionNKS003R3
The control of the fog lamps is dependent upon the position of the combination switch (lighting switch). The
lighting switch must be in the 2ND position or AUTO position (headlamp is ON) for front fog lamp operation.
When the lighting switch is placed in fog lamp position, the BCM (body control module) receives input signal
requesting the fog lamps to illuminate. When the headlamps are illuminated, this input signal is communicated
to the IPDM E/R (intelligent power distribution module engine room) across the CAN communication lines. The
CPU (central processing unit) located in the IPDM E/R controls the front fog lamp relay coil. When activated,
this relay directs power to the front fog lamps.
PKIC0621E
Page 4621 of 5621

LT-194
FRONT FOG LAMP
Revision: 2006 January2006 M35/M45
OUTLINE
Power is supplied at all times
through 15A fuse (No. 88, located in IPDM E/R)
to front fog lamp relay, located in IPDM E/R,
through 15A fuse (No. 78, located in IPDM E/R)
to CPU, located in IPDM E/R,
through 15A fuse (No. 71, located in IPDM E/R)
to CPU, located in IPDM E/R,
through 50A fusible link (letter F, located in fuse fusible link and relay block)
to BCM terminal 55,
through 10A fuse [No. 21, located in fuse block (J/B)]
to BCM terminal 42, and
to combination meter terminal 23,
through 10A fuse [No. 19, located in fuse block (J/B)]
to unified meter and A/C amp. terminal 54,
through 10A fuse [No. 22, located in fuse block (J/B)]
to key slot terminal 1.
With the ignition switch in the ON or START position, power is supplied
to CPU, located in IPDM E/R,
through 15A fuse [No. 1, located in fuse block (J/B)]
to BCM terminal 38,
through 10A fuse [No. 14, located in fuse block (J/B)]
to combination meter terminal 12,
through 10A fuse [No. 12, located in fuse block (J/B)]
to unified meter and A/C amp. terminal 53.
With the ignition switch in the ACC or ON position, power is supplied
through 10A fuse [No. 6, located in fuse block (J/B)]
to BCM terminal 11.
Ground is supplied
to BCM terminal 52
to combination meter terminals 9, 10 and 11
to unified meter and A/C amp. terminals 55 and 71
to engine switch (push switch) terminal 1
to key slot terminal 8
through grounds M16 and M70,
to IPDM E/R terminals 38 and 51
through grounds E22 and E43.
Page 4676 of 5621
PARKING, LICENSE PLATE AND TAIL LAMPS
LT-249
C
D
E
F
G
H
I
J
L
MA
B
LT
Revision: 2006 January2006 M35/M45
PARKING, LICENSE PLATE AND TAIL LAMPSPFP:26550
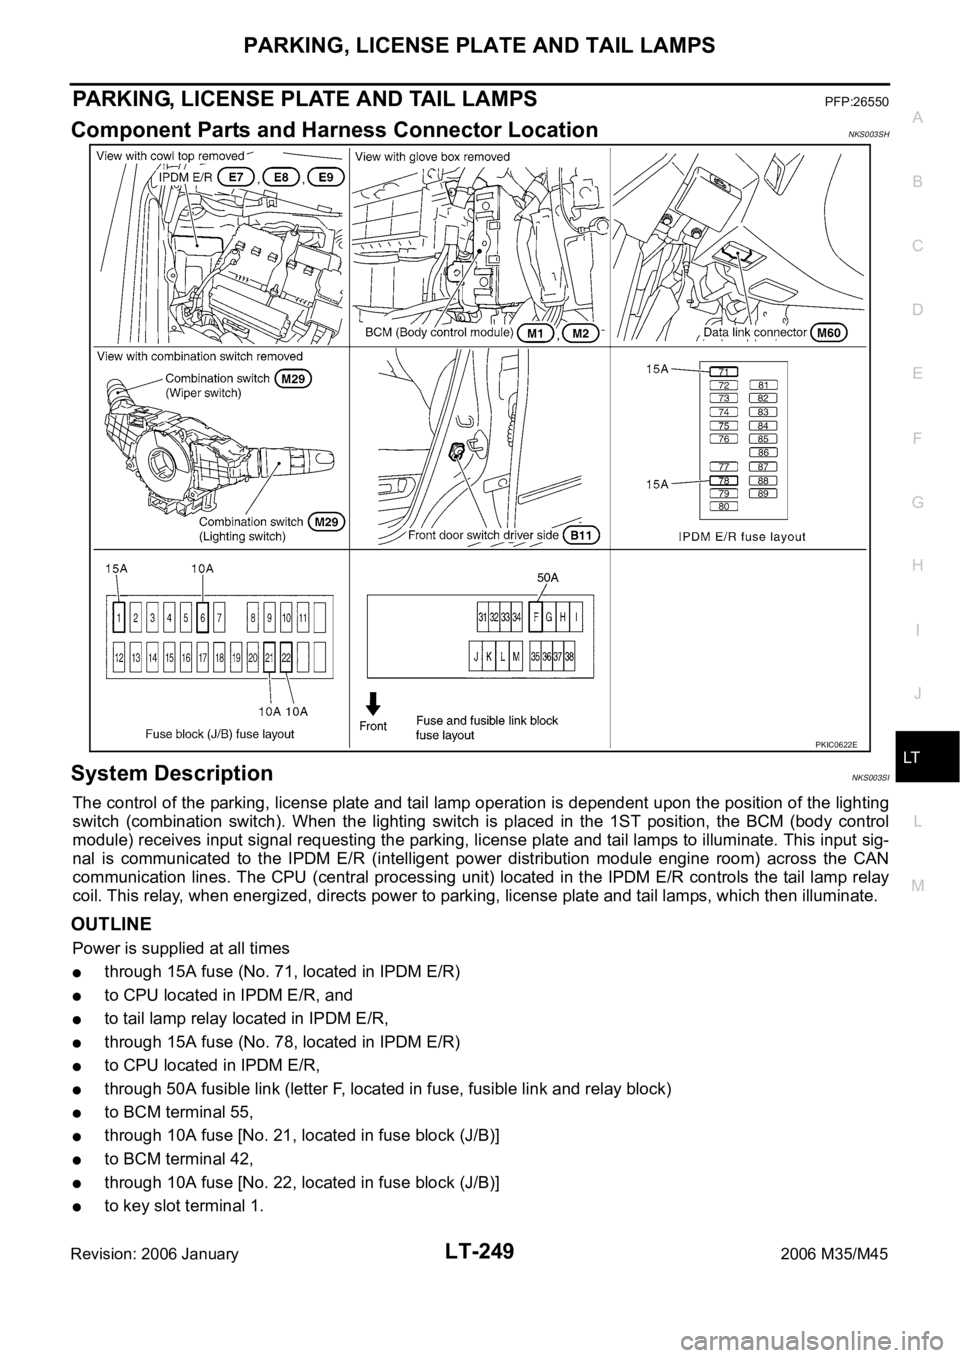
Component Parts and Harness Connector LocationNKS003SH
System DescriptionNKS003SI
The control of the parking, license plate and tail lamp operation is dependent upon the position of the lighting
switch (combination switch). When the lighting switch is placed in the 1ST position, the BCM (body control
module) receives input signal requesting the parking, license plate and tail lamps to illuminate. This input sig-
nal is communicated to the IPDM E/R (intelligent power distribution module engine room) across the CAN
communication lines. The CPU (central processing unit) located in the IPDM E/R controls the tail lamp relay
coil. This relay, when energized, directs power to parking, license plate and tail lamps, which then illuminate.
OUTLINE
Power is supplied at all times
through 15A fuse (No. 71, located in IPDM E/R)
to CPU located in IPDM E/R, and
to tail lamp relay located in IPDM E/R,
through 15A fuse (No. 78, located in IPDM E/R)
to CPU located in IPDM E/R,
through 50A fusible link (letter F, located in fuse, fusible link and relay block)
to BCM terminal 55,
through 10A fuse [No. 21, located in fuse block (J/B)]
to BCM terminal 42,
through 10A fuse [No. 22, located in fuse block (J/B)]
to key slot terminal 1.
PKIC0622E
Page 4697 of 5621
LT-270
INTERIOR ROOM LAMP
Revision: 2006 January2006 M35/M45
to vanity mirror lamp LH and RH terminals 2
through grounds M16 and M70.
And power is supplied
through BCM terminal 41
to vanity mirror lamp (LH and RH) terminals 1.
ROOM LAMP TIMER OPERATION
BCM controls applicable lamps to illuminate for 15 seconds (can be set maximum 30 seconds) by timer oper-
ation under following conditions. BCM also controls applicable lamps to brighten for 1 second (can be set max-
imum 5 seconds) when turned ON, or to dim for 3 seconds (can be set maximum 5 seconds) when turned
OFF. (Timer operating time and dimming/brightening time can be changed with CONSULT-II. Refer to LT- 2 8 5 ,
"WORK SUPPORT (INT LAMP)" .) This control operates as follows.
Applicable lamps
Room lamp system: map lamp, foot lamp (driver side and passenger side) and personal lamp (rear LH
and rear RH).
BCM controls room lamp timer operation under following condition.
Condition 1: Door lock state changes.*
BCM judges as the door lock is unlocked under either case below.
–The Intelligent Key unit sends door lock/unlock trunk open request signal (driver side unlock or passenger
side unlock) to BCM through CAN communication line by unlock operation of intelligent key, outside key
antenna and front door request switch (driver side) or outside key antenna and front door request switch
(passenger side).
–Key cylinder switch state (unlock) signal is sent to BCM through power window serial link when front door
lock assembly (driver side) (key cylinder switch) is unlocked (ON) by power window main switch unlock
operation.
And fulfills all the conditions below.
–The engine switch (push switch) is OFF.
–All the doors are closed.
*: This setting can be changed by CONSULT-II. Refer to LT-285, "
WORK SUPPORT (INT LAMP)" .
Condition 2: Any door switch state changes.*
The BCM terminal value of operated door switch is changed when any door is opened and then closed.
From that BCM judges as the door is opened and then closed.
And fulfills all the conditions below.
–The engine switch (push switch) is OFF.
–All the doors are closed.
*: This setting can be changed by CONSULT-II. Refer to LT-285, "
WORK SUPPORT (INT LAMP)" .
Condition 3: Engine switch (push switch) state changes.*
The Intelligent Key unit judges as the engine switch (push switch) is OFF and sends push-button ignition
switch (push switch) signal to PDU (power distribution unit) when push-button ignition switch (push
switch) turned OFF. Then PDU (power distribution unit) turns OFF, IGN power supply and ACC power
supply.
And fulfills the conditions below.
–All the doors are closed.
*:This setting can be changed by CONSULT-II. Refer to LT- 2 8 5 , "
WORK SUPPORT (INT LAMP)" .
NOTE:
When timer operation signal is input during former timer operation, BCM goes for latter timer operation.
Page 4712 of 5621
INTERIOR ROOM LAMP
LT-285
C
D
E
F
G
H
I
J
L
MA
B
LT
Revision: 2006 January2006 M35/M45
WORK SUPPORT (INT LAMP)
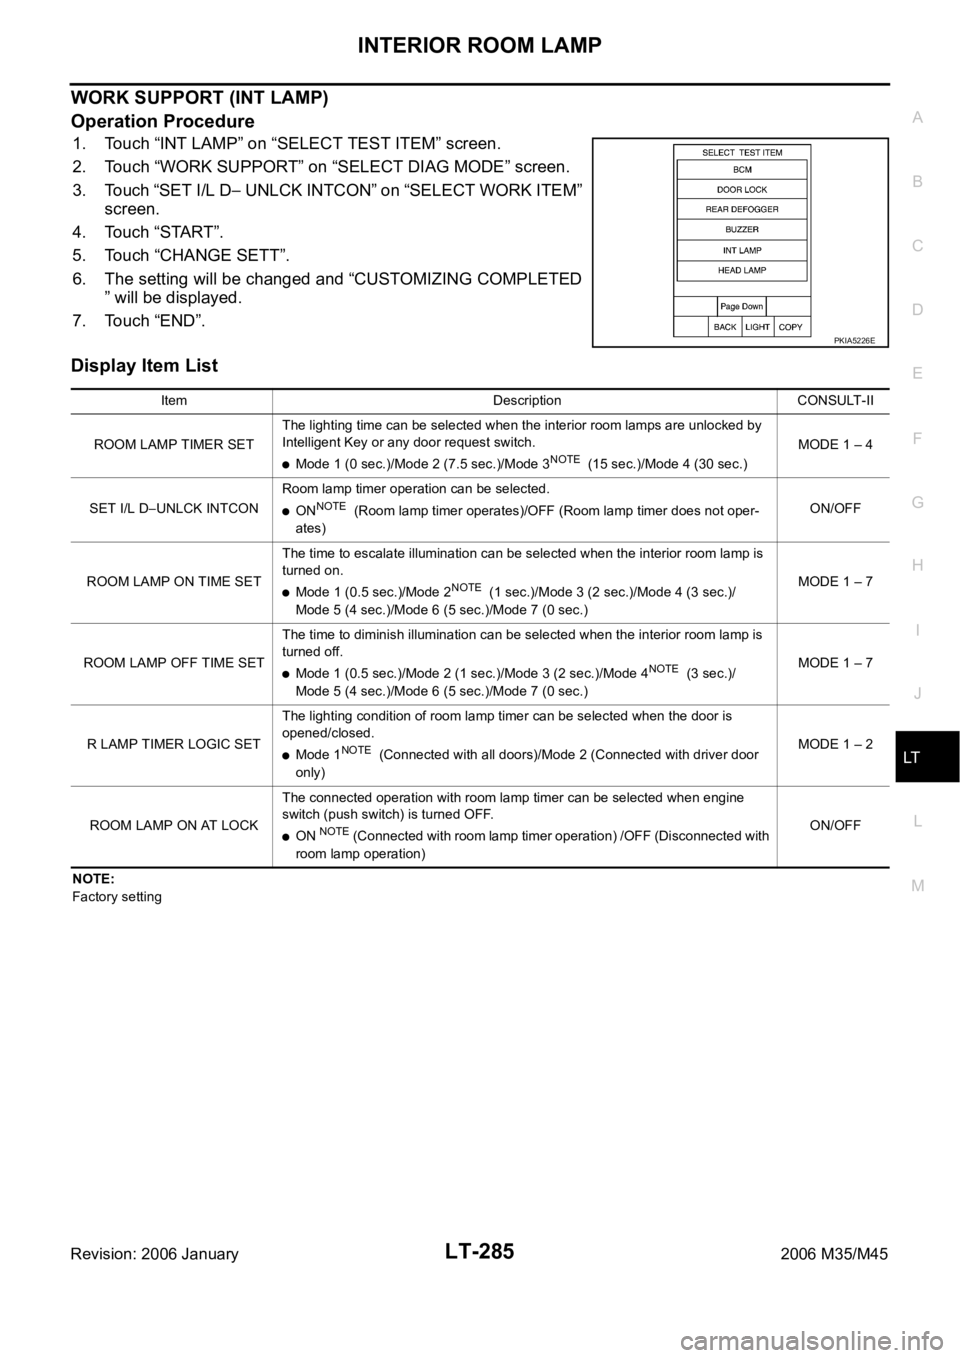
Operation Procedure
1. Touch “INT LAMP” on “SELECT TEST ITEM” screen.
2. Touch “WORK SUPPORT” on “SELECT DIAG MODE” screen.
3. Touch “SET I/L D
UNLCK INTCON” on “SELECT WORK ITEM”
screen.
4. Touch “START”.
5. Touch “CHANGE SETT”.
6. The setting will be changed and “CUSTOMIZING COMPLETED
” will be displayed.
7. Touch “END”.
Display Item List
NOTE:
Factory setting
PKIA5226E
Item Description CONSULT-II
ROOM LAMP TIMER SETThe lighting time can be selected when the interior room lamps are unlocked by
Intelligent Key or any door request switch.
Mode 1 (0 sec.)/Mode 2 (7.5 sec.)/Mode 3NOTE (15 sec.)/Mode 4 (30 sec.)MODE 1 – 4
SET I/L D
UNLCK INTCONRoom lamp timer operation can be selected.ONNOTE (Room lamp timer operates)/OFF (Room lamp timer does not oper-
ates)ON/OFF
ROOM LAMP ON TIME SETThe time to escalate illumination can be selected when the interior room lamp is
turned on.
Mode 1 (0.5 sec.)/Mode 2NOTE (1 sec.)/Mode 3 (2 sec.)/Mode 4 (3 sec.)/
Mode 5 (4 sec.)/Mode 6 (5 sec.)/Mode 7 (0 sec.)MODE 1 – 7
ROOM LAMP OFF TIME SETThe time to diminish illumination can be selected when the interior room lamp is
turned off.
Mode 1 (0.5 sec.)/Mode 2 (1 sec.)/Mode 3 (2 sec.)/Mode 4NOTE (3 sec.)/
Mode 5 (4 sec.)/Mode 6 (5 sec.)/Mode 7 (0 sec.)MODE 1 – 7
R LAMP TIMER LOGIC SETThe lighting condition of room lamp timer can be selected when the door is
opened/closed.
Mode 1NOTE (Connected with all doors)/Mode 2 (Connected with driver door
only)MODE 1 – 2
ROOM LAMP ON AT LOCKThe connected operation with room lamp timer can be selected when engine
switch (push switch) is turned OFF.
ON NOTE (Connected with room lamp timer operation) /OFF (Disconnected with
room lamp operation)ON/OFF
Page 4722 of 5621

ILLUMINATION
LT-295
C
D
E
F
G
H
I
J
L
MA
B
LT
Revision: 2006 January2006 M35/M45
ILLUMINATIONPFP:27545
System DescriptionNKS003TH
Control of the illumination lamps operation is dependent upon the position of the lighting switch (combination
switch). When the lighting switch is placed in the 1ST or 2ND position (or if the auto light system is activated)
the BCM (body control module) receives input signal requesting the illumination lamps to illuminate. This input
signal is communicated to the IPDM E/R (intelligent power distribution module engine room) across the CAN
communication lines. The CPU (central processing unit) located in the IPDM E/R controls the tail lamp relay
coil. This relay, when energized, directs power to the illumination lamps, which then illuminate.
OUTLINE
Power is supplied at all times
through 15A fuse (No. 71, located in IPDM E/R)
to tail lamp relay, located in IPDM E/R, and
to CPU located in IPDM E/R,
through 15A fuse (No. 78, located in IPDM E/R)
to CPU located in IPDM E/R,
through 50A fusible link (letter F, located in fuse, fusible link and relay block)
to BCM terminal 55,
through 10A fuse [No. 21, located in fuse block (J/B)]
to BCM terminal 42 and
to combination meter terminal 23,
through 10A fuse [No. 19, located in fuse block (J/B)]
to unified meter and A/C amp. terminal 54,
through 10A fuse [No. 22, located in fuse block (J/B)]
to intelligent key unit terminals 1, 41 and 57.
With the ignition switch in the ON or START position, power is supplied
through 15A fuse [No. 1, located in fuse block (J/B)]
to BCM terminal 38,
through 10A fuse [No. 14, located in fuse block (J/B)]
to combination meter terminal 12,
through 10A fuse [No. 12, located in fuse block (J/B)]
to unified meter and A/C amp. terminal 53 and
to rear sunshade cancel relay terminal 1.
With the ignition switch in the ACC or ON position, power is supplied
through 10A fuse [No. 6, located in fuse block (J/B)]
to BCM terminal 11
to unified meter and A/C amp. terminal 41 and
to combination meter terminal 2.
Ground is supplied
to BCM terminal 52
to unified meter and A/C amp. terminals 55 and 71
to combination meter terminals 9, 10, and 11
to Intelligent Key unit terminals 20, 40, 56 and 72, and
to illumination control switch terminal 3
through grounds M16 and M70,
to IPDM E/R terminals 38 and 51
through grounds E22 and E43.
Page 4744 of 5621
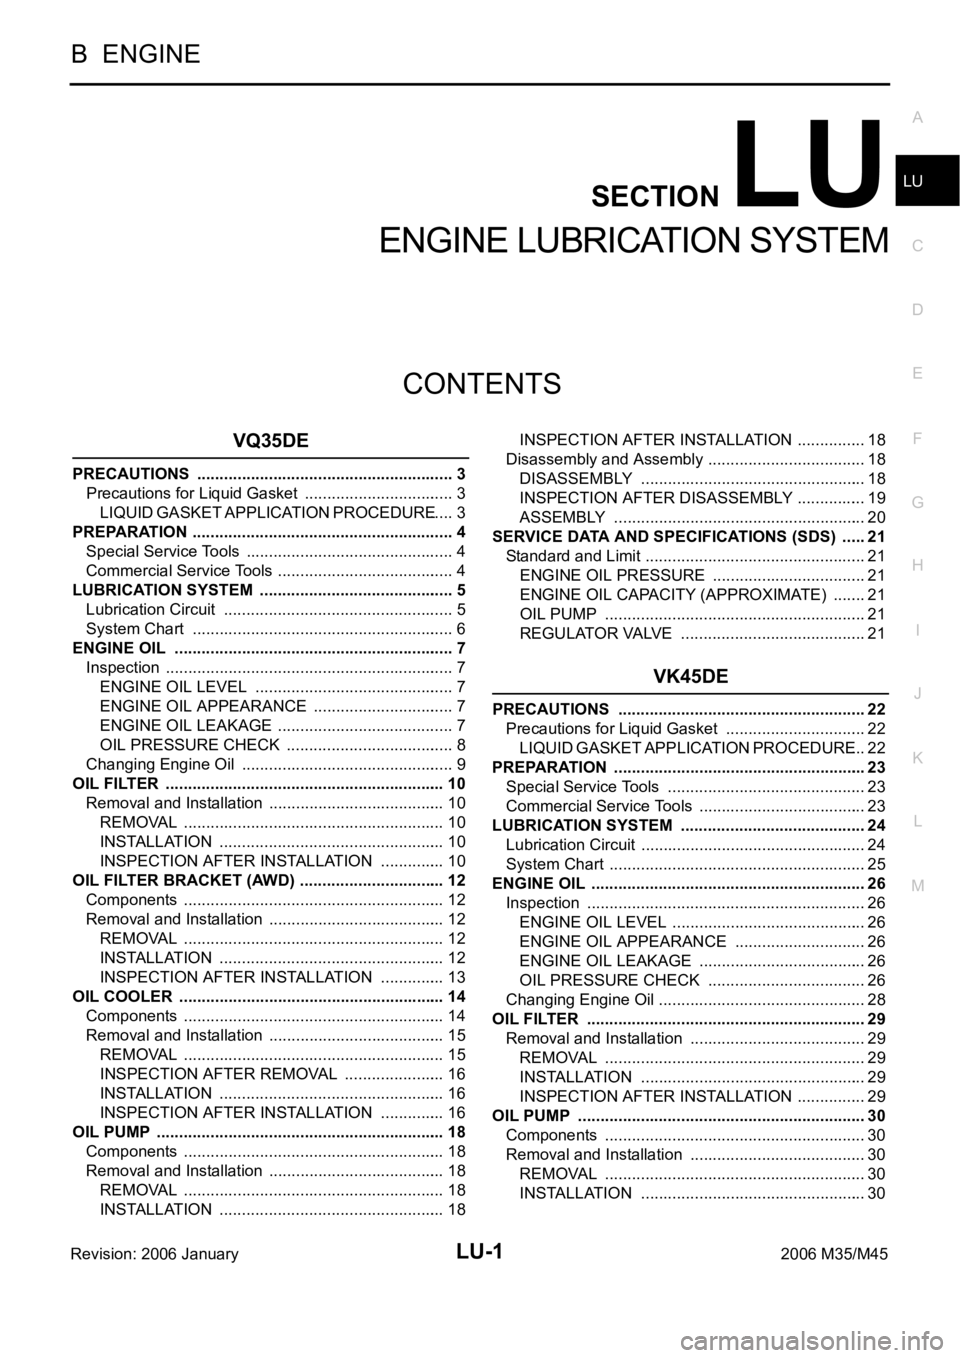
LU-1
ENGINE LUBRICATION SYSTEM
B ENGINE
CONTENTS
C
D
E
F
G
H
I
J
K
L
M
SECTION LU
A
LU
Revision: 2006 January2006 M35/M45
ENGINE LUBRICATION SYSTEM
VQ35DE
PRECAUTIONS .......................................................... 3
Precautions for Liquid Gasket .................................. 3
LIQUID GASKET APPLICATION PROCEDURE ..... 3
PREPARATION ........................................................... 4
Special Service Tools ............................................... 4
Commercial Service Tools ........................................ 4
LUBRICATION SYSTEM ............................................ 5
Lubrication Circuit .................................................... 5
System Chart ........................................................... 6
ENGINE OIL ............................................................... 7
Inspection ................................................................. 7
ENGINE OIL LEVEL ............................................. 7
ENGINE OIL APPEARANCE ................................ 7
ENGINE OIL LEAKAGE ........................................ 7
OIL PRESSURE CHECK ...................................... 8
Changing Engine Oil ................................................ 9
OIL FILTER ............................................................... 10
Removal and Installation ........................................ 10
REMOVAL ........................................................
... 10
INSTALLATION ................................................... 10
INSPECTION AFTER INSTALLATION ............... 10
OIL FILTER BRACKET (AWD) ................................. 12
Components ........................................................... 12
Removal and Installation ........................................ 12
REMOVAL ........................................................
... 12
INSTALLATION ................................................... 12
INSPECTION AFTER INSTALLATION ............... 13
OIL COOLER ............................................................ 14
Components ........................................................... 14
Removal and Installation ........................................ 15
REMOVAL ........................................................
... 15
INSPECTION AFTER REMOVAL ....................... 16
INSTALLATION ................................................... 16
INSPECTION AFTER INSTALLATION ............... 16
OIL PUMP ................................................................. 18
Components ........................................................... 18
Removal and Installation ........................................ 18
REMOVAL ........................................................
... 18
INSTALLATION ................................................... 18INSPECTION AFTER INSTALLATION ................ 18
Disassembly and Assembly .................................... 18
DISASSEMBLY ................................................... 18
INSPECTION AFTER DISASSEMBLY ................ 19
ASSEMBLY ......................................................... 20
SERVICE DATA AND SPECIFICATIONS (SDS) ...... 21
Standard and Limit .................................................. 21
ENGINE OIL PRESSURE ................................... 21
ENGINE OIL CAPACITY (APPROXIMATE) ........ 21
OIL PUMP ........................................................... 21
REGULATOR VALVE .......................................... 21
VK45DE
PRECAUTIONS ........................................................ 22
Precautions for Liquid Gasket ................................ 22
LIQUID GASKET APPLICATION PROCEDURE ... 22
PREPARATION ......................................................... 23
Special Service Tools ............................................. 23
Commercial Service Tools ...................................... 23
LUBRICATION SYSTEM .......................................... 24
Lubrication Circuit ................................................... 24
System Chart .......................................................... 25
ENGINE OIL .............................................................. 26
Inspection ............................................................... 26
ENGINE OIL LEVEL ............................................ 26
ENGINE OIL APPEARANCE .............................. 26
ENGINE OIL LEAKAGE ...................................... 26
OIL PRESSURE CHECK .................................... 26
Changing Engine Oil ............................................
... 28
OIL FILTER ............................................................... 29
Removal and Installation ........................................ 29
REMOVAL ........................................................
... 29
INSTALLATION ................................................... 29
INSPECTION AFTER INSTALLATION ................ 29
OIL PUMP ................................................................. 30
Components ........................................................... 30
Removal and Installation ........................................ 30
REMOVAL ........................................................
... 30
INSTALLATION ................................................... 30
Page 4745 of 5621

LU-2Revision: 2006 January2006 M35/M45 INSPECTION AFTER INSTALLATION ................ 31
Disassembly and Assembly .................................... 31
DISASSEMBLY ................................................... 31
INSPECTION AFTER DISASSEMBLY ................ 31
ASSEMBLY ......................................................... 32SERVICE DATA AND SPECIFICATIONS (SDS) ...... 33
Standard and Limit .................................................. 33
ENGINE OIL PRESSURE .................................... 33
ENGINE OIL CAPACITY (APPROXIMATE) ........ 33
OIL PUMP ............................................................ 33
REGULATOR VALVE ........................................... 33