2006 INFINITI M35 engine
[x] Cancel search: enginePage 5545 of 5621

WT-20
TROUBLE DIAGNOSES
Revision: 2006 January2006 M35/M45
ID REGISTRATION WITHOUT ACTIVATION TOOL
This procedure must be done after replacement of a tire pressure transmitter, low tire pressure warn-
ing control unit, or tire rotation.
CAUTION:
If CONSULT-II is used with no connection of CONSULT-II CONVERTER, malfunction might be detected
during self-diagnosis depending on control unit which performs CAN communication.
1. Turn ignition switch OFF.
2. Connect CONSULT-II and CONSULT-II CONVERTER to data link connector.
3. Turn ignition switch ON.
4. Touch “START (NISSAN BASED VHCL)” “AIR PRESSURE MONITOR”.
If “AIR PRESSURE MONITOR” is not displayed, print the “SELECT SYSTEM” screen. Then refer to
LAN-7, "
Precautions When Using CONSULT-II" .
NOTE:
Just after starting engine, or turning ignition switch ON, it may not be displayed even if “START (NIS-
SAN BASED VHCL)” is touched. In this case, reconnect CONSULT-II and CONSULT-II CONVERTER.
5. Touch “WORK SUPPORT” on “SELECT DIAG MODE” screen.
6. Touch “ID REGIST” on “SELECT WORK ITEM”.
7. Adjust the tire pressure to the values shown in the table below for ID registration, and drive the vehicle at
40 km/h (25 MPH) or more for a few minutes.
8. After completing all ID registrations, press “END” to complete the procedure.
9. Inflate all tires to proper pressure. Refer to WT-41, "
SERVICE DATA AND SPECIFICATIONS (SDS)" .
Tire position
Tire pressure kPa (kg/cm2 , psi)
Front
Left 240 (2.4, 34)
Front
Right 220 (2.2, 31)
Rear
Right 200 (2.0, 29)
Rear
Left 180 (1.8, 26)
Activation tire position CONSULT-II
Front LH
“YET”
“DONE” Front RH
Rear RH
Rear LH
Page 5548 of 5621
TROUBLE DIAGNOSES
WT-23
C
D
F
G
H
I
J
K
L
MA
B
WT
Revision: 2006 January2006 M35/M45
NOTICE:
186 kPa (1.86 kg/cm2 , 27 psi): Standard air pressure is for 230 kpa (2.3 kg/cm2 , 33 psi) vehicles.
How to Erase Self-Diagnostic Results
1. Perform applicable inspection of malfunctioning item and then repair or replace.
2. Start engine, and touch “START (NISSAN BASED VHCL)” “ AIR PRESSURE MONITOR” “SELF-DIAG
RESULTS” “ERASE” in this order to erase the diagnostic memory.
CAUTION:
If memory cannot be erased, repeat step 1, 2.
3. Perform self-diagnosis again, and make sure that DTC memory is erased.
DATA MONITOR MODE
Operation Procedure
1. Perform “CONSULT-II Start Procedure”. Refer to GI-39, "CONSULT-II Start Procedure" .
2. Touch “DATA MONITOR”.
3. Select from “SELECT MONITOR ITEM”, screen of data monitor is displayed.
NOTE:
When malfunction is detected, CONSULT-II performs REAL-TIME DIAGNOSIS. Also, any malfunction
detected while in this mode will be displayed in real time.
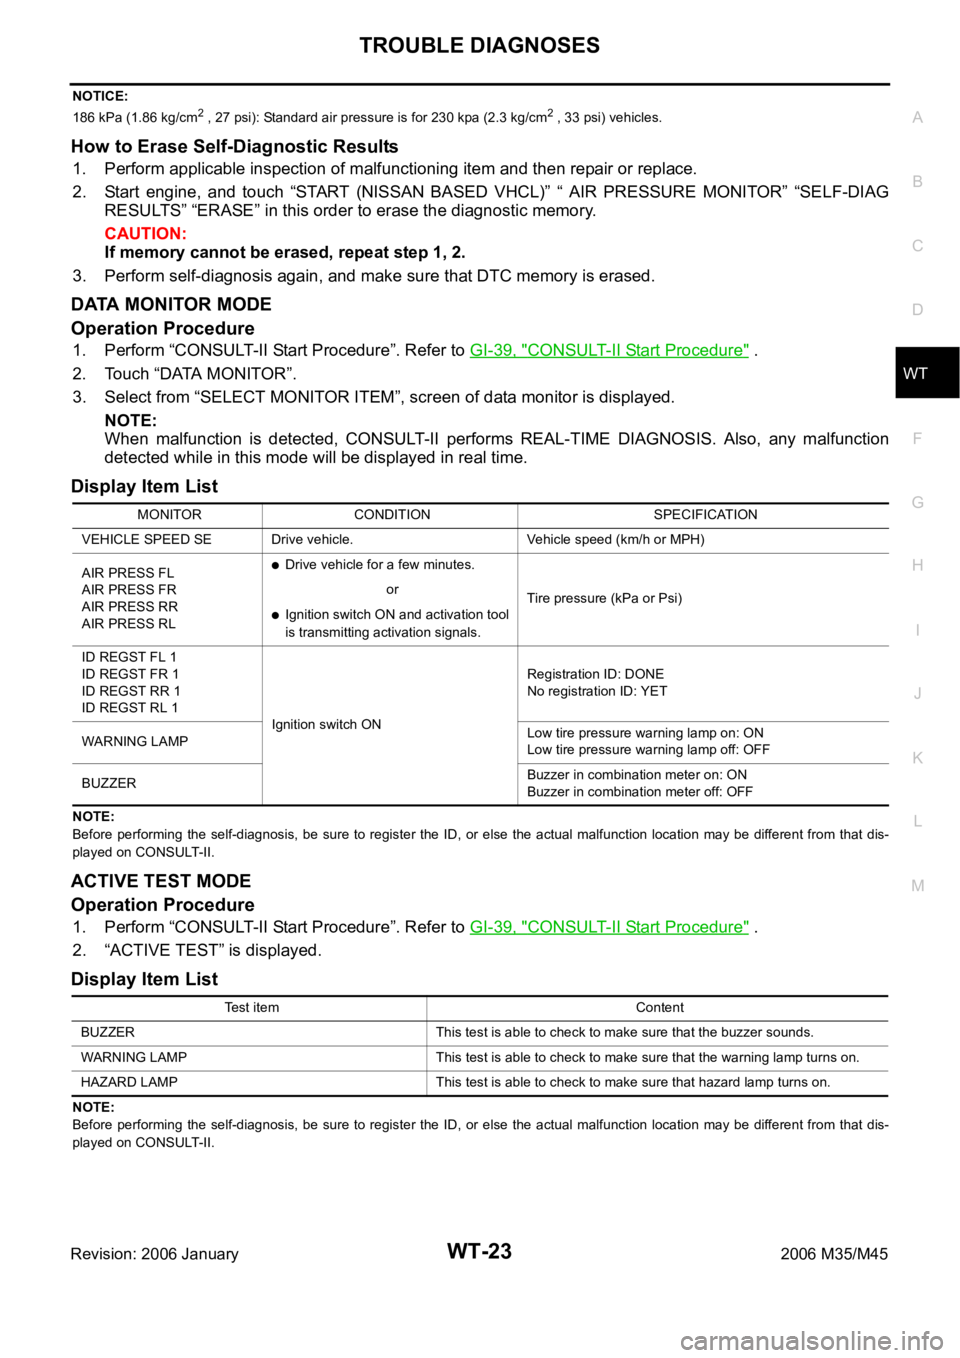
Display Item List
NOTE:
Before performing the self-diagnosis, be sure to register the ID, or else the actual malfunction location may be different from that dis-
played on CONSULT-II.
ACTIVE TEST MODE
Operation Procedure
1. Perform “CONSULT-II Start Procedure”. Refer to GI-39, "CONSULT-II Start Procedure" .
2. “ACTIVE TEST” is displayed.
Display Item List
NOTE:
Before performing the self-diagnosis, be sure to register the ID, or else the actual malfunction location may be different from that dis-
played on CONSULT-II.MONITOR CONDITION SPECIFICATION
VEHICLE SPEED SE Drive vehicle. Vehicle speed (km/h or MPH)
AIR PRESS FL
AIR PRESS FR
AIR PRESS RR
AIR PRESS RL
Drive vehicle for a few minutes.
Tire pressure (kPa or Psi) or
Ignition switch ON and activation tool
is transmitting activation signals.
ID REGST FL 1
ID REGST FR 1
ID REGST RR 1
ID REGST RL 1
Ignition switch ONRegistration ID: DONE
No registration ID: YET
WARNING LAMPLow tire pressure warning lamp on: ON
Low tire pressure warning lamp off: OFF
BUZZERBuzzer in combination meter on: ON
Buzzer in combination meter off: OFF
Test item Content
BUZZER This test is able to check to make sure that the buzzer sounds.
WARNING LAMP This test is able to check to make sure that the warning lamp turns on.
HAZARD LAMP This test is able to check to make sure that hazard lamp turns on.
Page 5559 of 5621
WT-34
TROUBLE DIAGNOSIS FOR SELF-DIAGNOSTIC ITEMS
Revision: 2006 January2006 M35/M45
2. REPLACE TIRE PRESSURE TRANSMITTER
1. Check low tire pressure warning condition again, and replace malfunctioning tire pressure transmitter.
2. Perform ID registration of all transmitter.
Can ID registration of all tire pressure transmitters be completed?
YES >> GO TO 3.
NO >> GO TO the inspection 1. Refer to WT-30, "
Inspection 1: Transmitter no Data" .
3. VEHICLE DRIVING
Drive at a speed of 40 km/h (25 MPH) or more for 3 minutes, and then drive the vehicle at any speed for 10
minutes. Then check all tire pressures with CONSULT-II “DATA MONITOR” within 5 minutes.
Does
“DATA MONITOR” display tire pressure as normal without any warning lamp?
YES >> INSPECTION END
NO >> Replace malfunctioning transmitter, and perform “Step 3” again.
Inspection 7: Vehicle Speed SignalNES000KG
MALFUNCTION CODE NO. 52
1. CHECK SELF-DIAGNOSIS RESULTS
1. Turn ignition switch OFF.
2. Connect CONSULT-II and CONSULT-II CONVERTER to data link connector.
3. Turn ignition switch ON.
4. Touch “START (NISSAN BASED VHCL)” “AIR PRESSURE MONITOR”.
–If “AIR PRESSURE MONITOR” is not displayed, print the “SELECT SYSTEM” screen. Then refer to LAN-
7, "Precautions When Using CONSULT-II" .
NOTE:
Just after starting engine, or turning ignition switch ON, it may not be displayed even if “START (NISSAN
BASED VHCL)” is touched. In this case, reconnect CONSULT-II and CONSULT-II CONVERTER.
5. Touch “SELF-DIAG RESULTS” on “SELECT DIAG MODE” screen.
6. Check display contents in self-diagnostic results.
Is
“CAN COMM CIRCUIT” displayed in the self-diagnosis display items?
YES >> Malfunction in CAN communication system. GO TO LAN-7, "Precautions When Using CONSULT-
II" .
NO >> No malfunction. Check combination meter refer to DI-18, "
Trouble Diagnosis" .
Inspection 8: CAN Communication System MalfunctionNES000KS
1. CHECK LOW TIRE PRESSURE WARNING CONTROL UNIT CONNECTOR
1. Turn ignition switch OFF, disconnect low tire pressure warning control unit harness connector, and check
terminal for deformation, disconnection, looseness, etc.
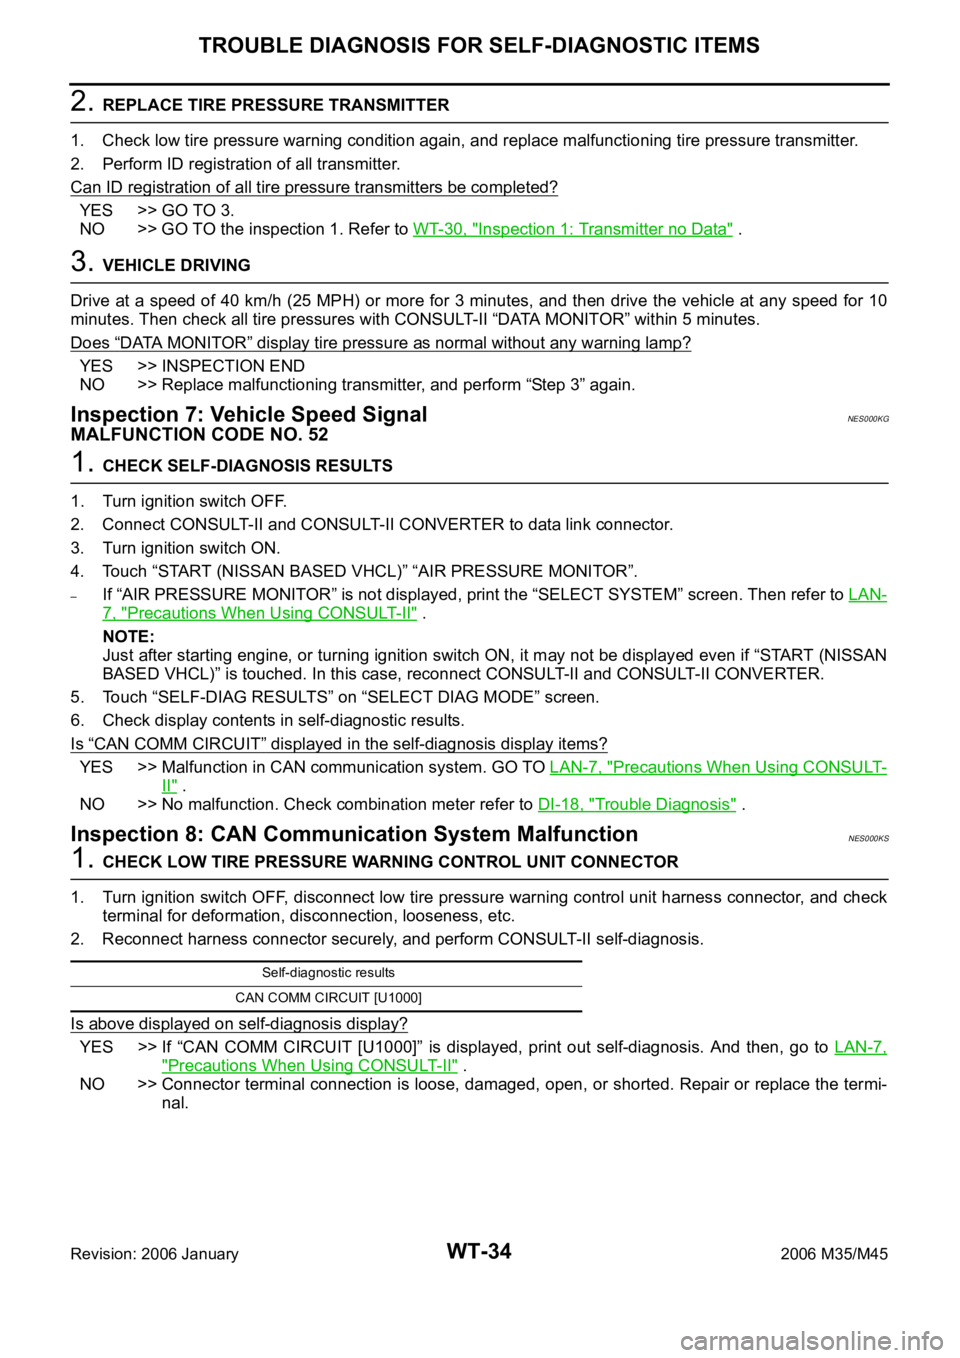
2. Reconnect harness connector securely, and perform CONSULT-II self-diagnosis.
Is above displayed on self-diagnosis display?
YES >> If “CAN COMM CIRCUIT [U1000]” is displayed, print out self-diagnosis. And then, go to LAN-7,
"Precautions When Using CONSULT-II" .
NO >> Connector terminal connection is loose, damaged, open, or shorted. Repair or replace the termi-
nal.
Self-diagnostic results
CAN COMM CIRCUIT [U1000]
Page 5560 of 5621
TROUBLE DIAGNOSIS FOR SYMPTOMS
WT-35
C
D
F
G
H
I
J
K
L
MA
B
WT
Revision: 2006 January2006 M35/M45
TROUBLE DIAGNOSIS FOR SYMPTOMSPFP:00007
Inspection 1: Warning Lamp Does Not Come On When Ignition Switch Is Turned
On
NES000KH
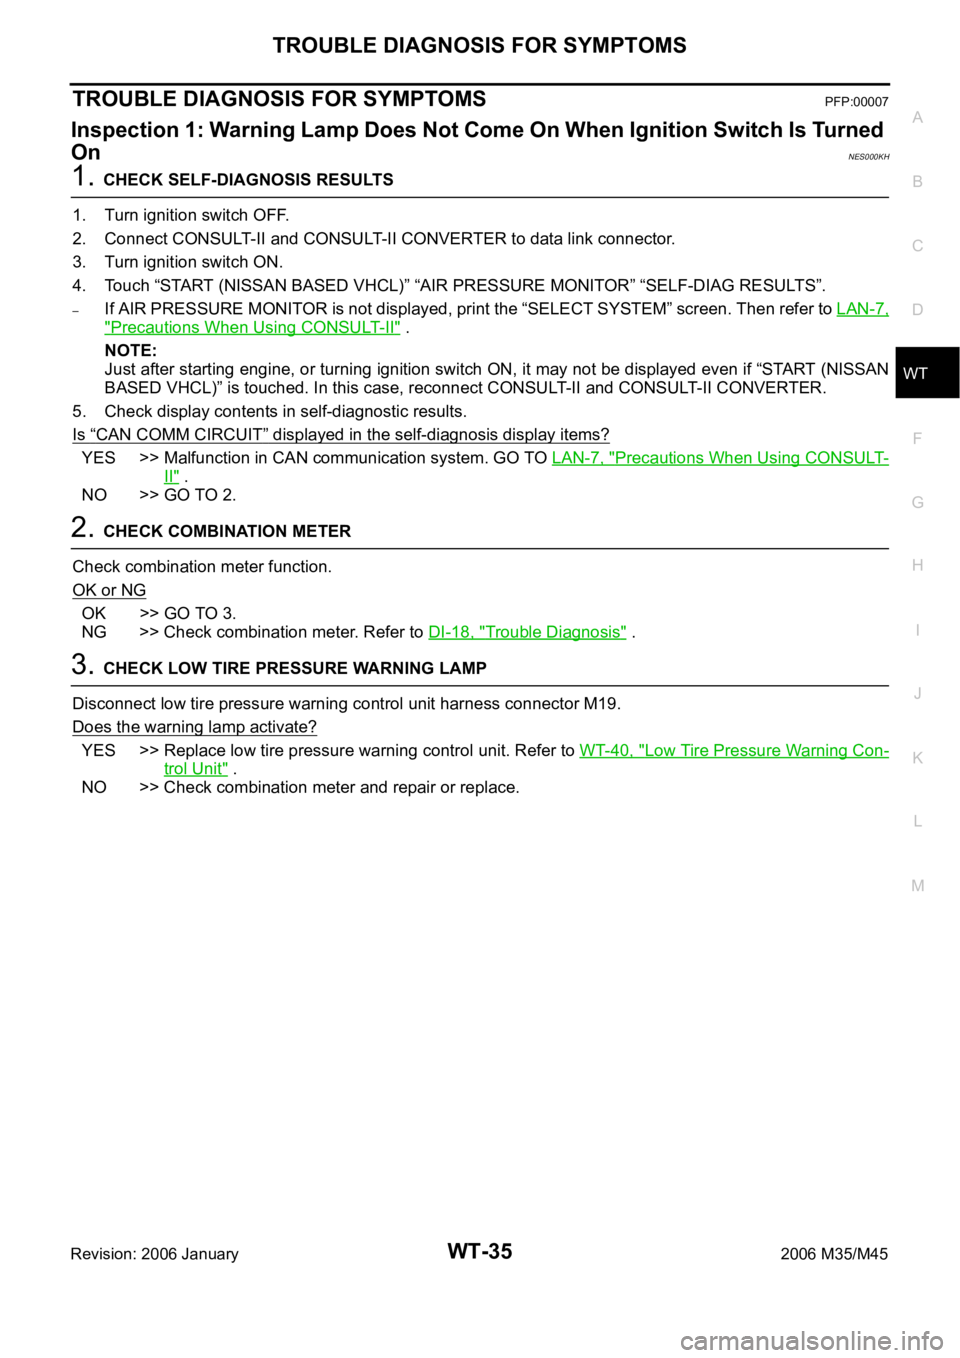
1. CHECK SELF-DIAGNOSIS RESULTS
1. Turn ignition switch OFF.
2. Connect CONSULT-II and CONSULT-II CONVERTER to data link connector.
3. Turn ignition switch ON.
4. Touch “START (NISSAN BASED VHCL)” “AIR PRESSURE MONITOR” “SELF-DIAG RESULTS”.
–If AIR PRESSURE MONITOR is not displayed, print the “SELECT SYSTEM” screen. Then refer to LAN-7,
"Precautions When Using CONSULT-II" .
NOTE:
Just after starting engine, or turning ignition switch ON, it may not be displayed even if “START (NISSAN
BASED VHCL)” is touched. In this case, reconnect CONSULT-II and CONSULT-II CONVERTER.
5. Check display contents in self-diagnostic results.
Is
“CAN COMM CIRCUIT” displayed in the self-diagnosis display items?
YES >> Malfunction in CAN communication system. GO TO LAN-7, "Precautions When Using CONSULT-
II" .
NO >> GO TO 2.
2. CHECK COMBINATION METER
Check combination meter function.
OK or NG
OK >> GO TO 3.
NG >> Check combination meter. Refer to DI-18, "
Trouble Diagnosis" .
3. CHECK LOW TIRE PRESSURE WARNING LAMP
Disconnect low tire pressure warning control unit harness connector M19.
Does the warning lamp activate?
YES >> Replace low tire pressure warning control unit. Refer to WT-40, "Low Tire Pressure Warning Con-
trol Unit" .
NO >> Check combination meter and repair or replace.
Page 5571 of 5621
WW-4
FRONT WIPER AND WASHER SYSTEM
Revision: 2006 January2006 M35/M45
FRONT WIPER AND WASHER SYSTEMPFP:28810
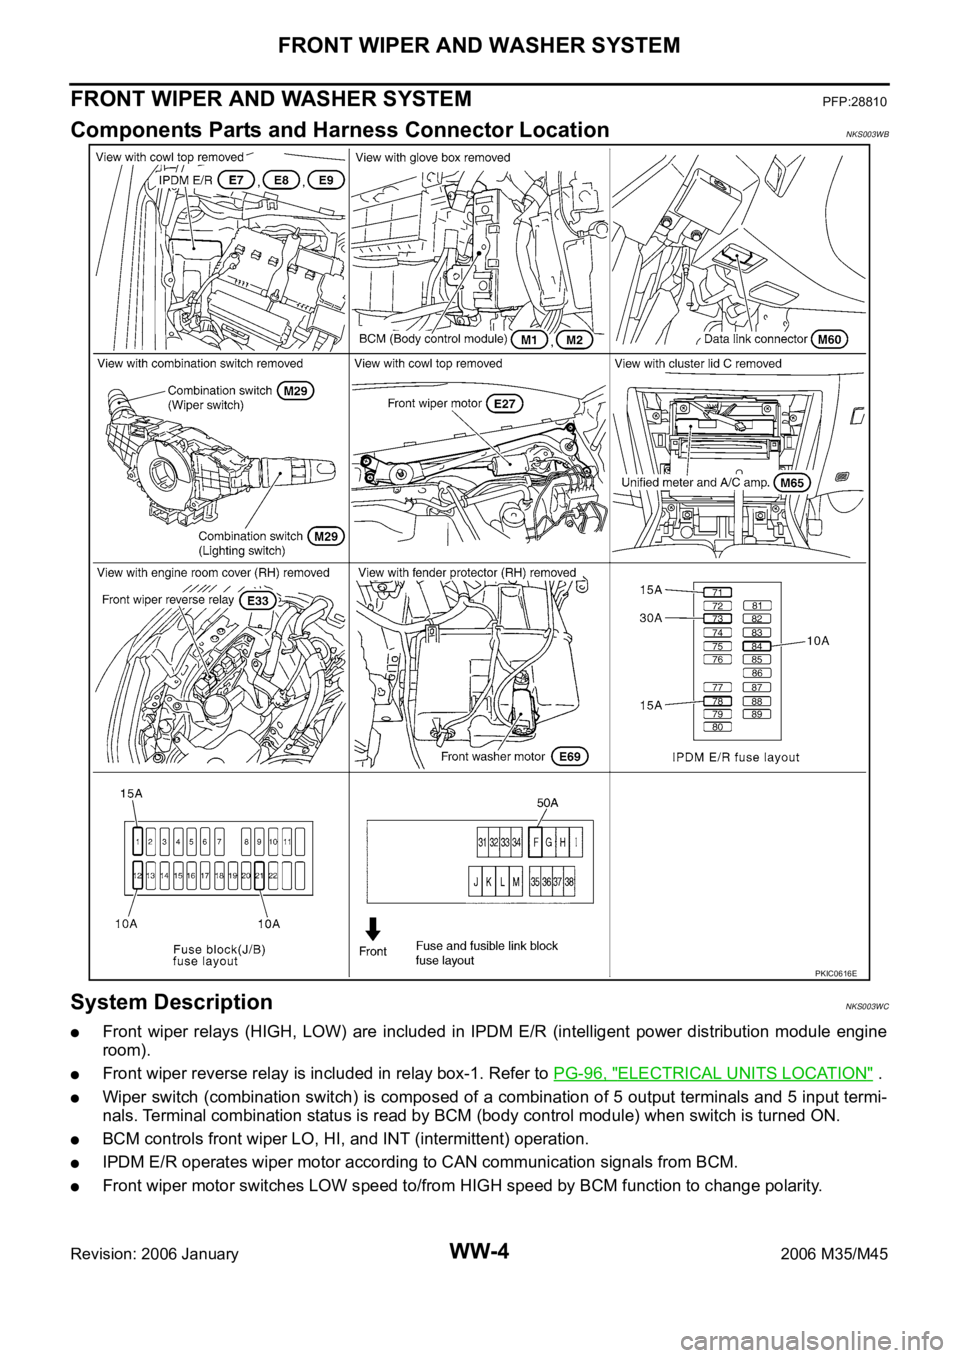
Components Parts and Harness Connector LocationNKS003WB
System DescriptionNKS003WC
Front wiper relays (HIGH, LOW) are included in IPDM E/R (intelligent power distribution module engine
room).
Front wiper reverse relay is included in relay box-1. Refer to PG-96, "ELECTRICAL UNITS LOCATION" .
Wiper switch (combination switch) is composed of a combination of 5 output terminals and 5 input termi-
nals. Terminal combination status is read by BCM (body control module) when switch is turned ON.
BCM controls front wiper LO, HI, and INT (intermittent) operation.
IPDM E/R operates wiper motor according to CAN communication signals from BCM.
Front wiper motor switches LOW speed to/from HIGH speed by BCM function to change polarity.
PKIC0616E
Page 5614 of 5621
FRONT WIPER AND WASHER SYSTEM
WW-47
C
D
E
F
G
H
I
J
L
MA
B
WW
Revision: 2006 January2006 M35/M45
Removal and Installation of Washer TankNKS003X7
: Vehicle front
REMOVAL
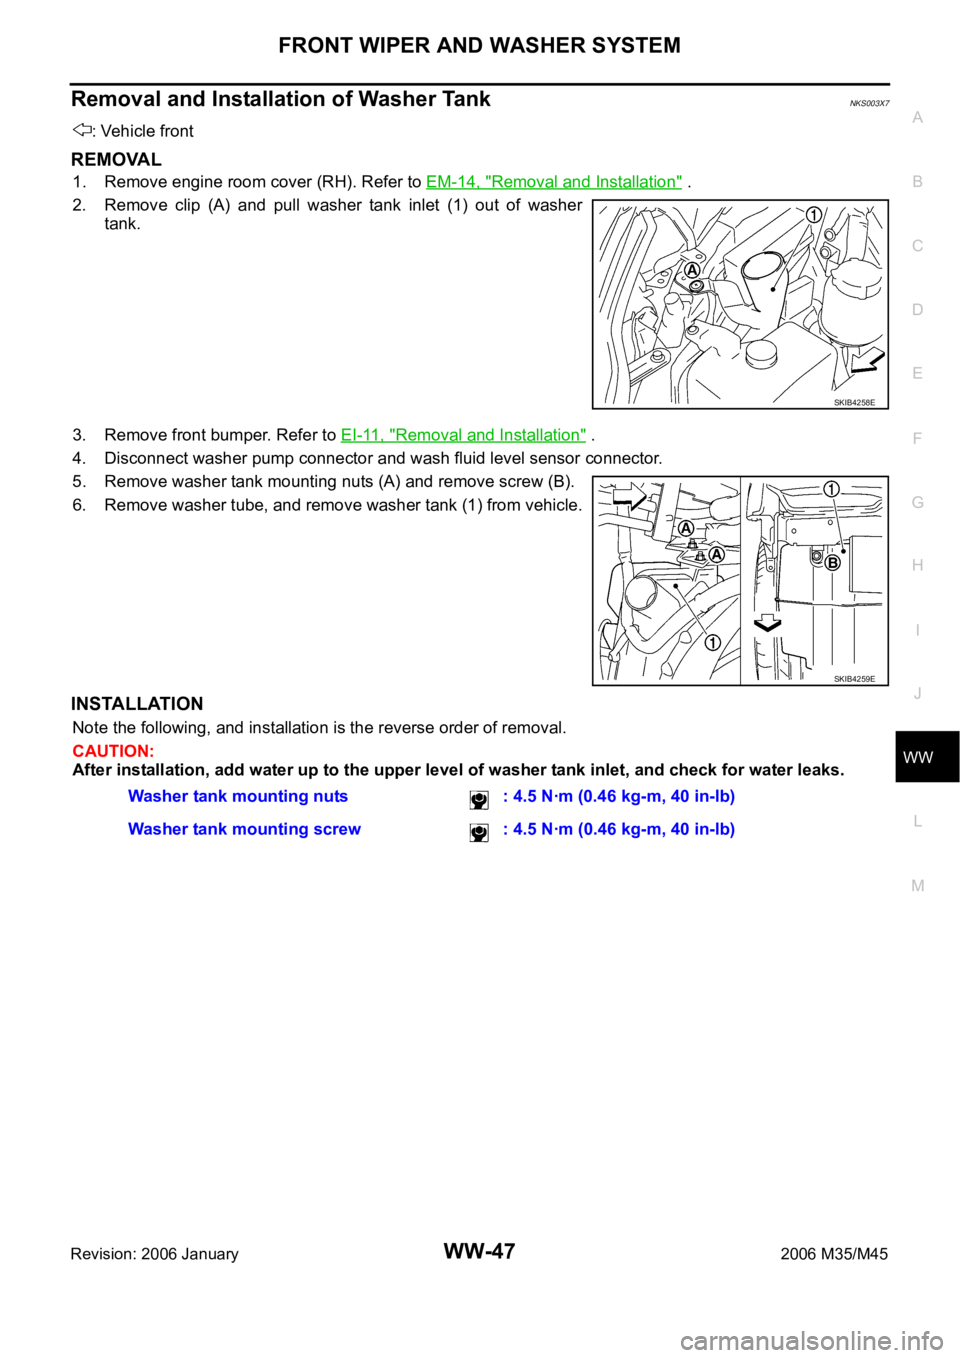
1. Remove engine room cover (RH). Refer to EM-14, "Removal and Installation" .
2. Remove clip (A) and pull washer tank inlet (1) out of washer
tank.
3. Remove front bumper. Refer to EI-11, "
Removal and Installation" .
4. Disconnect washer pump connector and wash fluid level sensor connector.
5. Remove washer tank mounting nuts (A) and remove screw (B).
6. Remove washer tube, and remove washer tank (1) from vehicle.
INSTALLATION
Note the following, and installation is the reverse order of removal.
CAUTION:
After installation, add water up to the upper level of washer tank inlet, and check for water leaks.
SKIB4258E
SKIB4259E
Washer tank mounting nuts : 4.5 Nꞏm (0.46 kg-m, 40 in-lb)
Washer tank mounting screw : 4.5 Nꞏm (0.46 kg-m, 40 in-lb)