Page 3128 of 3171
FRONT WIPER AND WASHER SYSTEM
WW-17
C
D
E
F
G
H
I
J
L
MA
B
WW
2.CHECK POWER SUPPLY CIRCUIT
1. Turn ignition switch OFF.
2. Disconnect BCM connector.
3. Check voltage between BCM harness connector and ground.
OK or NG
OK >> GO TO 3.
NG >> Repair harness or connector.
3.CHECK GROUND CIRCUIT
Check continuity between BCM harness connector and ground.
OK or NG
OK >> INSPECTION END
NG >> Repair harness or connector.
Terminal Ignition switch position
(+)
(-) OFF ACC ON
BCM
connectorTerminal
M42 3
Ground0V 0VBattery
voltage
M44 57Battery
voltageBattery
voltageBattery
voltage
SKIB6233E
BCM connector Terminal
GroundContinuity
M44 55 Yes
SKIB6293E
Page 3129 of 3171
WW-18
FRONT WIPER AND WASHER SYSTEM
CONSULT-II Function (BCM)
EKS00P53
CONSULT-II can display each diagnostic item using the diagnostic test modes shown following.
CONSULT-II OPERATION
CAUTION:
If CONSULT-II is used with no connection of CONSULT-II CONVERTER, malfunctions might be
detected in self-diagnosis depending on control unit which carries out CAN communication.
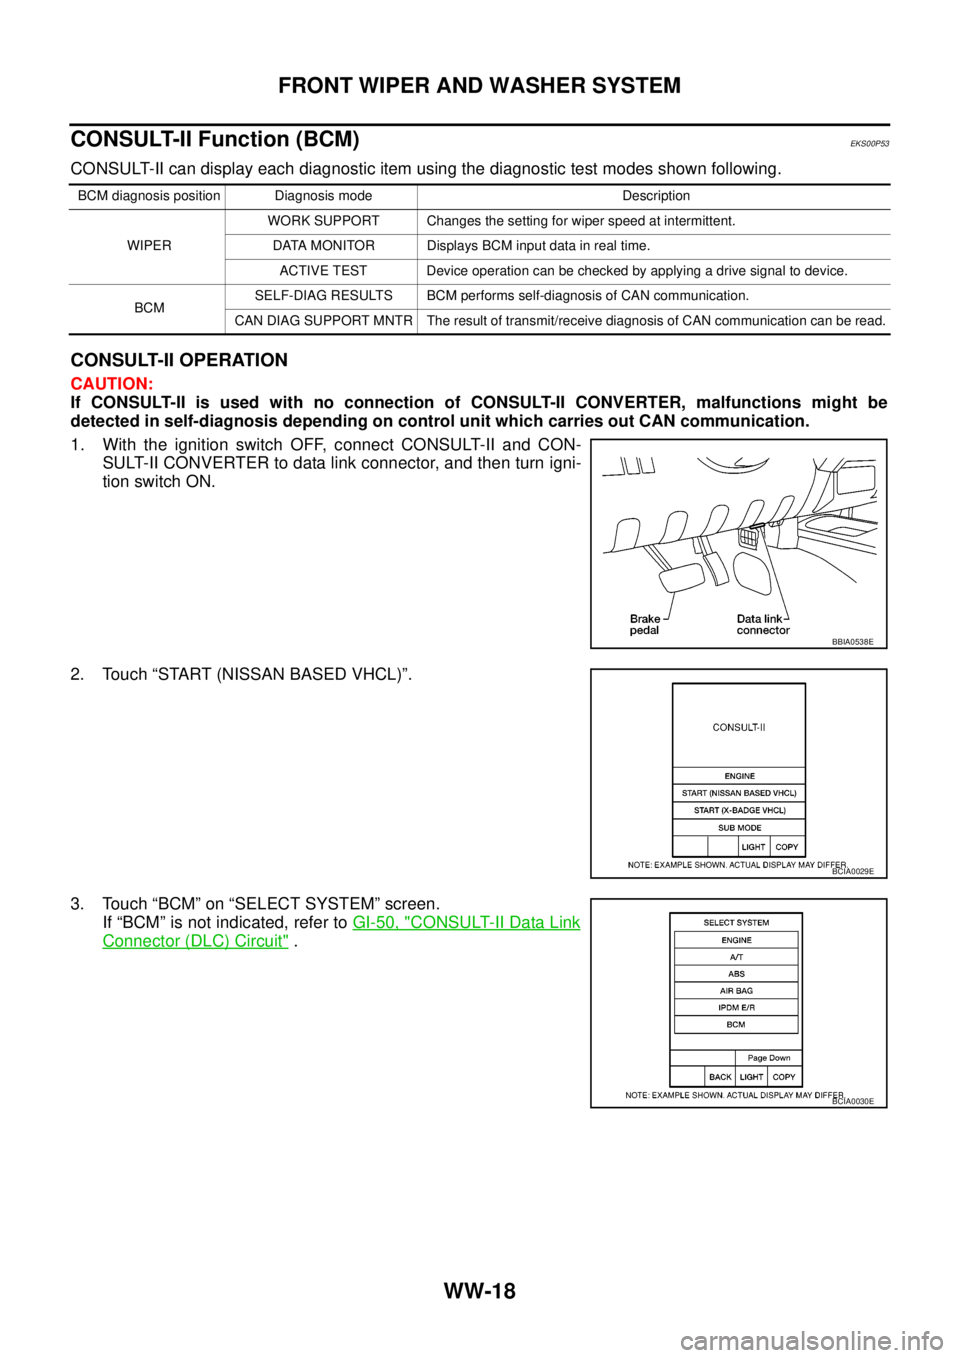
1. With the ignition switch OFF, connect CONSULT-II and CON-
SULT-II CONVERTER to data link connector, and then turn igni-
tion switch ON.
2. Touch “START (NISSAN BASED VHCL)”.
3. Touch “BCM” on “SELECT SYSTEM” screen.
If “BCM” is not indicated, refer toGI-50, "
CONSULT-II Data Link
Connector (DLC) Circuit".
BCM diagnosis position Diagnosis mode Description
WIPERWORK SUPPORT Changes the setting for wiper speed at intermittent.
DATA MONITOR Displays BCM input data in real time.
ACTIVE TEST Device operation can be checked by applying a drive signal to device.
BCMSELF-DIAG RESULTS BCM performs self-diagnosis of CAN communication.
CAN DIAG SUPPORT MNTR The result of transmit/receive diagnosis of CAN communication can be read.
BBIA0538E
BCIA0029E
BCIA0030E
Page 3130 of 3171
FRONT WIPER AND WASHER SYSTEM
WW-19
C
D
E
F
G
H
I
J
L
MA
B
WW
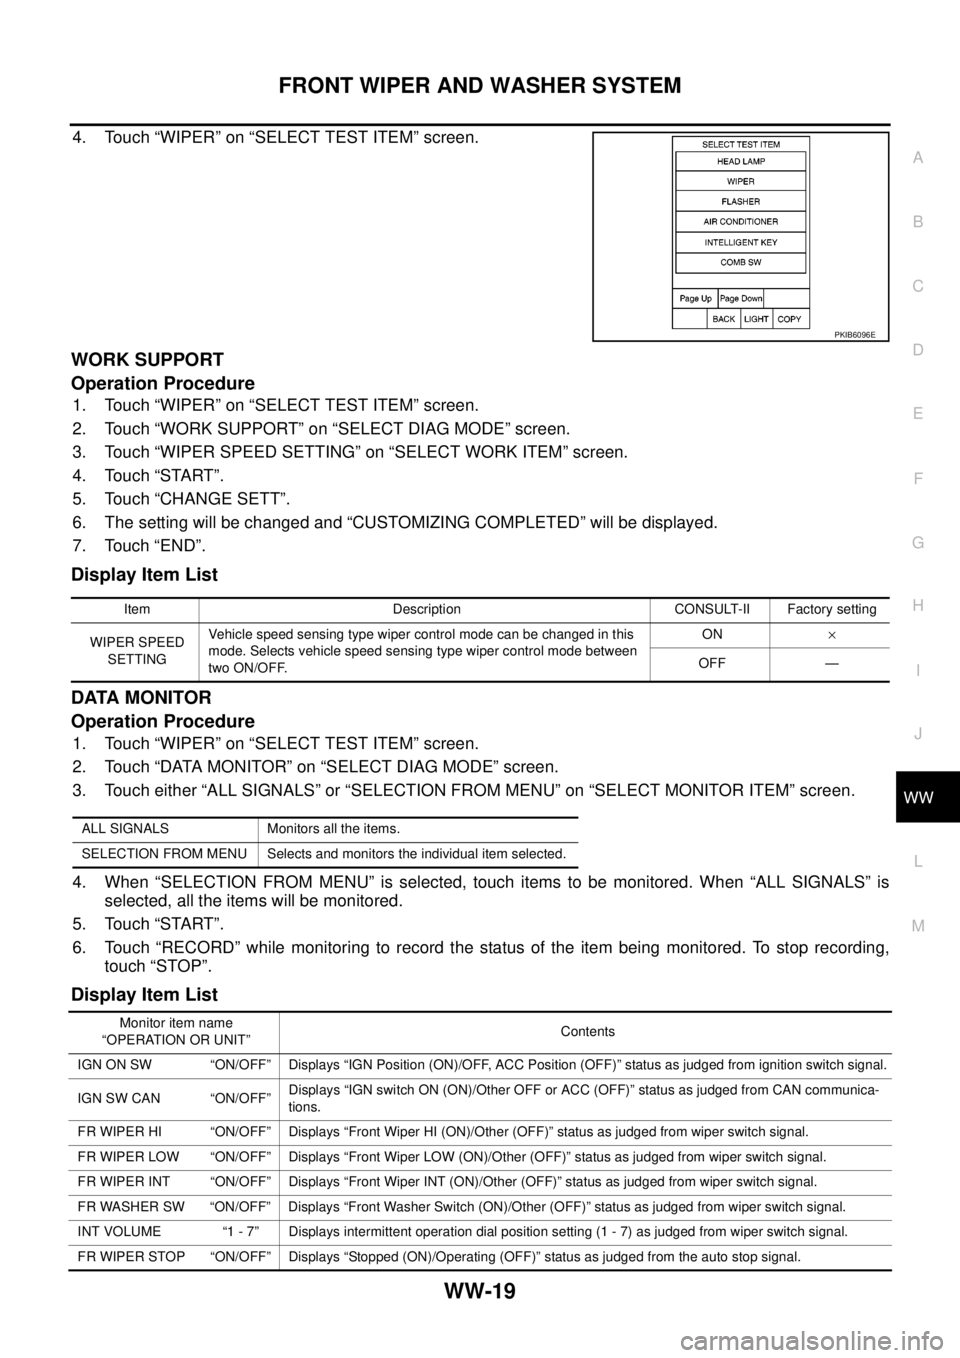
4. Touch “WIPER” on “SELECT TEST ITEM” screen.
WORK SUPPORT
Operation Procedure
1. Touch “WIPER” on “SELECT TEST ITEM” screen.
2. Touch “WORK SUPPORT” on “SELECT DIAG MODE” screen.
3. Touch “WIPER SPEED SETTING” on “SELECT WORK ITEM” screen.
4. Touch “START”.
5. Touch “CHANGE SETT”.
6. The setting will be changed and “CUSTOMIZING COMPLETED” will be displayed.
7. Touch “END”.
Display Item List
DATA MONITOR
Operation Procedure
1. Touch “WIPER” on “SELECT TEST ITEM” screen.
2. Touch “DATA MONITOR” on “SELECT DIAG MODE” screen.
3. Touch either “ALL SIGNALS” or “SELECTION FROM MENU” on “SELECT MONITOR ITEM” screen.
4. When “SELECTION FROM MENU” is selected, touch items to be monitored. When “ALL SIGNALS” is
selected, all the items will be monitored.
5. Touch “START”.
6. Touch “RECORD” while monitoring to record the status of the item being monitored. To stop recording,
touch “STOP”.
Display Item List
PKIB6096E
Item Description CONSULT-II Factory setting
WIPER SPEED
SETTINGVehicle speed sensing type wiper control mode can be changed in this
mode. Selects vehicle speed sensing type wiper control mode between
two ON/OFF.ON´
OFF —
ALL SIGNALS Monitors all the items.
SELECTION FROM MENU Selects and monitors the individual item selected.
Monitor item name
“OPERATION OR UNIT”Contents
IGN ON SW “ON/OFF” Displays “IGN Position (ON)/OFF, ACC Position (OFF)” status as judged from ignition switch signal.
IGN SW CAN “ON/OFF”Displays “IGN switch ON (ON)/Other OFF or ACC (OFF)” status as judged from CAN communica-
tions.
FR WIPER HI “ON/OFF” Displays “Front Wiper HI (ON)/Other (OFF)” status as judged from wiper switch signal.
FR WIPER LOW “ON/OFF” Displays “Front Wiper LOW (ON)/Other (OFF)” status as judged from wiper switch signal.
FR WIPER INT “ON/OFF” Displays “Front Wiper INT (ON)/Other (OFF)” status as judged from wiper switch signal.
FR WASHER SW “ON/OFF” Displays “Front Washer Switch (ON)/Other (OFF)” status as judged from wiper switch signal.
INT VOLUME “1 - 7” Displays intermittent operation dial position setting (1 - 7) as judged from wiper switch signal.
FR WIPER STOP “ON/OFF” Displays “Stopped (ON)/Operating (OFF)” status as judged from the auto stop signal.
Page 3132 of 3171
FRONT WIPER AND WASHER SYSTEM
WW-21
C
D
E
F
G
H
I
J
L
MA
B
WW
CONSULT-II Function (IPDM E/R)EKS00P54
CONSULT-II can display each diagnostic item using the diagnostic test modes shown following.
CONSULT-II OPERATION
CAUTION:
If CONSULT-II is used with no connection of CONSULT-II CONVERTER, malfunctions might be
detected in self-diagnosis depending on control unit which carries out CAN communication.
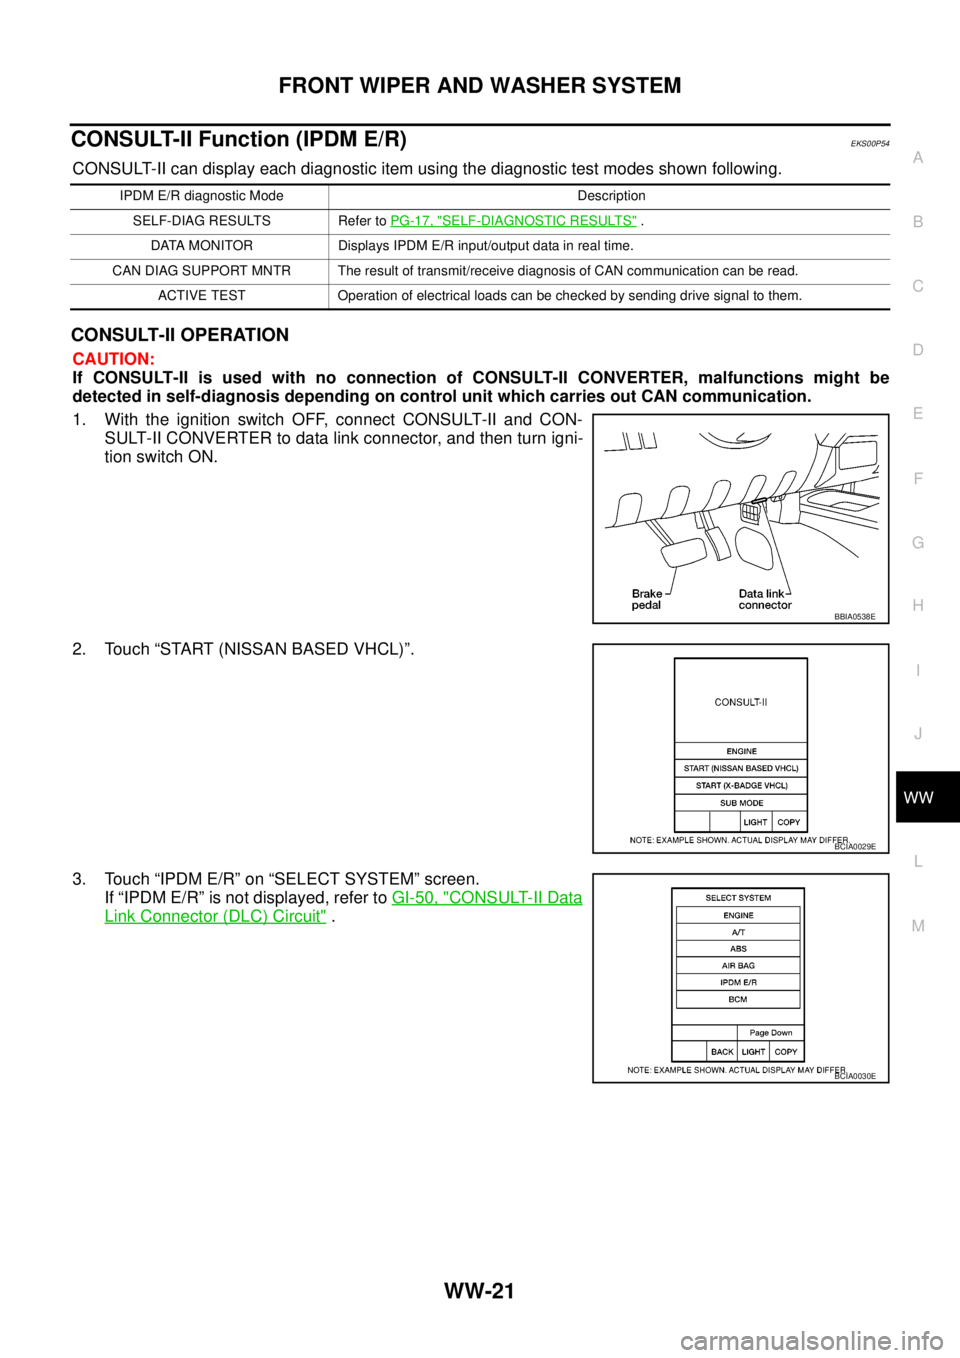
1. With the ignition switch OFF, connect CONSULT-II and CON-
SULT-II CONVERTER to data link connector, and then turn igni-
tion switch ON.
2. Touch “START (NISSAN BASED VHCL)”.
3. Touch “IPDM E/R” on “SELECT SYSTEM” screen.
If “IPDM E/R” is not displayed, refer toGI-50, "
CONSULT-II Data
Link Connector (DLC) Circuit".
IPDM E/R diagnostic Mode Description
SELF-DIAG RESULTS Refer toPG-17, "
SELF-DIAGNOSTIC RESULTS".
DATA MONITOR Displays IPDM E/R input/output data in real time.
CAN DIAG SUPPORT MNTR The result of transmit/receive diagnosis of CAN communication can be read.
ACTIVE TEST Operation of electrical loads can be checked by sending drive signal to them.
BBIA0538E
BCIA0029E
BCIA0030E
Page 3133 of 3171
WW-22
FRONT WIPER AND WASHER SYSTEM
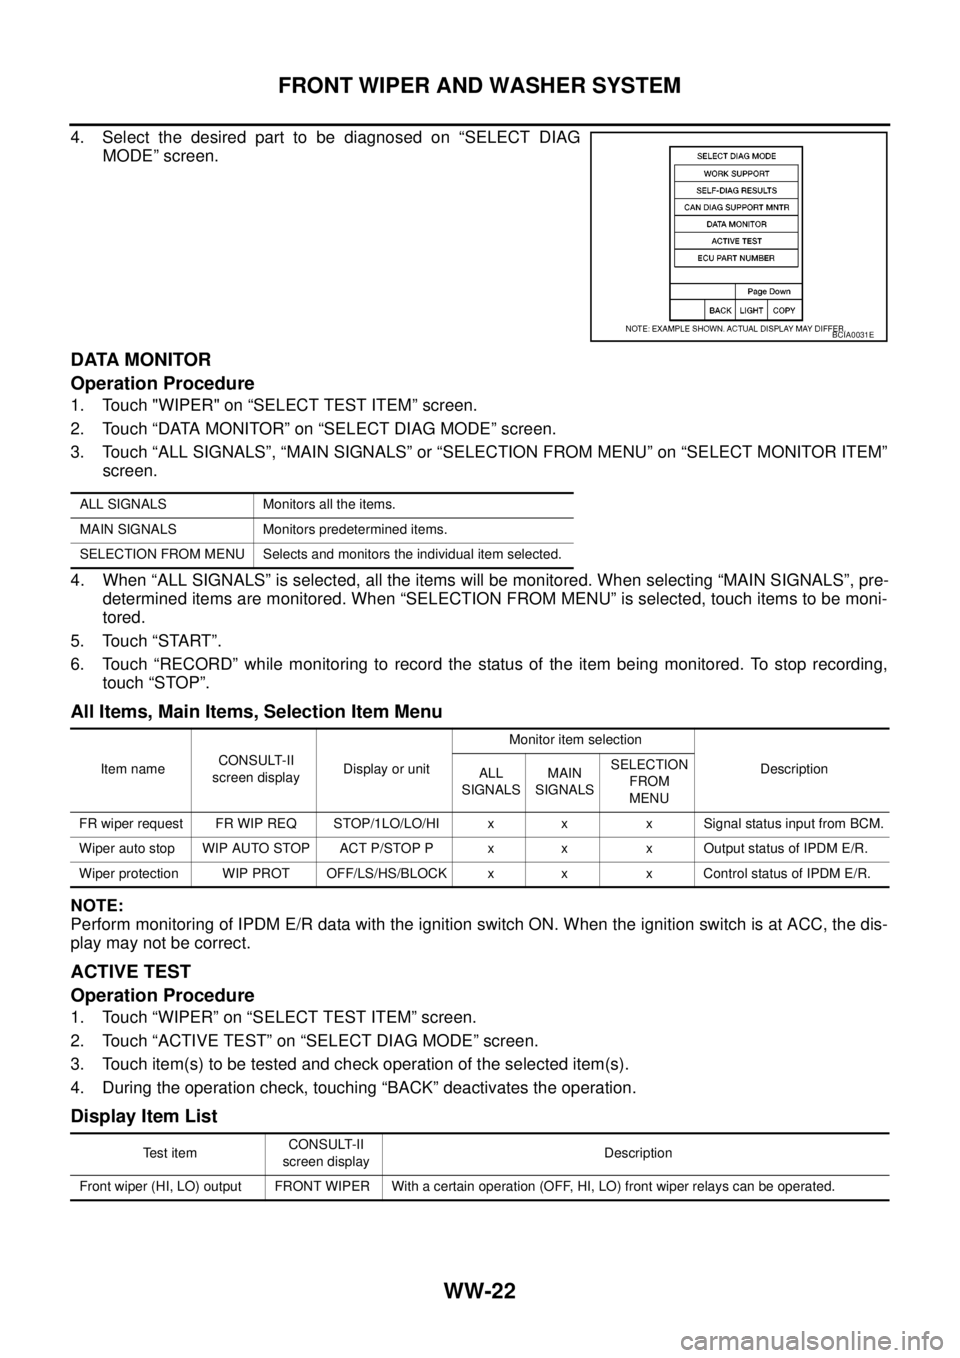
4. Select the desired part to be diagnosed on “SELECT DIAG
MODE” screen.
DATA MONITOR
Operation Procedure
1. Touch "WIPER" on “SELECT TEST ITEM” screen.
2. Touch “DATA MONITOR” on “SELECT DIAG MODE” screen.
3. Touch “ALL SIGNALS”, “MAIN SIGNALS” or “SELECTION FROM MENU” on “SELECT MONITOR ITEM”
screen.
4. When “ALL SIGNALS” is selected, all the items will be monitored. When selecting “MAIN SIGNALS”, pre-
determined items are monitored. When “SELECTION FROM MENU” is selected, touch items to be moni-
tored.
5. Touch “START”.
6. Touch “RECORD” while monitoring to record the status of the item being monitored. To stop recording,
touch “STOP”.
All Items, Main Items, Selection Item Menu
NOTE:
Perform monitoring of IPDM E/R data with the ignition switch ON. When the ignition switch is at ACC, the dis-
play may not be correct.
ACTIVE TEST
Operation Procedure
1. Touch “WIPER” on “SELECT TEST ITEM” screen.
2. Touch “ACTIVE TEST” on “SELECT DIAG MODE” screen.
3. Touch item(s) to be tested and check operation of the selected item(s).
4. During the operation check, touching “BACK” deactivates the operation.
Display Item List
BCIA0031E
ALL SIGNALS Monitors all the items.
MAIN SIGNALS Monitors predetermined items.
SELECTION FROM MENU Selects and monitors the individual item selected.
Item nameCONSULT-II
screen displayDisplay or unitMonitor item selection
Description
ALL
SIGNALSMAIN
SIGNALSSELECTION
FROM
MENU
FR wiper request FR WIP REQ STOP/1LO/LO/HI x x x Signal status input from BCM.
Wiper auto stop WIP AUTO STOP ACT P/STOP P x x x Output status of IPDM E/R.
Wiper protection WIP PROT OFF/LS/HS/BLOCK x x x Control status of IPDM E/R.
Te s t i t e mCONSULT-II
screen displayDescription
Front wiper (HI, LO) output FRONT WIPER With a certain operation (OFF, HI, LO) front wiper relays can be operated.
Page 3134 of 3171
FRONT WIPER AND WASHER SYSTEM
WW-23
C
D
E
F
G
H
I
J
L
MA
B
WW
Front Wiper Does Not Operate in Rain (Front Wiper Switch Turned to INT Posi-
tion)
EKS00Q9V
1.CHECK CONDITIONS OF WINDSHIELD ( LIGHT AND RAIN SENSOR DETECTION AREA)
Check light and rain sensor detection area of windshield for dirt such as greases.
OK or NG
OK >> GO TO 2.
NG >> Clean light and rain sensor detection area of windshield fully.
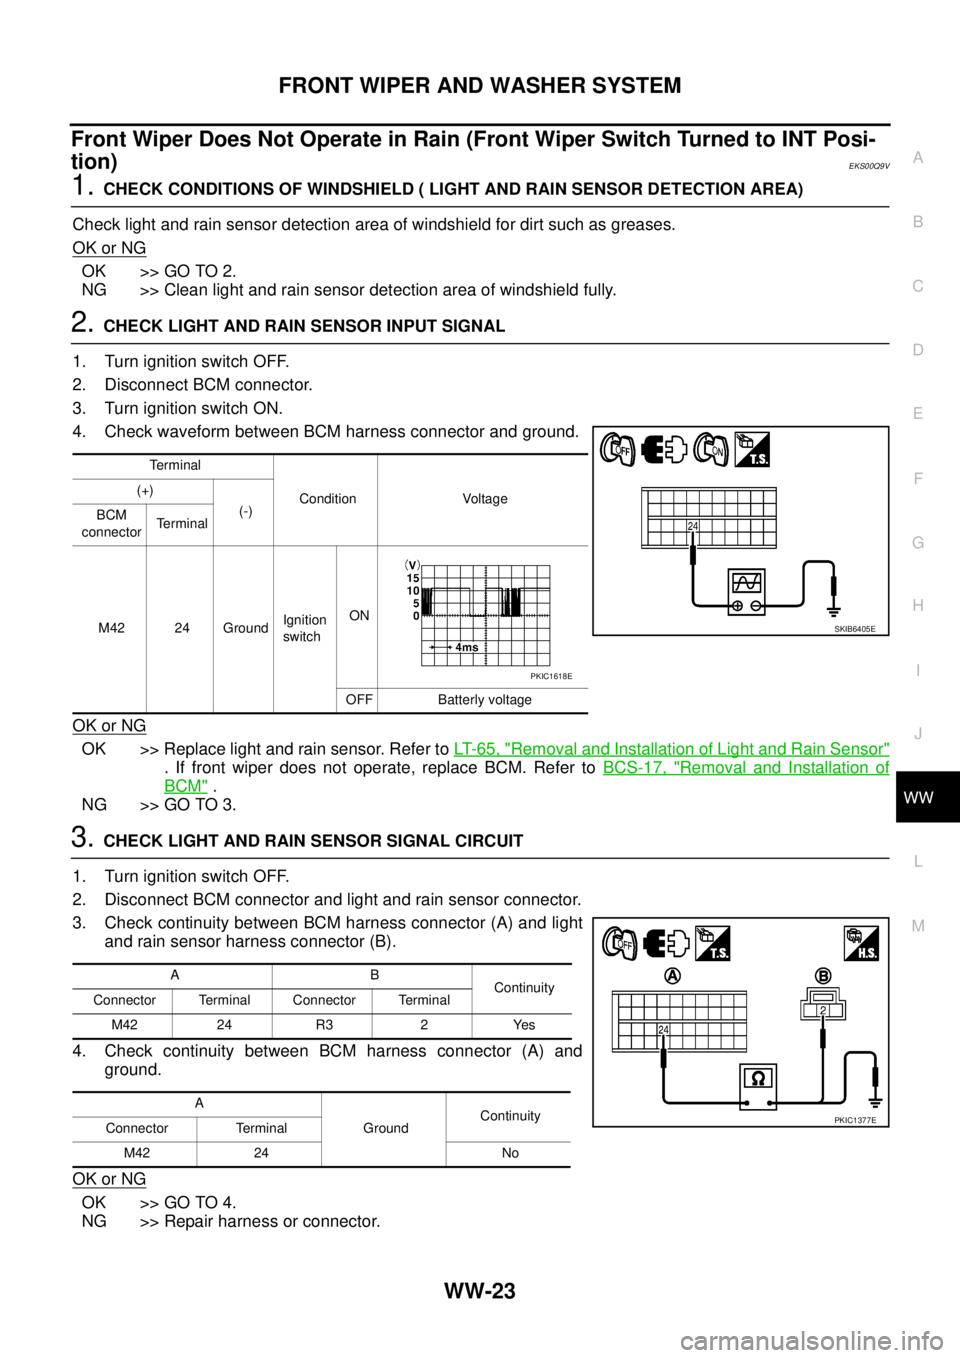
2.CHECK LIGHT AND RAIN SENSOR INPUT SIGNAL
1. Turn ignition switch OFF.
2. Disconnect BCM connector.
3. Turn ignition switch ON.
4. Check waveform between BCM harness connector and ground.
OK or NG
OK >> Replace light and rain sensor. Refer toLT-65, "Removal and Installation of Light and Rain Sensor"
. If front wiper does not operate, replace BCM. Refer toBCS-17, "Removal and Installation of
BCM".
NG >> GO TO 3.
3.CHECK LIGHT AND RAIN SENSOR SIGNAL CIRCUIT
1. Turn ignition switch OFF.
2. Disconnect BCM connector and light and rain sensor connector.
3. Check continuity between BCM harness connector (A) and light
and rain sensor harness connector (B).
4. Check continuity between BCM harness connector (A) and
ground.
OK or NG
OK >> GO TO 4.
NG >> Repair harness or connector.
Terminal
Condition Voltage (+)
(-)
BCM
connectorTerminal
M42 24 GroundIgnition
switchON
OFF Batterly voltage
SKIB6405E
PKIC1618E
AB
Continuity
Connector Terminal Connector Terminal
M42 24 R3 2 Yes
A
GroundContinuity
Connector Terminal
M42 24 No
PKIC1377E
Page 3135 of 3171
WW-24
FRONT WIPER AND WASHER SYSTEM
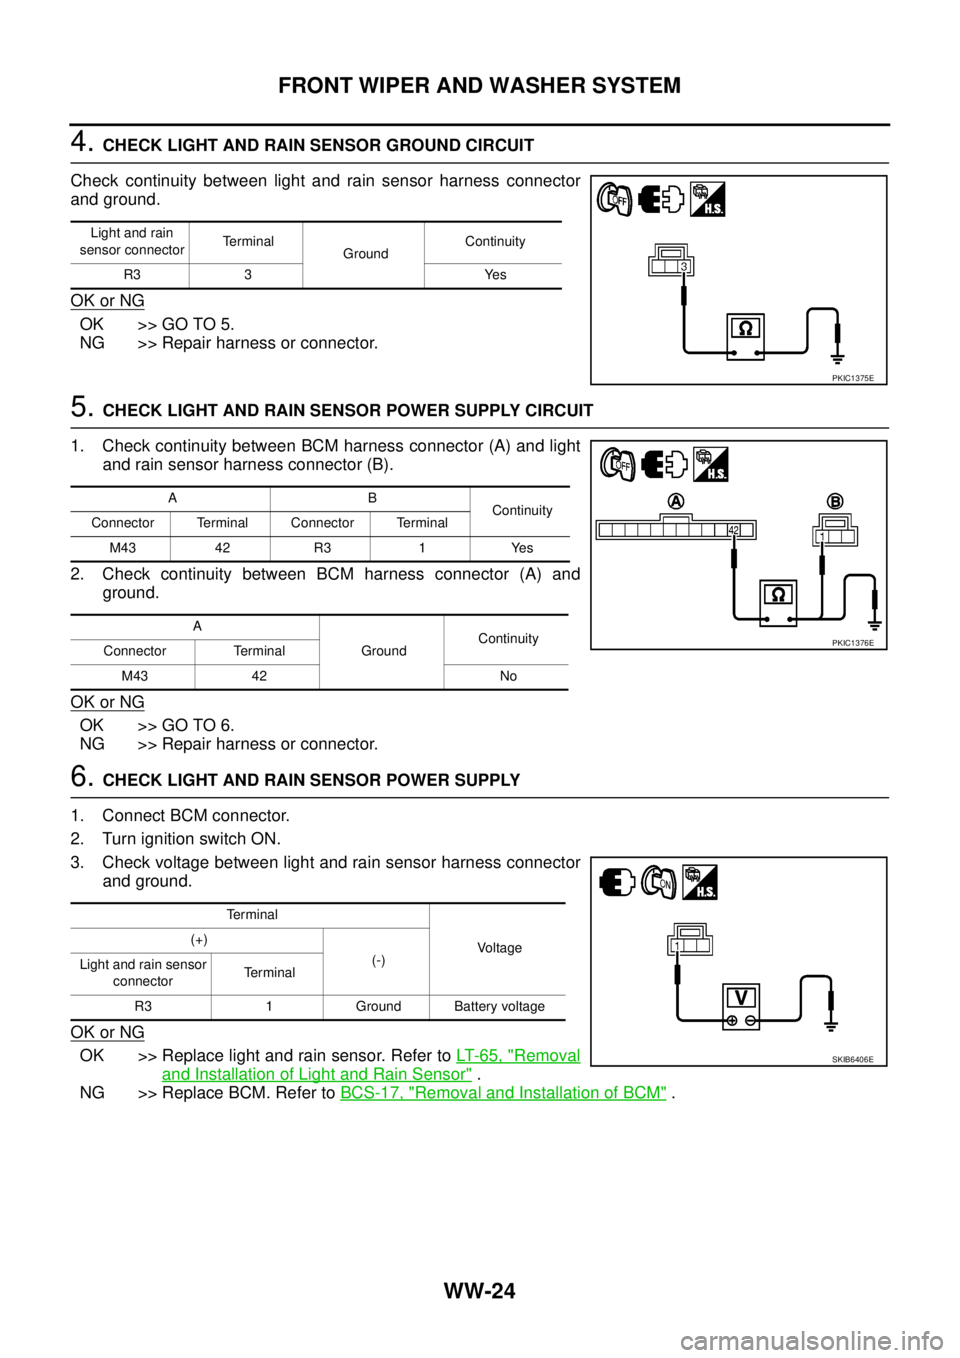
4.CHECK LIGHT AND RAIN SENSOR GROUND CIRCUIT
Check continuity between light and rain sensor harness connector
and ground.
OK or NG
OK >> GO TO 5.
NG >> Repair harness or connector.
5.CHECK LIGHT AND RAIN SENSOR POWER SUPPLY CIRCUIT
1. Check continuity between BCM harness connector (A) and light
and rain sensor harness connector (B).
2. Check continuity between BCM harness connector (A) and
ground.
OK or NG
OK >> GO TO 6.
NG >> Repair harness or connector.
6.CHECK LIGHT AND RAIN SENSOR POWER SUPPLY
1. Connect BCM connector.
2. Turn ignition switch ON.
3. Check voltage between light and rain sensor harness connector
and ground.
OK or NG
OK >> Replace light and rain sensor. Refer toLT-65, "Removal
and Installation of Light and Rain Sensor".
NG >> Replace BCM. Refer toBCS-17, "
Removal and Installation of BCM".
Light and rain
sensor connectorTerminal
GroundContinuity
R3 3 Yes
PKIC1375E
AB
Continuity
Connector Terminal Connector Terminal
M43 42 R3 1 Yes
A
GroundContinuity
Connector Terminal
M43 42 No
PKIC1376E
Terminal
Voltage (+)
(-)
Light and rain sensor
connectorTe r m i n a l
R3 1 Ground Battery voltage
SKIB6406E
Page 3137 of 3171
WW-26
FRONT WIPER AND WASHER SYSTEM
4.CHECK FRONT WIPER MOTOR GROUND CIRCUIT
1. Turn ignition switch OFF.
2. Disconnect front wiper motor connector.
3. Check continuity between front wiper motor harness connector
and ground.
OK >> GO TO 5.
NG >> Repair harness or connector.
5.CHECK FRONT WIPER CIRCUIT
1. Disconnect IPDM E/R connector.
2. Check continuity between IPDM E/R harness connector (A) and
front wiper motor harness connector (B).
3. Check continuity between IPDM E/R harness connector (A) and
Ground.
OK or NG
OK >> GO TO 6.
NG >> Repair harness or connector.
Front wiper motor
connectorTerminal
GroundContinuity
E72 2 Yes
SKIB6224E
AB
Continuity
Connector Terminal Connector Terminal
E1332
E721
Ye s
35 4
A
GroundContinuity
Connector Terminal
E1332
No
35
SKIB6226E