2005 NISSAN NAVARA SRS
[x] Cancel search: SRSPage 2819 of 3171
SB-2
PRECAUTIONS
PRECAUTIONS
PFP:00001
Precautions for Supplemental Restraint System (SRS) “AIR BAG” and “SEAT
BELT PRE-TENSIONER”
EHS0026D
The Supplemental Restraint System such as “AIR BAG” and “SEAT BELT PRE-TENSIONER”, used along
with a front seat belt, helps to reduce the risk or severity of injury to the driver and front passenger for certain
types of collision. Information necessary to service the system safely is included in the SRS and SB section of
this Service Manual.
WARNING:
lTo avoid rendering the SRS inoperative, which could increase the risk of personal injury or death
in the event of a collision which would result in air bag inflation, all maintenance must be per-
formed by an authorized NISSAN/INFINITI dealer.
lImproper maintenance, including incorrect removal and installation of the SRS, can lead to per-
sonal injury caused by unintentional activation of the system. For removal of Spiral Cable and Air
Bag Module, see the SRS section.
lDo not use electrical test equipment on any circuit related to the SRS unless instructed to in this
Service Manual. SRS wiring harnesses can be identified by yellow and/or orange harnesses or
harness connectors.
Precautions for Seat Belt ServiceEHS00265
CAUTION:
lBefore removing the seat belt pre-tensioner assembly, turn the ignition switch OFF, disconnect
both battery cables and wait at least 3 minutes.
lDo not use electrical test equipment for seat belt pre-tensioner connector.
lAfter replacing or reinstalling seat belt pre-tensioner assembly, or reconnecting seat belt pre-
tensioner assembly connector, ensure entire SRS operates properly. Refer toSRS-18, "
SRS Oper-
ation Check".
lDeploy seat belt pre-tensioner assembly before disposing. Refer toSRS-49, "DISPOSAL OF AIR
BAG MODULE AND SEAT BELT PRE-TENSIONER".
lDo not disassemble buckle or seat belt assembly.
lReplace anchor bolts if they are deformed or worn out.
lNever oil tongue and buckle.
lIf any component of seat belt assembly is questionable, do not repair. Replace the whole seat belt
assembly.
lIf webbing is cut, frayed, or damaged, replace seat belt assembly.
lWhen replacing seat belt assembly, use a genuine NISSAN seat belt assembly.
AFTER A COLLISION
WARNING:
lInspect all seat belt assemblies including retractors and attaching hardware after any collision.
lNISSAN recommends that all seat belt assemblies in use during a collision be replaced unless the
collision was minor and the belts show no damage and continue to operate properly. Failure to do
so could result in serious personal injury in an accident. Seat belt assemblies not in use during a
collision should also be replaced if either damage or improper operation is noted. Seat belt pre-
tensioner should be replaced even if the seat belts are not in use during a frontal collision in which
the air bags are deployed.
Replace any seat belt assembly (including anchor bolts) if:
lThe seat belt was in use at the time of a collision (except for minor collisions and the belts, retractors and
buckles show no damage and continue to operate properly).
lThe seat belt was damaged in an accident. (i.e., torn webbing, bent retractor or guide, etc.)
lThe seat belt attaching point was damaged in an accident. Inspect the seat belt attaching area for damage
or distortion and repair as necessary before installing a new seat belt assembly.
lAnchor bolts are deformed or worn out.
lThe seat belt pre-tensioner should be replaced even if the seat belts are not in use during the collision in
which the air bags are deployed.
Page 2821 of 3171
SB-4
SEAT BELTS
REMOVALOFSEATBELTRETRACTOR
CAUTION:
lBefore servicing SRS, turn the ignition switch off, disconnect both battery cables and wait at least
3 minutes.
1. Remove the rear door finishers. Refer toEI-30, "
DOOR FINISHER".
2. Remove the seat belt retractor and belt bolts and assembly.
lOn RH side, disconnect the seat belt tension sensor.
3. Disconnect the seat belt pre-tensioner electrical connector.
CAUTION:
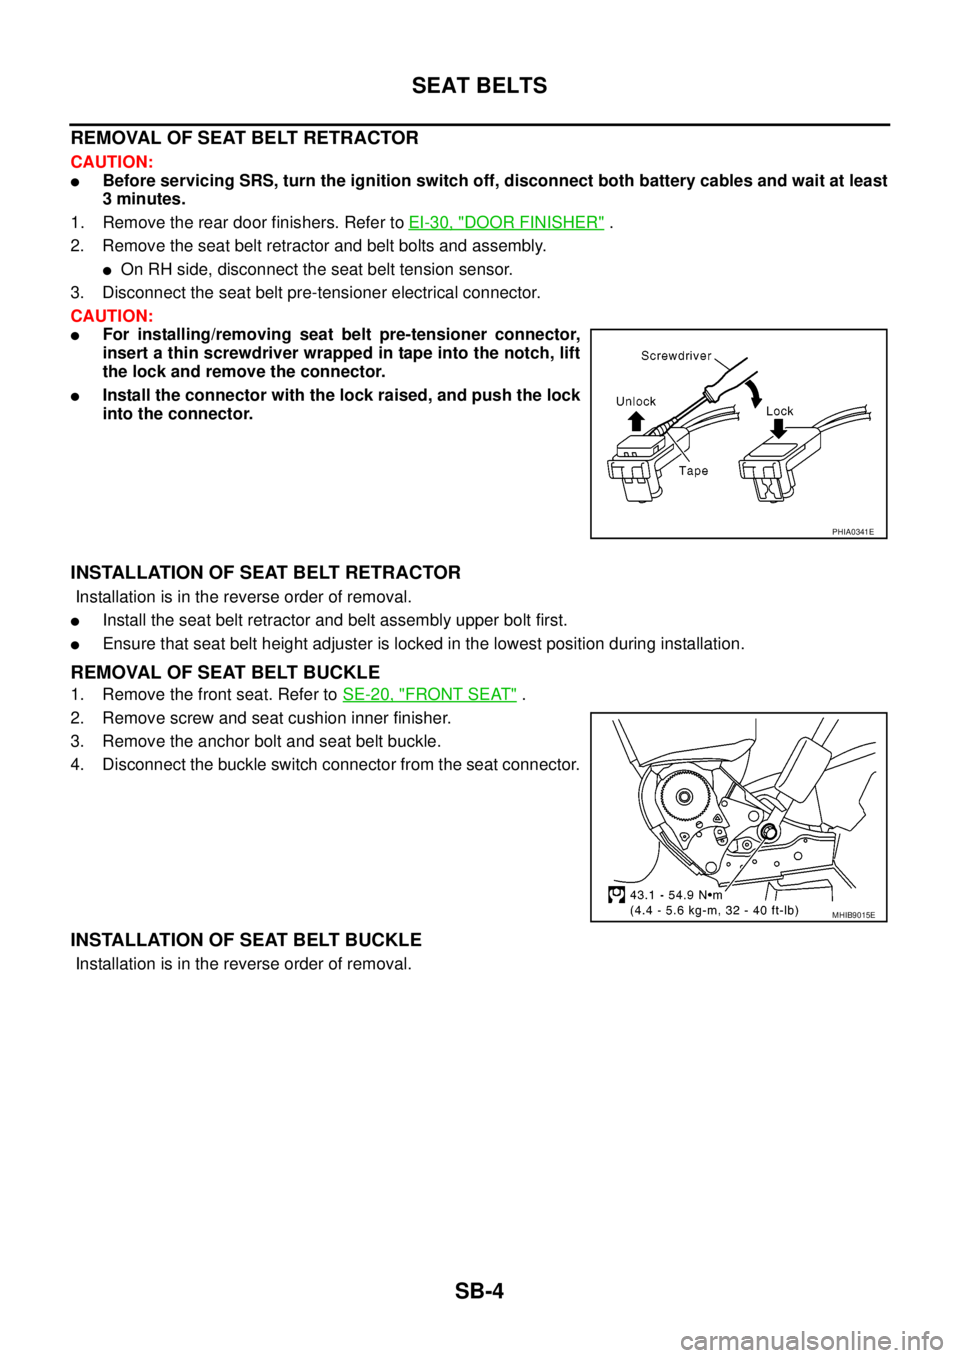
lFor installing/removing seat belt pre-tensioner connector,
insert a thin screwdriver wrapped in tape into the notch, lift
the lock and remove the connector.
lInstall the connector with the lock raised, and push the lock
into the connector.
INSTALLATION OF SEAT BELT RETRACTOR
Installation is in the reverse order of removal.
lInstall the seat belt retractor and belt assembly upper bolt first.
lEnsure that seat belt height adjuster is locked in the lowest position during installation.
REMOVAL OF SEAT BELT BUCKLE
1. Remove the front seat. Refer toSE-20, "FRONT SEAT".
2. Remove screw and seat cushion inner finisher.
3. Remove the anchor bolt and seat belt buckle.
4. Disconnect the buckle switch connector from the seat connector.
INSTALLATION OF SEAT BELT BUCKLE
Installation is in the reverse order of removal.
PHIA0341E
MHIB9015E
Page 2823 of 3171
SB-6
SEAT BELTS
REMOVALOFSEATBELTRETRACTOR
CAUTION:
lBefore servicing SRS, turn the ignition switch off, disconnect both battery cables and wait at least
3 minutes.
1. Remove the center pillar upper/lower finishers. Refer toEI-33, "
BODY SIDE TRIM".
2. Remove the seat belt retractor and belt bolts and assembly.
lOn RH side, disconnect the seat belt tension sensor.
3. Disconnect the seat belt pre-tensioner electrical connector.
CAUTION:
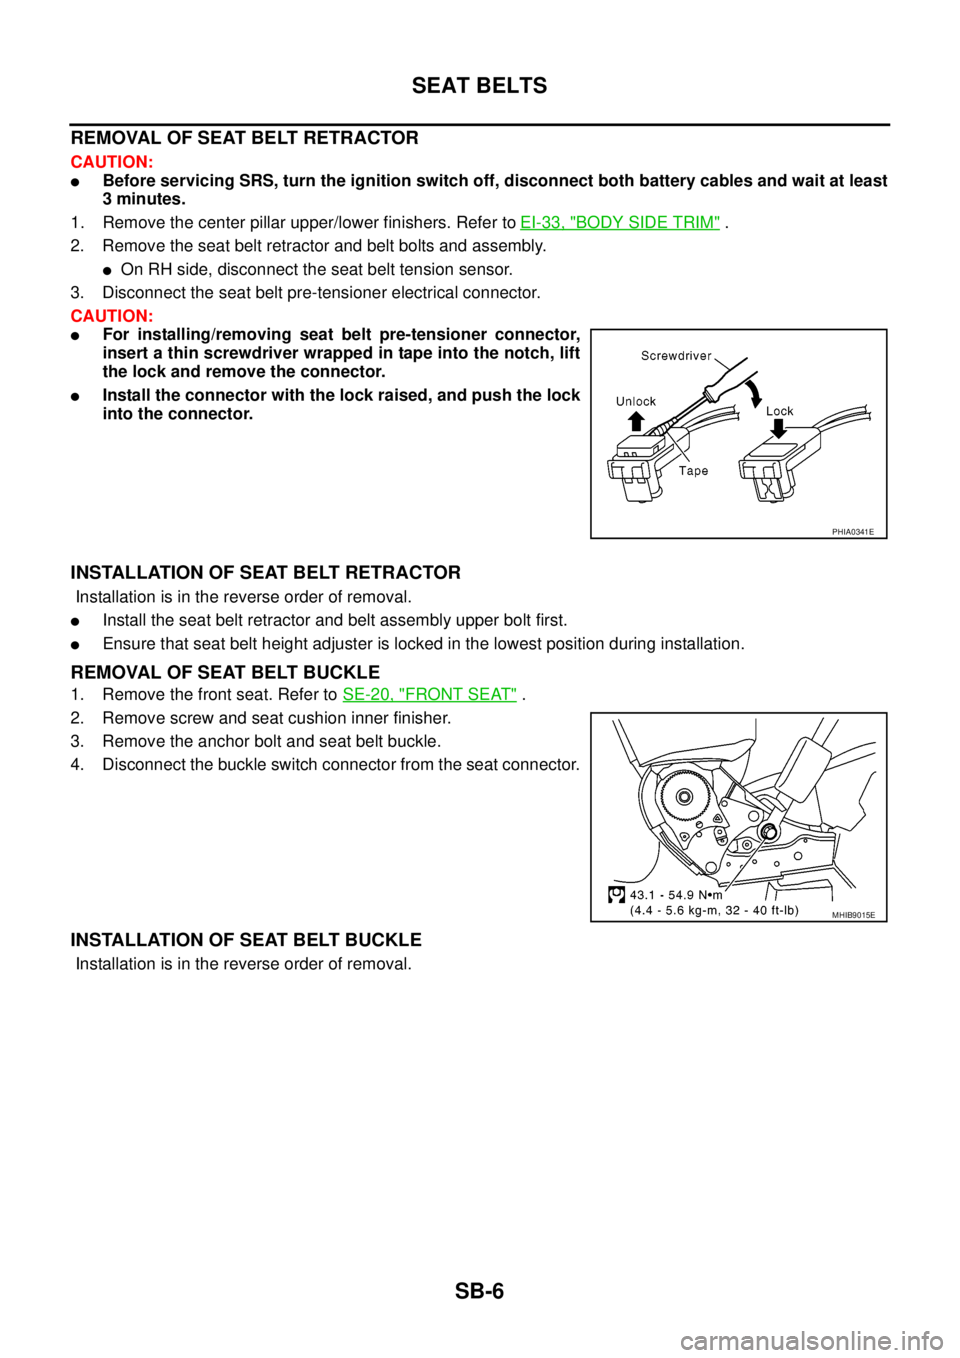
lFor installing/removing seat belt pre-tensioner connector,
insert a thin screwdriver wrapped in tape into the notch, lift
the lock and remove the connector.
lInstall the connector with the lock raised, and push the lock
into the connector.
INSTALLATION OF SEAT BELT RETRACTOR
Installation is in the reverse order of removal.
lInstall the seat belt retractor and belt assembly upper bolt first.
lEnsure that seat belt height adjuster is locked in the lowest position during installation.
REMOVAL OF SEAT BELT BUCKLE
1. Remove the front seat. Refer toSE-20, "FRONT SEAT".
2. Remove screw and seat cushion inner finisher.
3. Remove the anchor bolt and seat belt buckle.
4. Disconnect the buckle switch connector from the seat connector.
INSTALLATION OF SEAT BELT BUCKLE
Installation is in the reverse order of removal.
PHIA0341E
MHIB9015E
Page 2828 of 3171
SEAT BELTS
SB-11
C
D
E
F
G
I
J
K
L
MA
B
SB
Seat Belt InspectionEHS0026A
AFTER A COLLISION
WARNING:
Inspect all seat belt assemblies including retractors and attaching hardware after any collision.
NISSAN recommends that all seat belt assemblies in use during a collision be replaced unless the col-
lision was minor and the belts show no damage and continue to operate properly. Failure to do so
could result in serious personal injury in an accident. Seat belt assemblies not in use during a colli-
sion should also be replaced if either damage or improper operation is noted. Seat belt pre-tensioners
should be replaced even if the seat belts are not in use during a frontal collision in which the air bags
are deployed.
Replace any seat belt assembly (including anchor bolts) if:
lThe seat belt was in use at the time of a collision (except for minor collisions and the belts, retractors and
buckles show no damage and continue to operate properly).
lThe seat belt was damaged in an accident. (i.e. torn webbing, bent retractor or guide).
lThe seat belt attaching point was damaged in an accident. Inspect the seat belt attaching area for damage
or distortion and repair as necessary before installing a new seat belt assembly.
lAnchor bolts are deformed or worn out.
lThe seat belt pre-tensioner should be replaced even if the seat belts are not in use during the collision in
which the air bags are deployed.
PRELIMINARY CHECKS
1. Check the seat belt warning lamp for proper operation as follows:
a. Switch ignition ON. The seat belt warning lamp should illuminate.
b. Fasten driver's seat belt. The seat belt warning lamp should go out. If warning lamp remains illuminated,
Refer toDI-28, "
WARNING LAMPS".
2. If the air bag warning lamp is blinking, conduct self-diagnosis using CONSULT-II, and air bag warning
lamp. Refer toSRS-18, "
SRS Operation Check".
3. Check that the seat belt retractor, seat belt anchor and buckle bolts are securely attached.
4. Check the shoulder seat belt guide and shoulder belt height adjuster for front seats. Ensure guide swivels
freely and that belt lays flat and does not bind in guide. Ensure height adjuster operates properly and
holds securely.
5. Check retractor operation:
a. Fully extend the seat belt webbing and check for twists, tears or other damage.
b. Allow the seat belt to retract. Ensure that belt returns smoothly and completely into the retractor. If the
seat belt does not return smoothly, wipe the inside of the loops with a clean paper cloth, because dirt built
up in the loops of the upper anchors can cause the seat belts to retract slowly.
c. Fasten the seat belt. Check the seat belt returns smoothly and completely to the retractor. If the belt does
not return smoothly, the cause may be an accumulation of dust or dirt. Use the “SEAT BELT TAPE SET”
and perform the following steps.
Inspect the front seat belt through-anchor:
1. Pull the seat belt out to a length of 500 mm (19.69 in) or more.
2. Use a clip or other device to hold the seat belt at the center pillar belt opening.
3. Pass a thin wire through the through-anchor belt opening. Hold both ends of the wire and pull taut while
moving it up and down several times along the belt opening surface to remove dirt.
4. Any dirt that cannot be removed with the wire can be removed by cleaning the opening with a clean
cloth.
5. Apply tape at the point where the belt contacts the through-anchor belt opening.
NOTE:
Apply the tape so that there is no looseness or wrinkling.
6. Remove the clip holding the seat belt and check that the belt returns smoothly.
7. Repeat steps above as necessary to check the other seat belts.
Page 2834 of 3171
SC-1
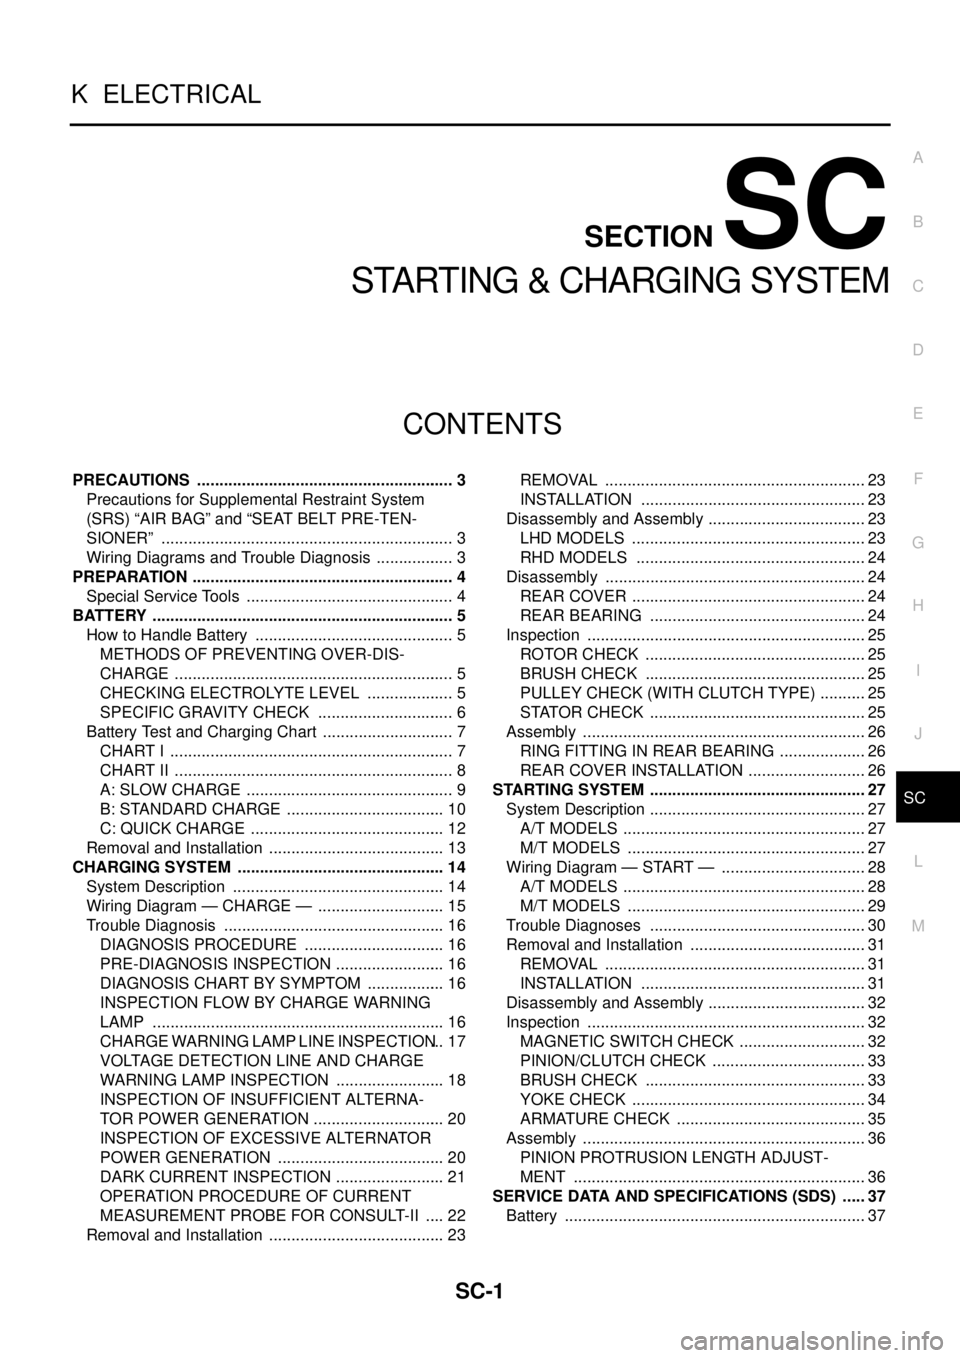
STARTING & CHARGING SYSTEM
K ELECTRICAL
CONTENTS
C
D
E
F
G
H
I
J
L
M
SECTIONSC
A
B
SC
STARTING & CHARGING SYSTEM
PRECAUTIONS .......................................................... 3
Precautions for Supplemental Restraint System
(SRS)“AIRBAG”and“SEATBELTPRE-TEN-
SIONER” .................................................................. 3
Wiring Diagrams and Trouble Diagnosis .................. 3
PREPARATION ........................................................... 4
Special Service Tools ............................................... 4
BATTERY .................................................................... 5
How to Handle Battery ............................................. 5
METHODS OF PREVENTING OVER-DIS-
CHARGE ............................................................... 5
CHECKING ELECTROLYTE LEVEL .................... 5
SPECIFIC GRAVITY CHECK ............................... 6
Battery Test and Charging Chart .............................. 7
CHART I ................................................................ 7
CHART II ............................................................... 8
A: SLOW CHARGE ............................................... 9
B: STANDARD CHARGE .................................... 10
C: QUICK CHARGE ............................................ 12
Removal and Installation ........................................ 13
CHARGING SYSTEM ............................................... 14
System Description ................................................ 14
Wiring Diagram — CHARGE — ............................. 15
Trouble Diagnosis .................................................. 16
DIAGNOSIS PROCEDURE ................................ 16
PRE-DIAGNOSIS INSPECTION ......................... 16
DIAGNOSIS CHART BY SYMPTOM .................. 16
INSPECTION FLOW BY CHARGE WARNING
LAMP .................................................................. 16
CHARGE WARNING LAMP LINE INSPECTION... 17
VOLTAGE DETECTION LINE AND CHARGE
WARNING LAMP INSPECTION ......................... 18
INSPECTION OF INSUFFICIENT ALTERNA-
TOR POWER GENERATION .............................. 20
INSPECTION OF EXCESSIVE ALTERNATOR
POWER GENERATION ...................................... 20
DARK CURRENT INSPECTION ......................... 21
OPERATION PROCEDURE OF CURRENT
MEASUREMENT PROBE FOR CONSULT-II ..... 22
Removal and Installation ........................................ 23REMOVAL ........................................................... 23
INSTALLATION ................................................... 23
Disassembly and Assembly .................................... 23
LHD MODELS ..................................................... 23
RHD MODELS .................................................... 24
Disassembly ........................................................... 24
REAR COVER ..................................................... 24
REAR BEARING ................................................. 24
Inspection ............................................................... 25
ROTOR CHECK .................................................. 25
BRUSH CHECK .................................................. 25
PULLEY CHECK (WITH CLUTCH TYPE) ........... 25
STATOR CHECK ................................................. 25
Assembly ................................................................ 26
RING FITTING IN REAR BEARING .................... 26
REAR COVER INSTALLATION ........................... 26
STARTING SYSTEM ................................................. 27
System Description ................................................. 27
A/T MODELS ....................................................... 27
M/T MODELS ...................................................... 27
Wiring Diagram — START — ................................. 28
A/T MODELS ....................................................... 28
M/T MODELS ...................................................... 29
Trouble Diagnoses ................................................. 30
Removal and Installation ........................................ 31
REMOVAL ........................................................... 31
INSTALLATION ................................................... 31
Disassembly and Assembly .................................... 32
Inspection ............................................................... 32
MAGNETIC SWITCH CHECK ............................. 32
PINION/CLUTCH CHECK ................................... 33
BRUSH CHECK .................................................. 33
YOKE CHECK ..................................................... 34
ARMATURE CHECK ........................................... 35
Assembly ................................................................ 36
PINION PROTRUSION LENGTH ADJUST-
MENT .................................................................. 36
SERVICE DATA AND SPECIFICATIONS (SDS) ...... 37
Battery .................................................................... 37
Page 2836 of 3171
PRECAUTIONS
SC-3
C
D
E
F
G
H
I
J
L
MA
B
SC
PRECAUTIONSPFP:00011
Precautions for Supplemental Restraint System (SRS) “AIR BAG” and “SEAT
BELT PRE-TENSIONER”
EKS00MZ4
The Supplemental Restraint System such as “AIR BAG” and “SEAT BELT PRE-TENSIONER”, used along
with a front seat belt, helps to reduce the risk or severity of injury to the driver and front passenger for certain
types of collision. Information necessary to service the system safely is included in the SRS and SB section of
this Service Manual.
WARNING:
lTo avoid rendering the SRS inoperative, which could increase the risk of personal injury or death
in the event of a collision which would result in air bag inflation, all maintenance must be per-
formed by an authorized NISSAN/INFINITI dealer.
lImproper maintenance, including incorrect removal and installation of the SRS, can lead to per-
sonal injury caused by unintentional activation of the system. For removal of Spiral Cable and Air
Bag Module, see the SRS section.
lDo not use electrical test equipment on any circuit related to the SRS unless instructed to in this
Service Manual. SRS wiring harnesses can be identified by yellow and/or orange harnesses or
harness connectors.
Wiring Diagrams and Trouble DiagnosisEKS00MZ5
When you read wiring diagrams, refer to the followings:
lGI-15, "How to Read Wiring Diagrams"in GI section
lPG-4, "POWER SUPPLY ROUTING CIRCUIT"for power distribution circuit in PG section
When you perform trouble diagnosis, refer to the followings:
lGI-11, "How to Follow Trouble Diagnoses"in GI section
lGI-24, "How to Perform Efficient Diagnosis for an Electrical Incident"in GI section
Page 2872 of 3171
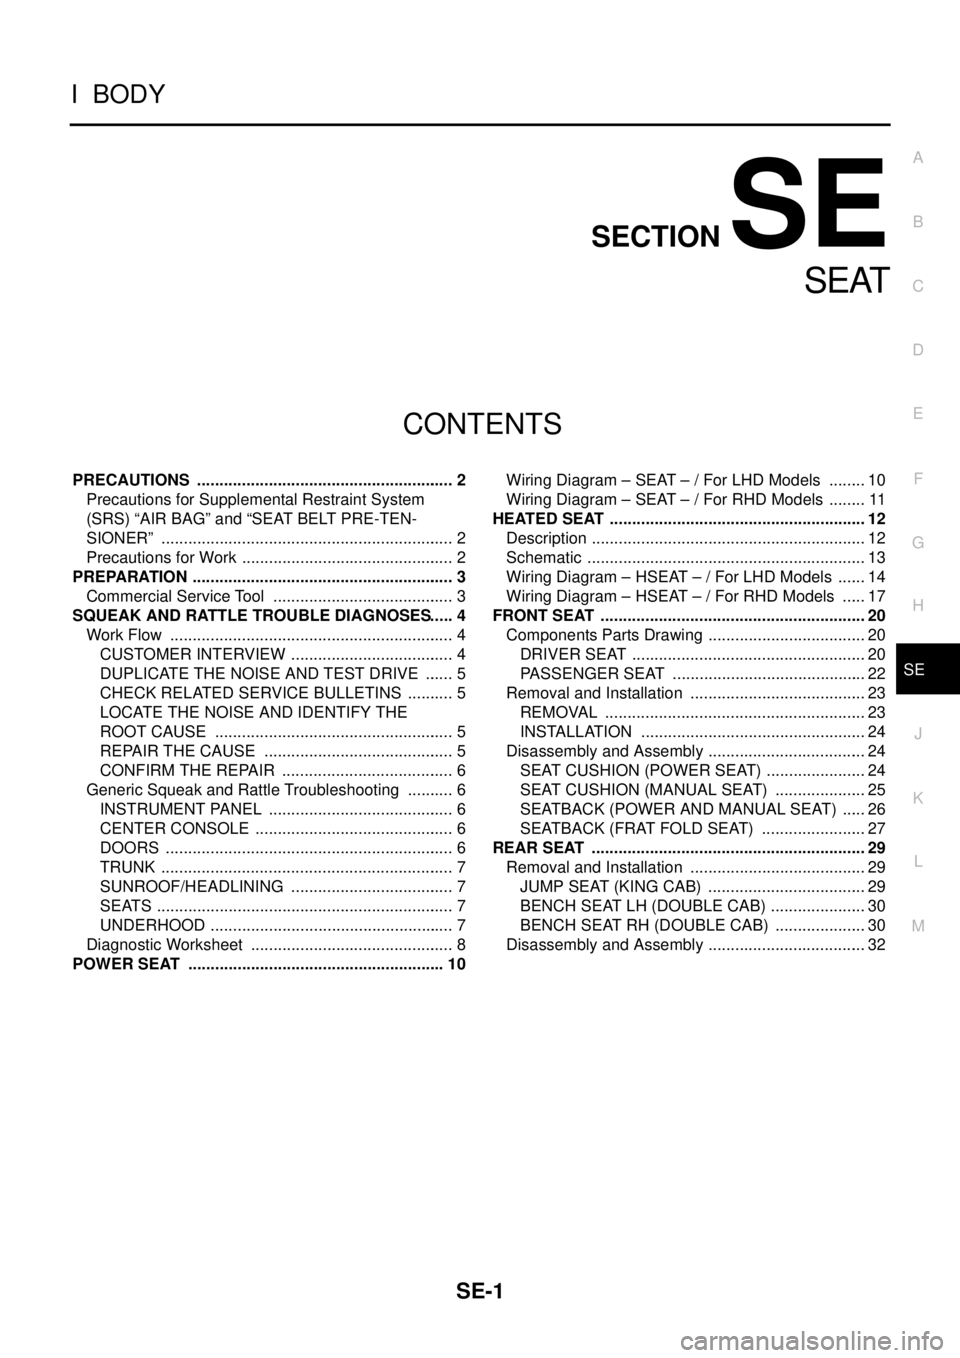
SE-1
SEAT
IBODY
CONTENTS
C
D
E
F
G
H
J
K
L
M
SECTIONSE
A
B
SE
SEAT
PRECAUTIONS .......................................................... 2
Precautions for Supplemental Restraint System
(SRS)“AIRBAG”and“SEATBELTPRE-TEN-
SIONER” .................................................................. 2
Precautions for Work ................................................ 2
PREPARATION ........................................................... 3
Commercial Service Tool ......................................... 3
SQUEAK AND RATTLE TROUBLE DIAGNOSES..... 4
Work Flow ................................................................ 4
CUSTOMER INTERVIEW ..................................... 4
DUPLICATE THE NOISE AND TEST DRIVE ....... 5
CHECK RELATED SERVICE BULLETINS ........... 5
LOCATE THE NOISE AND IDENTIFY THE
ROOT CAUSE ...................................................... 5
REPAIR THE CAUSE ........................................... 5
CONFIRM THE REPAIR ....................................... 6
Generic Squeak and Rattle Troubleshooting ........... 6
INSTRUMENT PANEL .......................................... 6
CENTER CONSOLE ............................................. 6
DOORS ................................................................. 6
TRUNK .................................................................. 7
SUNROOF/HEADLINING ..................................... 7
SEATS ................................................................... 7
UNDERHOOD ....................................................... 7
Diagnostic Worksheet .............................................. 8
POWER SEAT .......................................................... 10Wiring Diagram – SEAT – / For LHD Models ......... 10
Wiring Diagram – SEAT – / For RHD Models ......... 11
HEATED SEAT .......................................................... 12
Description .............................................................. 12
Schematic ............................................................... 13
Wiring Diagram – HSEAT – / For LHD Models ....... 14
Wiring Diagram – HSEAT – / For RHD Models ...... 17
FRONT SEAT ............................................................ 20
Components Parts Drawing .................................... 20
DRIVER SEAT ..................................................... 20
PASSENGER SEAT ............................................ 22
Removal and Installation ........................................ 23
REMOVAL ........................................................... 23
INSTALLATION ................................................... 24
Disassembly and Assembly .................................... 24
SEAT CUSHION (POWER SEAT) ....................... 24
SEAT CUSHION (MANUAL SEAT) ..................... 25
SEATBACK (POWER AND MANUAL SEAT) ...... 26
SEATBACK (FRAT FOLD SEAT) ........................ 27
REAR SEAT .............................................................. 29
Removal and Installation ........................................ 29
JUMP SEAT (KING CAB) .................................... 29
BENCH SEAT LH (DOUBLE CAB) ...................... 30
BENCH SEAT RH (DOUBLE CAB) ..................... 30
Disassembly and Assembly .................................... 32
Page 2873 of 3171

SE-2
PRECAUTIONS
PRECAUTIONS
PFP:00001
Precautions for Supplemental Restraint System (SRS) “AIR BAG” and “SEAT
BELT PRE-TENSIONER”
EIS00CEB
The Supplemental Restraint System such as “AIR BAG” and “SEAT BELT PRE-TENSIONER”, used along
with a front seat belt, helps to reduce the risk or severity of injury to the driver and front passenger for certain
types of collision. Information necessary to service the system safely is included in the SRS and SB section of
this Service Manual.
WARNING:
lTo avoid rendering the SRS inoperative, which could increase the risk of personal injury or death
in the event of a collision which would result in air bag inflation, all maintenance must be per-
formed by an authorized NISSAN/INFINITI dealer.
lImproper maintenance, including incorrect removal and installation of the SRS, can lead to per-
sonal injury caused by unintentional activation of the system. For removal of Spiral Cable and Air
Bag Module, see the SRS section.
lDo not use electrical test equipment on any circuit related to the SRS unless instructed to in this
Service Manual. SRS wiring harnesses can be identified by yellow and/or orange harnesses or
harness connectors.
Precautions for WorkEIS00BAR
lWhen removing or disassembling each component, be careful not to damage or deform it. If a component
may be subject to interference, be sure to protect it with a shop cloth.
lWhen removing (disengaging) components with a screwdriver or similar tool, be sure to wrap the compo-
nent with a shop cloth or vinyl tape to protect it.
lProtect the removed parts with a shop cloth and keep them.
lReplace a deformed or damaged clip.
lIf a part is specified as a non-reusable part, always replace it with new one.
lBe sure to tighten bolts and nuts securely to the specified torque.
lAfter re-installation is completed, be sure to check that each part works normally.
lFollow the steps below to clean components.
–Water soluble foul: Dip a soft cloth into lukewarm water, and wring the water out of the cloth to wipe the
fouled area.
Then rub with a soft and dry cloth.
–Oily foul: Dip a soft cloth into lukewarm water with mild detergent (concentration: within 2 to 3%), and wipe
the fouled area.
Then dip a cloth into fresh water, and wring the water out of the cloth to wipe the detergent off. Then rub
with a soft and dry cloth.
lDo not use organic solvent such as thinner, benzene, alcohol, or gasoline.
lFor genuine leather seats, use a genuine leather seat cleaner.