Page 1208 of 1500
36-1
GROUP 36
PARKING BRAKES
CONTENTS
GENERAL DESCRIPTION. . . . . . . . .36-2
PARKING BRAKE DIAGNOSIS . . . .36-2
INTRODUCTION. . . . . . . . . . . . . . . . . . . . . 36-2
TROUBLESHOOTING STRATEGY . . . . . . 36-2
SYMPTOM CHART. . . . . . . . . . . . . . . . . . . 36-2
SYMPTOM PROCEDURES . . . . . . . . . . . . 36-3
ON-VEHICLE SERVICE . . . . . . . . . . .36-3
PARKING BRAKE LEVER STROKE CHECK
AND ADJUSTMENT . . . . . . . . . . . . . . . . . . 36-3
PARKING BRAKE SWITCH CHECK . . . . . 36-5
PARKING BRAKE LINING SEATING
PROCEDURE . . . . . . . . . . . . . . . . . . . . . . . 36-5
PARKING BRAKE LEVER . . . . . . . . .36-6
REMOVAL AND INSTALLATION . . . . . . . . 36-6
PARKING BRAKE CABLE . . . . . . . . .36-7
REMOVAL AND INSTALLATION . . . . . . . . 36-7
PARKING BRAKE LINING AND
DRUM . . . . . . . . . . . . . . . . . . . . . . . . .36-8
REMOVAL AND INSTALLATION . . . . . . . . 36-8
INSPECTION. . . . . . . . . . . . . . . . . . . . . . . . 36-11
SPECIFICATIONS . . . . . . . . . . . . . . .36-12
FASTENER TIGHTENING SPECIFICATIONS36-12
SERVICE SPECIFICATIONS . . . . . . . . . . . 36-12
LUBRICANT . . . . . . . . . . . . . . . . . . . . . . . . 36-12
Page 1210 of 1500
ON-VEHICLE SERVICE
PARKING BRAKES36-3
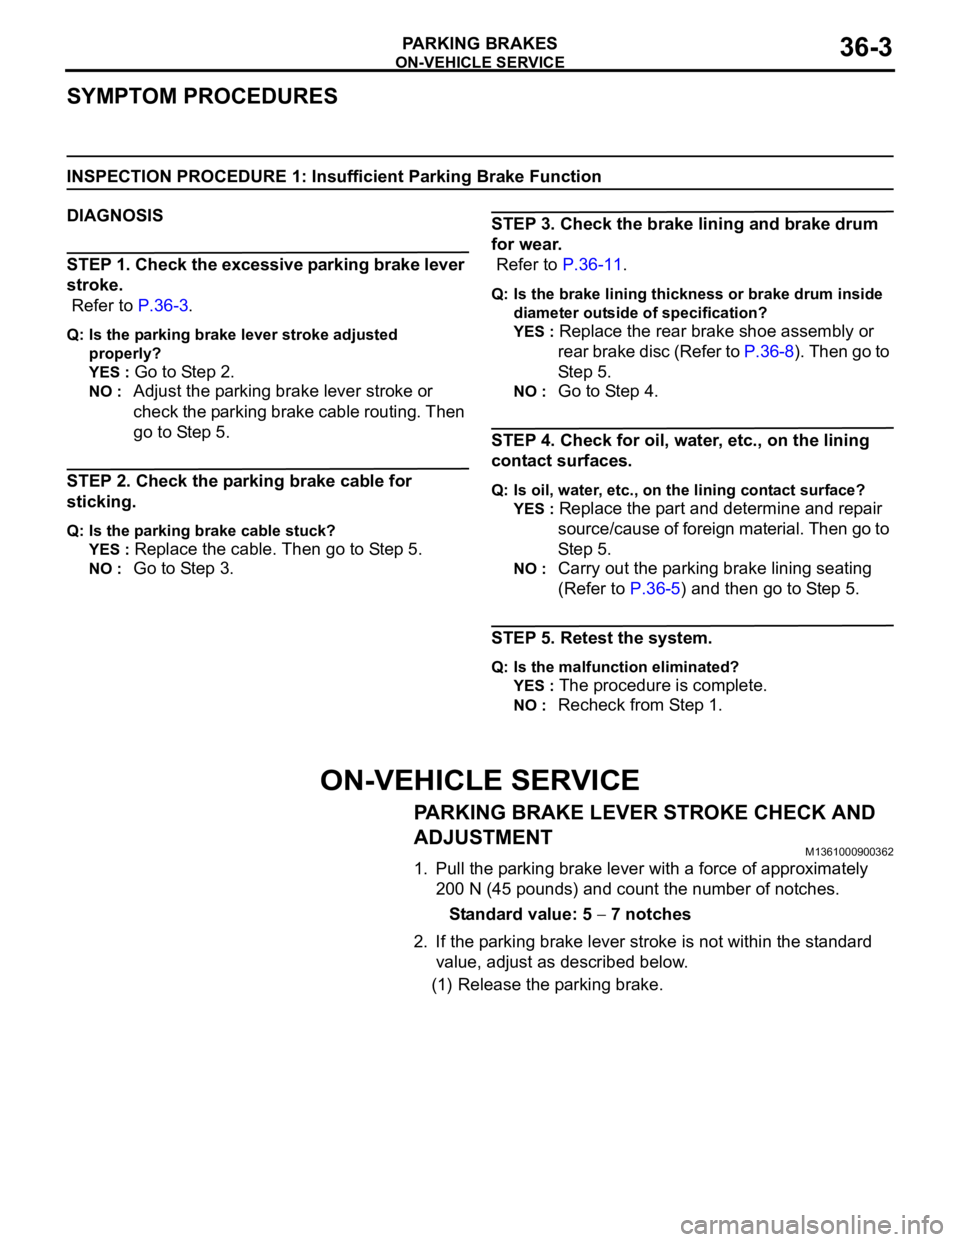
SYMPTOM PROCEDURES
INSPECTION PROCEDURE 1: Insufficient Parking Brake Function
DIAGNOSIS
STEP 1. Check the excessive parking brake lever
stroke.
Refer to P.36-3.
Q: Is the parking brake lever stroke adjusted
properly?
YES :
Go to Step 2.
NO : Adjust the parking brake lever stroke or
check the parking brake cable routing. Then
go to Step 5.
STEP 2. Check the parking brake cable for
sticking.
Q: Is the parking brake cable stuck?
YES :
Replace the cable. Then go to Step 5.
NO : Go to Step 3.
STEP 3. Check the brake lining and brake drum
for wear.
Refer to P.36-11.
Q: Is the brake lining thickness or brake drum inside
diameter outside of specification?
YES :
Replace the rear brake shoe assembly or
rear brake disc (Refer to P.36-8). Then go to
Step 5.
NO : Go to Step 4.
STEP 4. Check for oil, water, etc., on the lining
contact surfaces.
Q: Is oil, water, etc., on the lining contact surface?
YES :
Replace the part and determine and repair
source/cause of foreign material. Then go to
St e p 5.
NO : Carry out the parking brake lining seating
(Refer to P.36-5) and then go to Step 5.
STEP 5. Retest the system.
Q: Is the malfunction eliminated?
YES :
The procedure is complete.
NO : Recheck from Step 1.
ON-VEHICLE SERVICE
PARKING BRAKE LEVER STROKE CHECK AND
ADJUSTMENT
M1361000900362
1. Pull the parking brake lever with a force of approximately
200 N (45 pounds) and count the number of notches.
Standard value: 5
7 notches
2. If the parking brake lever stroke is not within the standard
value, adjust as described below.
(1) Release the parking brake.
Page 1211 of 1500
ON-VEHICLE SERVICE
PARKING BRAKES36-4
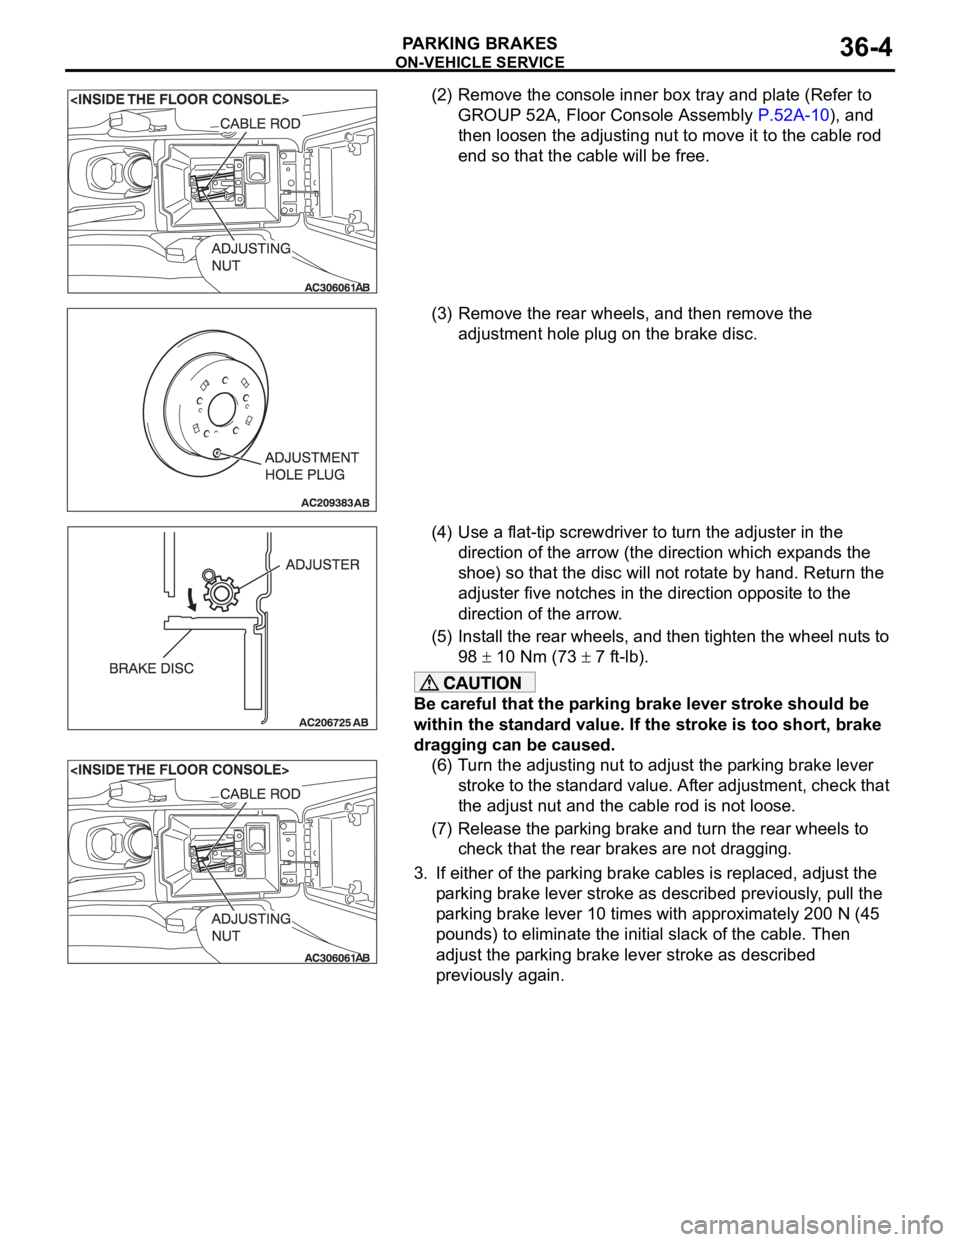
(2) Remove the console inner box tray and plate (Refer to
GROUP 52A, Floor Console Assembly P.52A-10), and
then loosen the adjusting nut to move it to the cable rod
end so that the cable will be free.
(3) Remove the rear wheels, and then remove the
adjustment hole plug on the brake disc.
(4) Use a flat-tip screwdriver to turn the adjuster in the
direction of the arrow (the direction which expands the
shoe) so that the disc will not rotate by hand. Return the
adjuster five notches in the direction opposite to the
direction of the arrow.
(5) Install the rear wheels, and then tighten the wheel nuts to
98
10 Nm (73 7 ft-lb).
Be careful that the parking brake lever stroke should be
within the standard value. If the stroke is too short, brake
dragging can be caused.
(6) Turn the adjusting nut to adjust the parking brake lever
stroke to the standard value. After adjustment, check that
the adjust nut and the cable rod is not loose.
(7) Release the parking brake and turn the rear wheels to
check that the rear brakes are not dragging.
3. If either of the parking brake cables is replaced, adjust the
parking brake lever stroke as described previously, pull the
parking brake lever 10 times with approximately 200 N (45
pounds) to eliminate the initial slack of the cable. Then
adjust the parking brake lever stroke as described
previously again.
Page 1212 of 1500
ON-VEHICLE SERVICE
PARKING BRAKES36-5
PARKING BRAKE SWITCH CHECKM1361003300411
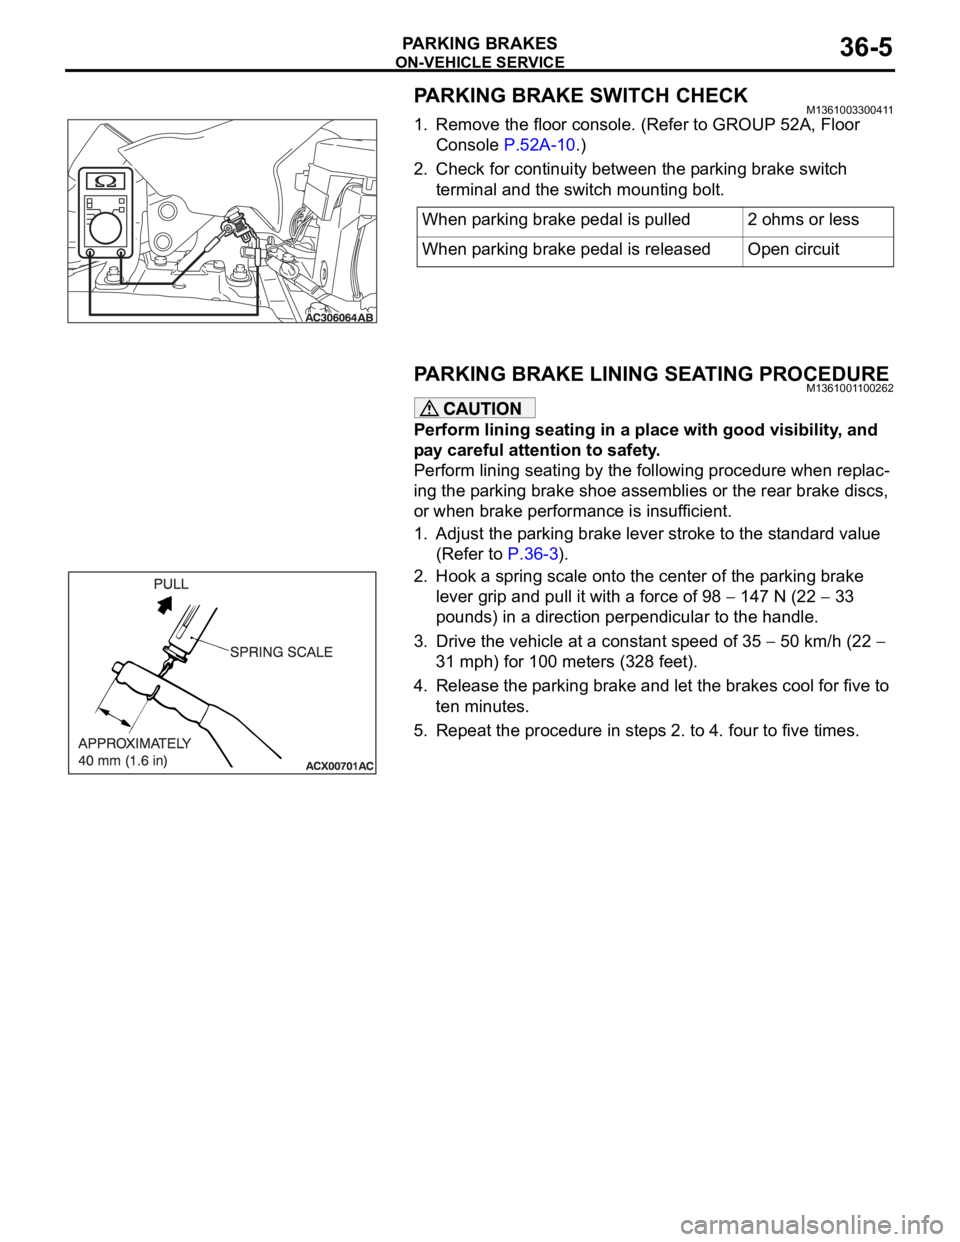
1. Remove the floor console. (Refer to GROUP 52A, Floor
Console P.52A-10.)
2. Check for continuity between the parking brake switch
terminal and the switch mounting bolt.
PARKING BRAKE LINING SEATING PROCEDUREM1361001100262
Perform lining seating in a place with good visibility, and
pay careful attention to safety.
Perform lining seating by the following procedure when replac-
ing the parking brake shoe assemblies or the rear brake discs,
or when brake performance is insufficient.
1. Adjust the parking brake lever stroke to the standard value
(Refer to P.36-3).
2. Hook a spring scale onto the center of the parking brake
lever grip and pull it with a force of 98
147 N (22 33
pounds) in a direction perpendicular to the handle.
3. Drive the vehicle at a constant speed of 35
50 km/h (22
31 mph) for 100 meters (328 feet).
4. Release the parking brake and let the brakes cool for five to
ten minutes.
5. Repeat the procedure in steps 2. to 4. four to five times.When parking brake pedal is pulled 2 ohms or less
When parking brake pedal is released Open circuit
Page 1216 of 1500
Page 1217 of 1500
PARKING BRAKE LINING AND DRUM
PARKING BRAKES36-10
INSTALLATION SERVICE POINTS
.
>>A<< REAR BRAKE CHAMBER RETAINER
INSTALLATION
Use pliers or a similar tool to close the rear brake chamber
retainer end onto the pin.
.
>>B<< REAR BRAKE SHOE SLACK ADJUSTER
INSTALLATION
Install the rear brake shoe slack adjuster as shown.
.
Page 1219 of 1500
SPECIFICATIONS
PARKING BRAKES36-12
SPECIFICATIONS
FASTENER TIGHTENING SPECIFICATIONSM1361003500266
SERVICE SPECIFICATIONSM1361000300412
LUBRICANTM1361000400301
ITEM SPECIFICATION
Parking brake lining and drum
Rear brake bolt (rear brake caliper assembly mounting
bolt)60
5 Nm (45 3 ft-lb)
Rear wheel hub assembly mounting bolt 73
7 Nm (54 5 ft-lb)
ITEMS STANDARD VALUE LIMIT
Parking brake lever stroke
[Parking brake lever pull force: Approximately 200 N
(45 pounds)]5
7 notches
Rear brake lining thickness mm (in) 2.8 Minimum 1.0
Brake drum inside diameter mm (in) 190.0 191.0
ITEM SPECIFIED LUBRICANT
Rear brake shoe slack adjuster Brake grease SAE J310, NLGI No.1
Backing plate
Rear brake shoe assembly
Page 1222 of 1500
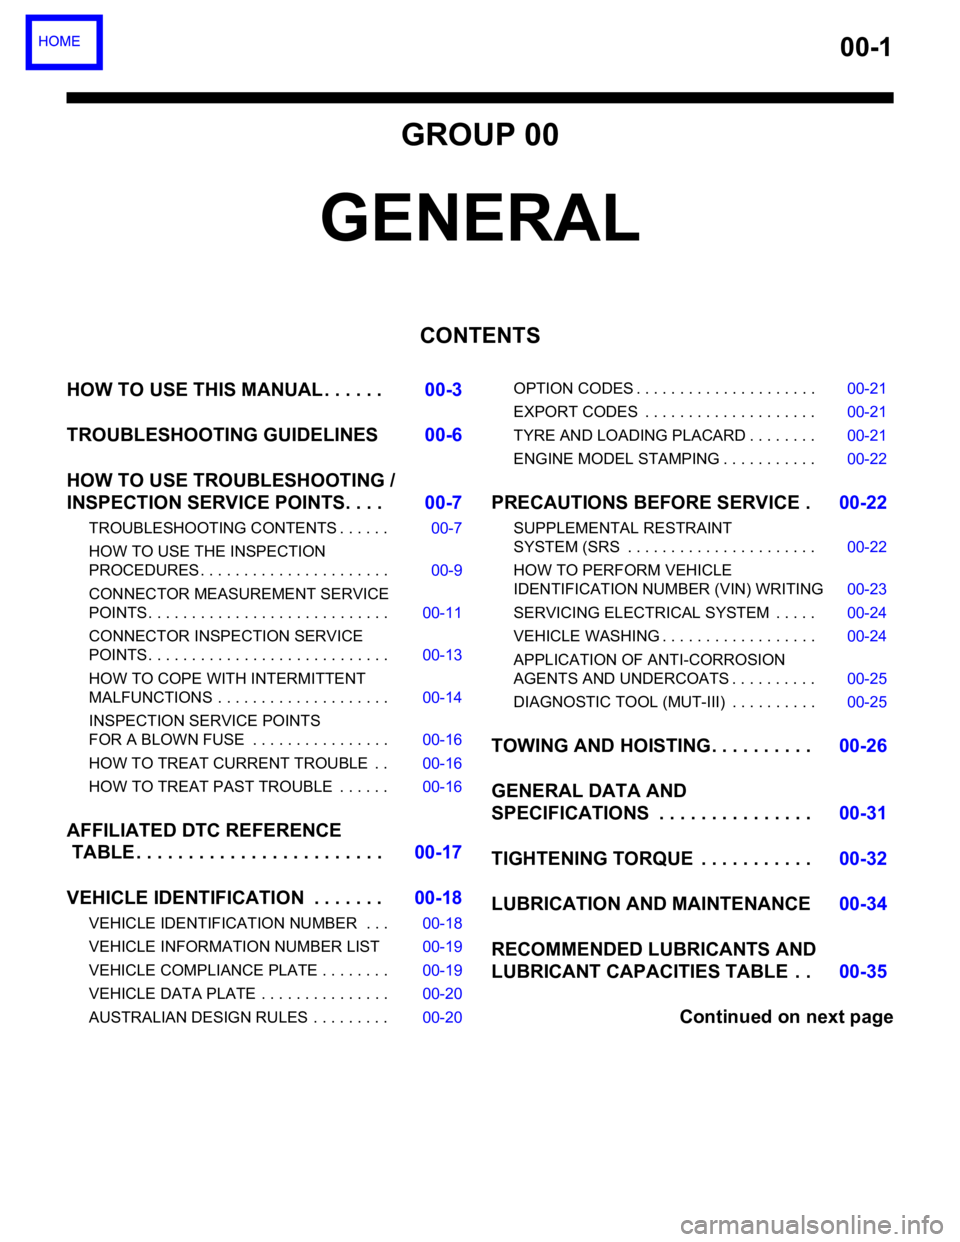
00-1
GROUP 00
GENERAL
CONTENTS
HOW TO USE THIS MANUAL . . . . . .00-3
TROUBLESHOOTING GUIDELINES00-6
HOW TO USE TROUBLESHOOTING /
INSPECTION SERVICE POINTS. . . .00-7
TROUBLESHOOTING CONTENTS . . . . . . 00-7
HOW TO USE THE INSPECTION
PROCEDURES . . . . . . . . . . . . . . . . . . . . . . 00-9
CONNECTOR MEASUREMENT SERVICE
POINTS . . . . . . . . . . . . . . . . . . . . . . . . . . . . 00-11
CONNECTOR INSPECTION SERVICE
POINTS . . . . . . . . . . . . . . . . . . . . . . . . . . . . 00-13
HOW TO COPE WITH INTERMITTENT
MALFUNCTIONS . . . . . . . . . . . . . . . . . . . . 00-14
INSPECTION SERVICE POINTS
FOR A BLOWN FUSE . . . . . . . . . . . . . . . . 00-16
HOW TO TREAT CURRENT TROUBLE . . 00-16
HOW TO TREAT PAST TROUBLE . . . . . . 00-16
AFFILIATED DTC REFERENCE
TABLE . . . . . . . . . . . . . . . . . . . . . . . .00-17
VEHICLE IDENTIFICATION . . . . . . .00-18
VEHICLE IDENTIFICATION NUMBER . . . 00-18
VEHICLE INFORMATION NUMBER LIST 00-19
VEHICLE COMPLIANCE PLATE . . . . . . . . 00-19
VEHICLE DATA PLATE . . . . . . . . . . . . . . . 00-20
AUSTRALIAN DESIGN RULES . . . . . . . . . 00-20OPTION CODES . . . . . . . . . . . . . . . . . . . . . 00-21
EXPORT CODES . . . . . . . . . . . . . . . . . . . . 00-21
TYRE AND LOADING PLACARD . . . . . . . . 00-21
ENGINE MODEL STAMPING . . . . . . . . . . . 00-22
PRECAUTIONS BEFORE SERVICE .00-22
SUPPLEMENTAL RESTRAINT
SYSTEM (SRS . . . . . . . . . . . . . . . . . . . . . . 00-22
HOW TO PERFORM VEHICLE
IDENTIFICATION NUMBER (VIN) WRITING00-23
SERVICING ELECTRICAL SYSTEM . . . . . 00-24
VEHICLE WASHING . . . . . . . . . . . . . . . . . . 00-24
APPLICATION OF ANTI-CORROSION
AGENTS AND UNDERCOATS . . . . . . . . . . 00-25
DIAGNOSTIC TOOL (MUT-III) . . . . . . . . . . 00-25
TOWING AND HOISTING. . . . . . . . . .00-26
GENERAL DATA AND
SPECIFICATIONS . . . . . . . . . . . . . . .00-31
TIGHTENING TORQUE . . . . . . . . . . .00-32
LUBRICATION AND MAINTENANCE 00-34
RECOMMENDED LUBRICANTS AND
LUBRICANT CAPACITIES TABLE . .00-35
Continued on next page