Page 16 of 174
.
For more information on the Voi")
The system also has the following useful fea-
tures:
�Enlarged display of intersections.
�Automatic re-routing when a vehicle is off
the course (when map is displayed).
For more information on the Voice Guidance
feature, please refer to section 10.
SHORT MENUS
T o make the NISSAN Navigation System easier
to use, there is a short menu function in whichthe most commonly used items are listed.
When the indicator is illuminated, the short
menus (Easy Mode) are displayed. When the
indicator is turned off, the default navigation
systems menus (Expert Mode) are displayed.
INFO:
�[Easy Mode] is the default setting on the
initial screen at the delivery of your new ve-
hicle.
�The term [Expert Mode] is used in this
manual when the
Short Menus key indi-
cator is turned off. When the green indicator
is highlighted, the system is set to [Easy
Mode].
�When the SETTING , DEST or
ROUTE button is pressed in the [Easy
Mode] screen, the
Help key is displayed.
For more information on the Short Menu
feature, please refer to section 4.
INV1444
WHAT FEATURES ARE AVAILABLE ON THE NISSAN NAVIGATION SYSTEM?
3-4
Page 22 of 174

HOW TO USE THE JOYSTICK
AND THE PUSH ENTER BUT-
TON
The navigation system is operated by selecting
keys on the screen with the joystick and press-
ing the PUSH ENTER button. Be sure to un-
derstand the operation of the joystick before
using the navigation system.
Selecting the keys on the screen
Use the joystick to select keys on the screen.
The joystick can be tilted in eight directions.
The selected key will be highlighted in yellow.
INFO:
Use the joystick to scroll the map.
Selecting the function of the
highlighted key
Press the PUSH ENTER button.
The display shows the screen to carry out thefunction of the selected key (highlighted in yel-
low).
HOW TO USE THEPREVIOUS
BUTTON
This button has two functions.
T o return to the previous screen:
When this button is pressed during setup,
setup will be canceled, and the screen will re-
turn to the previous screen.
T o finish the set-up:
When this button is pressed after set-up is
completed, the settings will be renewed as di-
rected, and the screen will return to the map.
INFO:
When the PREVIOUS button must be
pressed, (for example, after the set-up is fin-
ished) instructions are given in the operation
procedure of each section in this manual. If the
PREVIOUS button is pressed when not fin-ished with the set-up, the setting will be can-
celed, and the screen will return to the previous
screen.
HOW TO USE THECANCEL
BUTTON
This button has two functions:
�Operation is canceled when pushed during
operation.
�The [CONFIRMA TION] screen is displayed
during route guidance in the present loca-
tion map.
INV1445
HOW DO I OPERATE THE NISSAN NAVIGATION SYSTEM?
4-6
Page 43 of 174

INFO:
�Use the
Address Book key and the
Point of Interest (POI) key in the same
way as in Expert Mode.
Please refer to “Setting with the
Address Book key” on page 5-3 and")
�Point of Interest (POI)
INFO:
�Use the
Address Book key and the
Point of Interest (POI) key in the same
way as in Expert Mode.
Please refer to “Setting with the
Address Book key” on page 5-3 and
“Setting with the
Point of Interest (POI)
key” on page 6-2.
�If the
Short Menus key is highlighted in
green in the [SETTING] screen, the screen
is in Easy Mode. In this case, the keys dis-
played are different from the screen in Ex-
pert Mode.
�If you set a destination or waypoints, they
will be displayed with icons.
�If you want to go to places close to the
stored locations or facilities, use categories
such as facility , nearby facility or memory
for easier setting.�When using either the Point of Interest
(POI) or nearby Points of Interest catego-
ries, the names called up can be set as the
destination if you do not scroll the screen.
If you want to choose a different place on
the screen from the one called up, you will
have to scroll the screen.
SETTING WITH THEAddress Book
KEY
The Address Book will allow you to store lo-
cations in the memory . This is especially useful
for locations that you visit frequently .
Please refer to “Setting up and editing the ad-
dress book” on page 7-2.1. Press the DEST button.
2. Select the
Address Book key on the
[DEST . SETTING] screen.
The [DEST . SETTINGS (Address Book)] screen
will be displayed.
INV1453
HOW DO I PROGRAM A DESTINATION?
5-3
Page 44 of 174
3. Select the item key of your destination
(waypoints) on the [DEST . SETTINGS (Ad-
dress Book)] screen.4. T o set the destination (waypoints), refer to
“Making the system guide the route with
detailed options” on page 5-27.5. T o slightly alter the destination.
Select the
Map key to display the map
screen of the area around the specified des-
tination (waypoints).
INV1476INV1477INV1478
HOW DO I PROGRAM A DESTINATION?
5-4
Page 46 of 174
4. T o set the destination (waypoints), refer to
“Making the system guide the route with
detailed options” on page 5-27.5. T o slightly alter the destination.
Select the
Map key to display the map
screen of the area around the specified des-
tination (waypoints).6. If necessary , operate the joystick to adjust
the location of the destination (waypoints).
Press the PUSH ENTER button. Select the
Destination key to confirm. The
[DEST . SETTINGS (Previous Dest.)] screen
will be displayed.
T o set the destination (waypoints), refer to
“Making the system guide the route with
detailed options” on page 5-27.
SETTING WITH THE
Address/StreetKEY
Sets the destination (waypoints) from the street
INV1482INV1483INV1484
HOW DO I PROGRAM A DESTINATION?
5-6
Page 49 of 174
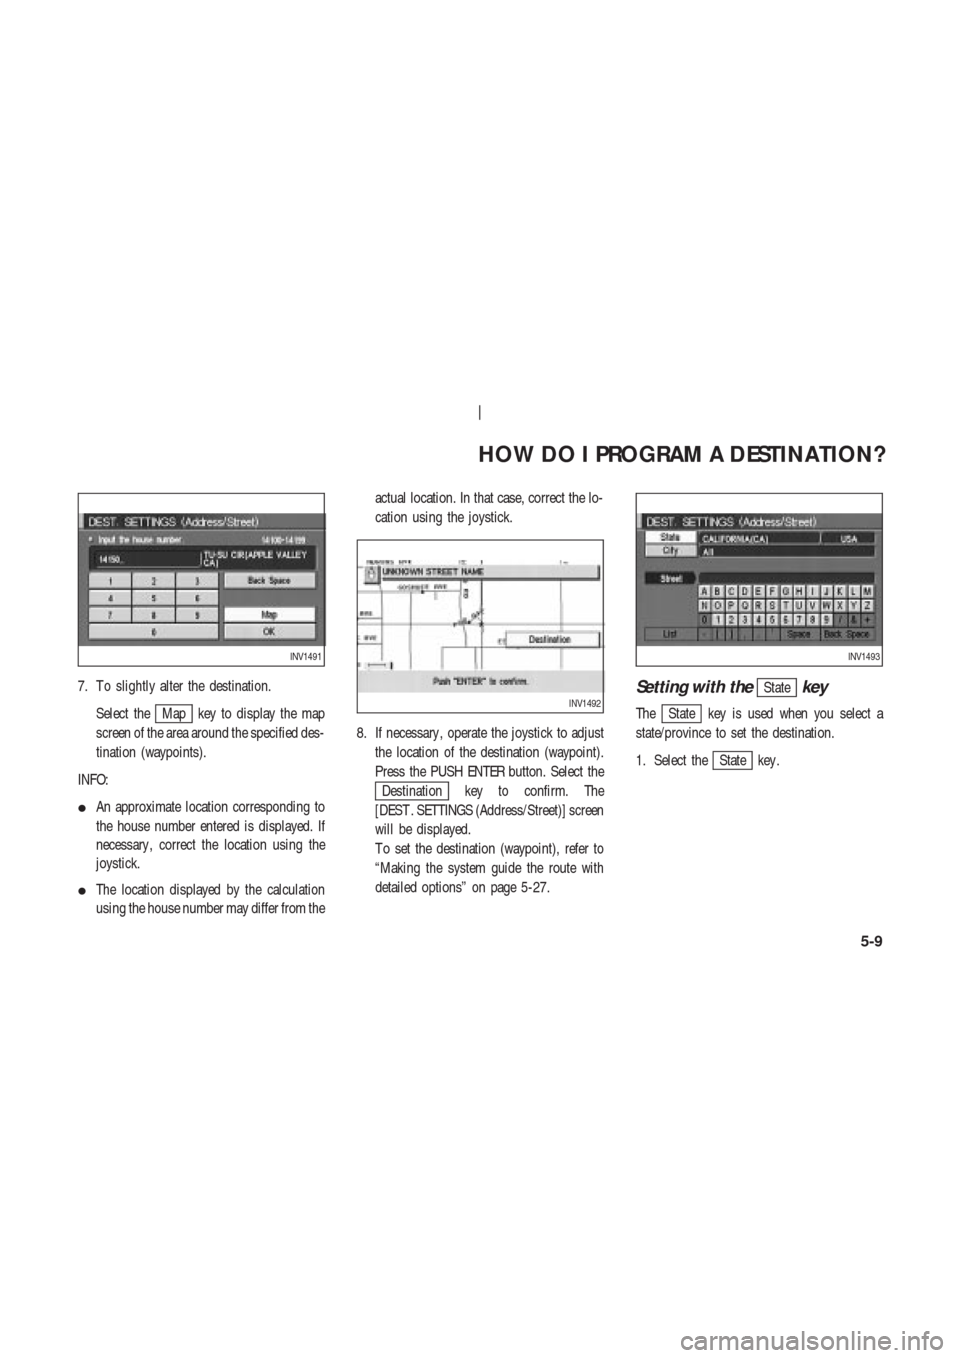
7. T o slightly alter the destination.
Select the
Map key to display the map
screen of the area around the specified des-
tination (waypoints).
INFO:
�An approximate location corresponding to
the house number entered is displayed. If
necessary , correct the location using the
joystick.
�The location displayed by the calculation
using the house number may differ from theactual location. In that case, correct the lo-
cation using the joystick.
8. If necessary , operate the joystick to adjust
the location of the destination (waypoint).
Press the PUSH ENTER button. Select the
Destination key to confirm. The
[DEST . SETTINGS (Address/Street)] screen
will be displayed.
T o set the destination (waypoint), refer to
“Making the system guide the route with
detailed options” on page 5-27.
Setting with theStatekey
TheState key is used when you select a
state/province to set the destination.
1. Select the
State key .
INV1491
INV1492
INV1493
HOW DO I PROGRAM A DESTINATION?
5-9
Page 54 of 174
4. Select the name of the second street.
The [DEST . SETTINGS (Intersection)] screen
will appear .5. T o set the destination (waypoints), refer to
“Making the system guide the route with
detailed options” on page 5-27.6. T o slightly alter the destination.
Select the
Map key to display the map
screen of the area around the specified des-
tination (waypoints).
INV1507INV1508INV1509
HOW DO I PROGRAM A DESTINATION?
5-14
Page 60 of 174
4. T o slightly alter the destination.
Select the
Map key to display the map
screen of the area around the specified des-
tination (waypoints).5. If necessary , operate the joystick to adjust
the location of the destination (waypoints).
Press the PUSH ENTER button. Select the
Destination key to confirm.
The [DEST . SETTINGS (City)] screen will
be displayed.
T o set the destination (waypoints), refer to
“Making the system guide the route with
detailed options” on page 5-27.
Setting with theStatekey
TheState key is used when you select a
state/province to set the destination.
1. Select the
State key .
INV1526INV1527INV1528
HOW DO I PROGRAM A DESTINATION?
5-20
![NISSAN 350Z 2004 Z33 Navigation Manual 3. Select the item key of your destination
(waypoints) on the [DEST . SETTINGS (Ad-
dress Book)] screen.4. T o set the destination (waypoints), refer to
“Making the system guide the route with
detai](/manual-img/5/668/w960_668-43.png "NISSAN 350Z 2004 Z33 Navigation Manual 3. Select the item key of your destination
(waypoints) on the [DEST . SETTINGS (Ad-
dress Book)] screen.4. T o set the destination (waypoints), refer to
“Making the system guide the route with
detai")
, refer to
“Making the system guide the route with
detailed options” on page 5-27.5. T o slightly alter the destination.
Select the
Map key to display the map")
![NISSAN 350Z 2004 Z33 Navigation Manual 4. Select the name of the second street.
The [DEST . SETTINGS (Intersection)] screen
will appear .5. T o set the destination (waypoints), refer to
“Making the system guide the route with
detailed op](/manual-img/5/668/w960_668-53.png "NISSAN 350Z 2004 Z33 Navigation Manual 4. Select the name of the second street.
The [DEST . SETTINGS (Intersection)] screen
will appear .5. T o set the destination (waypoints), refer to
“Making the system guide the route with
detailed op")
.5. If necessary , operate the joystick to adjust
the loca")