Page 97 of 174
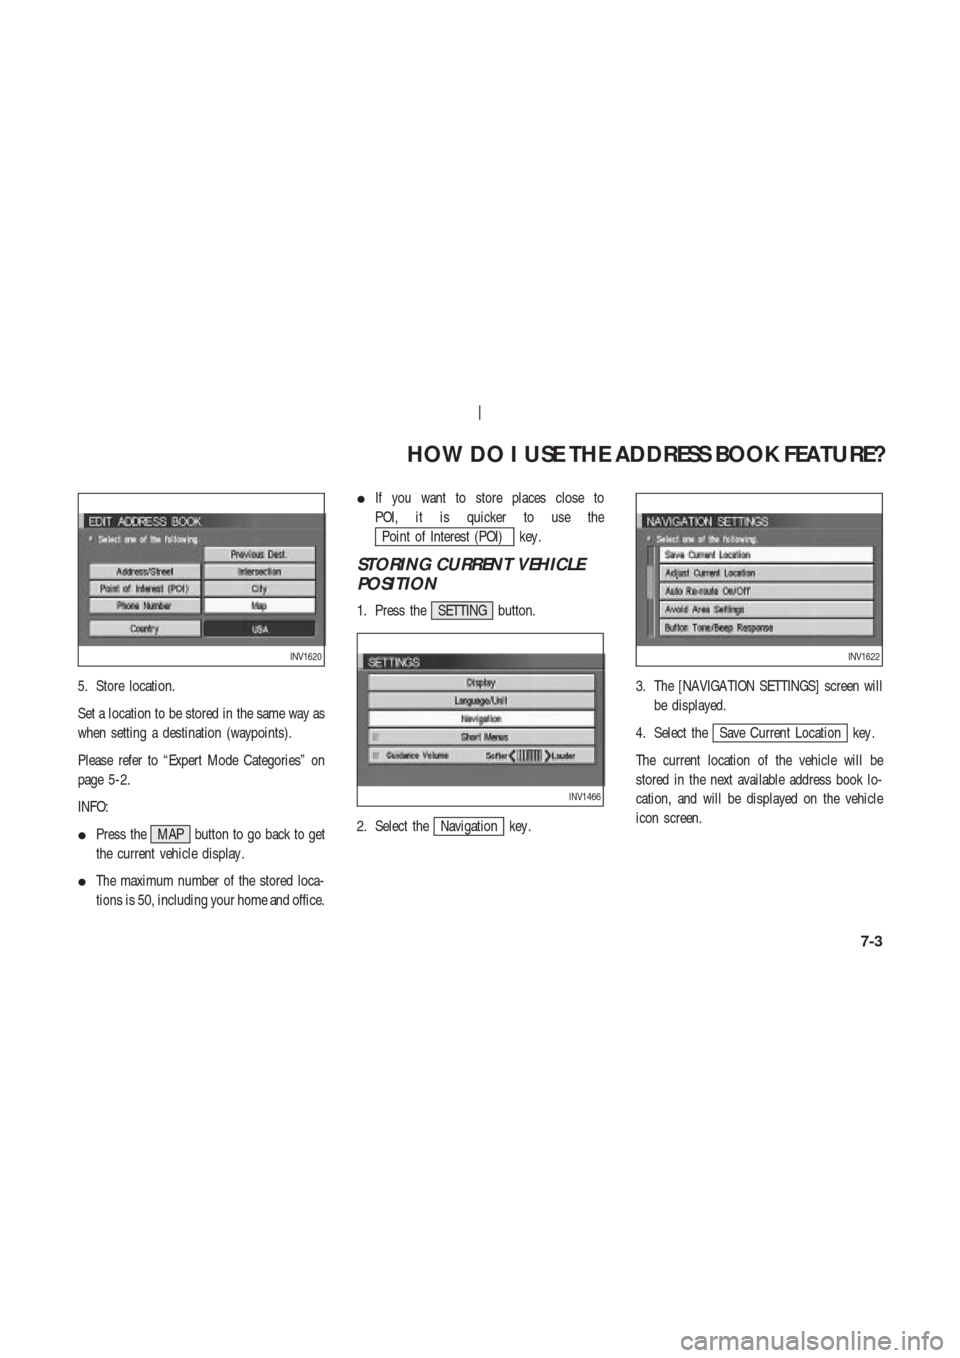
5. Store location.
Set a location to be stored in the same way as
when setting a destination (waypoints).
Please refer to “Expert Mode Categories” on
page 5-2.
INFO:
�Press the MAP button to go back to get
the current vehicle display .
�The maximum number of the stored loca-
tions is 50, including your home and office.�If you want to store places close to
POI, it is quicker to use the
Point of Interest (POI) key .
STORING CURRENT VEHICLE
POSITION
1. Press the SETTING button.
2. Select the
Navigation key .3. The [NAVIGA TION SETTINGS] screen will
be displayed.
4. Select the
Save Current Location key .
The current location of the vehicle will be
stored in the next available address book lo-
cation, and will be displayed on the vehicle
icon screen.
INV1620
INV1466
INV1622
HOW DO I USE THE ADDRESS BOOK FEATURE?
7-3
Page 99 of 174
CONFIRMING THE STORED
LOCATIONS
T o confirm that the locations have been stored:
1. Press the SETTING button.
2. Select the
Navigation key .The [NAVIGA TION SETTINGS] screen will be
displayed.
3. Select the
Edit Address Book key .4. Choose the
Map key next to the location
that you want to confirm.
INV1466
INV1618INV1628
HOW DO I USE THE ADDRESS BOOK FEATURE?
7-5
Page 100 of 174
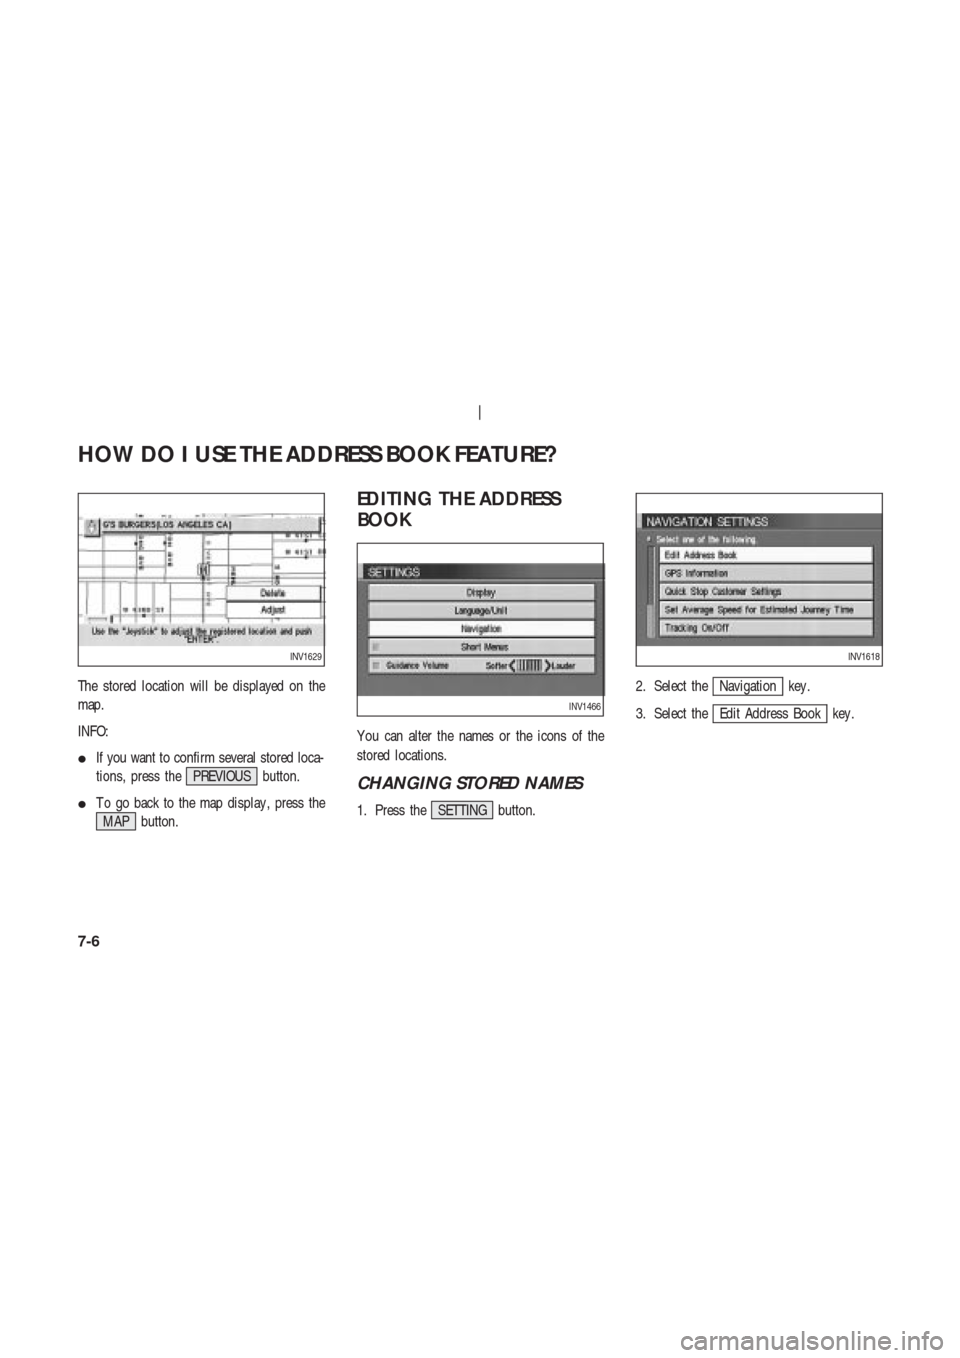
The stored location will be displayed on the
map.
INFO:
�If you want to confirm several stored loca-
tions, press the PREVIOUS button.
�T o go back to the map display , press the
MAP button.
EDITING THE ADDRESS
BOOK
Y ou can alter the names or the icons of the
stored locations.
CHANGING STORED NAMES
1. Press the SETTING button.2. Select the
Navigation key .
3. Select the
Edit Address Book key .
INV1629
INV1466
INV1618
HOW DO I USE THE ADDRESS BOOK FEATURE?
7-6
Page 102 of 174
2. Select theNavigation key .The [NAVIGA TION SETTINGS] screen will be
displayed.
3. Select the
Edit Address Book key .
4. Choose a stored location where you want to
set the icon.5. Select the
Landmark Icon key .
INV1466
INV1618
INV1637
INV1638
HOW DO I USE THE ADDRESS BOOK FEATURE?
7-8
Page 105 of 174
ADJUSTING THE STORED AD-
DRESS BOOK ENTRIES
Y ou can easily adjust the point of the stored
location with the joystick.
1. Press the SETTING button.
2. Select the
Navigation key .The [NAVIGA TION SETTINGS] screen will be
displayed.
3. Select the
Edit Address Book key .4. Choose the
Map key next to the stored
location you want to adjust.
INV1466
INV1618INV1643
HOW DO I USE THE ADDRESS BOOK FEATURE?
7-11
Page 106 of 174
5. Use the joystick to set the new location.
6. Select the
Adjust key .The location is updated after the update mes-
sage is shown. The screen goes back to the
screen displayed in step 4.
INFO:
T o go back to the screen displaying the current
vehicle position, press the MAP button.
DELETING STORED LOCA-
TIONS
Y ou can delete the stored locations you no
longer need from the system memory .
1. Press the SETTING button.2. Select theNavigation key .
INV1644
INV1645
INV1466
INV1618
HOW DO I USE THE ADDRESS BOOK FEATURE?
7-12
Page 110 of 174
SETTING A VOID AREAS
Setting “avoid areas” will give you a route away
from areas you wish to avoid.
INFO:
If the vehicle icon is in the “avoid area”, route
calculation cannot be completed.
1. Press the SETTING button.
2. Select the
Navigation key .3. The display shows the [NAVIGA TION SET -
TINGS] screen.
Select the
Avoid Area Settings key .4. The display shows the [AVOID AREA SET -
TINGS] screen.
Select a key which is not set as an “avoid area”.
INFO:
It is possible to set up to 10 areas to avoid.
INV1466
INV1652INV1653
HOW DO I USE THE AVOID AREA FEATURE?
8-2
Page 113 of 174
SETTING WITH THE SE-
LECTED LOCA TION KEY
When the stored “avoid area” is selected, it can
be renamed or deleted.
RENAMING THE AVOID AREAS
1. Press the SETTING button.
2. Select the
Navigation key .3. The display shows the [NAVIGA TION SET -
TINGS] screen.
Select the
Avoid Area Settings key .4. The display shows the [AVOID AREA SET -
TINGS] screen.
Select a key which is set as an “avoid area”.
INV1466
INV1652INV1662
HOW DO I USE THE AVOID AREA FEATURE?
8-5
![NISSAN 350Z 2004 Z33 Navigation Manual CONFIRMING THE STORED
LOCATIONS
T o confirm that the locations have been stored:
1. Press the SETTING button.
2. Select the
Navigation key .The [NAVIGA TION SETTINGS] screen will be
displayed.
3. Sele](/manual-img/5/668/w960_668-98.png "NISSAN 350Z 2004 Z33 Navigation Manual CONFIRMING THE STORED
LOCATIONS
T o confirm that the locations have been stored:
1. Press the SETTING button.
2. Select the
Navigation key .The [NAVIGA TION SETTINGS] screen will be
displayed.
3. Sele")
![NISSAN 350Z 2004 Z33 Navigation Manual 2. Select theNavigation key .The [NAVIGA TION SETTINGS] screen will be
displayed.
3. Select the
Edit Address Book key .
4. Choose a stored location where you want to
set the icon.5. Select the
Landmar](/manual-img/5/668/w960_668-101.png "NISSAN 350Z 2004 Z33 Navigation Manual 2. Select theNavigation key .The [NAVIGA TION SETTINGS] screen will be
displayed.
3. Select the
Edit Address Book key .
4. Choose a stored location where you want to
set the icon.5. Select the
Landmar")


