Page 1805 of 3870

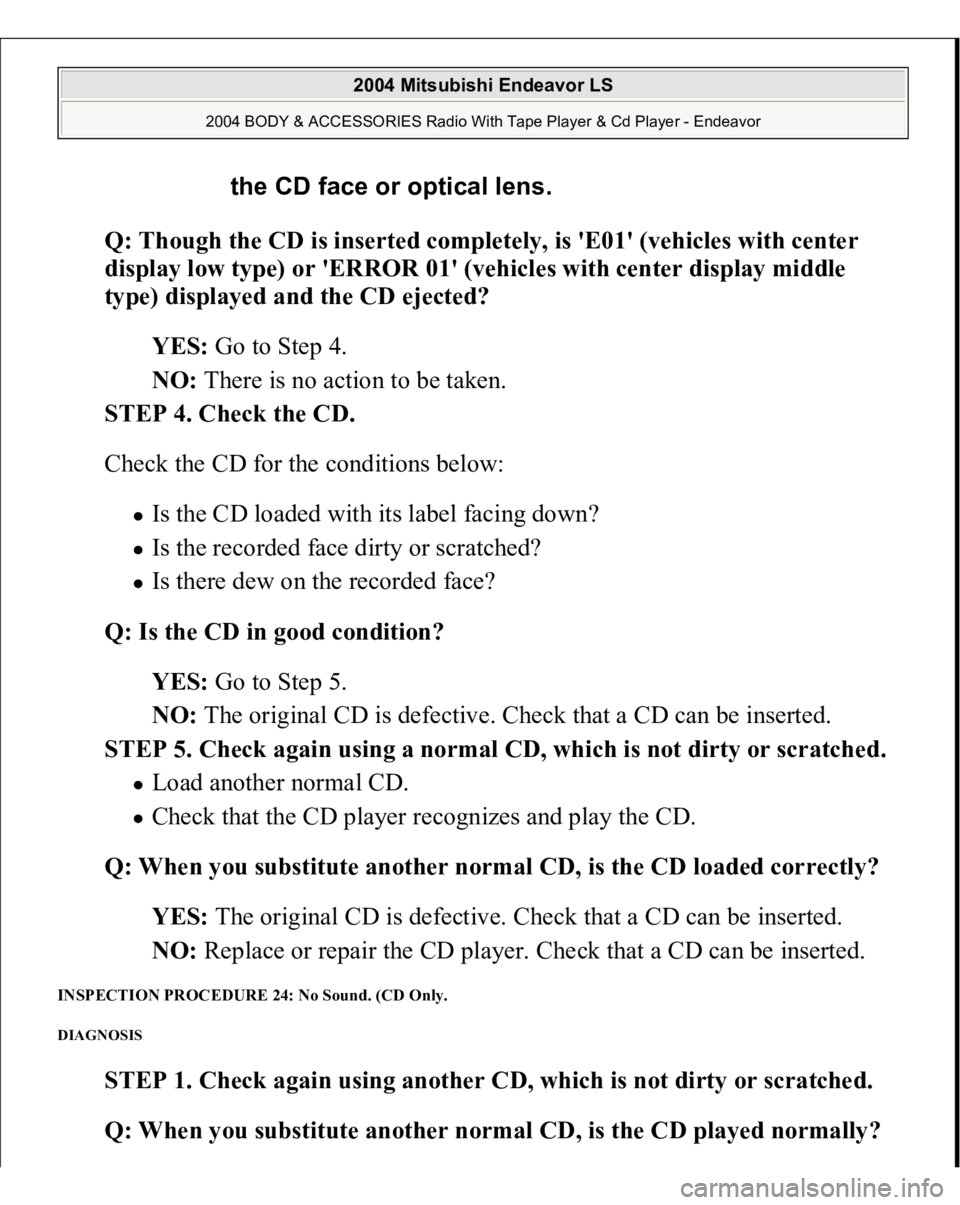
Q: Though the CD is inserted completely, is 'E01' (vehicles with center
display low type) or 'ERROR 01' (vehicles with center display middle
type) displayed and the CD ejected?
YES: Go to Step 4.
NO: There is no action to be taken.
STEP 4. Check the CD.
Check the CD for the conditions below:
Is the CD loaded with its label facing down? Is the recorded face dirty or scratched? Is there dew on the recorded face?
Q: Is the CD in good condition?
YES: Go to Step 5.
NO: The original CD is defective. Check that a CD can be inserted.
STEP 5. Check again using a normal CD, which is not dirty or scratched. Load another normal CD. Check that the CD player recognizes and play the CD.
Q: When you substitute another normal CD, is the CD loaded correctly?
YES: The original CD is defective. Check that a CD can be inserted.
NO: Replace or repair the CD player. Check that a CD can be inserted.
INSPECTION PROCEDURE 24: No Sound. (CD Only. DIAGNOSIS
STEP 1. Check again using another CD, which is not dirty or scratched.
Q: When
you substitute another normal CD, is the CD
played normall
y?
the CD face or optical lens.
2004 Mitsubishi Endeavor LS
2004 BODY & ACCESSORIES Radio With Tape Player & Cd Player - Endeavor
Page 1806 of 3870

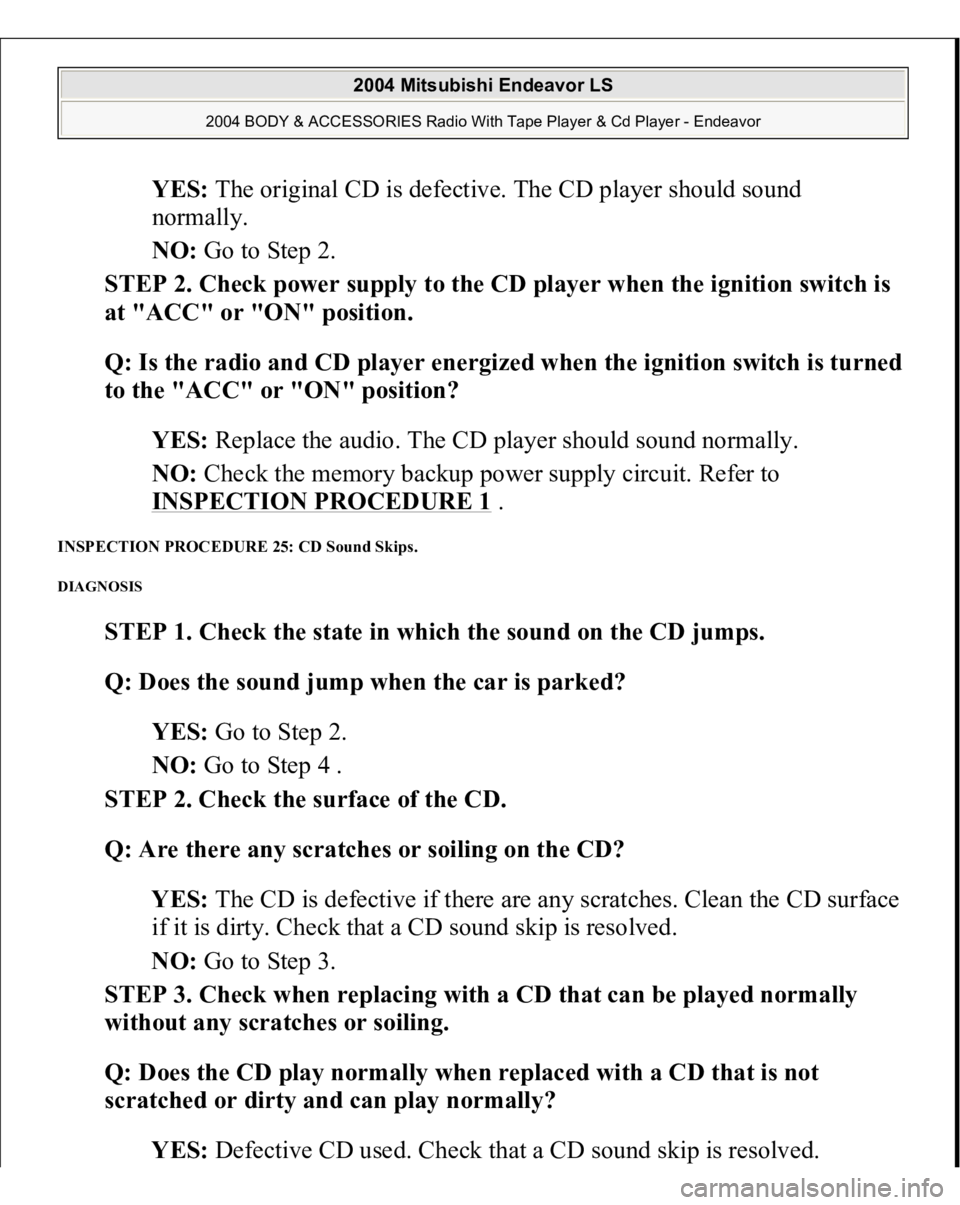
YES: The original CD is defective. The CD player should sound
normally.
NO: Go to Step 2.
STEP 2. Check power supply to the CD player when the ignition switch is
at "ACC" or "ON" position.
Q: Is the radio and CD
player ener
gized when the i
gnition switch is turned
to the "ACC" or "ON" position?
YES: Replace the audio. The CD player should sound normally.
NO: Check the memory backup power supply circuit. Refer to
INSPECTION PROCEDURE 1
.
INSPECTION PROCEDURE 25: CD Sound Skips. DIAGNOSIS
STEP 1. Check the state in which the sound on the CD jumps.
Q: Does the sound jump when the car is parked?
YES: Go to Step 2.
NO: Go to Step 4 .
STEP 2. Check the surface of the CD.
Q: Are there any scratches or soiling on the CD?
YES: The CD is defective if there are any scratches. Clean the CD surface
if it is dirty. Check that a CD sound skip is resolved.
NO: Go to Step 3.
STEP 3. Check when replacing with a CD that can be played normally
without any scratches or soiling.
Q: Does the CD play normally when replaced with a CD that is not
scratched or dirty and can play normally?
YES: Defective CD used. Check that a CD sound ski
p is
resolved.
2004 Mitsubishi Endeavor LS
2004 BODY & ACCESSORIES Radio With Tape Player & Cd Player - Endeavor
Page 1807 of 3870

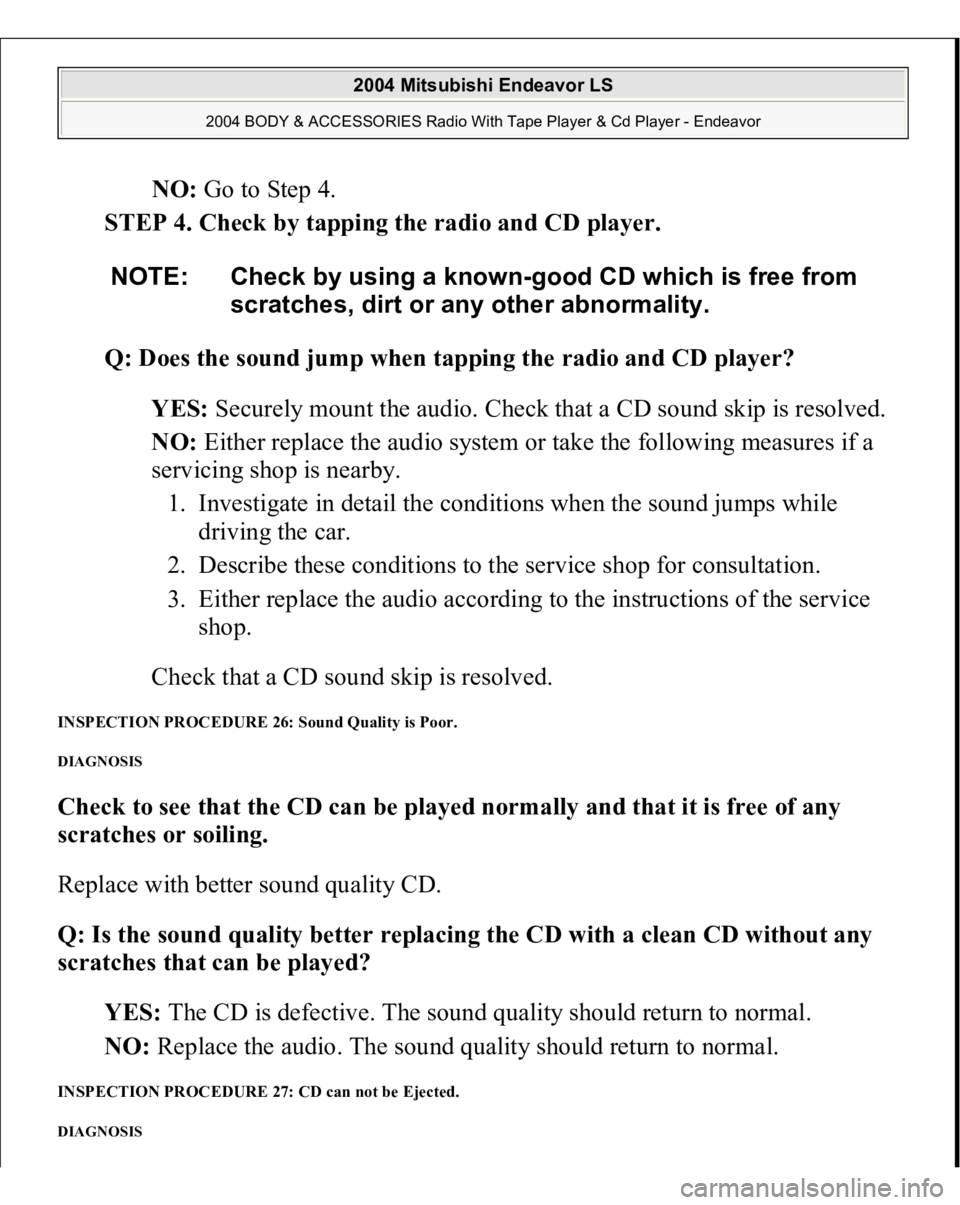
NO: Go to Step 4.
STEP 4. Check by tapping the radio and CD player.
Q: Does the sound jump when tapping the radio and CD player?
YES: Securely mount the audio. Check that a CD sound skip is resolved.
NO: Either replace the audio system or take the following measures if a
servicing shop is nearby.
1. Investigate in detail the conditions when the sound jumps while
driving the car.
2. Describe these conditions to the service shop for consultation.
3. Either replace the audio according to the instructions of the service
shop.
Check that a CD sound skip is resolved.
INSPECTION PROCEDURE 26: Sound Quality is Poor. DIAGNOSIS Check to see that the CD can be played normally and that it is free of any
scratches or soiling.
Replace with better sound quality CD.
Q: Is the sound quality better replacing the CD with a clean CD without any
scratches that can be played?
YES: The CD is defective. The sound quality should return to normal.
NO: Replace the audio. The sound quality should return to normal. INSPECTION PROCEDURE 27: CD can not be Ejected. DIAGNOSIS
NOTE: Check by using a known-good CD which is free from
scratches, dirt or any other abnormality.
2004 Mitsubishi Endeavor LS
2004 BODY & ACCESSORIES Radio With Tape Player & Cd Player - Endeavor
Page 1825 of 3870
Fig. 1: Identifying Special Tools
Courtesy of MITSUBISHI MOTOR SALES OF AMERICA.
VIDEO ENTERTAINMENT SYSTEM DIAGNOSIS TROUBLESHOOTING STRATEGY Use these steps to plan your diagnostic strategy. Follow through with each step to
ensure that you have exhausted all possible methods of finding a combination meter
fault.
1. Gather information from the customer.
2. Verify that the condition described by the customer exists.
3. Find and repair the malfunction by following the symptom chart.
4. Verify that the malfunction has been eliminated. TROUBLE SYMPTOM CHART
2004 Mitsubishi Endeavor LS
2004 BODY & ACCESSORIES Video Entertainment System - Endeavor
Page 1938 of 3870
2004 SUSPENSION
Front - Endeavor
GENERAL DESCRIPTION The front suspension is a McPherson strut with coil spring. The shock absorber is
gas-filled hydraulic double-acting type. CONSTRUCTION DIAGRAM Fig. 1: Front Suspension Construction Diagram
Courtesy of MITSUBISHI MOTOR SALES OF AMERICA.
FRONT SUSPENSION DIAGNOSIS INTRODUCTION TO FRONT SUSPENSION DIAGNOSIS
2004 Mitsubishi Endeavor LS 2004 SUSPENSION Front - Endeavor
2004 Mitsubishi Endeavor LS 2004 SUSPENSION Front - Endeavor
Page 1939 of 3870
If the front suspension is faulty, the vehicle will not run straightforward or noise
will occur. Incorrect wheel alignment, malfunction of strut assembly, stabilizer bar,
coil spring, or worn or out-of-balance tires can cause these problems. FRONT SUSPENSION DIAGNOSIS TROUBLESHOOTING STRATEGY Use these steps to plan your diagnostic strategy. If you follow them carefully, you
will be sure that you have exhausted most of the possible ways to find a front
suspension fault.
1. Gather information from the customer.
2. Verify that the condition described by the customer exists.
3. Find and repair the malfunction by following the Symptom Chart and
Symptom Procedures.
4. Verify malfunction is eliminated. SYMPTOM CHART Fig. 2: Symptom Chart
Courtesy of MITSUBISHI MOTOR SALES OF AMERICA.
SYMPTOM PROCEDURES INSPECTION PROCEDURE 1: Steering Wheel Is Heavy, Vibrates Or Pulls To One Side DIAGNOSIS
STEP 1. Check the tires.
2004 Mitsubishi Endeavor LS 2004 SUSPENSION Front - Endeavor
Page 1940 of 3870
Q: Are the tires in normal condition?
YES: Go to Step 2.
NO: If out of balance, balance the tires as necessary. If excessively worn,
replace the tires as necessary and go to Step 5 .
STEP 2. Check the wheel alignment.
Refer to ON
-VEHICLE SERVICE
.
Q: Is the wheel alignment correct?
YES: Go to Step 3.
NO: Adjust it, then go to Step 5 .
STEP 3. Check the lower arm ball joint.
Q: Is the ball joint in good condition?
YES: Go to Step 4.
NO: Replace the lower arm assembly, then go to Step 5 .
STEP 4. Check the coil spring.
Q: Is the coil spring in good condition?
YES: Go to Step 5.
NO: Replace it, then go to Step 5.
STEP 5. Retest the system.
Q: Is the malfunction eliminated?
YES: The procedure is complete.
NO: Return to Step 1 .
INSPECTION PROCEDURE 2: Excessive Body Rolling DIAGNOSIS
STEP 1. Check for broken or deteriorated stabilizer bar
.
2004 Mitsubishi Endeavor LS 2004 SUSPENSION Front - Endeavor
Page 1941 of 3870
Q: Is the stabilizer bar in good condition?
YES: Go to Step 2.
NO: Replace it, then go to Step 3 .
STEP 2. Check the strut assembly for damage.
Q: Is the strut assembly in good condition?
YES: Go to Step 3.
NO: Replace it, then go to Step 3.
STEP 3. Retest the system.
Q: Is the malfunction eliminated?
YES: The procedure is complete.
NO: Return to Step 1 .
INSPECTION PROCEDURE 3: Poor Ride DIAGNOSIS
STEP 1. Check for improper tire inflation pressure.
Q: Is the tire inflation correct?
YES: Go to Step 2.
NO: Adjust it, then go to Step 4 .
STEP 2. Check for broken or deteriorated coil spring(s).
Q: Are the coil spring(s) broken or deteriorated?
YES: Replace the coil spring(s), then go to Step 4 .
NO: Go to Step 3.
STEP 3. Check for strut assembly damage.
Q: Is the strut assembly damaged?
2004 Mitsubishi Endeavor LS 2004 SUSPENSION Front - Endeavor