Page 57 of 152

55
OVERVIEW REPAIRS OPERATIONCONTROLS DATA INDEX
FUEL GAUGE COOLANT TEMPERATURE GAUGEIn the navigation system
Please also comply with the instruc-
tions in the previous section.<
If the indicator light 1 changes from orange
to red, there are approx. 2.1 gallons /
8 liters of fuel in the tank.
Low temperature The needle is at the bottom or on the right
of the range.
The engine is still cold. Drive at moderate
engine and vehicle speeds.Center positionNormal operating temperature of the
engine.High temperatureAs soon as there is a deviation from the
center position upwards or to the left:
Drive moderately and at low engine speed.
If necessary, switch off the engine and
allow it to cool down.
Checking coolant level, refer to page 100.
1Red indicator lampWhen you switch on the ignition, warning
lamp 1 comes on briefly to confirm that the
system is operational.
Lights up while driving:
Engine is too hot. Switch off the engine
immediately and allow it to cool down.Navigation system option
Coolant temperature warning
lamp in the speedometer lights up
while driving:
Engine is too hot. Switch off the engine
immediately and allow it to cool down.
Page 58 of 152

56
SERVICE INTERVAL DISPLAY CLOCKRemaining distance for serviceThe distance remaining before the next
scheduled service is displayed in miles /
kilometers with the ignition key in position
1 or higher. The display also indicates
whether an engine oil service and/or an
inspection is due.
The onboard computer bases its calcula-
tions of the remaining distance on your
driving style in the period immediately pre-
ceding your data request. The remaining
distance display counts backwards in steps
of 35 miles / 50 km to the next service. A
flashing message and a minus sign in front
of the display that again begins counting
forwards mean that the service interval has
been exceeded.
Please contact your MINI Dealer for an
appointment.
The remaining-distance display disappears
after approx. 5 seconds and changes to the
odometer and trip odometer display.
For more information on the service inter-
val display, refer to page 102.
SettingsFrom ignition key position 1:
Left button: hours
Right button: minutes.
Move forward in increments:
Press the button
or
fast forward:
Press and hold the button.
Changeover from 24-hour to 12-hour
mode:
Press both buttons at the same time for
approx. 5 seconds.
Page 59 of 152

57
OVERVIEW REPAIRS OPERATIONCONTROLS DATA INDEX
ONBOARD COMPUTER
*
Mode selection
With the ignition key in position 1 and higher,
you can use the button in the turn signal indi-
cator lever to retrieve information from the
onboard computer for display in the tachom-
eter. By pressing the button briefly, you can
call up a new function for display.
The displays appear in the following order:
Outside temperature, range, average con-
sumption and current consumption, aver-
age speed and current speed.
Starting with ignition key position 1, the
last active setting is displayed.
If the vehicle is equipped with a navi-
gation system, you will find more
information on the onboard computer in
the navigation system Owner's Manual.<
Outside temperature If the vehicle is equipped with a tachome-
ter, but not with an onboard computer, the
outside temperature is displayed.
You can have the units 6 or 7 set
by your MINI Dealer.<
Ice warning If the outside temperature falls below
approx. 37 7 / +36, the onboard com-
puter automatically switches to the outside
temperature display.
In addition, an acoustic signal can be heard
and the display flashes for a short time.
The ice warning does not exclude the
possibility that surface ice can form
at temperatures above 37 7 / +36, e.g.
on bridges and shaded roads.<
With navigation system option:
The temperature is displayed in the status
line of the navigation system, refer to the
Owner's Manual for the navigation system.Current vehicle speedIf the vehicle is equipped with a tachome-
ter, but not with an onboard computer, the
current vehicle speed is displayed.
With the ignition key in position 1 and
higher, you can use the button in the turn
signal indicator lever to call this up in the
tachometer display. Briefly press the but-
ton to switch the display from the outside
temperature to the current vehicle speed.
Page 60 of 152
58
ONBOARD COMPUTER
*
Range
The onboard computer bases its calcula-
tions for the cruising range on the driving
style and on the remaining fuel in the tank.
If the range displayed is less than
35 miles / 50 km, be sure to refuel;
otherwise engine functions are not guaran-
teed and damage could occur.
consumption Press the button in the turn signal indicator
lever for a longer period.
The displayed average speed value and
consumption value are recalculated.
Any time spent when the vehicle is station-
ary and the engine is shut off is ignored for
the calculation.
You can have an other unit of mea-
surement set by your MINI Dealer.<
Current fuel consumption The current consumption value is calcu-
lated and displayed on the basis of your
driving style.
You can have a different unit of mea-
surement set by your MINI Dealer.<
Page 61 of 152

*
The concept
This system optimizes driving stability and
traction, especially when just starting off,
when accele")
59
OVERVIEW REPAIRS OPERATIONCONTROLS DATA INDEX
ALL SEASON TRACTION CONTROL (ASC)
*
The concept
This system optimizes driving stability and
traction, especially when just starting off,
when accelerating or when cornering.
ASC recognizes the danger present in trac-
tion loss and will increase driving stability
and traction by reducing the engine's out-
put and, if necessary, by applying the
brakes to the front wheels.
ASC is operational each time you start the
engine. It contains the following functions:
>Antilock Brake System (ABS)
>Cornering Brake Control (CBC)
>Electronic Brake Force Distribution (EBD).
The laws of physics cannot be
repealed, even with ASC. An appropri-
ate driving style always remains the
responsibility of the driver. Avoid using the
additional safety margin provided by the
system as an excuse for taking unnecessary
risks.
Do not make any modifications to the ASC
system. Allow only authorized technicians
to perform service procedures on the
ASC.<
Indicator lamp
The indicator lamp in the display
elements will go out shortly after
the ignition has been switched on,
refer to pages 16, 17.
If the indicator lamp flashes:
ASC controls the drive and braking forces.
If the indicator lamp fails to go out after
the engine is started, or if it comes on dur-
ing normal driving and stays on:
The system is defective or was turned off
using the button.
The described stabilizing operations are no
longer available.
You can, however, drive the vehicle nor-
mally without ASC.
In the event of a malfunction, please see
your MINI Dealer, refer to pages 16, 17.
To switch off the ASCBriefly press the switch.
The indicator lamp stays lit.
When driving with snow chains or to 'rock
free' in snow, it can be helpful to switch off
the ASC for a brief period.
To maintain vehicle stability, always
drive with the ASC switched on
whenever possible.
Indicator lamp goes out.
Page 62 of 152

*
The concept
This system optimizes driving stability and
traction, especially when just starting off,
when accelerating or when cornering. It
also maintains dri")
60
DYNAMIC STABILITY CONTROL (DSC)
*
The concept
This system optimizes driving stability and
traction, especially when just starting off,
when accelerating or when cornering. It
also maintains driving stability even in criti-
cal driving situations.
DSC recognizes unstable vehicle conditions,
such as understeering or oversteering, and,
as far as is possible within the laws of phys-
ics, helps keep the vehicle on a steady
course by reducing the rpms and by brake
applications to the individual wheels.
The DSC is operational every time you start
the engine. It contains the following func-
tions:
>All Season traction Control (ASC)
>Antilock Brake System (ABS)
>Cornering Brake Control (CBC)
>Electronic Brake Force Distribution (EBD).
The laws of physics cannot be
repealed, even with DSC. An appropri-
ate driving style always remains the respon-
sibility of the driver. Avoid using the addi-
tional safety margin provided by the system
as an excuse for taking unnecessary risks.
Do not make any modifications to the DSC
system. Allow only authorized technicians to
perform service procedures on the DSC.<
Indicator lamp
The indicator lamp in the display
elements will go out shortly after
the ignition has been switched on,
refer to pages 16, 17.
If the indicator lamp flashes:
DSC controls the drive and braking forces.
If the indicator lamp fails to go out after
the engine is started, or if it comes on dur-
ing normal driving and stays on:
The system is defective or was turned off
using the button.
The described stabilizing operations are no
longer available.
The vehicle will remain completely opera-
tional, however, without DSC.
In the event of a malfunction, please see
your MINI Dealer, refer to pages 16, 17.
To switch off the DSCBriefly press the switch.
The indicator lamp stays lit.
When driving with snow chains, it may be
effective to switch off the DSC for a brief
period.
To maintain stability, always drive
with the DSC switched on whenever
possible.
Indicator lamp goes out.
Page 63 of 152
 The concept The ABS keeps the wheels from locking
while braking, thereby enhancing active
driving safety.
ABS also inclu")
61
OVERVIEW REPAIRS OPERATIONCONTROLS DATA INDEX
ANTILOCK BRAKE SYSTEM (ABS) The concept The ABS keeps the wheels from locking
while braking, thereby enhancing active
driving safety.
ABS also includes Electronic Brake Force
Distribution (EBD).Braking with ABSTo achieve optimal performance from ABS
when reacting to critical situations, you
should apply maximum pressure to the
brake pedal – panic stop.
Since the vehicle remains maneuverable,
you can still go around any obstacles with
the smallest possible steering movements.
Pulsation of the brake pedal in conjunction
with the sound of hydraulic regulation indi-
cates to you that you are driving at the limit
and reminds you to readapt your vehicle's
speed to road surface conditions.
Cornering Brake Control (CBC)Cornering Brake Control (CBC) is an
enhancement of ABS that improves vehicle
stability especially when braking during
cornering.
When the vehicle is being braked, the rear
wheels are relieved from load, and this can
cause the vehicle to oversteer in curves.
CBC counteracts this by making use of uni-
lateral braking pressure to generate a stabi-
lizing counter torque while braking outside
of the ABS control range.Electronic Brake Force Distribution
(EBD)In order to achieve a short braking distance
when the vehicle is fully loaded, your vehi-
cle is equipped with relatively large brakes
on the rear axle. EBV continuously moni-
tors the speeds of the rear wheels in rela-
tion to the front wheels in order to prevent
overbraking of the rear wheels even when
the vehicle has a light load. If the rear
wheels tend to lock, the EBV controls their
slip, ensuring operating stability.
Page 64 of 152

62
FLAT TIRE MONITOR The conceptAs you drive, the Flat Tire Monitor keeps
track of the tire inflation pressure in all four
tires. The system alerts you when there is a
substantial pressure loss in one of the tires
relative to another.
The tire inflation pressures are monitored
based on the speeds of the four wheels in
relation to one another. A flat tire is
detected as the result of differences in cer-
tain speed ratios, and a warning is gener-
ated.System requirementsSo that the system can 'familiarize' itself
with the correct inflation pressure, please
do the following:
1. Check the tire inflation pressure in all
tires
2. Compare them with the inflation pres-
sure table, refer to page 88, and adjust
the pressures if necessary
3. Initializing the system.
System limitations
The Flat Tire Monitor cannot alert you
to severe and sudden tire damage
caused by external factors, nor does it
detect the gradual and minor loss of pres-
sure in all four tires.<
On the other hand, the following situations
could lead to a delayed detection of pres-
sure loss or to the system not functioning:
>Driving on snow-covered or slippery
roads
>Performance-oriented driving: slip at the
drive wheels, high rates of lateral accel-
eration
>When driving with snow chains, false
warnings and undetected pressure loss
may occur
>When driving with a space-saver spare
tire, the Flat Tire Monitor cannot func-
tion.
Initializing the system
The system must be re-initialized
immediately after changing a tire
and wheel, or after correcting the pressure
in any tire. This requires a bit of driving.<
1. Before a journey, start the engine, but do
not start driving
2. Press the button long enough for the
indicator lamp in the display elements to
light up for a few seconds
3. Drive off.
It takes a few minutes before the Flat Tire
Monitor can detect a flat tire and issue an
alert.
Do not initialize the system if you are
driving with snow chains or a space-
saver spare tire.<
 1
1 2
2 3
3 4
4 5
5 6
6 7
7 8
8 9
9 10
10 11
11 12
12 13
13 14
14 15
15 16
16 17
17 18
18 19
19 20
20 21
21 22
22 23
23 24
24 25
25 26
26 27
27 28
28 29
29 30
30 31
31 32
32 33
33 34
34 35
35 36
36 37
37 38
38 39
39 40
40 41
41 42
42 43
43 44
44 45
45 46
46 47
47 48
48 49
49 50
50 51
51 52
52 53
53 54
54 55
55 56
56 57
57 58
58 59
59 60
60 61
61 62
62 63
63 64
64 65
65 66
66 67
67 68
68 69
69 70
70 71
71 72
72 73
73 74
74 75
75 76
76 77
77 78
78 79
79 80
80 81
81 82
82 83
83 84
84 85
85 86
86 87
87 88
88 89
89 90
90 91
91 92
92 93
93 94
94 95
95 96
96 97
97 98
98 99
99 100
100 101
101 102
102 103
103 104
104 105
105 106
106 107
107 108
108 109
109 110
110 111
111 112
112 113
113 114
114 115
115 116
116 117
117 118
118 119
119 120
120 121
121 122
122 123
123 124
124 125
125 126
126 127
127 128
128 129
129 130
130 131
131 132
132 133
133 134
134 135
135 136
136 137
137 138
138 139
139 140
140 141
141 142
142 143
143 144
144 145
145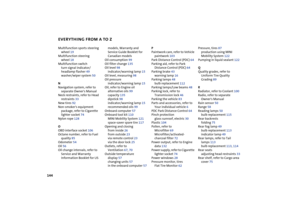 146
146 147
147 148
148 149
149 150
150 151
151