Page 65 of 120

Reference
At a glance
Controls
Driving tips
Mobility
63
Outside air/Automatic recirculated
air control AUC/recirculated air
mode
You can respond to unpleasant
external odors or pollutants by
temporarily stopping the flow of
outside air. The system then
recirculates the air currently within the
vehicle.
By repeatedly pressing the button, you can
select one of three different operating
modes.
>Indicator lamps off: outside air flows
into the vehicle
>Left-hand indicator lamp on, AUC
mode: the system detects pollutants in
the outside air and responds by deacti-
vating the outside airflow as required.
The system then recirculates the air
currently within the vehicle. Depending
on air quality requirements, the system
automatically switches between out-
side air supply and recirculation of the
air already within the vehicle
>Right-hand indicator lamp on: the flow
of outside air is permanently blocked.
The system recirculates the air already
within the vehicle.
If the windows fog over in the recircu-
lated air mode, switch this mode off
and increase the air supply as required. Do
not use the recirculated-air mode continu-
ously over a long period of time as this
would reduce the air quality in the interior
of the vehicle.<
Rear window defroster
The indicator lamp lights up when
the rear window defroster is
active. The rear window defroster
switches off automatically.
Ventilation
You can adjust the blower controls for the
upper body area to obtain the optimum air-
flow rates and directions for your personal
requirements:
1Rotary dials for opening and closing the
vents at any setting desired
2Sliders for adjusting airflow direction
Microfilter/activated-charcoal filter
The built-in microfilter removes dust and
pollen from the incoming air. The activated-
charcoal filter provides additional protec-
tion by filtering gaseous pollutants from the
outside air. Your BMW center replaces this
combined filter as a standard part of your
scheduled maintenance. A substantial
reduction in airflow indicates that the filter
needs to be replaced earlier.
Page 66 of 120

Interior conveniences
64
Interior conveniences
Glove compartment
To open
Press the two push buttons together.
To close
Swing the door up.
To prevent injury in the event of an
accident, close the glove compart-
ment immediately after use.<
Storage compartments
Storage compartment between
backrests
To open
1.Press button; see arrow 1
2.Swing the cover downward.
To close
Swing the door up.
Locking/unlocking
The storage compartment between the
backrests is automatically locked and
unlocked with the central locking system.
Releasing manually
In the event of an electrical malfunction of
the central locking system, you can manu-
ally unlock the storage compartment
between the seats.
1.Pull on the cord in the rear luggage
compartment panel.
The storage compartment between the
seats unlocks
2.Press button; see arrow 1.
Other compartments and nets*
You will find additional storage compart-
ments in the front doors and in the center
console.
Depending on the particular version, the
vehicle may also be equipped with two
storage compartments behind the seats.
A net
* is located on the passenger side
along the center console.
Page 67 of 120

Reference
At a glance
Controls
Driving tips
Mobility
65
Beverage holder
A beverage holder is located on either side
beneath the air outlets.
1.Press the trim piece beneath the air
outlets; see arrow 1
2.Place the beverage into the holder
3.Adjust the holder to fit the size of the
beverage container; see arrow 2.
Do not place glass containers into the
beverage holders, as this increases
the risk of injury in the event of an acci-
dent.<
Preparations for the cellular
phone*
Hands-free system
In vehicles with telephone preparation, the
cover for the hands-free microphone is
located on the trim of the steering column.
For further information on the cellular
phone, refer to the Owner's Manual for the
telephone.
Ashtray*
To empty
1.Open cover
2.Pull out ashtray 1.
Cigarette lighter
Press in lighter 2. As soon as the lighter
springs back out, it can be removed.
Hold or touch the hot cigarette lighter
by the knob only. Holding or touching
it in other areas could result in burns.
The cigarette lighter remains operational
even when the ignition key has been
removed. For this reason, children should
never be left in the vehicle unattended.<
Cigarette lighter socket
This can be used for attaching power sup-
plies for flashlights, car vacuum cleaners
and other similar appliances up to a rating
of approx. 200 watts at 12 volts.
Do not damage the socket by insert-
ing plugs of a different shape or
size.<
Page 68 of 120
Page 69 of 120
Driving tips
Driving tips provides you with information
you will need in certain driving situations
and when using special operating modes.
Page 70 of 120

Special operating instructions
68
Special operating instructions
Break-in procedures
To ensure that your vehicle provides maxi-
mum economy throughout a long service
life, we request that you observe the fol-
lowing:
Engine and differential
Up to 1,200 miles / 2,000 km:
Drive at varying engine and road speeds,
but do not exceed the following engine or
road speed:
4,500 rpm / 4,500/min or
100 mph / 160 km/h.
Obey your local and state maximum speed
limits.
Refrain from using full throttle and avoid
pressing the accelerator beyond the kick-
down point.
After you have driven 1,200 miles /
2,000 km, you can gradually increase the
engine or road speeds.
You should also comply with these break-in
procedures if the engine or differential is
replaced later in the course of the vehicle's
service life.
Sequential manual gearbox SMG
Up to 1,200 miles / 2,000 km:
Avoid using the acceleration assistant dur-
ing the vehicle's break-in period.
Tires
Due to technical factors associated with
their manufacture, tires do not achieve their
full traction potential until an initial break-in
period has elapsed. You should therefore
drive with extra caution during the first
200 miles / 300 km.
Obey your local and state maximum speed
limits.
When the vehicle is operated on wet
or slushy roads, a wedge of water
may form between the tire and the road surface. This phenomenon is referred to as
hydroplaning and can lead to partial or
complete loss of traction, vehicle control
and braking effectiveness. Reduce your
speed on wet roads.<
Brake system
Approx. 300 miles / 500 km must elapse
before the brake pads and rotors achieve
their optimal surface and wear pattern.
To break in the separate parking brake
drums, apply the parking brake lightly when
coasting to a standstill – at a traffic signal,
for instance; use caution to avoid posing a
danger to other road users.
To avoid corrosion, repeat this procedure
from time to time.
The brake lamps do not come on when the
parking brake is set.
Vacuum for the brake system servo
unit on your BMW is available only
when the engine is running. When you
move the car with the engine off, e.g. by
towing, substantially higher levels of pedal
force will be required to brake the vehicle.<
Clutch
The clutch will achieve its optimal function-
ality after approx. 300 miles / 500 km. Shift
gears carefully during the break-in period.
Page 71 of 120

Reference
At a glance
Controls
Driving tips
Mobility
69
Driving notes
Parking the vehicle
Condensation forms in the air conditioner
system during operation, which then exits
under the vehicle. Traces of condensed
water on the ground underneath the vehi-
cle are thus normal.
Brakes
Do not drive with your foot resting on
the brake pedal. Even light but con-
sistent pedal pressure can lead to high
temperatures, brake wear and possibly
even brake failure.
Hydroplaning
When driving on wet or slushy roads,
reduce vehicle speed. If you do not, a
wedge of water may form between the tires
and the road surface. This phenomenon
can lead to partial or complete loss of trac-
tion, vehicle control and braking effective-
ness.<
Driving through water
Do not drive through water on the
road if it is deeper than 1 ft / 30 cm,
and then only at walking speed. Otherwise,
the vehicle's engine, the electrical systems
and the transmission may be damaged.<
High temperatures
High temperatures occur with every
vehicle equipped with a catalytic con-
verter. Heat shields are installed adjacent
to some sections of the exhaust system.
Never remove these shields; do not apply
undercoating to their surfaces. When driv-
ing, standing at idle and parking the vehi-
cle, take care to avoid contact between the
hot exhaust system and flammable materi-
als, e.g. hay, leaves, grass, etc. Such con-
tact could lead to a fire, resulting in serious
personal injury and property damage.<
Brake system
Indicator lamp
The indicator lamp lights up
although the parking brake is not
engaged:
Check the brake fluid level. It is very impor-
tant that you follow the instructions on
page 85 before driving on.
Disc brakes
Corrosion
Limited vehicle use, extended periods with
the vehicle parked or in storage, and oper-
ating conditions in which braking is
restricted to gentle, low-pressure applica-
tions will all increase the tendency for cor-
rosion to form on the rotors and contamina-
tion to accumulate on the brake pads. This
occurs because the minimal pressure
which must be exerted by the pads to clean
the rotors by brake applications is not
reached.
If the brake rotors are corroded, they will
tend to respond to braking with a pulsating
effect which even extended application will
fail to cure.
Wet roads
When driving in heavy rain and on wet
roads, it is useful to apply light pressure
to the brake pedal every few miles. Watch
traffic conditions to ensure that this maneu-
ver does not endanger other road users.
The resulting heat dries the brake rotors
and brake pads. Immediate braking control
is then available if necessary.
Inclines
Extended or steep mountain descents
should be driven in the gear or drive posi-
tion in which only minimal periodic brake
application is required. This helps avoid
placing excessive loads on the brake sys-
tem. Observe the maximum allowable
engine speed when doing so; refer to
page 48.
Page 72 of 120

Special operating instructions
70 Do not coast with the clutch
depressed or with the transmission or
selector lever in Neutral. Do not coast with
the engine switched off. Otherwise the
engine provides no braking effect and there
is no power-assist for braking or steering
when the engine is off.<
Brake pads
The yellow indicator lamp for the
brake pads lights up:
Have the condition of the brake
pads inspected.
For your own safety: use brake pads
which the manufacturer has approved
for your specific vehicle model. The manu-
facturer cannot evaluate non-approved
brake pads to determine if they are suitable
for use, and therefore cannot ensure the
operating safety of the vehicle in the event
of their use.<
Cargo loading
Avoid overloading the vehicle so that
the permitted load on the tires is not
exceeded. Otherwise, overheating and
inner damage to the tires may result. The
ultimate result can assume the form of a
sudden air loss.<
Determining the maximum load
1.Locate the following statement on your
vehicle's placard
*:
The combined weight of occu-
pants and cargo should never
exceed XXX kg or YYY lbs; otherwise
damage to the vehicle and unstable
driving conditions could result.<2.Determine the combined weight of the
driver and passenger that will be riding
in your vehicle
3.Substract the combined weight of the
driver and passenger from XXX kilo-
grams or YYY pounds
4.The resulting figure equals the available
amount of cargo and luggage load
capacity.
For example, if the XXX amount equals
551 lbs. and there will be two 150 lbs.
passengers in your vehicle, the amount
of available cargo and luggage load
capacity is 251 lbs.
551 lbs. minus 300 lbs. = 251 lbs.
5.Determine the combined weight of lug-
gage and cargo being loaded on the
vehicle. That weight may not safely
exceed the available cargo and luggage
load capacity calculated in Step 4.
Load
The permissible load is the sum of the
occupants' weights and the weight of the
cargo. The greater the weight of the occu-
pants, the less cargo can be transported.
Stowing cargo
>Load heavy cargo as far forward as
possible, directly behind the luggage
compartment partition, and as low as
possible
>Cover sharp edges and corners.
To avoid damaging the rear of the
backrest or the rear interior trim
panel, do not stow heavy cargo or cargo
with sharp edges and corners behind the
seats.
In addition, large and bulky cargo stowed
 1
1 2
2 3
3 4
4 5
5 6
6 7
7 8
8 9
9 10
10 11
11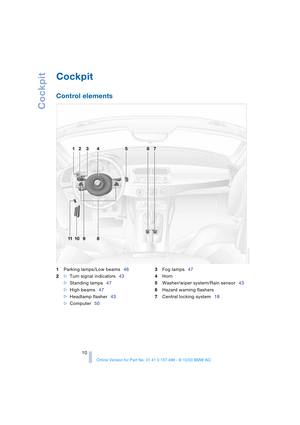 12
12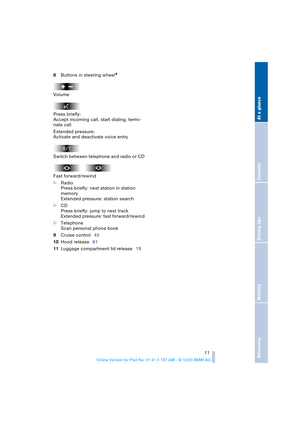 13
13 14
14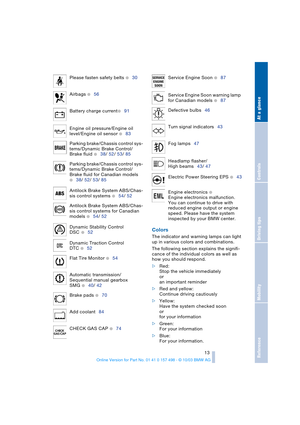 15
15 16
16 17
17 18
18 19
19 20
20 21
21 22
22 23
23 24
24 25
25 26
26 27
27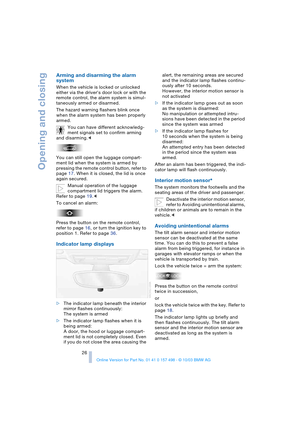 28
28 29
29 30
30 31
31 32
32 33
33 34
34 35
35 36
36 37
37 38
38 39
39 40
40 41
41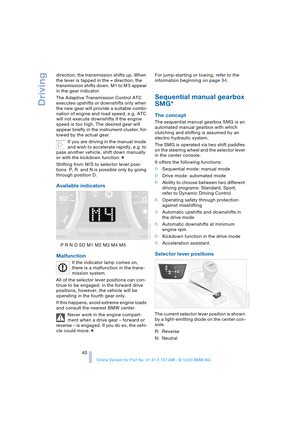 42
42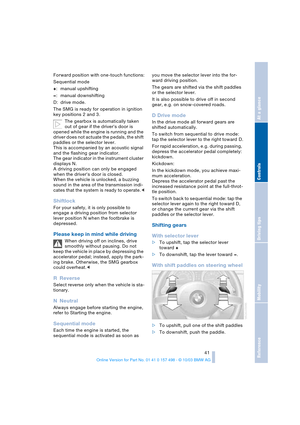 43
43 44
44 45
45 46
46 47
47 48
48 49
49 50
50 51
51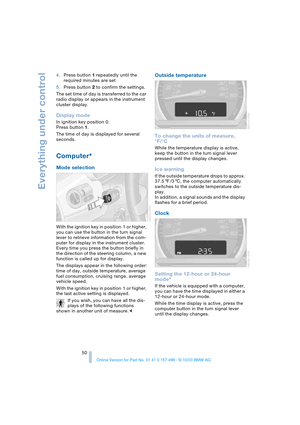 52
52 53
53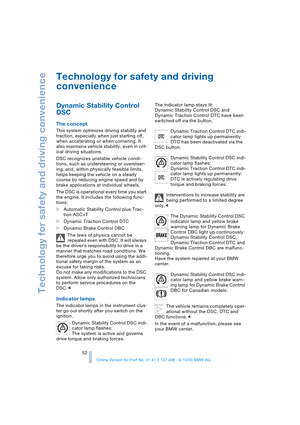 54
54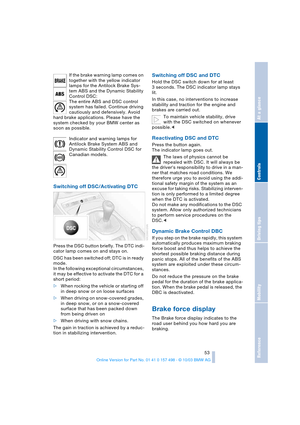 55
55 56
56 57
57 58
58 59
59 60
60 61
61 62
62 63
63 64
64 65
65 66
66 67
67 68
68 69
69 70
70 71
71 72
72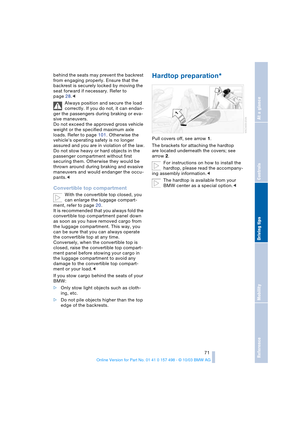 73
73 74
74 75
75 76
76 77
77 78
78 79
79 80
80 81
81 82
82 83
83 84
84 85
85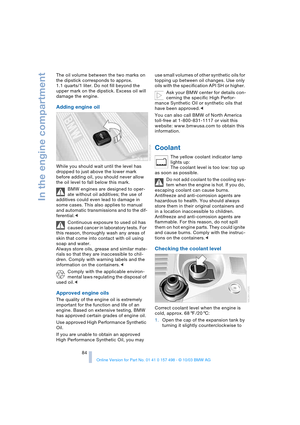 86
86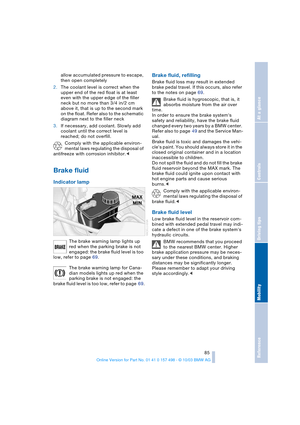 87
87 88
88 89
89 90
90 91
91 92
92 93
93 94
94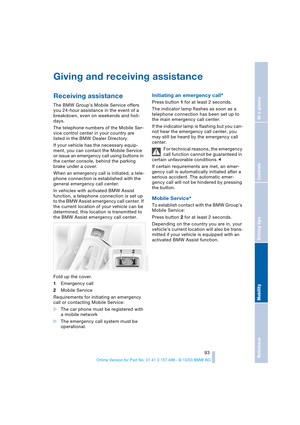 95
95 96
96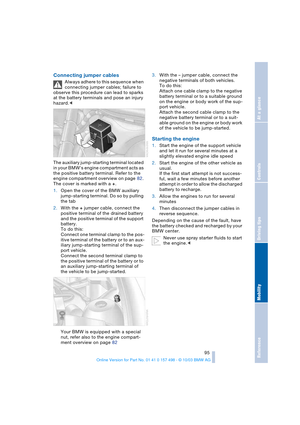 97
97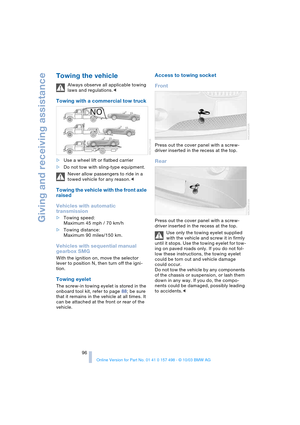 98
98 99
99 100
100 101
101 102
102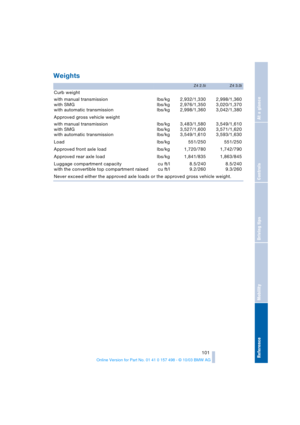 103
103 104
104 105
105 106
106 107
107 108
108 109
109 110
110 111
111 112
112 113
113 114
114 115
115 116
116 117
117 118
118 119
119
