2004 BMW Z4 ROADSTER 3.0I interior lights
[x] Cancel search: interior lightsPage 28 of 120

Opening and closing
26
Arming and disarming the alarm
system
When the vehicle is locked or unlocked
either via the driver's door lock or with the
remote control, the alarm system is simul-
taneously armed or disarmed.
The hazard warning flashers blink once
when the alarm system has been properly
armed.
You can have different acknowledg-
ment signals set to confirm arming
and disarming.<
You can still open the luggage compart-
ment lid when the system is armed by
pressing the remote control button, refer to
page 17. When it is closed, the lid is once
again secured.
Manual operation of the luggage
compartment lid triggers the alarm.
Refer to page 19.<
To cancel an alarm:
Press the button on the remote control,
refer to page 16, or turn the ignition key to
position 1. Refer to page 36.
Indicator lamp displays
>The indicator lamp beneath the interior
mirror flashes continuously:
The system is armed
>The indicator lamp flashes when it is
being armed:
A door, the hood or luggage compart-
ment lid is not completely closed. Even
if you do not close the area causing the alert, the remaining areas are secured
and the indicator lamp flashes continu-
ously after 10 seconds.
However, the interior motion sensor is
not activated
>If the indicator lamp goes out as soon
as the system is disarmed:
No manipulation or attempted intru-
sions have been detected in the period
since the system was armed
>If the indicator lamp flashes for
10 seconds when the system is being
disarmed:
An attempted entry has been detected
in the period since the system was
armed.
After an alarm has been triggered, the indi-
cator lamp will flash continuously.
Interior motion sensor*
The system monitors the footwells and the
seating areas of the driver and passenger.
Deactivate the interior motion sensor,
refer to Avoiding unintentional alarms,
if children or animals are to remain in the
vehicle.<
Avoiding unintentional alarms
The tilt alarm sensor and interior motion
sensor can be deactivated at the same
time. You can do this to prevent a false
alarm from being triggered, for instance in
garages with elevator ramps or when the
vehicle is transported by train.
Lock the vehicle twice = arm the system:
Press the button on the remote control
twice in succession,
or
lock the vehicle twice with the key. Refer to
page 18.
The indicator lamp lights up briefly and
then flashes continuously. The tilt alarm
sensor and the interior motion sensor are
deactivated as long as the system is
armed.
Page 61 of 120

Reference
At a glance
Controls
Driving tips
Mobility
59
Air distribution
You can direct airflow onto the
windows , toward the upper
body and into the footwell .
All intermediate settings are pos-
sible.
Air supply/blower
You can set the blower to 8 differ-
ent levels. Both heating and ven-
tilation become more effective as
the air supply rate is increased.
Turn the rotary control toward zero:
The blower and the heating are turned off,
and the air supply is stopped.
Temperature
In order to increase the tempera-
ture of the passenger compart-
ment, turn to the right toward the
red zone.
Air conditioning
The air is cooled and dehumidi-
fied and – depending on the tem-
perature setting – rewarmed.
Depending on the weather, the
windshield may fog over briefly when the
engine is started.
Condensation forms during operation
of the air conditioning system, which
then exits under the vehicle. Traces of con-
densed water on the ground underneath
the vehicle are thus normal.<
Outside-air/recirculated-air mode
If there are unpleasant odors in
the outside air, you can tempo-
rarily block the supply of incom-
ing air. The system then recircu-
lates the air currently within the vehicle.
If the windows fog over in the recircu-
lated air mode, switch this mode off
and increase the air supply as required. Do
not use the recirculated-air mode continu-
ously over a long period of time as this
would otherwise reduce the air quality in
the interior of the vehicle.<
Rear window defroster
The indicator lamp lights up when
the rear window defroster is
active. The rear window defroster
switches off automatically.
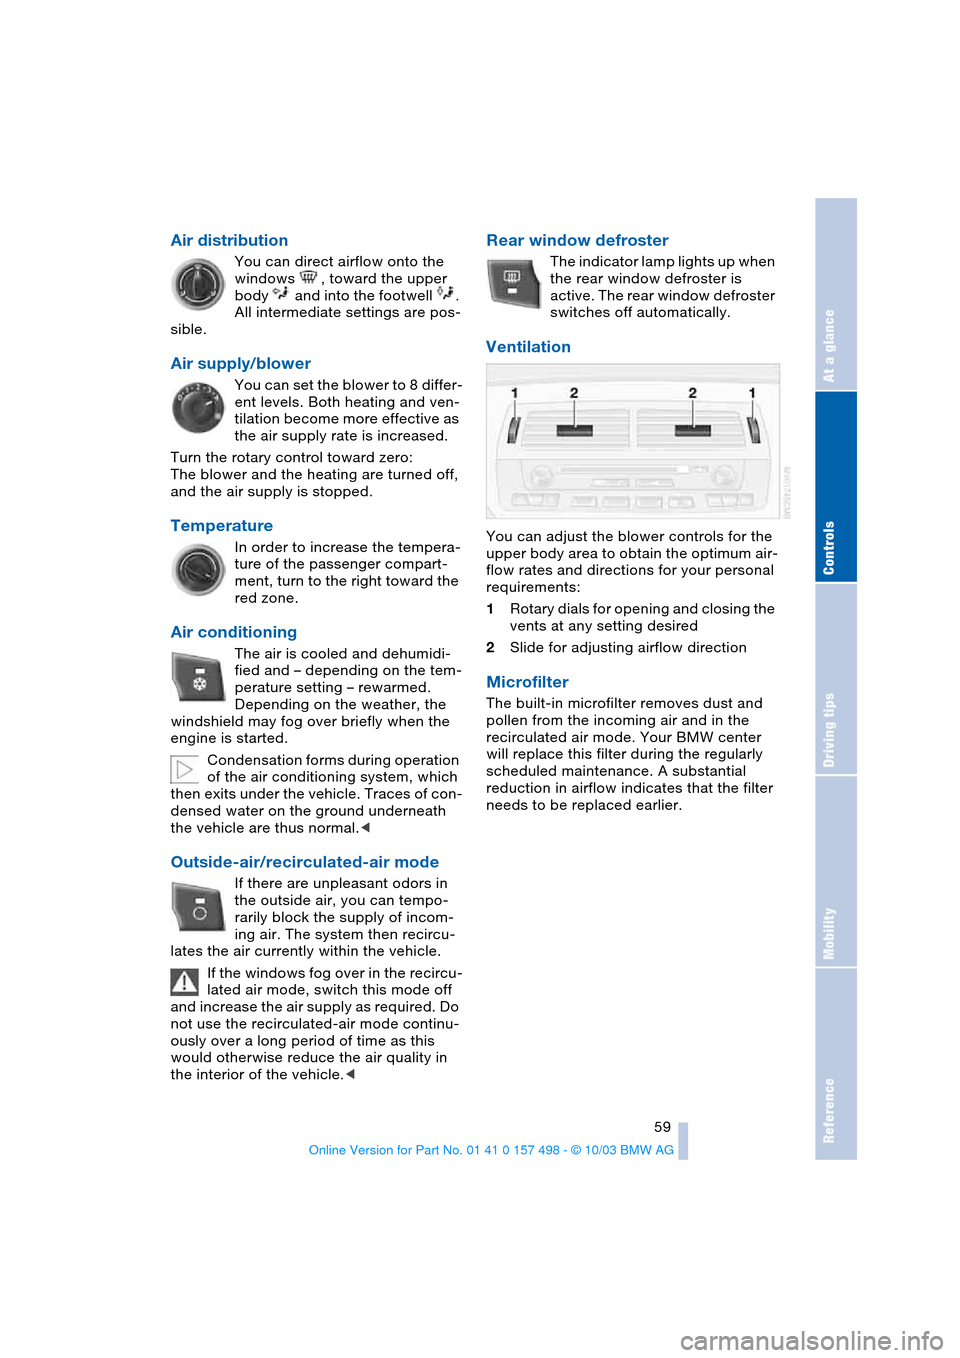
Ventilation
You can adjust the blower controls for the
upper body area to obtain the optimum air-
flow rates and directions for your personal
requirements:
1Rotary dials for opening and closing the
vents at any setting desired
2Slide for adjusting airflow direction
Microfilter
The built-in microfilter removes dust and
pollen from the incoming air and in the
recirculated air mode. Your BMW center
will replace this filter during the regularly
scheduled maintenance. A substantial
reduction in airflow indicates that the filter
needs to be replaced earlier.
Page 64 of 120

Controlling the climate for pleasant driving
62
Tips for pleasant driving
Use the automatic system – switch on with
AUTO button 6. Select the desired interior
temperature.
Detailed setting options are described for
you below.
Automatic air distribution and supply
The AUTO program assumes the
adjustment of the air distribution
and air supply for you and in addi-
tion adapts the temperature to
external influences, summer or winter, to
meet preferences you can specify.
In the AUTO program, the air conditioning
mode is also turned on at the same time.
The AUTO program functions only to
a limited extent when the convertible
top is open.<
Individual air distribution
You yourself can direct airflow
onto the windows , toward the
upper body and into the foot-
well . The arrow lights up. The
automatic air supply remains unchanged.
All intermediate settings are possible. By
pressing the AUTO button, you can reacti-
vate the air distribution.
Temperature
The interior temperature that
appears on the display panel is a
general figure intended for refer-
ence purposes. When you start
the vehicle, the system ensures that the
selected temperature is reached as quickly
as possible, regardless of the season. It
then maintains this temperature.
Air supply/blower
You can set the blower through
an infinitely variable range of
speeds. This shuts off the auto-
matic air supply. The arrow lights
up. The automatic air distribution remains
unchanged. You can reactivate the auto-
matic air supply by pressing the AUTO but-
ton.When you turn the rotary control toward
zero: the blower, heating and air condi-
tioner are switched off, and the air supply is
stopped. You can reactivate the system by
turning the control toward the right again.
To defrost windows and remove
condensation
This program quickly removes ice
and condensation from the wind-
shield and the side windows.
Maximum cooling
Above an outside temperature of
417/+56 and with the engine
running, you achieve a maximum
cooling effect as quickly as possi-
ble. At the same time, the air conditioning is
turned on.
The temperature is set to the lowest possi-
ble value. The system switches into the
recirculated air mode and air flows at max-
imum blower speed from the air outlets
only. Therefore, the air outlets must always
be open when you select this program.
Air conditioning
The air is cooled and dehumidi-
fied and, depending on the tem-
perature setting, rewarmed.
Depending on the weather, the
windshield may fog over briefly when the
engine is started.
The air conditioning system is automati-
cally switched on when you use the AUTO
program.
Condensation forms during operation
of the air conditioning system, which
then exits under the vehicle. Traces of con-
densed water on the ground underneath
the vehicle are thus normal.<
Page 65 of 120

Reference
At a glance
Controls
Driving tips
Mobility
63
Outside air/Automatic recirculated
air control AUC/recirculated air
mode
You can respond to unpleasant
external odors or pollutants by
temporarily stopping the flow of
outside air. The system then
recirculates the air currently within the
vehicle.
By repeatedly pressing the button, you can
select one of three different operating
modes.
>Indicator lamps off: outside air flows
into the vehicle
>Left-hand indicator lamp on, AUC
mode: the system detects pollutants in
the outside air and responds by deacti-
vating the outside airflow as required.
The system then recirculates the air
currently within the vehicle. Depending
on air quality requirements, the system
automatically switches between out-
side air supply and recirculation of the
air already within the vehicle
>Right-hand indicator lamp on: the flow
of outside air is permanently blocked.
The system recirculates the air already
within the vehicle.
If the windows fog over in the recircu-
lated air mode, switch this mode off
and increase the air supply as required. Do
not use the recirculated-air mode continu-
ously over a long period of time as this
would reduce the air quality in the interior
of the vehicle.<
Rear window defroster
The indicator lamp lights up when
the rear window defroster is
active. The rear window defroster
switches off automatically.
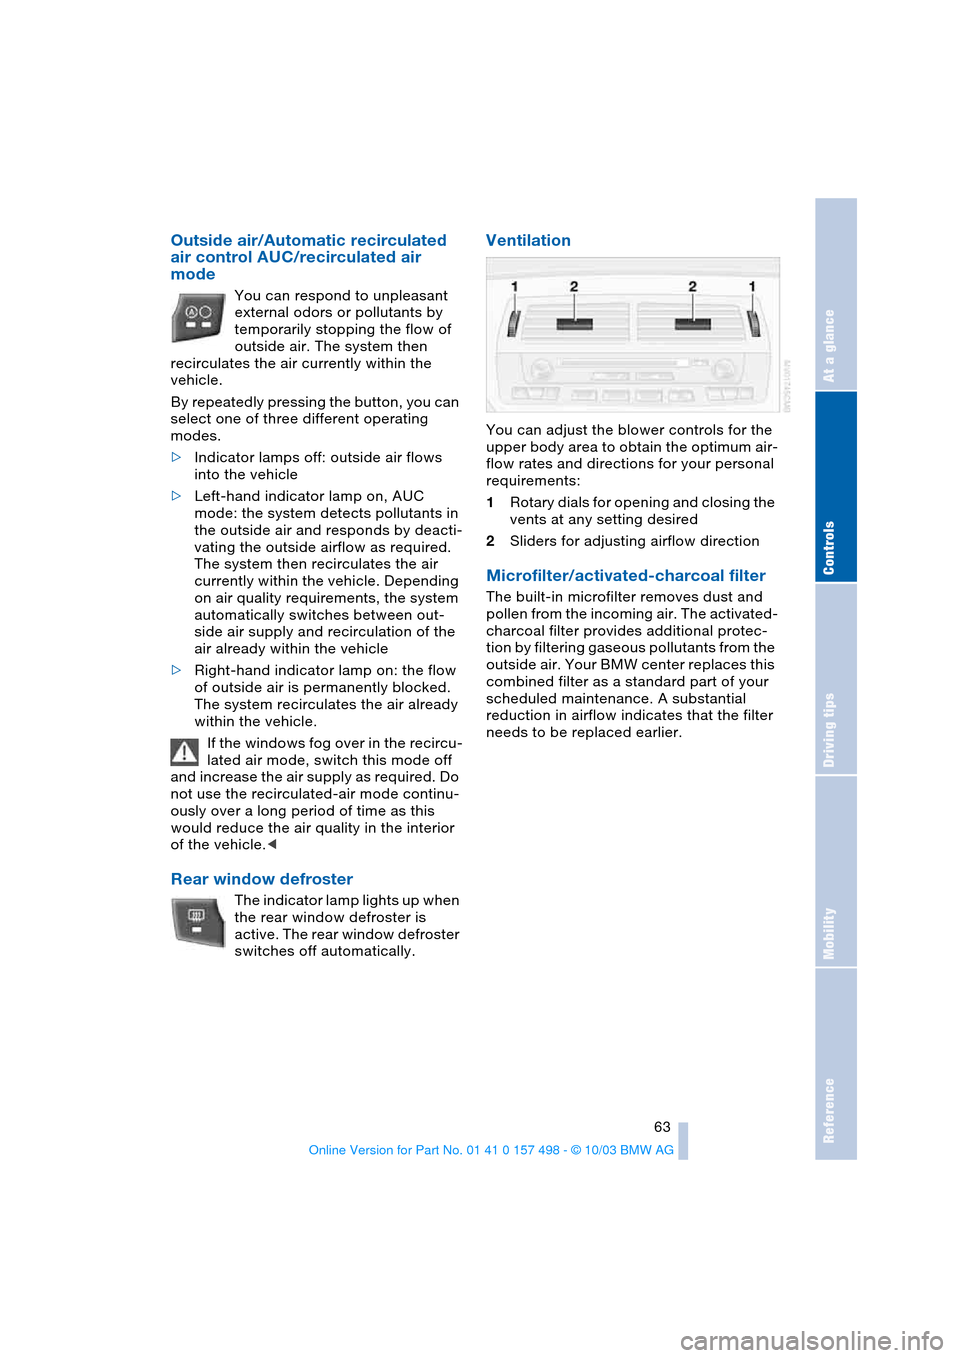
Ventilation
You can adjust the blower controls for the
upper body area to obtain the optimum air-
flow rates and directions for your personal
requirements:
1Rotary dials for opening and closing the
vents at any setting desired
2Sliders for adjusting airflow direction
Microfilter/activated-charcoal filter
The built-in microfilter removes dust and
pollen from the incoming air. The activated-
charcoal filter provides additional protec-
tion by filtering gaseous pollutants from the
outside air. Your BMW center replaces this
combined filter as a standard part of your
scheduled maintenance. A substantial
reduction in airflow indicates that the filter
needs to be replaced earlier.
Page 72 of 120

Special operating instructions
70 Do not coast with the clutch
depressed or with the transmission or
selector lever in Neutral. Do not coast with
the engine switched off. Otherwise the
engine provides no braking effect and there
is no power-assist for braking or steering
when the engine is off.<
Brake pads
The yellow indicator lamp for the
brake pads lights up:
Have the condition of the brake
pads inspected.
For your own safety: use brake pads
which the manufacturer has approved
for your specific vehicle model. The manu-
facturer cannot evaluate non-approved
brake pads to determine if they are suitable
for use, and therefore cannot ensure the
operating safety of the vehicle in the event
of their use.<
Cargo loading
Avoid overloading the vehicle so that
the permitted load on the tires is not
exceeded. Otherwise, overheating and
inner damage to the tires may result. The
ultimate result can assume the form of a
sudden air loss.<
Determining the maximum load
1.Locate the following statement on your
vehicle's placard
*:
The combined weight of occu-
pants and cargo should never
exceed XXX kg or YYY lbs; otherwise
damage to the vehicle and unstable
driving conditions could result.<2.Determine the combined weight of the
driver and passenger that will be riding
in your vehicle
3.Substract the combined weight of the
driver and passenger from XXX kilo-
grams or YYY pounds
4.The resulting figure equals the available
amount of cargo and luggage load
capacity.
For example, if the XXX amount equals
551 lbs. and there will be two 150 lbs.
passengers in your vehicle, the amount
of available cargo and luggage load
capacity is 251 lbs.
551 lbs. minus 300 lbs. = 251 lbs.
5.Determine the combined weight of lug-
gage and cargo being loaded on the
vehicle. That weight may not safely
exceed the available cargo and luggage
load capacity calculated in Step 4.
Load
The permissible load is the sum of the
occupants' weights and the weight of the
cargo. The greater the weight of the occu-
pants, the less cargo can be transported.
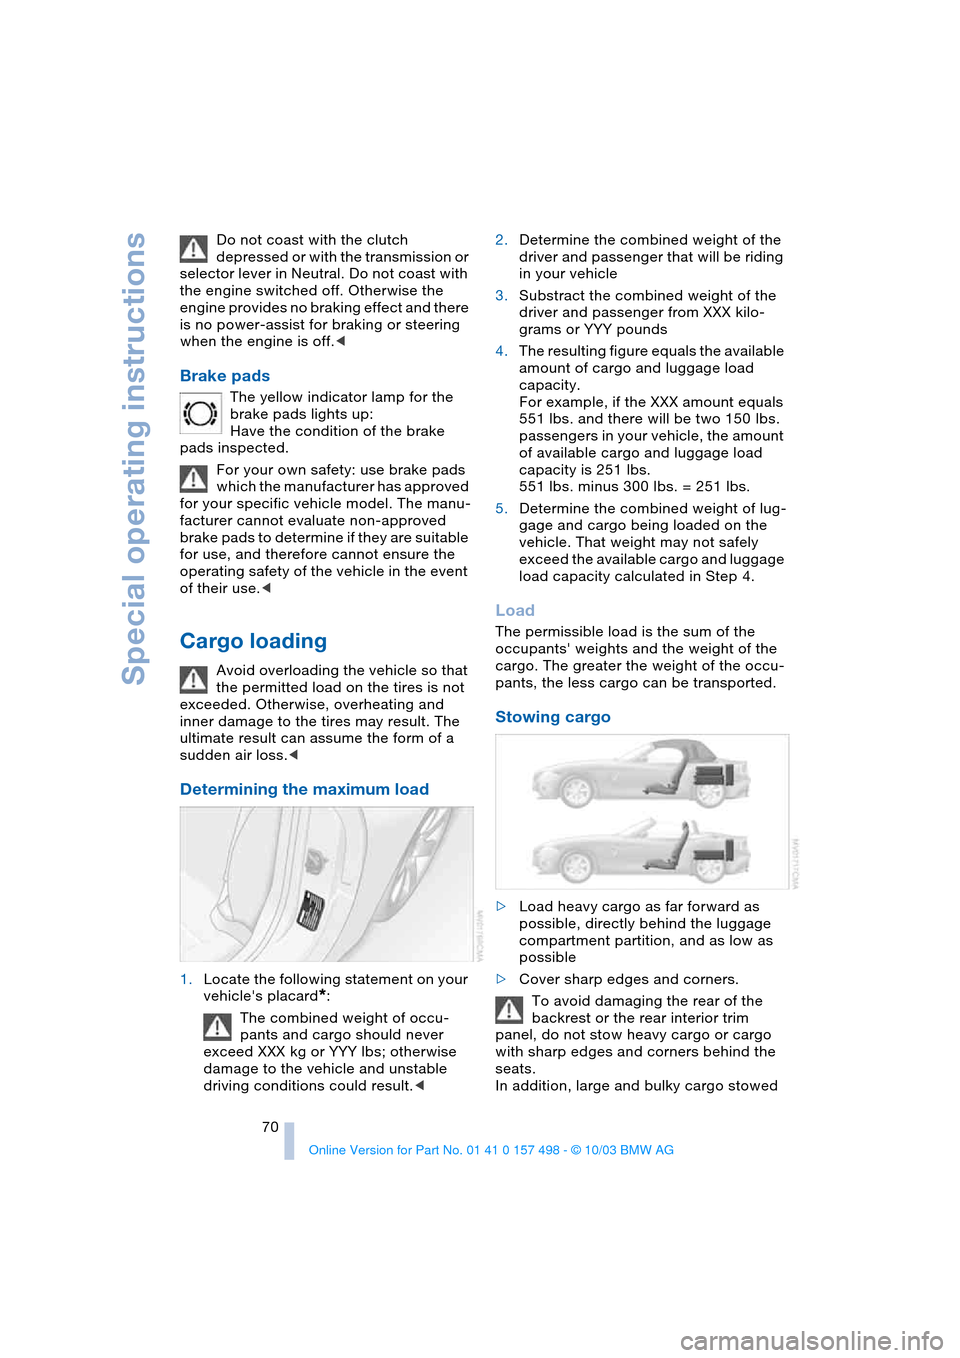
Stowing cargo
>Load heavy cargo as far forward as
possible, directly behind the luggage
compartment partition, and as low as
possible
>Cover sharp edges and corners.
To avoid damaging the rear of the
backrest or the rear interior trim
panel, do not stow heavy cargo or cargo
with sharp edges and corners behind the
seats.
In addition, large and bulky cargo stowed
Page 110 of 120

Everything from A to Z
108 Hazard warning flashers 10
Headlamp cover, care,
refer to the Caring for
your vehicle brochure
Headlamp flasher 43
– indicator lamp 13
Headlamps
– bulb replacement 88
– care, refer to the Caring
for your vehicle brochure
– cleaning 44
Headlamps, automatic
control 46
Headlamp washer
reservoir 83
– content, refer to
Capacities 103
Headlamp washer
system
– cleaning the
headlamps 44
– washing fluids 83
Head restraints 28
Heated mirrors 31
Heated seats 30
Heating 58
– exterior mirrors 31
– rear window 59, 63
– seats 30
Heavy loads, refer to
Stowing cargo 70
Height, refer to
Dimensions 102
Height adjustment
– seats 28
– steering wheel 30
High beams 47
– bulb replacement 89
– headlamp flasher 43
– indicator lamp 13
High Performance
Synthetic Oil 84
– alternative oils 84
– approved oils 84
High temperatures 69
Holders for beverages 65
Hood 81
Horn 10
Hydraulic Brake Assistant,
refer to Dynamic Brake
Control DBC 52Hydraulics
– brakes 85
Hydroplaning 69
I
Ice warning 50
Identification mark
– Run Flat tires 80
Ignition 36
Ignition key 16
Ignition lock 36
Inclines 69
Index 104
Indicator/warning lamp
– airbags 57
– alarm system 26
– brakes 13
– coolant temperature 49
– DSC 52
– engine temperature 48
– Flat Tire Monitor 55
– fog lamps 47
– passenger airbags 34
– please fasten safety
belts 30
– reserve 48
Indicator and warning
lamps, overview 12
Individual air
distribution 59, 62
Individual settings, refer to
Vehicle Memory,
Key Memory 31
Inflation pressure, tires 75
Inflation pressure
monitoring, refer to Flat
Tire Monitor 54
INSPECTION 49
Instrument cluster 12
Instrument lighting 47
Instrument panel, refer to
Cockpit 10
Interior lamps 47
– remote control 17
Interior motion sensor 26
Interior rearview mirror 31
– automatic dimming
feature 31
Interior temperature
– adjusting 59, 62Interlock, refer to
Steering lock 36
Intermittent
– operation, wipers 44
Interval
– display, service 49
J
Jack 91
Jacking points 91
Jets, refer to
Ventilation 59, 63
Jump-starting 94
K
Key Memory 31
Keys 16
Key switch for passenger
airbags 33
Kickdown 39
Knock control 74
L
Lamps 46
Lamps and bulbs 88
LATCH, child-restraint
mounting system 35
Leather care, refer to the
Caring for your vehicle
brochure
Length, refer to
Dimensions 102
License plate lamps
– bulb replacement 91
Light-alloy wheels, care,
refer to the Caring for
your vehicle brochure
Lighter 65
Lighting
– of the instruments 47
Lighting of the instruments,
refer to Instrument
lighting 47
LIGHTS ON warning 46
Light switch 46
Loads, refer to Cargo
loading 70
Loads, securing 70