Page 57 of 120

Reference
At a glance
Controls
Driving tips
Mobility
55
place in all four tires over an extended
period of time.<
On the other hand, the following situations
can lead to false warning, a delayed detec-
tion of pressure loss and even to the sys-
tem not functioning:
>Driving on snow-covered or slippery
roads
>Performance-oriented driving: slip at
the drive wheels, high levels of lateral
acceleration
>When driving with snow chains, false
warnings and undetected pressure
losses may occur
>If the Flat Tire Monitor was not initial-
ized after the last time the tire inflation
pressures were corrected, undetected
losses in pressure or false warnings
that indicate a non-existent flat tire are
possible.
Initializing the system
Each time you correct the pressure in
a tire, or change a wheel or tire, reini-
tialize the system immediately afterwards.
This requires driving.<
1.Start the engine, but do not drive off
2.Press the button as long as you need to
until the yellow indicator lamp in the
instrument cluster lights up for a few
seconds
3.Drive off.
It takes a few minutes before the Flat Tire
Monitor can detect a flat tire and issue a
warning.
When driving with snow chains, do
not initialize the system.<
Flat tire warning
The indicator lamp in the instrument
cluster lights up in red. This visual
alert is accompanied by an acoustic
warning signal. There is a flat tire or a sign-
ficant loss of tire pressure.
1.Carefully reduce your speed to under
50 mph / 80 km/h. Avoid strong braking
and steering maneuvers. Do not exceed
a maximum speed of 50 mph / 80 km/h.
2.Check the inflation pressure in all four
tires as soon as possible.
Because the sides of Run Flat
tires are reinforced, a drop in infla-
tion pressure usually cannot be
detected from the outside, refer to Run
Flat tires on page 80.<
3.Before continuing to drive, refer to the
notes on page 80.
If the vehicle is not equipped with Run
Flat tires, refer to page 80, the stan-
dard equipment by design, continuing to
drive with a flat tire can result in serious
accidents.<
System malfunction
The indicator lamp in the instrument
cluster lights up yellow. The Flat
Tire Monitor is malfunctioning or out
of order. Please refer the problem to your
BMW center.
Page 58 of 120

Technology for safety and driving convenience
56
Airbags
The following airbags are located under the
marked covers:
1Front airbags for driver and passenger
2Side airbags for driver and passenger
3Knee airbags for driver and passenger
Protective effect
The front airbags help protect the driver
and passenger in the event of a head-on
collision where the protection provided by
the safety belt alone would not be ade-
quate. The side airbags help provide pro-
tection in the event of a collision from the
side. Each of the side airbags is designed
to help support the seat occupant's upper
body. The knee airbags help provide addi-
tional protection in the event of a head-on
collision.
The airbags are deliberately not triggered
in every impact situation, e. g. less severe
accidents, certain roll-over conditions, or
rear-end collisions.
For information on the correct seating posi-
tion, refer to page 27.
Do not apply adhesive materials to
the cover panels of the airbags, cover
them or modify them in any other way. Do
not attempt to remove the airbag retention
system from the vehicle. Never modify or
tamper with either the wiring or the individ-
ual components in the airbag system. This
category includes the upholstery in the
center of the steering wheel, on the instru-
ment panel, the side trim panels on the
doors. Do not attempt to remove or dis-
mantle the steering wheel.
Do not touch the individual components directly after the system has been trig-
gered, because there is a danger of burns.
If you note any indication of system mal-
function, if you desire to have an airbag
deactivated, or if the airbag retention sys-
tem is triggered in response to an accident,
you should always entrust all inspection,
repair and dismantling operations to your
BMW center.
Unprofessional attempts to service the sys-
tem could lead to failure in an emergency
or undesired airbag activation, either of
which could result in personal injury.
To ensure compliance with official safety
regulations, please also entrust disposal of
airbag generators to a BMW center.<
Airbag warning information is also provided
on the sun visors.Automatic deactivation of the
passenger airbags
Before transporting a child on the
passenger seat be sure to observe
the information/instructions under Trans-
porting children safely, refer to page 33.<
Your BMW has a seat occupation detection
system. By evaluating the weight on the
passenger's seat, the system detects
whether or not the seat is occupied by a
child in the child-restraint system or an
adult.
>When a child is seated in the child-
restraint system, the front, side and
knee airbags are automatically deacti-
vated on the passenger's side.
>When an adult is traveling in the front
seat or it is unoccupied, the front, side
and knee airbags remain active on the
passenger's side.
Although not desired, it can occur in
the case of heavier children that the
passenger airbags remain active or, in the
case of very light adults or young persons,
that the passenger airbags are deactivated.
The condition of the passenger airbag sys-
tem is shown by the indicator lamp in the
central console, refer to Indicator lamps
below. If the indicator lamp signals that the
passenger airbags are active and you wish
Page 59 of 120

Reference
At a glance
Controls
Driving tips
Mobility
57
them to be deactivated, the airbags have to
be deactivated with the vehicle ignition key
and the key switch on the outer passen-
ger's side of the instrument panel. Apart
from passengers, do not place any addi-
tional objects on the passenger seat. Do
not fit seat covers, seat cushion padding,
ball mats or other items to the passenger
seat unless they are specifically recom-
mended by BMW. Do not place any items
under the seat. Otherwise, the function of
the seat occupation detection could be
impaired.<
Indicator lamps
Airbag system operational
The airbag indicator lamp in the instrument
cluster indicates the operational readiness
of the entire airbag system and the safety
belt tensioners as of ignition key position 1.
The indicator lamp goes out after a few
seconds.
The indicator lamp in the central console
signals whether or not the passenger air-
bag system is activated or deactivated as
of ignition key position 1.
This lamp pertains only to the passen-
ger airbag system.<>The indicator lamp goes out after a few
seconds:
The passenger airbags are active, e. g.
when an adult is traveling in the vehicle
or the seat is unoccupied
>The indicator lamp lights up continu-
ously:
The passenger airbags are deactivated,
e. g. when a child is traveling in the vehi-
cle in the child-restraint system.
For more information on the operating prin-
ciple of the passenger airbag system and
seat occupation detection, refer to Auto-
matic deactivation of the passenger air-
bags.
Airbag system malfunction
A system malfunction could prevent
the system from responding in the
expected manner to an impact occurring
within its normal response range.
Please have the airbag system inspected
immediately at a BMW center.<
There is a fault in the airbag system
if the airbag indicator lamp behaves
as follows:
>The indicator lamp does not light up as
of ignition key position 1
>The indicator lamp remains on continu-
ously
>The indicator lamp lights up while the
vehicle is being driven.
Page 60 of 120
Controlling the climate for pleasant driving
58
Controlling the climate for pleasant
driving
Air conditioning
1Air onto the windshield and the side
windows
2Air for the upper body area59
3Air for the footwell
4Air distribution595Air conditioning59
6Outside-air/recirculated-air mode59
7Temperature adjustment59
8Air supply/blower59
9Rear window defroster59
Page 61 of 120

Reference
At a glance
Controls
Driving tips
Mobility
59
Air distribution
You can direct airflow onto the
windows , toward the upper
body and into the footwell .
All intermediate settings are pos-
sible.
Air supply/blower
You can set the blower to 8 differ-
ent levels. Both heating and ven-
tilation become more effective as
the air supply rate is increased.
Turn the rotary control toward zero:
The blower and the heating are turned off,
and the air supply is stopped.
Temperature
In order to increase the tempera-
ture of the passenger compart-
ment, turn to the right toward the
red zone.
Air conditioning
The air is cooled and dehumidi-
fied and – depending on the tem-
perature setting – rewarmed.
Depending on the weather, the
windshield may fog over briefly when the
engine is started.
Condensation forms during operation
of the air conditioning system, which
then exits under the vehicle. Traces of con-
densed water on the ground underneath
the vehicle are thus normal.<
Outside-air/recirculated-air mode
If there are unpleasant odors in
the outside air, you can tempo-
rarily block the supply of incom-
ing air. The system then recircu-
lates the air currently within the vehicle.
If the windows fog over in the recircu-
lated air mode, switch this mode off
and increase the air supply as required. Do
not use the recirculated-air mode continu-
ously over a long period of time as this
would otherwise reduce the air quality in
the interior of the vehicle.<
Rear window defroster
The indicator lamp lights up when
the rear window defroster is
active. The rear window defroster
switches off automatically.
Ventilation
You can adjust the blower controls for the
upper body area to obtain the optimum air-
flow rates and directions for your personal
requirements:
1Rotary dials for opening and closing the
vents at any setting desired
2Slide for adjusting airflow direction
Microfilter
The built-in microfilter removes dust and
pollen from the incoming air and in the
recirculated air mode. Your BMW center
will replace this filter during the regularly
scheduled maintenance. A substantial
reduction in airflow indicates that the filter
needs to be replaced earlier.
Page 62 of 120
Controlling the climate for pleasant driving
60
To defrost windows and remove
condensation
1Turn the rotary control to
2Turn the rotary blower control for the air
supply completely to the right
3Turn the rotary temperature control
completely to the right
4To defrost the rear window, switch on
the rear window defroster
Page 63 of 120
Reference
At a glance
Controls
Driving tips
Mobility
61
Automatic climate control*
1Air onto the windshield and the side
windows
2Air for the upper body area63
3Air for the footwell
4Individual air distribution62
5To defrost windows and remove
condensation62
6Automatic air distribution and air
supply627Air supply/blower62
8Air conditioning59
9Maximum cooling62
10Temperature62
11Outside air/Automatic recirculated air
control AUC/recirculated air mode63
12Rear window defroster63
Page 64 of 120

Controlling the climate for pleasant driving
62
Tips for pleasant driving
Use the automatic system – switch on with
AUTO button 6. Select the desired interior
temperature.
Detailed setting options are described for
you below.
Automatic air distribution and supply
The AUTO program assumes the
adjustment of the air distribution
and air supply for you and in addi-
tion adapts the temperature to
external influences, summer or winter, to
meet preferences you can specify.
In the AUTO program, the air conditioning
mode is also turned on at the same time.
The AUTO program functions only to
a limited extent when the convertible
top is open.<
Individual air distribution
You yourself can direct airflow
onto the windows , toward the
upper body and into the foot-
well . The arrow lights up. The
automatic air supply remains unchanged.
All intermediate settings are possible. By
pressing the AUTO button, you can reacti-
vate the air distribution.
Temperature
The interior temperature that
appears on the display panel is a
general figure intended for refer-
ence purposes. When you start
the vehicle, the system ensures that the
selected temperature is reached as quickly
as possible, regardless of the season. It
then maintains this temperature.
Air supply/blower
You can set the blower through
an infinitely variable range of
speeds. This shuts off the auto-
matic air supply. The arrow lights
up. The automatic air distribution remains
unchanged. You can reactivate the auto-
matic air supply by pressing the AUTO but-
ton.When you turn the rotary control toward
zero: the blower, heating and air condi-
tioner are switched off, and the air supply is
stopped. You can reactivate the system by
turning the control toward the right again.
To defrost windows and remove
condensation
This program quickly removes ice
and condensation from the wind-
shield and the side windows.
Maximum cooling
Above an outside temperature of
417/+56 and with the engine
running, you achieve a maximum
cooling effect as quickly as possi-
ble. At the same time, the air conditioning is
turned on.
The temperature is set to the lowest possi-
ble value. The system switches into the
recirculated air mode and air flows at max-
imum blower speed from the air outlets
only. Therefore, the air outlets must always
be open when you select this program.
Air conditioning
The air is cooled and dehumidi-
fied and, depending on the tem-
perature setting, rewarmed.
Depending on the weather, the
windshield may fog over briefly when the
engine is started.
The air conditioning system is automati-
cally switched on when you use the AUTO
program.
Condensation forms during operation
of the air conditioning system, which
then exits under the vehicle. Traces of con-
densed water on the ground underneath
the vehicle are thus normal.<
 1
1 2
2 3
3 4
4 5
5 6
6 7
7 8
8 9
9 10
10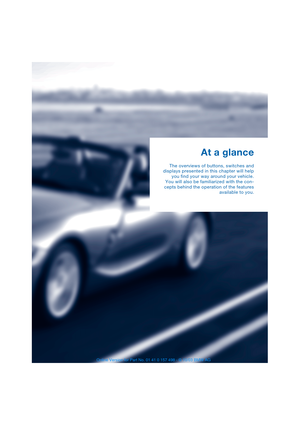 11
11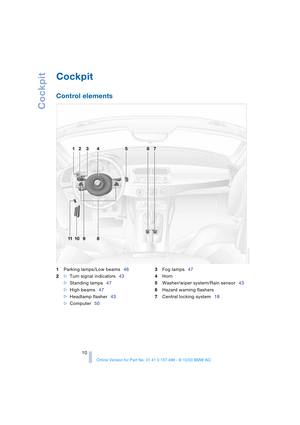 12
12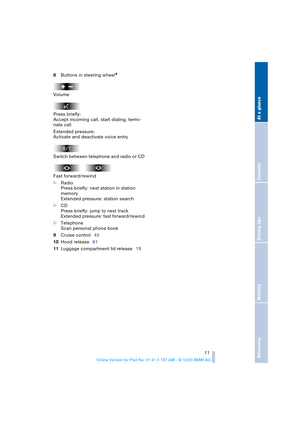 13
13 14
14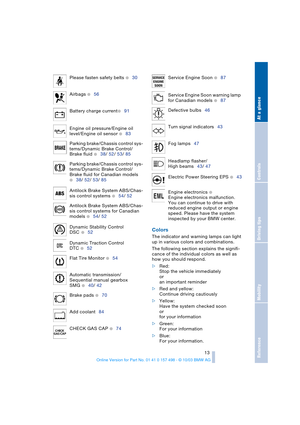 15
15 16
16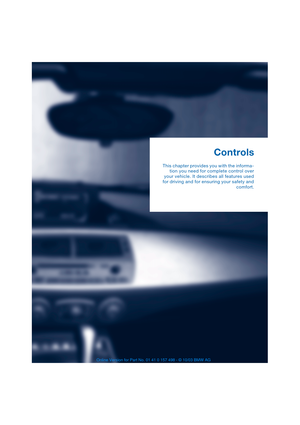 17
17 18
18 19
19 20
20 21
21 22
22 23
23 24
24 25
25 26
26 27
27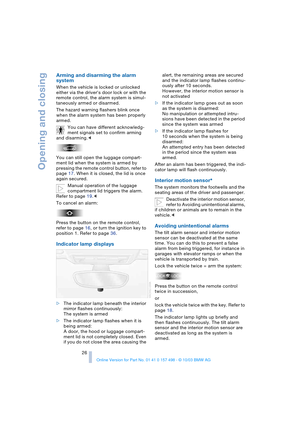 28
28 29
29 30
30 31
31 32
32 33
33 34
34 35
35 36
36 37
37 38
38 39
39 40
40 41
41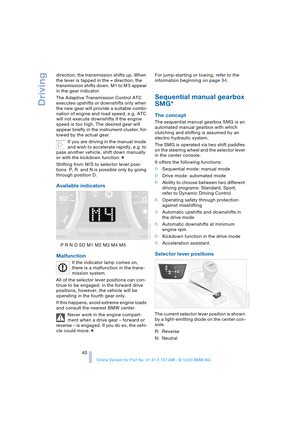 42
42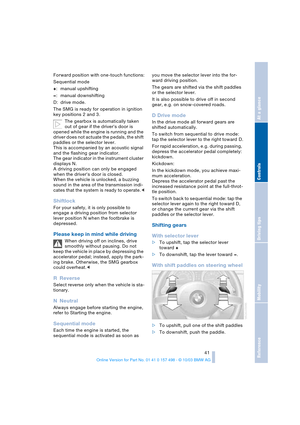 43
43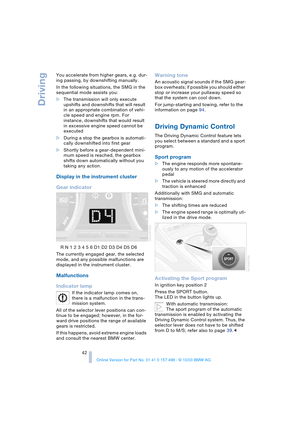 44
44 45
45 46
46 47
47 48
48 49
49 50
50 51
51 52
52 53
53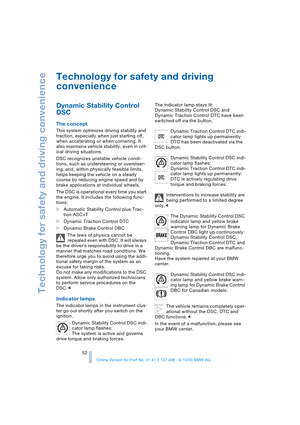 54
54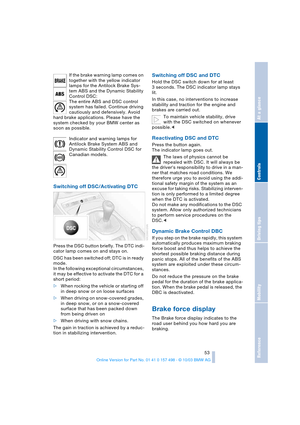 55
55 56
56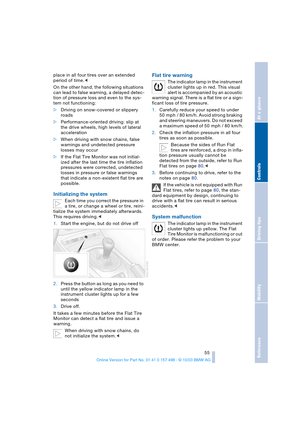 57
57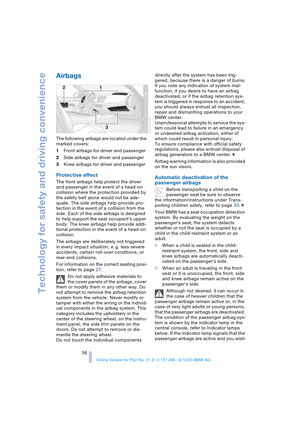 58
58 59
59 60
60 61
61 62
62 63
63 64
64 65
65 66
66 67
67 68
68 69
69 70
70 71
71 72
72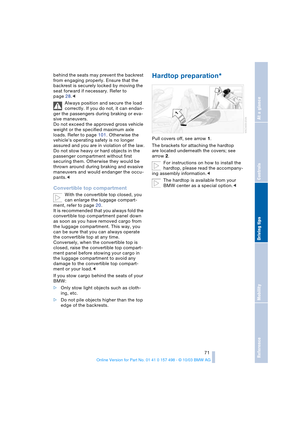 73
73 74
74 75
75 76
76 77
77 78
78 79
79 80
80 81
81 82
82 83
83 84
84 85
85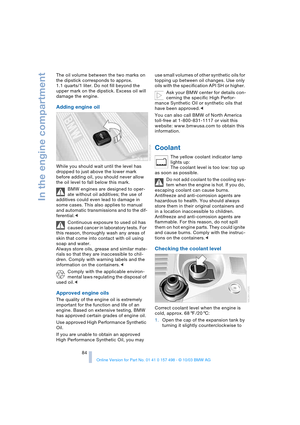 86
86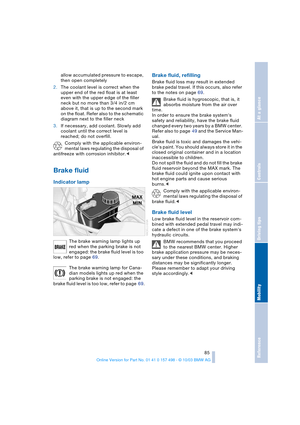 87
87 88
88 89
89 90
90 91
91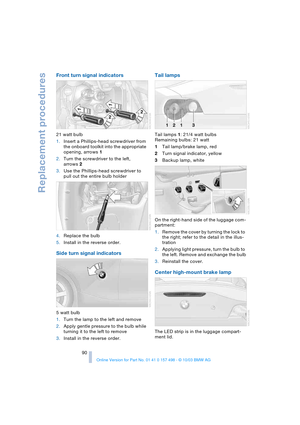 92
92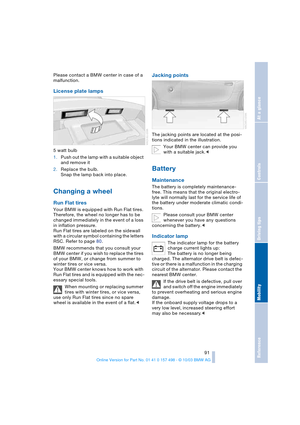 93
93 94
94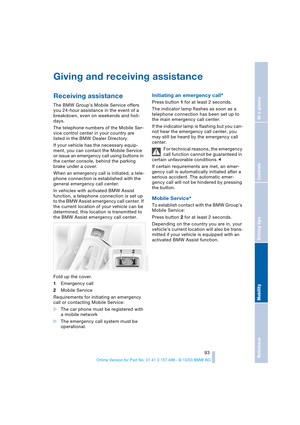 95
95 96
96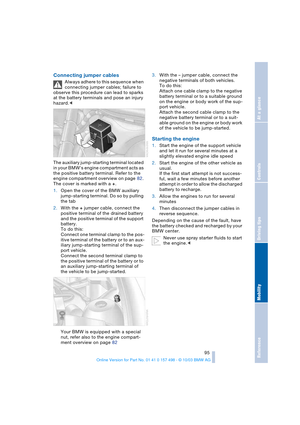 97
97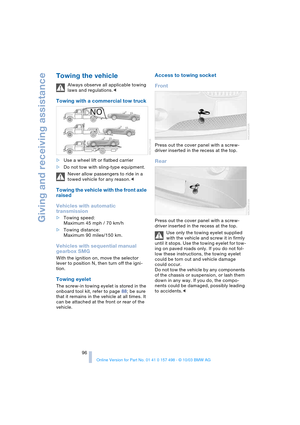 98
98 99
99 100
100 101
101 102
102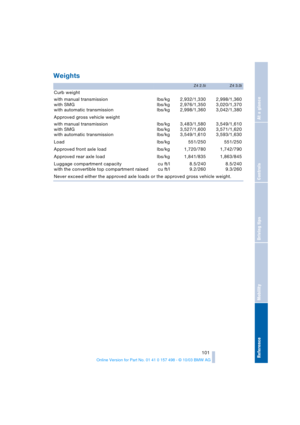 103
103 104
104 105
105 106
106 107
107 108
108 109
109 110
110 111
111 112
112 113
113 114
114 115
115 116
116 117
117 118
118 119
119

