Page 49 of 120

Reference
At a glance
Controls
Driving tips
Mobility
47
High beams/Standing
lamps
1High beams: blue indicator lamp
2Headlamp flasher: blue indicator lamp
3Standing lamps
Left or right standing lamps*
As an additional feature, you can illuminate
your vehicle on either side for parking:
1.Turn the ignition key to position 0 or
remove it
2.Turn off the low beams
3.Push the lever in the appropriate turn-
signal direction. The lever engages in
the turn signal position.
Instrument lighting
Turn the rotary dial to adjust the illumina-
tion intensity.
Fog lamps
Fog lamps*
A green indicator lamp comes on in
the instrument cluster to indicate
that the front fog lamps are on.
If the automatic headlamp control is
on, the low beams will automatically
come on whenever you activate the front
fog lamps.<
Interior lamps
The interior lamps operate automatically.
To switch the interior lamps on and
off manually
Press button 1 briefly.
If you would like the interior lamps to
remain off all the time, press and hold the
button for approx. 3 seconds.
Press the button briefly to revert to normal
operation.
Reading lamps*
Switch on and off with button 2 adjacent to
each lamp.
Page 50 of 120

Everything under control
48
Everything under control
Odometer
1Odometer
2Trip odometer
Odometer
With the ignition key in position 0, you can
activate the displays shown in the illustra-
tion by pressing the button – see arrow – in
the instrument cluster.
Trip odometer
To set to zero
Ignition key position 1
Keep the button pressed until the trip
odometer counter is set to zero.
Tachometer
Never allow the engine to operate with the
needle in the red overspeed sector of the
gauge.
To protect the engine, the fuel supply is
interrupted when you approach this sector.
Fuel gauge
When indicator lamp 1 begins to stay on
continuously, there are still approx.
2.1 gallons / 8 liters of fuel in the fuel tank.
Tank capacity: approx. 14.5 gallons/
55 liters.
If the tilt of the vehicle varies, for example
when you are driving in mountainous areas,
the needle may fluctuate slightly.
Fill the fuel tank well before it is
empty. Driving to the last drop of fuel
can prevent the engine from operating
properly and result in damage.<
When you switch on the ignition, the indi-
cator lamp comes on briefly to indicate an
operational check.
Engine coolant temperature
gauge
Blue
The engine is still cold. Drive at moderate
engine and vehicle speeds.
Page 51 of 120

Reference
At a glance
Controls
Driving tips
Mobility
49
Between the blue and red zones
Normal operating range. The needle may
rise as far as the edge of the red sector dur-
ing normal operation.
Red
When you switch on the ignition, warning
lamp 1 comes on briefly to indicate an
operational check.
Comes on while driving:
The engine has overheated. Stop and
switch the engine off immediately and
allow it to cool down.
For checking the coolant level, refer to
page 84.
Service interval display
Remaining distance to next service
The displays shown in the illustration
appear for a few seconds when the ignition
key is in position 1 or after the engine is
started.
The next service due appears with the
message OIL SERVICE or INSPECTION,
together with the distance remaining in
miles – in kilometers in Canada – before the
next scheduled service.
The computer bases its calculations of the
remaining distance on the preceding driv-
ing style.
A flashing message and a minus sign in
front of the number mean that the service
interval has already been exceeded by the
distance shown on the display. Please con-
tact your BMW center for an appointment.
Outside temperature
If the vehicle is not equipped with a com-
puter, the display in the instrument cluster
always shows the outside temperature.
Clock
If you wish to have a permanent time dis-
play, you can have it appear in the car radio
display, refer to the Owner's Manual for
Radio.
You can set the clock and the time display
in the car radio as follows.
To set
Ignition key in position 1 or higher:
Hours
1.Keep button 2 pressed for several sec-
onds until the hours are displayed and
the colon flashes
2.Press button 1 repeatedly until the
required hour is set
Minutes
3.Press button 2 to switch to the minutes
display
Page 52 of 120

Everything under control
50 4.Press button 1 repeatedly until the
required minutes are set
5.Press button 2 to confirm the settings.
The set time of day is transferred to the car
radio display or appears in the instrument
cluster display.
Display mode
In ignition key position 0:
Press button 1.
The time of day is displayed for several
seconds.
Computer*
Mode selection
With the ignition key in position 1 or higher,
you can use the button in the turn signal
lever to retrieve information from the com-
puter for display in the instrument cluster.
Every time you press the button briefly in
the direction of the steering column, a new
function is called up for display.
The displays appear in the following order:
time of day, outside temperature, average
fuel consumption, cruising range, average
vehicle speed.
With the ignition key in position 1 or higher,
the last active setting is displayed.
If you wish, you can have all the dis-
plays of the following functions
shown in another unit of measure.<
Outside temperature
To change the units of measure,
°F/°C
While the temperature display is active,
keep the button in the turn signal lever
pressed until the display changes.
Ice warning
If the outside temperature drops to approx.
37.57/36, the computer automatically
switches to the outside temperature dis-
play.
In addition, a signal sounds and the display
flashes for a brief period.
Clock
Setting the 12-hour or 24-hour
mode*
If the vehicle is equipped with a computer,
you can have the time displayed in either a
12-hour or 24-hour mode.
While the time display is active, press the
computer button in the turn signal lever
until the display changes.
Page 53 of 120
Reference
At a glance
Controls
Driving tips
Mobility
51
Average fuel consumption
If you continue to press the button on the
turn signal lever, the average fuel con-
sumption last displayed is recalculated
from that point in time.
Any time spent when the vehicle is station-
ary and the engine shut off is ignored in the
calculation.
Cruising range
The computer bases its calculations of the
cruising range on the preceding driving
style and on the remaining fuel in the tank.
It is important that you refuel when
the cruising range falls below approx.
30 miles/50 km. Otherwise, the engine
cannot be guaranteed to operate properly
and damage may result.<
Average speed
If you continue to press the button on the
turn signal lever, the average fuel con-
sumption last displayed is recalculated
from that point in time.
Page 54 of 120

Technology for safety and driving convenience
52
Technology for safety and driving
convenience
Dynamic Stability Control
DSC
The concept
This system optimizes driving stability and
traction, especially when just starting off,
when accelerating or when cornering. It
also maintains vehicle stability, even in crit-
ical driving situations.
DSC recognizes unstable vehicle condi-
tions, such as understeering or oversteer-
ing, and, within physically feasible limits,
helps keeping the vehicle on a steady
course by reducing engine speed and by
brake applications at individual wheels.
The DSC is operational every time you start
the engine. It includes the following func-
tions:
>Automatic Stability Control plus Trac-
tion ASC+T
>Dynamic Traction Control DTC
>Dynamic Brake Control DBC
The laws of physics cannot be
repealed even with DSC. It will always
be the driver's responsibility to drive in a
manner that matches road conditions. We
therefore urge you to avoid using the addi-
tional safety margin of the system as an
excuse for taking risks.
Do not make any modifications to the DSC
system. Allow only authorized technicians
to perform service procedures on the
DSC.<
Indicator lamps
The indicator lamps in the instrument clus-
ter go out shortly after you switch on the
ignition.
Dynamic Stability Control DSC indi-
cator lamp flashes:
The system is active and governs
drive torque and braking forces.The indicator lamp stays lit:
Dynamic Stability Control DSC and
Dynamic Traction Control DTC have been
switched off via the button.
Dynamic Traction Control DTC indi-
cator lamp lights up permanently:
DTC has been deactivated via the
DSC button.
Dynamic Stability Control DSC indi-
cator lamp flashes:
Dynamic Traction Control DTC indi-
cator lamp lights up permanently:
DTC is actively regulating drive
torque and braking forces.
Interventions to increase stability are
being performed to a limited degree
only.<
The Dynamic Stability Control DSC
indicator lamp and yellow brake
warning lamp for Dynamic Brake
Control DBC light up continuously:
Dynamic Stability Control DSC,
Dynamic Traction Control DTC and
Dynamic Brake Control DBC are malfunc-
tioning.
Have the system repaired at your BMW
center.
Dynamic Stability Control DSC indi-
cator lamp and yellow brake warn-
ing lamp for Dynamic Brake Control
DBC for Canadian models:
The vehicle remains completely oper-
ational without the DSC, DTC and
DBC functions.<
In the event of a malfunction, please see
your BMW center.
Page 55 of 120

Reference
At a glance
Controls
Driving tips
Mobility
53
If the brake warning lamp comes on
together with the yellow indicator
lamps for the Antilock Brake Sys-
tem ABS and the Dynamic Stability
Control DSC:
The entire ABS and DSC control
system has failed. Continue driving
cautiously and defensively. Avoid
hard brake applications. Please have the
system checked by your BMW center as
soon as possible.
Indicator and warning lamps for
Antilock Brake System ABS and
Dynamic Stability Control DSC for
Canadian models.
Switching off DSC/Activating DTC
Press the DSC button briefly. The DTC indi-
cator lamp comes on and stays on.
DSC has been switched off; DTC is in ready
mode.
In the following exceptional circumstances,
it may be effective to activate the DTC for a
short period:
>When rocking the vehicle or starting off
in deep snow or on loose surfaces
>When driving on snow-covered grades,
in deep snow, or on a snow-covered
surface that has been packed down
from being driven on
>When driving with snow chains.
The gain in traction is achieved by a reduc-
tion in stabilizing intervention.
Switching off DSC and DTC
Hold the DSC switch down for at least
3 seconds. The DSC indicator lamp stays
lit.
In this case, no interventions to increase
stability and traction for the engine and
brakes are carried out.
To maintain vehicle stability, drive
with the DSC switched on whenever
possible.<
Reactivating DSC and DTC
Press the button again.
The indicator lamp goes out.
The laws of physics cannot be
repealed with DSC. It will always be
the driver's responsibility to drive in a man-
ner that matches road conditions. We
therefore urge you to avoid using the addi-
tional safety margin of the system as an
excuse for taking risks. Stabilizing interven-
tion is only performed to a limited degree
when the DTC is activated.
Do not make any modifications to the DSC
system. Allow only authorized technicians
to perform service procedures on the
DSC.<
Dynamic Brake Control DBC
If you step on the brake rapidly, this system
automatically produces maximum braking
force boost and thus helps to achieve the
shortest possible braking distance during
panic stops. All of the benefits of the ABS
system are exploited under these circum-
stances.
Do not reduce the pressure on the brake
pedal for the duration of the brake applica-
tion. When the brake pedal is released, the
DBC is deactivated.
Brake force display
The Brake force display indicates to the
road user behind you how hard you are
braking.
Page 56 of 120

Technology for safety and driving convenience
54 The display has two levels:
>Normal braking:
Brake lamp 1 lights up on both sides of
the vehicle together with the center
brake lamp
>Forceful braking and braking with ABS:
Brake lamps 1 and 2 light up on both
vehicle sides together with the center
brake lamp.
Antilock Brake System ABS
The concept
ABS keeps the wheels from locking during
braking, thereby enhancing active driving
safety.
Malfunctions
If the yellow indicator lamp for the
Antilock Brake System ABS comes
on together with the brake warning
lamp and the indicator lamp for the
Dynamic Stability Control DSC:
The entire ABS and DSC control
system has failed. Continue driving
cautiously and defensively. Avoid
hard brake applications. Please have the
system checked by your BMW center as
soon as possible.
Indicator lamp for the Antilock
Brake System ABS with the brake
warning lamp and the indicator
lamp for the Dynamic Stability Con-
trol DSC for Canadian models.
Braking with ABS
If you are in a situation which requires full
braking, you will exploit the full benefits of
the ABS system if you apply maximum
brake pressure: panic stop.
Pulsation at the brake pedal combines with
sounds from the hydraulic circuits to indi-
cate to the driver that ABS is in its active
mode.
Flat Tire Monitor
The concept
As you drive, the Flat Tire Monitor keeps
track of pressure levels in all four tires. The
system alerts you whenever the inflation
pressure of a tire falls significantly below
the pressure of another tire.
The system actually detects pressure loss
by monitoring differences in the relative
speeds of the four wheels. It interprets vari-
ations outside specified limits as severe
pressure loss, and then responds by gen-
erating a warning.
System requirements
In order for the Flat Tire Monitor to learn the
correct tire inflation pressure, please do the
following:
1.Check the tire inflation pressures in all
tires
2.Compare to the inflation pressure table,
refer to page 76, and correct if neces-
sary
3.Initialize the system.
If the system is not initialized,
undetected losses in pressure or
false warnings that indicate a non-exis-
tent flat tire are possible.<
System limitations
The Flat Tire Monitor cannot provide
you with advance warning of sudden
and severe tire damage caused by external
factors and does not detect the balanced
and very gradual pressure loss that takes
 1
1 2
2 3
3 4
4 5
5 6
6 7
7 8
8 9
9 10
10 11
11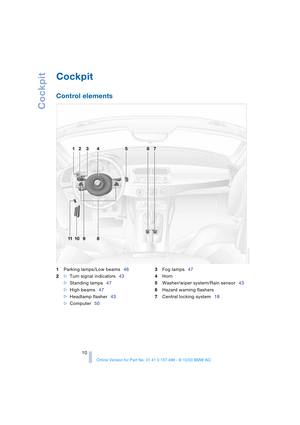 12
12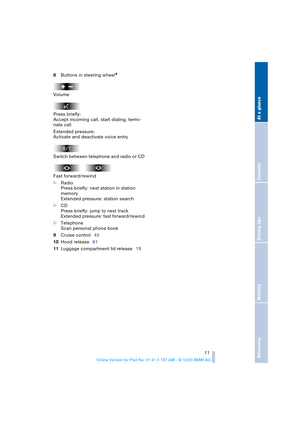 13
13 14
14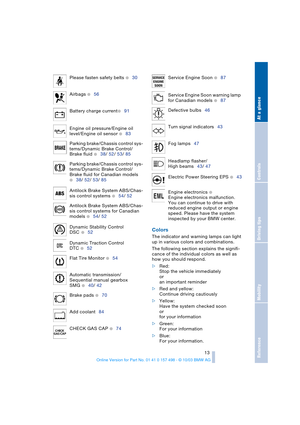 15
15 16
16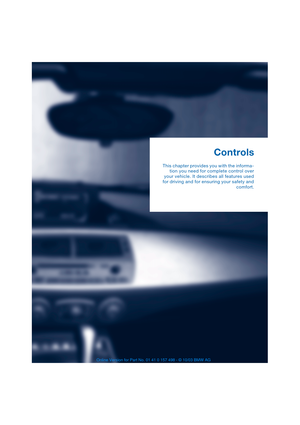 17
17 18
18 19
19 20
20 21
21 22
22 23
23 24
24 25
25 26
26 27
27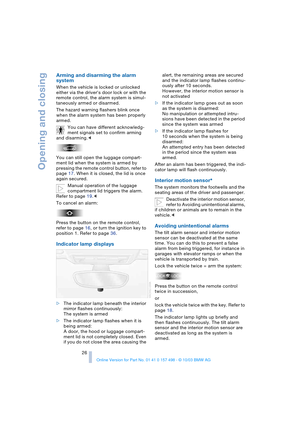 28
28 29
29 30
30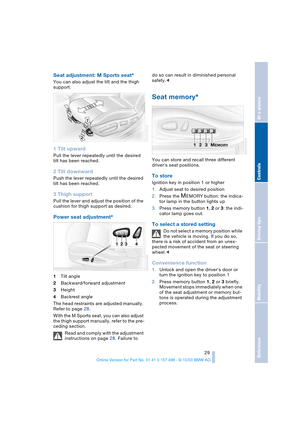 31
31 32
32 33
33 34
34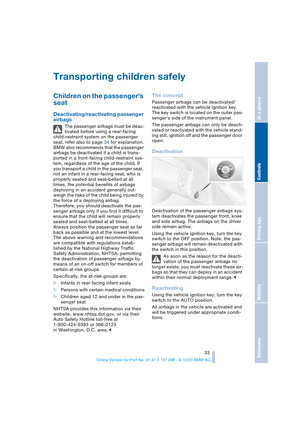 35
35 36
36 37
37 38
38 39
39 40
40 41
41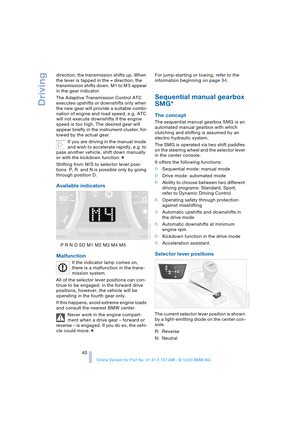 42
42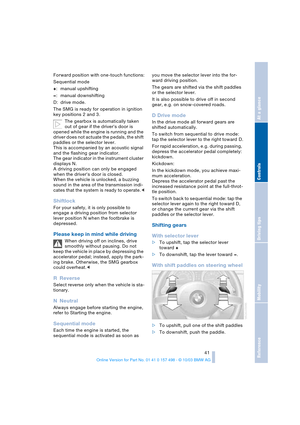 43
43 44
44 45
45 46
46 47
47 48
48 49
49 50
50 51
51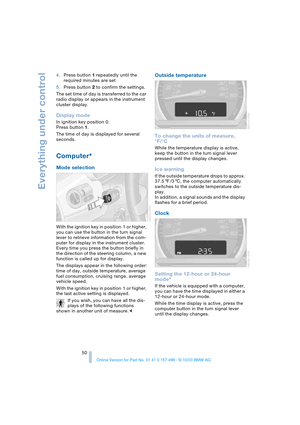 52
52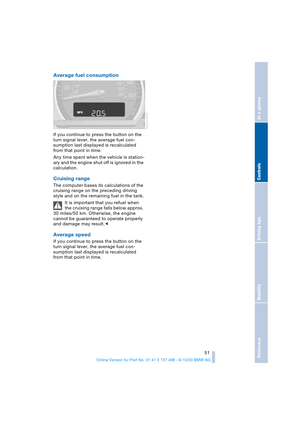 53
53 54
54 55
55 56
56 57
57 58
58 59
59 60
60 61
61 62
62 63
63 64
64 65
65 66
66 67
67 68
68 69
69 70
70 71
71 72
72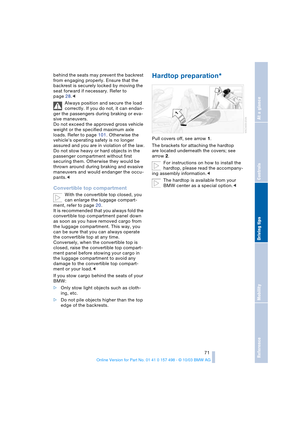 73
73 74
74 75
75 76
76 77
77 78
78 79
79 80
80 81
81 82
82 83
83 84
84 85
85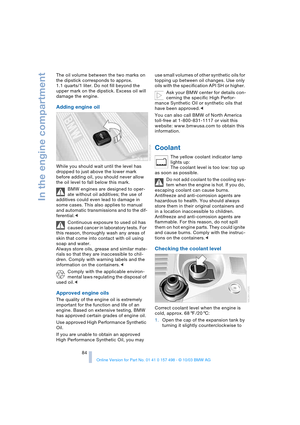 86
86 87
87 88
88 89
89 90
90 91
91 92
92 93
93 94
94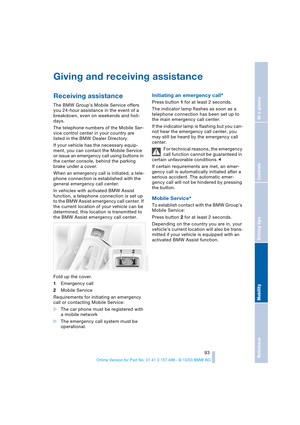 95
95 96
96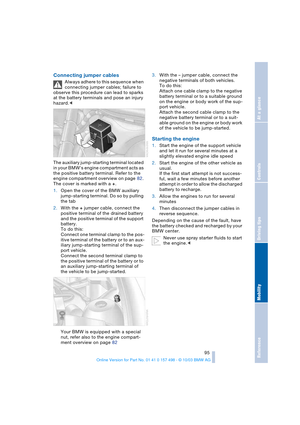 97
97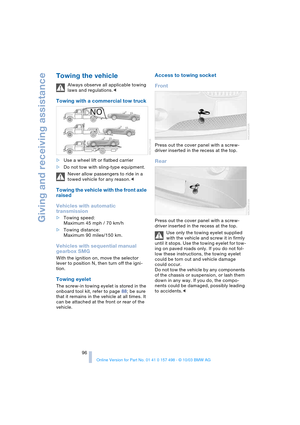 98
98 99
99 100
100 101
101 102
102 103
103 104
104 105
105 106
106 107
107 108
108 109
109 110
110 111
111 112
112 113
113 114
114 115
115 116
116 117
117 118
118 119
119