Page 25 of 120

Reference
At a glance
Controls
Driving tips
Mobility
23
could keep the convertible top from closing
properly.<
Ignition key in position 1 or higher.
With the vehicle standing.
1.Read and comply with the preceding
safety precautions
2.Make sure that the convertible top com-
partment panel in the luggage compart-
ment is lowered; refer to page 20. Oth-
erwise the convertible top cannot be
opened
3.Ensure that the luggage compartment
lid is closed
4.Press and hold the corresponding but-
ton for convertible top operation.
If the convertible top should halt right
before the closing phase is completed,
press against the front part of the convert-
ible top frame from the outside to help the
closing process along. Keep pressing the
button while doing so until the top starts up
again on its own.
Indicator lamps
>The red indicator lamp in the button will
light up while the convertible top is in
motion. It goes out as soon as the
opening or closing operation has been
completed
>If the red indicator lamp in the button
flashes after the button has been
released, then the opening or closing
operation has not yet been completed.
The sequence can be continued in the
desired direction by pressing this but-
ton
>If the yellow indicator lamp in the button
lights up continuously with the button
pressed, then the convertible top com-
partment panel is raised and the con-
vertible top cannot be moved.
The side windows will lower slightly when
you press the button for operating the con-
vertible top.
After the opening or closing operation, the
side windows will go back up if you keep
the button pressed for more than 2 sec-
onds after the indicator lamp has gone out.
Interruption
The automatic sequence will be interrupted
immediately if you release the button that
operates the top. The sequence can be
continued in the desired direction by press-
ing this button.
If the convertible top operation has
been interrupted, do not close the
side windows using the power window but-
tons. Otherwise the side windows may not
close properly against the rubber seal of
the convertible top.<
After the convertible top has been
stored for an extended period of time
in the convertible top compartment, e.g. in
the winter months because the hardtop was
being used, you may have to support the
convertible top by hand when closing it for
the first time.<
Convenience operation
Driver's door lock
Refer to page 18.
To close manually in the event of
an electrical malfunction
1.Pull out the handle in the luggage com-
partment as far as it will go
2.Turn the handle by 90° until it engages
Page 26 of 120
Opening and closing
24 3.Pull on the cord in the luggage com-
partment panel
The storage compartment between the
backrests unlocks, refer also to
page 64
4.Press button 1
The convertible top is released and
moves up slightly
5.Grab the convertible top at its frame
and pull it up to the windshield frame6.Pull out the cover panel that is in the
center of the front convertible top frame
7.Insert the Allen wrench into the hex slot.
The Allen wrench is located in the vehi-
cle tool pouch, refer to page 88
8.Pull the convertible top frame down as
far as possible
9.Continue turning the Allen wrench to
the left until the convertible top frame
has locked onto the windshield frame.
Wind deflector*
With the convertible top open, the wind
deflector keeps air movement in the pas-
senger compartment to a minimum, thus
providing you with a pleasant drive, even at
higher speeds.
Page 27 of 120

Reference
At a glance
Controls
Driving tips
Mobility
25
Installation
Insert the wind deflector in its proper orien-
tation into the guides 1 provided on the
rollover bars.
Refer to the labeling on the wind deflector
to determine its proper orientation.
The wind deflector must engage
firmly, as it could otherwise become
detached at higher vehicle speeds.<
The wind deflector panels 2 in the rollover
bars cannot be removed.
Removal
Slide both locks inward and remove the
wind deflector.
Clothes hooks
Clothes hooks 1 are located on the wind
deflector panels in the rollover bars.Do not hang heavy objects on the
hooks. If you do, they could endanger
the passengers, for example during braking
or evasive maneuvers.<
Storage
For storage, e.g. to achieve a better view to
the rear when the convertible top is closed,
there are two brackets on the inside of the
luggage compartment lid.
Insert the wind deflector into the brackets.
Make sure that the wind deflector
cannot be damaged by objects in the
luggage compartment.<
Alarm system*
The concept
The vehicle alarm system responds:
>When a door, the hood or the luggage
compartment lid is opened
>When attempts are made to start the
vehicle
>To movement inside the vehicle
>To alterations in the vehicle tilt, e.g. as
would occur during attempts to steal
the wheels or tow the vehicle
>To interruption of battery voltage.
The alarm produced by the system in the
event of unauthorized vehicle entry and
attempted theft depends on the country
version:
>Sounding of an acoustical alarm for
30 seconds
>Activation of the hazard warning flash-
ers for approx. five minutes.
Page 28 of 120

Opening and closing
26
Arming and disarming the alarm
system
When the vehicle is locked or unlocked
either via the driver's door lock or with the
remote control, the alarm system is simul-
taneously armed or disarmed.
The hazard warning flashers blink once
when the alarm system has been properly
armed.
You can have different acknowledg-
ment signals set to confirm arming
and disarming.<
You can still open the luggage compart-
ment lid when the system is armed by
pressing the remote control button, refer to
page 17. When it is closed, the lid is once
again secured.
Manual operation of the luggage
compartment lid triggers the alarm.
Refer to page 19.<
To cancel an alarm:
Press the button on the remote control,
refer to page 16, or turn the ignition key to
position 1. Refer to page 36.
Indicator lamp displays
>The indicator lamp beneath the interior
mirror flashes continuously:
The system is armed
>The indicator lamp flashes when it is
being armed:
A door, the hood or luggage compart-
ment lid is not completely closed. Even
if you do not close the area causing the alert, the remaining areas are secured
and the indicator lamp flashes continu-
ously after 10 seconds.
However, the interior motion sensor is
not activated
>If the indicator lamp goes out as soon
as the system is disarmed:
No manipulation or attempted intru-
sions have been detected in the period
since the system was armed
>If the indicator lamp flashes for
10 seconds when the system is being
disarmed:
An attempted entry has been detected
in the period since the system was
armed.
After an alarm has been triggered, the indi-
cator lamp will flash continuously.
Interior motion sensor*
The system monitors the footwells and the
seating areas of the driver and passenger.
Deactivate the interior motion sensor,
refer to Avoiding unintentional alarms,
if children or animals are to remain in the
vehicle.<
Avoiding unintentional alarms
The tilt alarm sensor and interior motion
sensor can be deactivated at the same
time. You can do this to prevent a false
alarm from being triggered, for instance in
garages with elevator ramps or when the
vehicle is transported by train.
Lock the vehicle twice = arm the system:
Press the button on the remote control
twice in succession,
or
lock the vehicle twice with the key. Refer to
page 18.
The indicator lamp lights up briefly and
then flashes continuously. The tilt alarm
sensor and the interior motion sensor are
deactivated as long as the system is
armed.
Page 29 of 120

Reference
At a glance
Controls
Driving tips
Mobility
27
Adjustments
Safe seating position
For relaxed driving with as little fatigue as
possible, you should select a seating posi-
tion that reflects your personal require-
ments. In combination with the safety belts
and airbags, the correct seating position
also plays an important role in enhancing
occupant safety in the event of an accident.
To ensure that the vehicle's safety systems
provide you with optimal protection, we
request that you direct your careful atten-
tion to the following section.
For supplementary information on trans-
porting children refer to page 33.
Sitting safely with airbags
Always maintain an adequate dis-
tance between yourself and the air-
bags. Always hold the steering wheel by its
rim with hands at the 9 and 3 o'clock posi-
tions to minimize the risk of injuries to your
hands or arms in the event of airbag
deployment.
Never allow any objects, individuals or ani-
mals to obstruct the areas between pas-
sengers and airbags.
Never use the front airbag's cover as a
storage tray or support for objects of any
kind. Ensure that the passenger is correctly
seated, i.e. that no feet or legs are propped
against the dashboard. Otherwise, leg
injury could result if the knee airbag and
front airbag suddenly deployed.
Never let an occupant's head rest near or
on a side airbag because the inflating air-
bag could cause a serious or fatal injury.<
Even when all these guidelines are
observed, the risk of injury as a result of
contact with the airbags cannot entirely be
ruled out in some situations. In sensitive
individuals, the ignition and inflation noise
may induce a mild hearing loss that is tem-
porary in most cases.
For airbag locations and additional infor-
mation on airbags, refer to page 56.
Sitting safely with safety belts
Always fasten your safety belt before start-
ing off. As supplemental restraint devices,
the airbags are designed to enhance the
effectiveness of the safety belts, and not to
replace them.
Your vehicle offers two sitting positions,
each of which is equipped with a safety
belt.
At all times, occupants should sit
upright and be properly restrained –
infants and small children in appropriate
child-restraint systems; larger children and
adults using the safety belts.
Expectant mothers should always wear
their safety belts, taking care to position
the lap belt against the lower hips, where it
will not exert pressure against the abdomi-
nal area.
Never allow more than one person to wear
a single safety belt. Never allow infants or
small children to ride in a passenger's lap.
Do not route the belt across your neck, or
run it across sharp edges. Be sure that the
belt does not become caught or jammed.
Avoid twisting the belt while routing it firmly
across the hips and shoulder; wear it as
snugly against your body as possible. Do
not allow the belt to rest against hard or
fragile objects. Otherwise, the lap belt
could slide over the hips in the event of a
frontal impact, leading to abdominal injury.
Avoid wearing bulky clothing and pull on
the lap belt periodically to retension it over
your shoulders. Otherwise, the restraining
effect of the safety belt could be dimin-
ished.<
For information on using the safety belts,
refer to page 30.
Page 30 of 120

Adjustments
28
Seats
Before adjusting your seat, always
observe the following precautions
Never try to adjust your seat while
operating the vehicle. The seat could
respond with an unexpected movement,
and the ensuing loss of vehicle control
could result in an accident.
Never ride with the backrest inclined to an
extreme angle – this also applies to the
passenger seat. If you do so, there is a risk
that you will slide under the safety belt in
the event of an accident, thus reducing the
protection provided by the safety belt.<
In addition, observe the instructions
regarding damaged safety belts on
page 30.
Seat adjustment
1Backward/forward
Pull lever 1 and slide the seat into the
desired position.
After releasing the lever, move the seat
backwards or forwards slightly to ensure
that the latch engages securely
2Height
Pull lever 2 and apply weight to or remove
weight from the seat as required
3Backrest
Pull lever 3 and apply weight to or remove
weight from the backrest as required.
Head restraints
Adjustments
Height: pull or push.
In order to move to the lowest positions,
press button 1.
Adjust the head restraint so that its
center is approximately at the height
of your ears. Otherwise, there is a higher
risk of injury to the cervical vertebra in the
event of an accident.<
Removal
Pull the head restraint upward until it stops.
Press button 1 and remove the head
restraint.
Installation
Insert the head restraint into the guides.
Page 31 of 120

Reference
At a glance
Controls
Driving tips
Mobility
29
Seat adjustment: M Sports seat*
You can also adjust the tilt and the thigh
support.
1 Tilt upward
Pull the lever repeatedly until the desired
tilt has been reached.
2 Tilt downward
Push the lever repeatedly until the desired
tilt has been reached.
3 Thigh support
Pull the lever and adjust the position of the
cushion for thigh support as desired.
Power seat adjustment*
1Tilt angle
2Backward/forward adjustment
3Height
4Backrest angle
The head restraints are adjusted manually.
Refer to page 28.
With the M Sports seat, you can also adjust
the thigh support manually, refer to the pre-
ceding section.
Read and comply with the adjustment
instructions on page 28. Failure to do so can result in diminished personal
safety.<
Seat memory*
You can store and recall three different
driver's seat positions.
To store
Ignition key in position 1 or higher
1.Adjust seat to desired position
2.Press the
MEMORY button: the indica-
tor lamp in the button lights up
3.Press memory button 1, 2 or 3: the indi-
cator lamp goes out.
To select a stored setting
Do not select a memory position while
the vehicle is moving. If you do so,
there is a risk of accident from an unex-
pected movement of the seat or steering
wheel.<
Convenience function
1.Unlock and open the driver's door or
turn the ignition key to position 1
2.Press memory button 1, 2 or 3 briefly.
Movement stops immediately when one
of the seat adjustment or memory but-
tons is operated during the adjustment
process.
Page 32 of 120

Adjustments
30
Safety function
1.Close the driver's door and turn the
ignition key to position 0 or 2
2.Press and hold the desired memory
button 1, 2 or 3 until the adjustment
process is completed.
If you press the
MEMORY button acciden-
tally:
Press the button again; the indicator lamp
goes out.
Seat heating*
The seat cushion and backrest can be
heated with the ignition key in position 2.
You can call up different heating modes by
repeatedly pressing the buttons.
The seat heating can also be switched off
from the higher heating modes:
Press the button and hold it slightly longer.
Safety belts
To close
Make sure you hear the lock engage in the
belt buckle.The warning lamp in the instrument
cluster lights up for a few seconds
or until the safety belts have been
fastened. Depending on the vehicle ver-
sion, an acoustic signal
* sounds at the
same time.
To unlock the safety belt
1.Press the red button in the belt buckle
2.Hold the belt
3.Guide the belt back into its reel.
The upper belt attachment point is suitable
for all body sizes provided that the person
is sitting correctly, refer to page 28.
Damaged safety belts
If the safety belts are damaged or
stretched in an accident: have the
entire belt system, including the tensioning
mechanisms, replaced at your BMW cen-
ter. Have the belt anchorage points
inspected for damage at the same time.
Failure to observe this precaution may pre-
vent the safety belts from effectively pro-
viding optimal protection when needed.<
Steering wheel
Adjustments
Never attempt to adjust the steering
wheel while driving the vehicle. It
could respond with unexpected move-
ment, posing a potential accident hazard.<
1.Push the locking lever downward
2.Adjust the steering column's reach and
height to suit your seat position
3.Pull the lever back in.
 1
1 2
2 3
3 4
4 5
5 6
6 7
7 8
8 9
9 10
10 11
11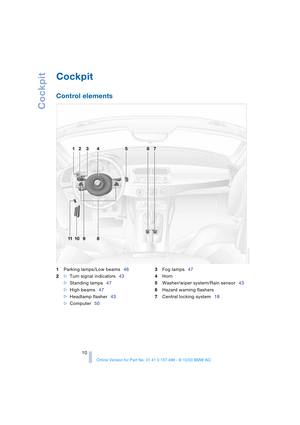 12
12 13
13 14
14 15
15 16
16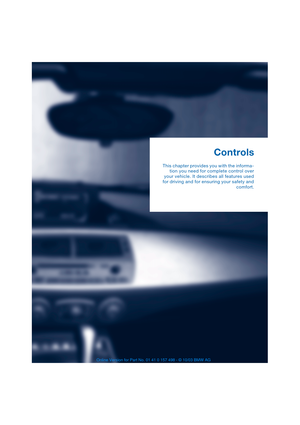 17
17 18
18 19
19 20
20 21
21 22
22 23
23 24
24 25
25 26
26 27
27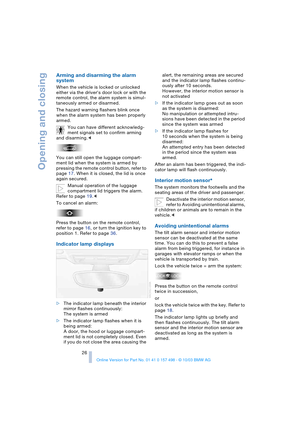 28
28 29
29 30
30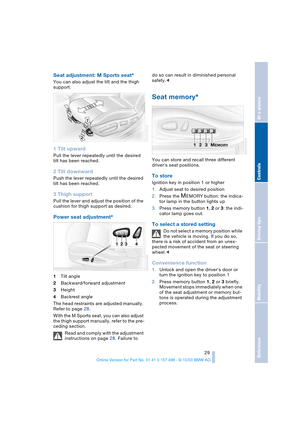 31
31 32
32 33
33 34
34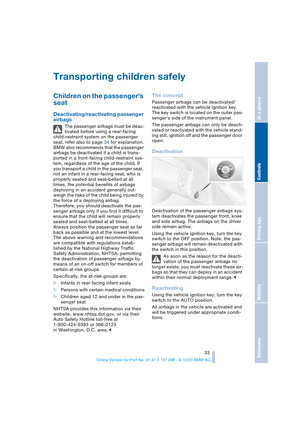 35
35 36
36 37
37 38
38 39
39 40
40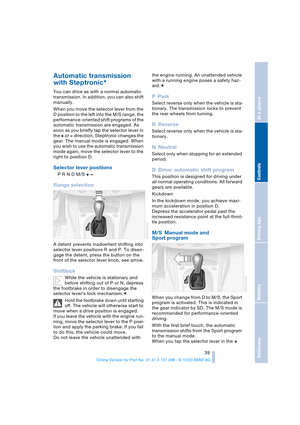 41
41 42
42 43
43 44
44 45
45 46
46 47
47 48
48 49
49 50
50 51
51 52
52 53
53 54
54 55
55 56
56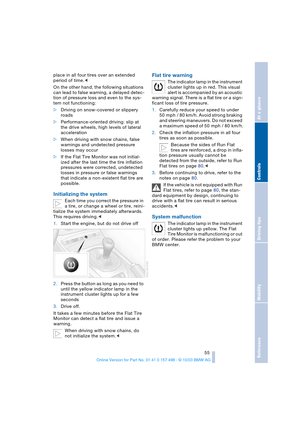 57
57 58
58 59
59 60
60 61
61 62
62 63
63 64
64 65
65 66
66 67
67 68
68 69
69 70
70 71
71 72
72 73
73 74
74 75
75 76
76 77
77 78
78 79
79 80
80 81
81 82
82 83
83 84
84 85
85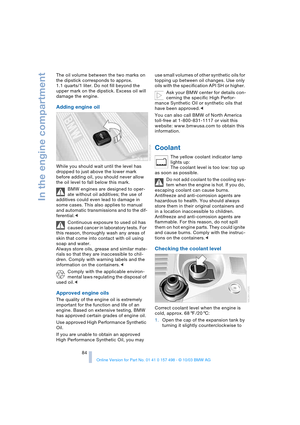 86
86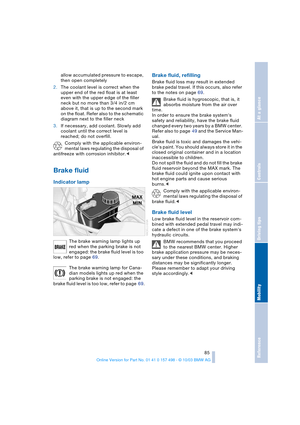 87
87 88
88 89
89 90
90 91
91 92
92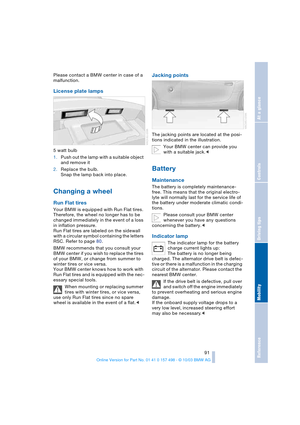 93
93 94
94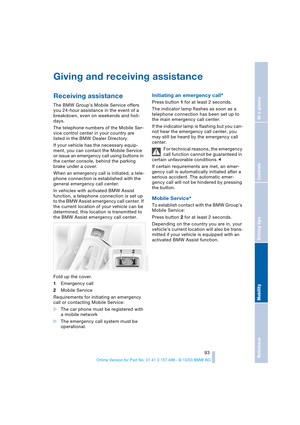 95
95 96
96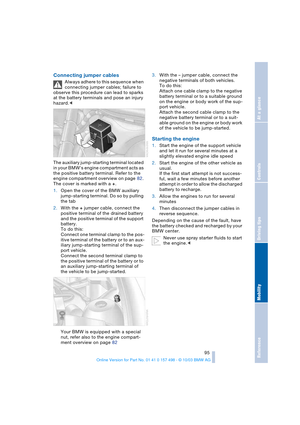 97
97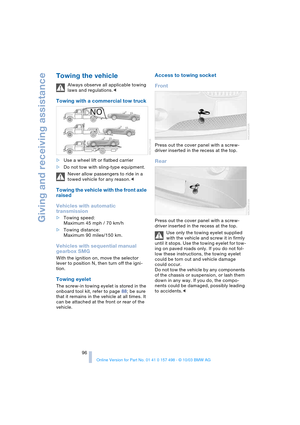 98
98 99
99 100
100 101
101 102
102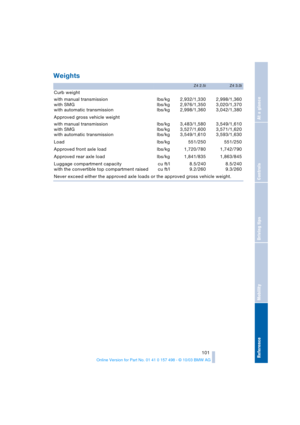 103
103 104
104 105
105 106
106 107
107 108
108 109
109 110
110 111
111 112
112 113
113 114
114 115
115 116
116 117
117 118
118 119
119