Page 73 of 249

’03MY CELICA U (L/O 0208)
69
2003 CELICA from Aug. ’02 Prod. (OM20809U)
OPERATION OF INSTRUMENTS AND
CONTROLS
Lights, Wipers and Defogger
Headlights and turn signals70
. . . . . . . . . . . . . . . . . . . . . . . . . . . . . . . . . . .
Headlight beam level control 72
. . . . . . . . . . . . . . . . . . . . . . . . . . . . . . . . . .
Emergency flashers 73
. . . . . . . . . . . . . . . . . . . . . . . . . . . . . . . . . . . . \
. . . . . .
Instrument panel light control 73
. . . . . . . . . . . . . . . . . . . . . . . . . . . . . . . . .
Front fog lights 74
. . . . . . . . . . . . . . . . . . . . . . . . . . . . . . . . . . . . \
. . . . . . . . . .
Interior light 74
. . . . . . . . . . . . . . . . . . . . . . . . . . . . . . . . . . . . \
. . . . . . . . . . . . .
Luggage compartment light 75
. . . . . . . . . . . . . . . . . . . . . . . . . . . . . . . . . . .
Windshield wipers and washer 76
. . . . . . . . . . . . . . . . . . . . . . . . . . . . . . . .
Rear window wiper and washer 76
. . . . . . . . . . . . . . . . . . . . . . . . . . . . . . .
Rear window defogger 77
. . . . . . . . . . . . . . . . . . . . . . . . . . . . . . . . . . . . \
. . .
SECTION 1 4
Page 74 of 249

’03MY CELICA U (L/O 0208)
70
2003 CELICA from Aug. ’02 Prod. (OM20809U)
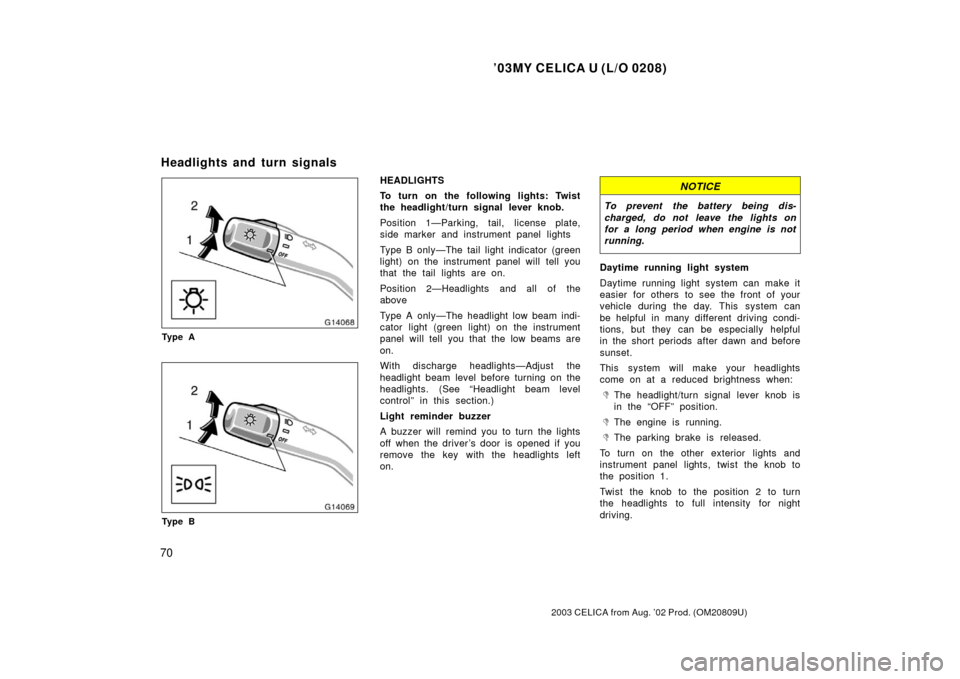
Ty p e A
Ty p e B
HEADLIGHTS
To turn on the following lights: Twist
the headlight/turn signal lever knob.
Position 1—Parking, tail, license plate,
side marker and instrument panel lights
Type B only—The tail light indicator (green
light) on the instrument panel will tell you
that the tail lights are on.
Position 2—Headlights and all of the
above
Type A only—The headlight low beam indi-
cator light (green light) on the instrument
panel will tell you that the low beams are
on.
With discharge headlights—Adjust the
headlight beam level before turning on the
headlights. (See “Headlight beam level
control” in this section.)
Light reminder buzzer
A buzzer will remind you to turn the lights
off when the driver ’s door is opened if you
remove the key with the headlights left
on.NOTICE
To prevent the battery being dis-
charged, do not leave the lights on
for a long period when engine is not
running.
Daytime running light system
Daytime running light system can make it
easier for others to see the front of your
vehicle during the day. This system can
be helpful in many different driving condi-
tions, but they can be especially helpful
in the short periods after dawn and before
sunset.
This system will make your headlights
come on at a reduced brightness when:
The headlight/turn signal lever knob is
in the “OFF” position.
The engine is running.
The parking brake is released.
To turn on the other exterior lights and
instrument panel lights, twist the knob to
the position 1.
Twist the knob to the position 2 to turn
the headlights to full intensity for night
driving.
Headlights and turn signals
Page 75 of 249

’03MY CELICA U (L/O 0208)
71
2003 CELICA from Aug. ’02 Prod. (OM20809U)
The headlights automatically switch to full
or reduced brightness depending on the
darkness of the surroundings when the
daytime running light system is activated.
Also, the other exterior lights and instru-
ment panel lights automatically turn on or
off.
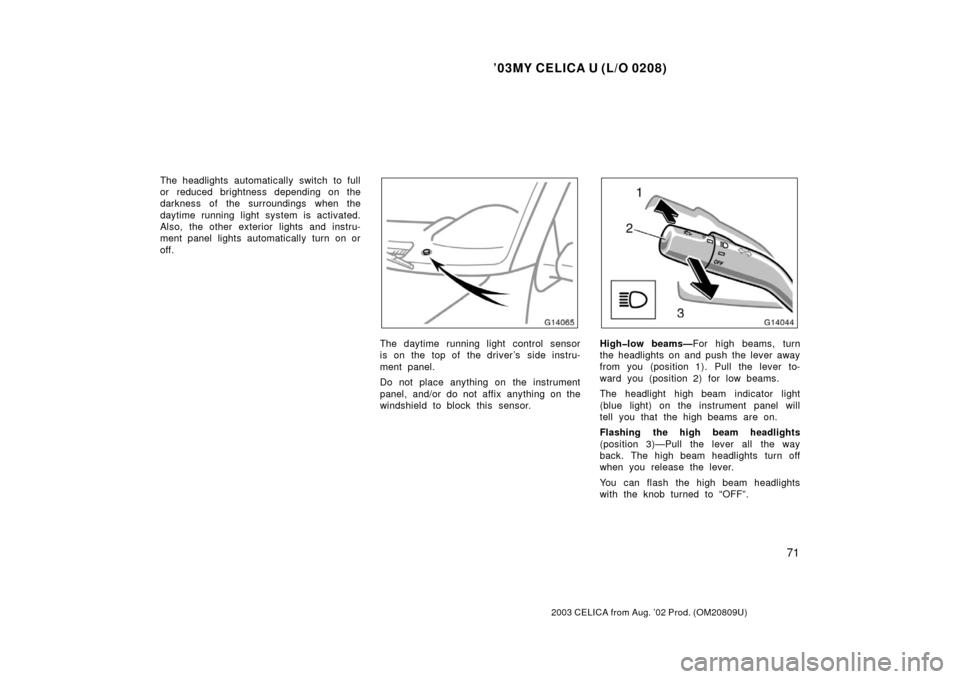
The daytime running light control sensor
is on the top of the driver’s side instru-
ment panel.
Do not place anything on the instrument
panel, and/or do not affix anything on the
windshield to block this sensor.High low beams—For high beams, turn
the headlights on and push the lever away
from you (position 1). Pull the lever to-
ward you (position 2) for low beams.
The headlight high beam indicator light
(blue light) on the instrument panel will
tell you that the high beams are on.
Flashing the high beam headlights
(position 3)—Pull the lever all the way
back. The high beam headlights turn off
when you release the lever.
You can flash the high beam headlights
with the knob turned to “OFF”.
Page 76 of 249

’03MY CELICA U (L/O 0208)
72
2003 CELICA from Aug. ’02 Prod. (OM20809U)
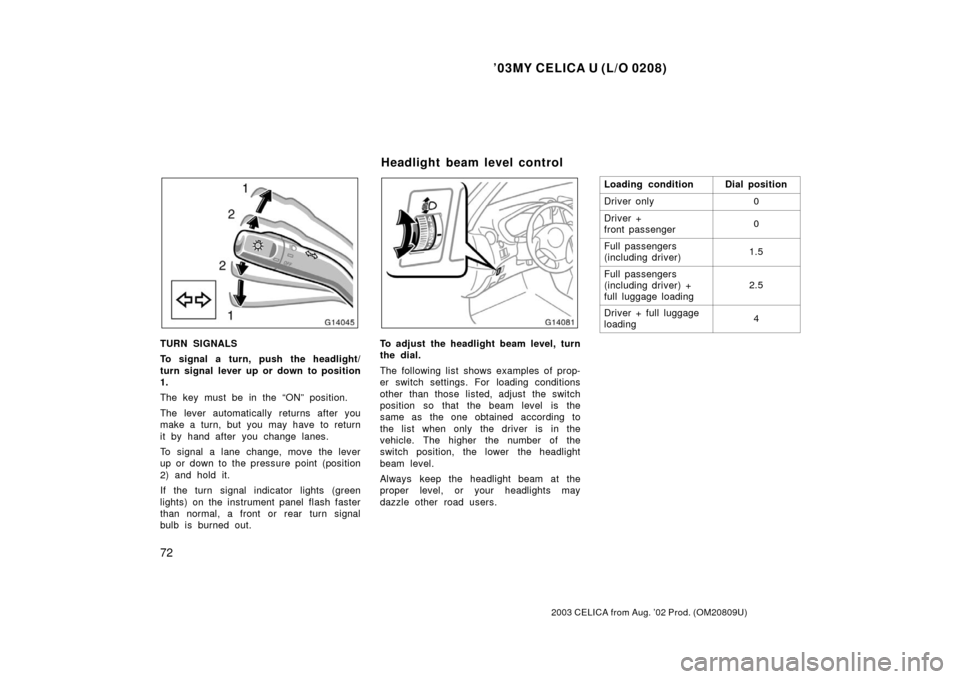
TURN SIGNALS
To signal a turn, push the headlight/
turn signal lever up or down to position
1.
The key must be in the “ON” position.
The lever automatically returns after you
make a turn, but you may have to return
it by hand after you change lanes.
To signal a lane change, move the lever
up or down to the pressure point (position
2) and hold it.
If the turn signal indicator lights (green
lights) on the instrument panel flash faster
than normal, a front or rear turn signal
bulb is burned out.To adjust the headlight beam level, turn
the dial.
The following list shows examples of prop-
er switch settings. For loading conditions
other than those listed, adjust the switch
position so that the beam level is the
same as the one obtained according to
the list when only the driver is in the
vehicle. The higher the number of the
switch position, the lower the headlight
beam level.
Always keep the headlight beam at the
proper level, or your headlights may
dazzle other road users.Loading condition
Dial position
Driver only0
Driver +
front passenger0
Full passengers
(including driver)1.5
Full passengers
(including driver) +
full luggage loading2.5
Driver + full luggage
loading4
Headlight beam level control
Page 77 of 249
’03MY CELICA U (L/O 0208)
73
2003 CELICA from Aug. ’02 Prod. (OM20809U)
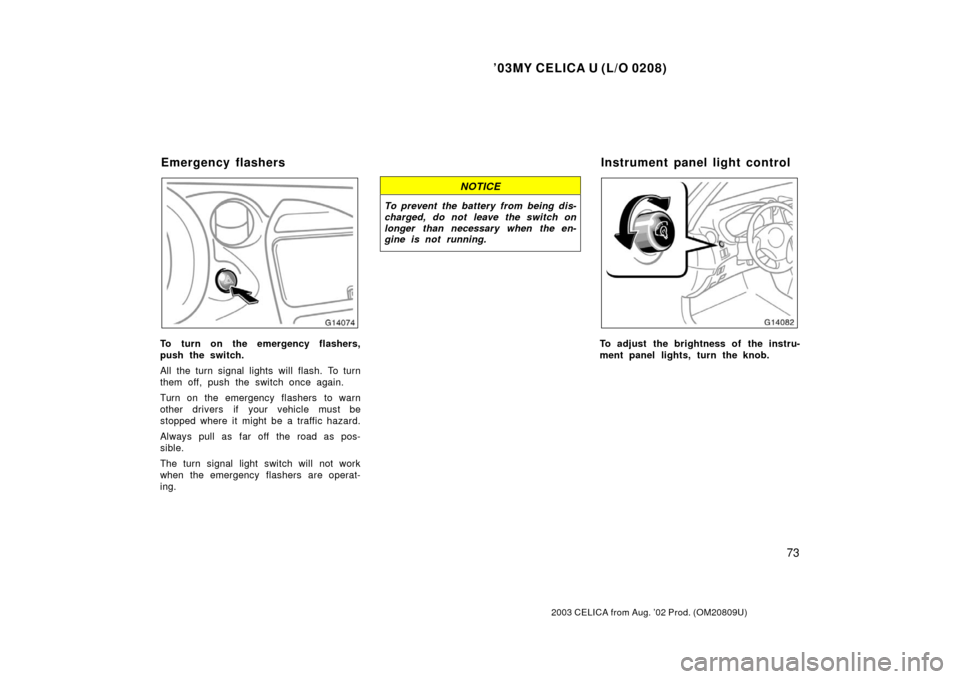
To turn on the emergency flashers,
push the switch.
All the turn signal lights will flash. To turn
them off, push the switch once again.
Turn on the emergency flashers to warn
other drivers if your vehicle must be
stopped where it might be a traffic hazard.
Always pull as far off the road as pos-
sible.
The turn signal light switch will not work
when the emergency flashers are operat-
ing.
NOTICE
To prevent the battery from being dis-
charged, do not leave the switch on
longer than necessary when the en-
gine is not running.
To adjust the brightness of the instru-
ment panel lights, turn the knob.
Emergency flashersInstrument panel light control
Page 78 of 249

’03MY CELICA U (L/O 0208)
74
2003 CELICA from Aug. ’02 Prod. (OM20809U)
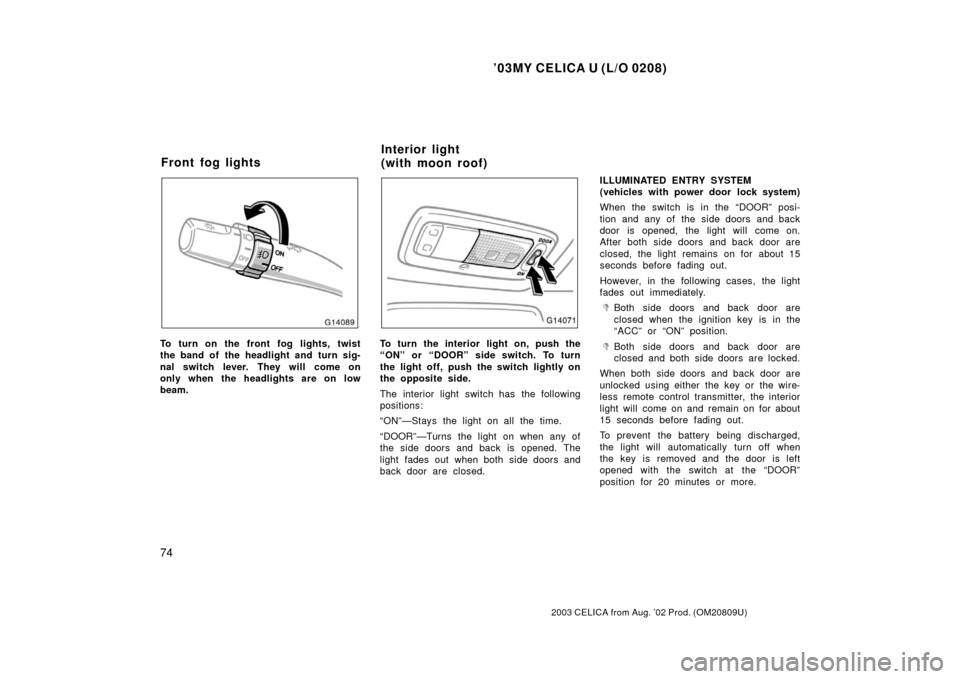
To turn on the front fog lights, twist
the band of the headlight and turn sig-
nal switch lever. They will come on
only when the headlights are on low
beam.To turn the interior light on, push the
“ON” or “DOOR” side switch. To turn
the light off, push the switch lightly on
the opposite side.
The interior light switch has the following
positions:
“ON”—Stays the light on all the time.
“DOOR”—Turns the light on when any of
the side doors and back is opened. The
light fades out when both side doors and
back door are closed.ILLUMINATED ENTRY SYSTEM
(vehicles with power door lock system)
When the switch is in the “DOOR” posi-
tion and any of the side doors and back
door is opened, the light will come on.
After both side doors and back door are
closed, the light remains on for about 15
seconds before fading out.
However, in the following cases, the light
fades out immediately.
Both side doors and back door are
closed when the ignition key is in the
“ACC” or “ON” position.
Both side doors and back door are
closed and both side doors are locked.
When both side doors and back door are
unlocked using either the key or the wire-
less remote control transmitter, the interior
light will come on and remain on for about
15 seconds before fading out.
To prevent the battery being discharged,
the light will automatically turn off when
the key is removed and the door is left
opened with the switch at the “DOOR”
position for 20 minutes or more.
Front fog lights Interior light
(with moon roof)
Page 79 of 249

’03MY CELICA U (L/O 0208)
75
2003 CELICA from Aug. ’02 Prod. (OM20809U)
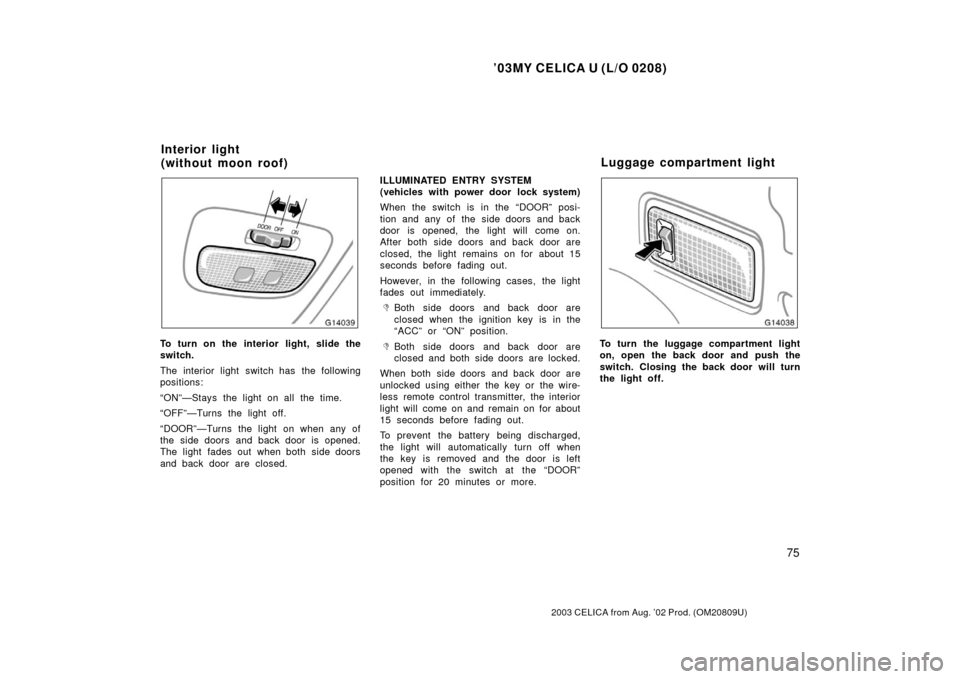
To turn on the interior light, slide the
switch.
The interior light switch has the following
positions:
“ON”—Stays the light on all the time.
“OFF”—Turns the light off.
“DOOR”—Turns the light on when any of
the side doors and back door is opened.
The light fades out when both side doors
and back door are closed.ILLUMINATED ENTRY SYSTEM
(vehicles with power door lock system)
When the switch is in the “DOOR” posi-
tion and any of the side doors and back
door is opened, the light will come on.
After both side doors and back door are
closed, the light remains on for about 15
seconds before fading out.
However, in the following cases, the light
fades out immediately.
Both side doors and back door are
closed when the ignition key is in the
“ACC” or “ON” position.
Both side doors and back door are
closed and both side doors are locked.
When both side doors and back door are
unlocked using either the key or the wire-
less remote control transmitter, the interior
light will come on and remain on for about
15 seconds before fading out.
To prevent the battery being discharged,
the light will automatically turn off when
the key is removed and the door is left
opened with the switch at the “DOOR”
position for 20 minutes or more.To turn the luggage compartment light
on, open the back door and push the
switch. Closing the back door will turn
the light off.
Interior light
(without moon roof) Luggage compartment light
Page 80 of 249

’03MY CELICA U (L/O 0208)
76
2003 CELICA from Aug. ’02 Prod. (OM20809U)
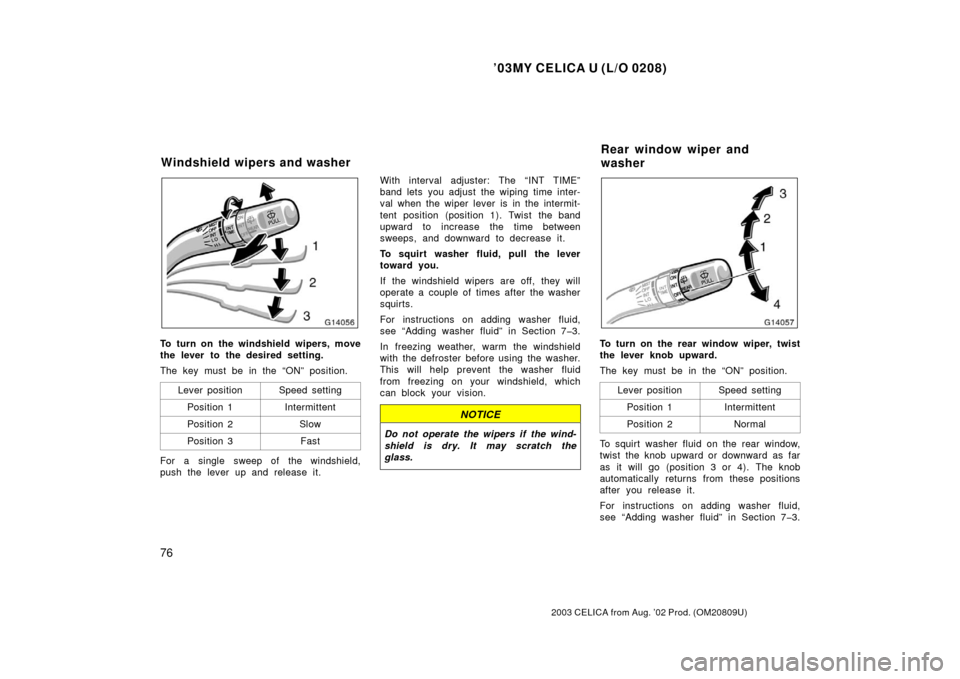
To turn on the windshield wipers, move
the lever to the desired setting.
The key must be in the “ON” position.Lever position
Speed setting
Position 1Intermittent
Position 2Slow
Position 3Fast
For a single sweep of the windshield,
push the lever up and release it. With interval adjuster: The “INT TIME”
band lets you adjust the wiping time inter-
val when the wiper lever is in the intermit-
tent position (position 1). Twist the band
upward to increase the time between
sweeps, and downward to decrease it.
To squirt washer fluid, pull the lever
toward you.
If the windshield wipers are off, they will
operate a couple of times after the washer
squirts.
For instructions on adding washer fluid,
see “Adding washer fluid” in Section 7 3.
In freezing weather, warm the windshield
with the defroster before using the washer.
This will help prevent the washer fluid
from freezing on your windshield, which
can block your vision.
NOTICE
Do not operate the wipers if the wind-
shield is dry. It may scratch the
glass.
To turn on the rear window wiper, twist
the lever knob upward.
The key must be in the “ON” position.
Lever position
Speed setting
Position 1Intermittent
Position 2Normal
To squirt washer fluid on the rear window,
twist the knob upward or downward as far
as it will go (position 3 or 4). The knob
automatically returns from these positions
after you release it.
For instructions on adding washer fluid,
see “Adding washer fluid” in Section 7 3.
Windshield wipers and washer Rear window wiper and
washer