Page 1402 of 2234
H42758SST(s)
H41078
10 m (33 ft) or more
SST(s)Battery
60±42
±
SUPPLEMENTAL RESTRAINT SYSTEM CURTAIN SHIELD AIR BAG ASSY LH
AVENSIS REPAIR MANUAL (RM1018E)
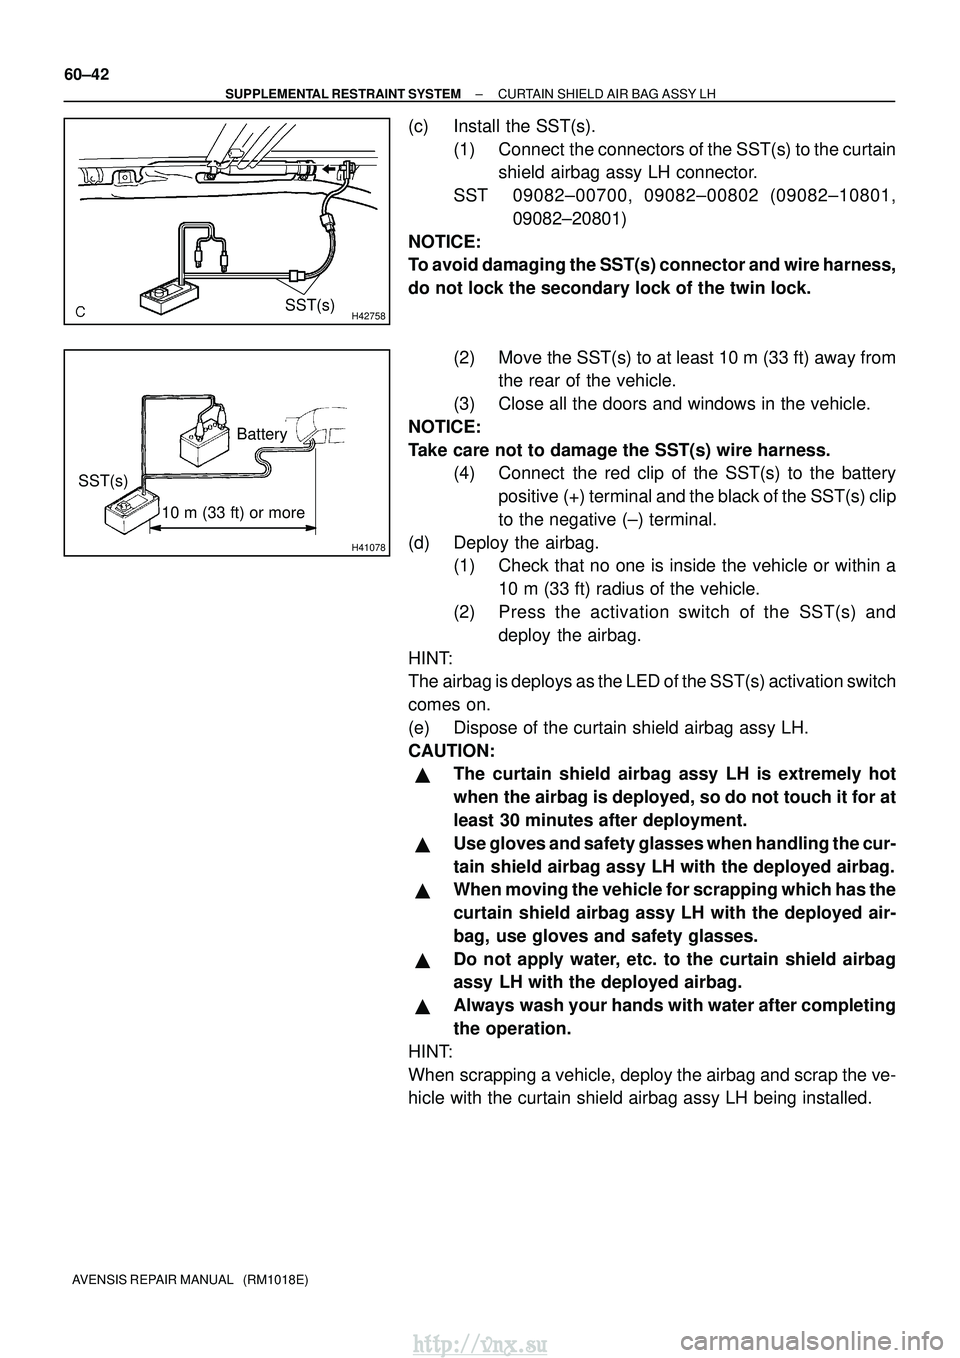
(c) Install the SST(s). (1) Connect the connectors of the SST(s) to the curtainshield airbag assy LH connector.
SST 09082±00700, 09082±00802 (09082±10801, 09082±20801)
NOTICE:
To avoid damaging the SST(s) connector and wire harness,
do not lock the secondary lock of the twin lock.
(2) Move the SST(s) to at least 10 m (33 ft) away fromthe rear of the vehicle.
(3) Close all the doors and windows in the vehicle.
NOTICE:
Take care not to damage the SST(s) wire harness. (4) Connect the red clip of the SST(s) to the battery
positive (+) terminal and the black of the SST(s) clip
to the negative (±) terminal.
(d) Deploy the airbag. (1) Check that no one is inside the vehicle or within a
10 m (33 ft) radius of the vehicle.
(2) Press the activation switch of the SST(s) and deploy the airbag.
HINT:
The airbag is deploys as the LED of the SST(s) activation switch
comes on.
(e) Dispose of the curtain shield airbag assy LH.
CAUTION:
�The curtain shield airbag assy LH is extremely hot
when the airbag is deployed, so do not touch it for at
least 30 minutes after deployment.
�Use gloves and safety glasses when handling the cur-
tain shield airbag assy LH with the deployed airbag.
�When moving the vehicle for scrapping which has the
curtain shield airbag assy LH with the deployed air-
bag, use gloves and safety glasses.
�Do not apply water, etc. to the curtain shield airbag
assy LH with the deployed airbag.
�Always wash your hands with water after completing
the operation.
HINT:
When scrapping a vehicle, deploy the airbag and scrap the ve-
hicle with the curtain shield airbag assy LH being installed.
http://vnx.su
Page 1408 of 2234
H42663
H42770
BatterySST(s)
H40007
10 m (33 ft) or more
SST(s)
60±48
±
SUPPLEMENTAL RESTRAINT SYSTEM FRONT SEAT AIRBAG ASSY LH
AVENSIS REPAIR MANUAL (RM1018E)
(b)Remove the front seat assy LH (See page 72±16).
(c) Disconnect the front seat airbag connector.
NOTICE:
When handling the airbag connector, take care not to
damage the airbag wire harness.
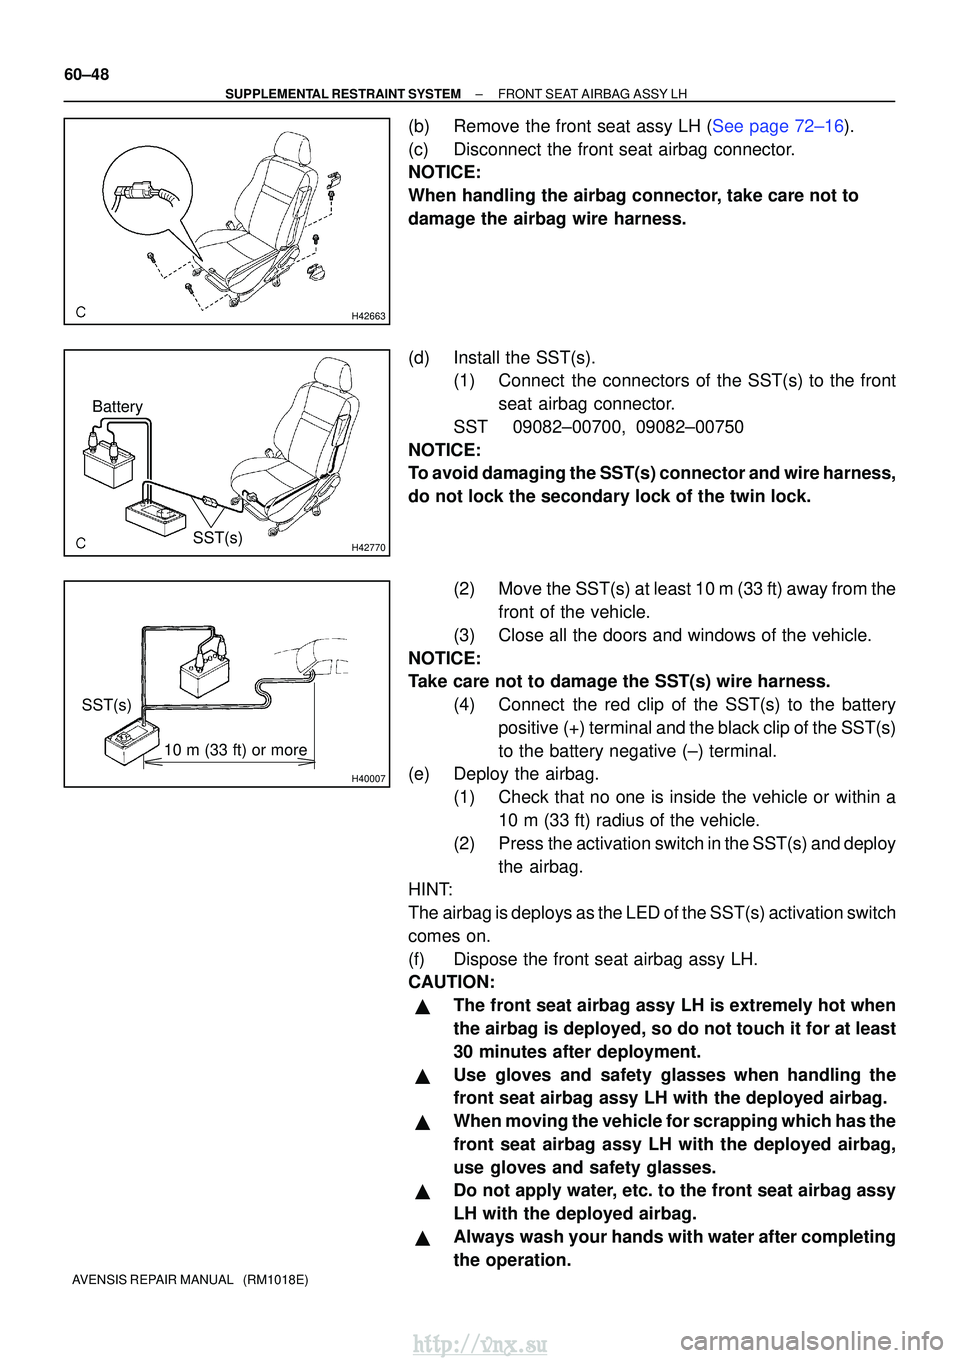
(d) Install the SST(s). (1) Connect the connectors of the SST(s) to the front
seat airbag connector.
SST 09082±00700, 09082±00750
NOTICE:
To avoid damaging the SST(s) connector and wire harness,
do not lock the secondary lock of the twin lock.
(2) Move the SST(s) at least 10 m (33 ft) away from thefront of the vehicle.
(3) Close all the doors and windows of the vehicle.
NOTICE:
Take care not to damage the SST(s) wire harness. (4) Connect the red clip of the SST(s) to the batterypositive (+) terminal and the black clip of the SST(s)
to the battery negative (±) terminal.
(e) Deploy the airbag.
(1) Check that no one is inside the vehicle or within a10 m (33 ft) radius of the vehicle.
(2) Press the activation switch in the SST(s) and deploy the airbag.
HINT:
The airbag is deploys as the LED of the SST(s) activation switch
comes on.
(f) Dispose the front seat airbag assy LH.
CAUTION:
�The front seat airbag assy LH is extremely hot when
the airbag is deployed, so do not touch it for at least
30 minutes after deployment.
�Use gloves and safety glasses when handling the
front seat airbag assy LH with the deployed airbag.
�When moving the vehicle for scrapping which has the
front seat airbag assy LH with the deployed airbag,
use gloves and safety glasses.
�Do not apply water, etc. to the front seat airbag assy
LH with the deployed airbag.
�Always wash your hands with water after completing
the operation.
http://vnx.su
Page 1418 of 2234
H40007
10 m (33 ft) or more
Battery
SST(s)
H40005
Battery
SST(s)
±
SUPPLEMENTAL RESTRAINT SYSTEM HORN BUTTON ASSY
60±21
AVENSIS REPAIR MANUAL (RM1018E)
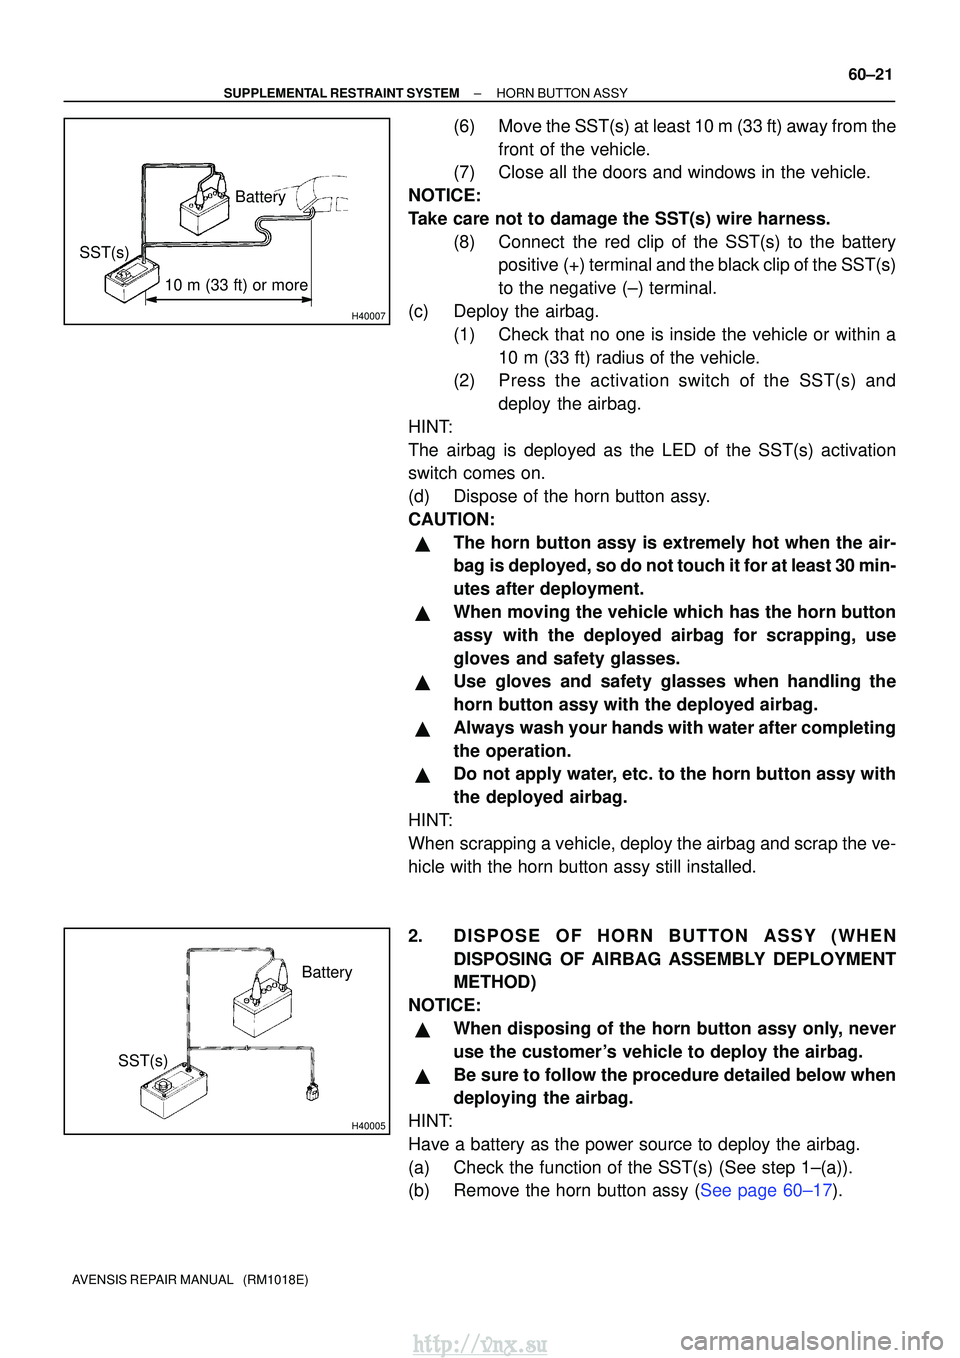
(6) Move the SST(s) at least 10 m (33 ft) away from the
front of the vehicle.
(7) Close all the doors and windows in the vehicle.
NOTICE:
Take care not to damage the SST(s) wire harness. (8) Connect the red clip of the SST(s) to the batterypositive (+) terminal and the black clip of the SST(s)
to the negative (±) terminal.
(c) Deploy the airbag. (1) Check that no one is inside the vehicle or within a10 m (33 ft) radius of the vehicle.
(2) Press the activation switch of the SST(s) and
deploy the airbag.
HINT:
The airbag is deployed as the LED of the SST(s) activation
switch comes on.
(d) Dispose of the horn button assy.
CAUTION:
�The horn button assy is extremely hot when the air-
bag is deployed, so do not touch it for at least 30 min-
utes after deployment.
�When moving the vehicle which has the horn button
assy with the deployed airbag for scrapping, use
gloves and safety glasses.
�Use gloves and safety glasses when handling the
horn button assy with the deployed airbag.
�Always wash your hands with water after completing
the operation.
�Do not apply water, etc. to the horn button assy with
the deployed airbag.
HINT:
When scrapping a vehicle, deploy the airbag and scrap the ve-
hicle with the horn button assy still installed.
2. DISPOSE OF HORN BUTTON ASSY (WHEN DISPOSING OF AIRBAG ASSEMBLY DEPLOYMENT
METHOD)
NOTICE:
�When disposing of the horn button assy only, never
use the customer's vehicle to deploy the airbag.
�Be sure to follow the procedure detailed below when
deploying the airbag.
HINT:
Have a battery as the power source to deploy the airbag.
(a) Check the function of the SST(s) (See step 1±(a)).
(b)Remove the horn button assy (See page 60±17).
http://vnx.su
Page 1426 of 2234
H42660
H42662
SST(s)SST(s)
H41078
10 m (33 ft) or more
SST(s)Battery
60±56
±
SUPPLEMENTAL RESTRAINT SYSTEM INSTRUMENT PANEL AIR BAG ASSY
AVENSIS REPAIR MANUAL (RM1018E)
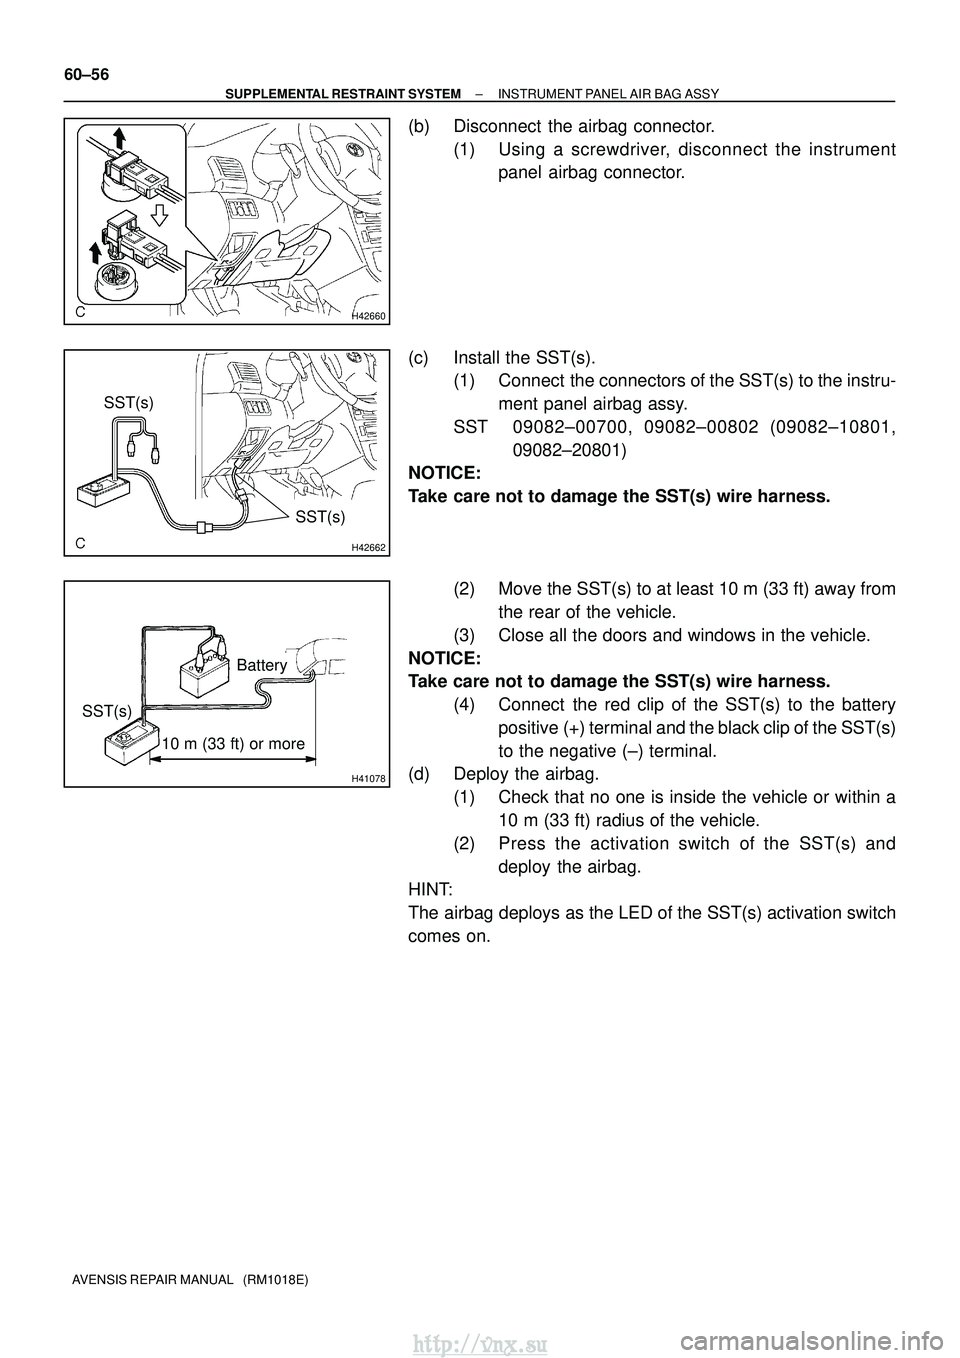
(b) Disconnect the airbag connector. (1) Using a screwdriver, disconnect the instrumentpanel airbag connector.
(c) Install the SST(s). (1) Connect the connectors of the SST(s) to the instru-
ment panel airbag assy.
SST 09082±00700, 09082±00802 (09082±10801, 09082±20801)
NOTICE:
Take care not to damage the SST(s) wire harness.
(2) Move the SST(s) to at least 10 m (33 ft) away fromthe rear of the vehicle.
(3) Close all the doors and windows in the vehicle.
NOTICE:
Take care not to damage the SST(s) wire harness. (4) Connect the red clip of the SST(s) to the batterypositive (+) terminal and the black clip of the SST(s)
to the negative (±) terminal.
(d) Deploy the airbag.
(1) Check that no one is inside the vehicle or within a10 m (33 ft) radius of the vehicle.
(2) Press the activation switch of the SST(s) and deploy the airbag.
HINT:
The airbag deploys as the LED of the SST(s) activation switch
comes on.
http://vnx.su
Page 1434 of 2234
H42642
H42645
SST(s)
H40007
10 m (33 ft) or more
Battery
SST(s)
±
SUPPLEMENTAL RESTRAINT SYSTEM INSTRUMENT PANEL PASSENGER AIR BAG ASSY
60±31
AVENSIS REPAIR MANUAL (RM1018E)
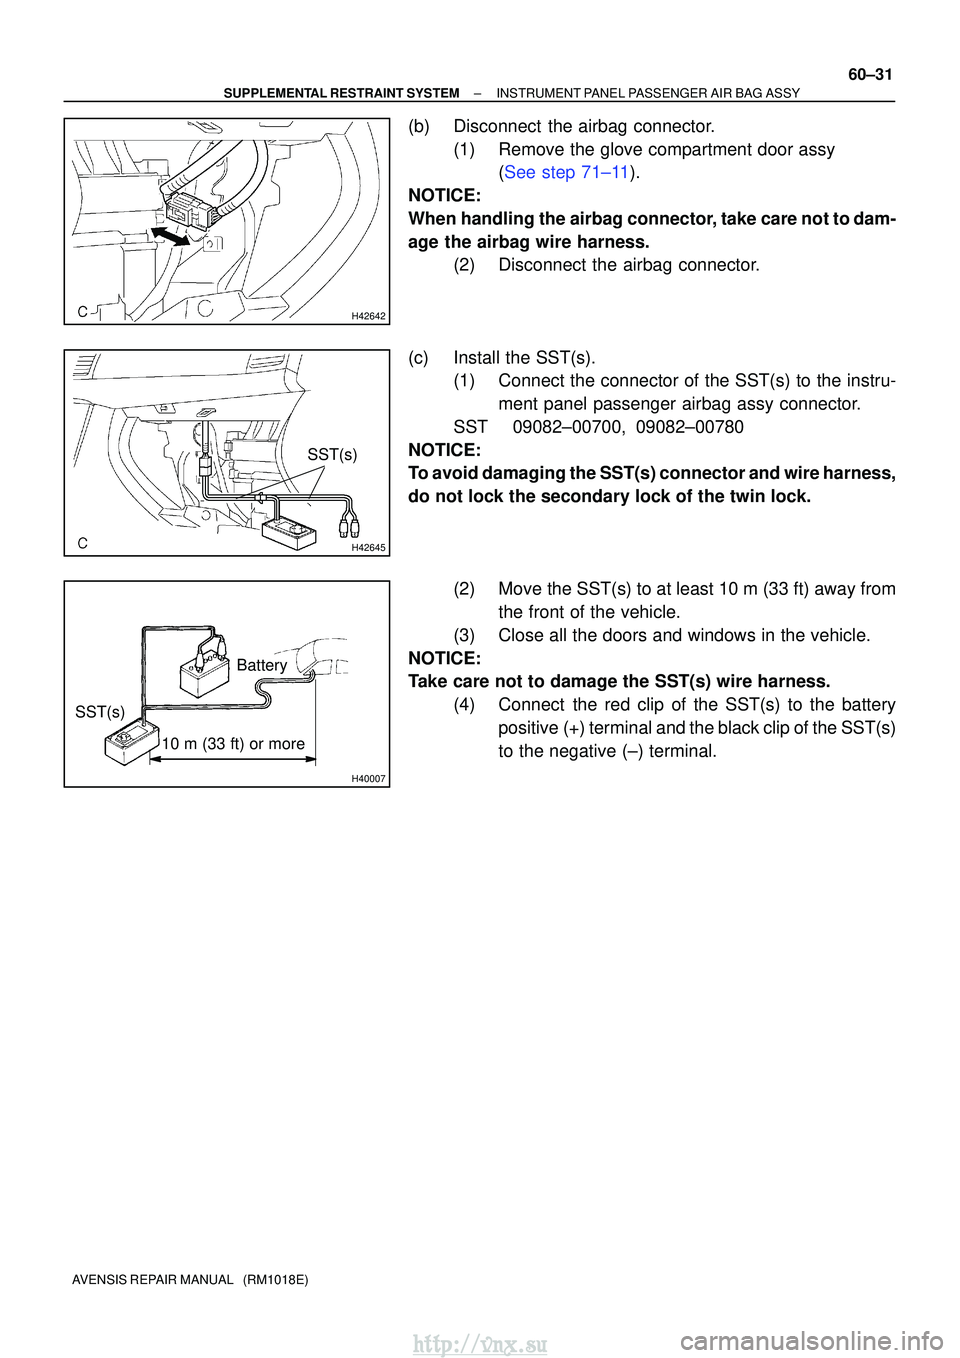
(b) Disconnect the airbag connector.
(1) Remove the glove compartment door assy (See step 71±11).
NOTICE:
When handling the airbag connector, take care not to dam-
age the airbag wire harness. (2) Disconnect the airbag connector.
(c) Install the SST(s). (1) Connect the connector of the SST(s) to the instru-
ment panel passenger airbag assy connector.
SST 09082±00700, 09082±00780
NOTICE:
To avoid damaging the SST(s) connector and wire harness,
do not lock the secondary lock of the twin lock.
(2) Move the SST(s) to at least 10 m (33 ft) away fromthe front of the vehicle.
(3) Close all the doors and windows in the vehicle.
NOTICE:
Take care not to damage the SST(s) wire harness. (4) Connect the red clip of the SST(s) to the batterypositive (+) terminal and the black clip of the SST(s)
to the negative (±) terminal.
http://vnx.su
Page 1466 of 2234
B51763
SST
SST
B50513
10 m or more
±
SEAT BELT FRONT SEAT BELT
61±11
AVENSIS REPAIR MANUAL (RM1018E)
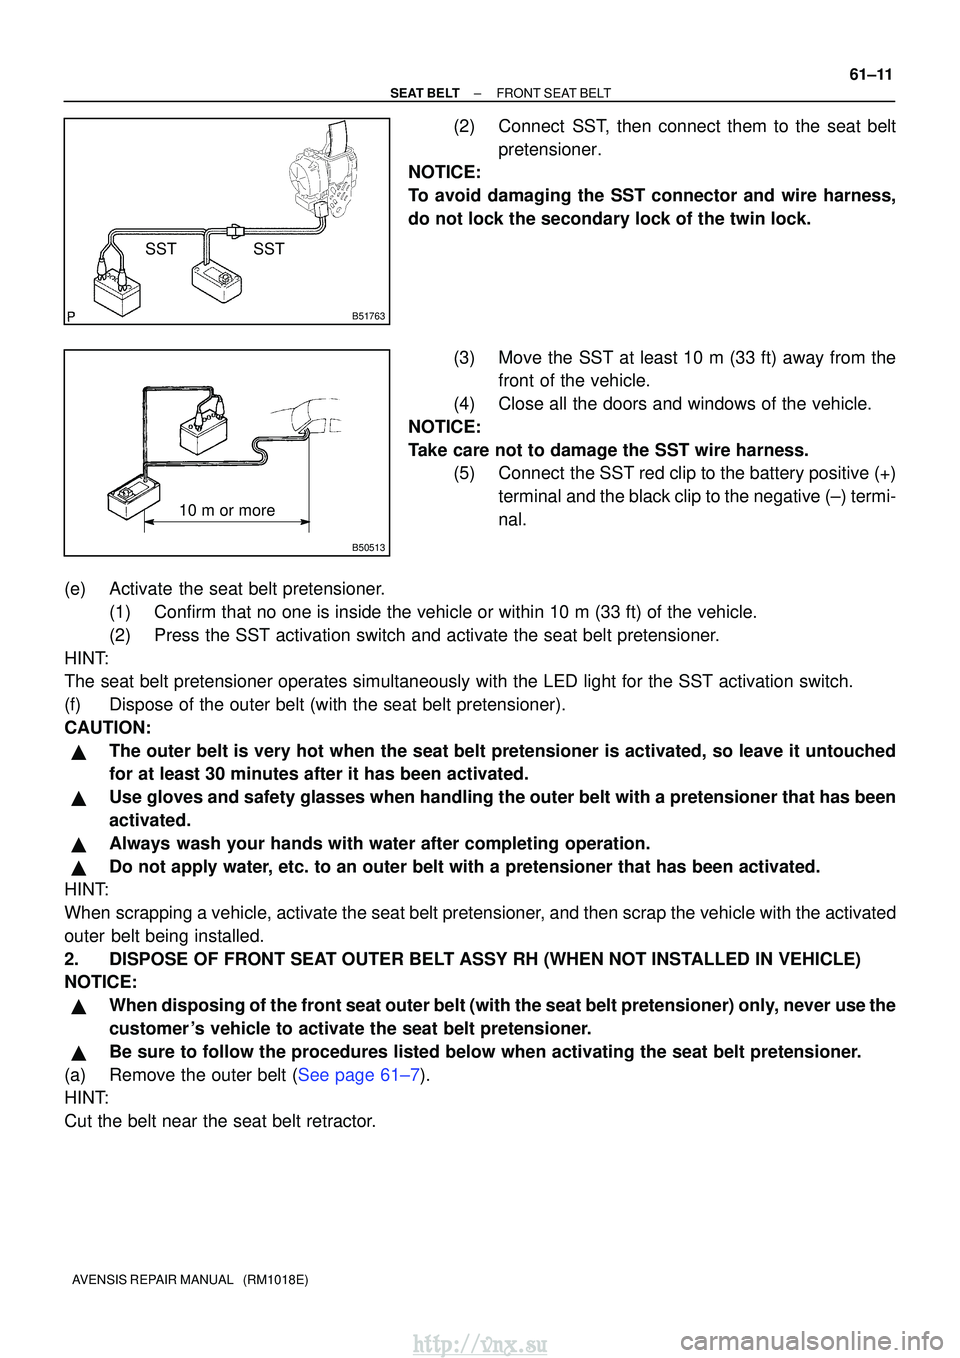
(2) Connect SST, then connect them to the seat belt
pretensioner.
NOTICE:
To avoid damaging the SST connector and wire harness,
do not lock the secondary lock of the twin lock.
(3) Move the SST at least 10 m (33 ft) away from thefront of the vehicle.
(4) Close all the doors and windows of the vehicle.
NOTICE:
Take care not to damage the SST wire harness. (5) Connect the SST red clip to the battery positive (+)
terminal and the black clip to the negative (±) termi-
nal.
(e) Activate the seat belt pretensioner. (1) Confirm that no one is inside the vehicle or within 10 m (33 ft) of th\
e vehicle.
(2) Press the SST activation switch and activate the seat belt pretensioner.
HINT:
The seat belt pretensioner operates simultaneously with the LED light fo\
r the SST activation switch.
(f) Dispose of the outer belt (with the seat belt pretensioner).
CAUTION:
�The outer belt is very hot when the seat belt pretensioner is activated,\
so leave it untouched
for at least 30 minutes after it has been activated.
�Use gloves and safety glasses when handling the outer belt with a pretensio\
ner that has been
activated.
�Always wash your hands with water after completing operation.
�Do not apply water, etc. to an outer belt with a pretensioner that has been activated.
HINT:
When scrapping a vehicle, activate the seat belt pretensioner, and then scrap the vehicle with the activated
outer belt being installed.
2. DISPOSE OF FRONT SEAT OUTER BELT ASSY RH (WHEN NOT INSTALLED IN VEHICLE)
NOTICE:
�When disposing of the front seat outer belt (with the seat belt pretens\
ioner) only, never use the
customer 's vehicle to activate the seat belt pretensioner.
�Be sure to follow the procedures listed below when activating the seat b\
elt pretensioner.
(a)Remove the outer belt (See page 61±7).
HINT:
Cut the belt near the seat belt retractor.
http://vnx.su
Page 1478 of 2234
610EB±01
A79910N�m (kgf� cm ft�lbf): Specified torque Rear Window Side
Garnish RH
Roof Side
Garnish Inner RH
Deck Trim
Side Board RH
Deck Floor
Box RH
Deck Floor
Box Front
Tonneau Cover Assy
Deck Board
Sub±assy
Deck Floor
Box Rear
Deck Trim
Side Board LH
Deck Floor
Box LH
Rear Window
Side Garnish
LH
Roof Side
Garnish
Inner LH Rear Floor
Finish Plate
Rear Seat Cushion Assy
and Rear Seatback Assy
Rear Seat
3 Point Type
Belt Assy Inner
42 (430, 31)
Rear Seat
3 Point Type
Belt Assy Outer
Rear Seat Belt
Assy Outer Center
Rear Seat
3 Point Type
Belt Assy Inner
31 (316, 23)CRS Anchor
Bracket Sub±assy
7.5 (76.5, 66 in.�
lbf)
42 (430, 31)
42 (430, 31)
42 (430, 31)
±
SEAT BELT REAR SEAT BELT (WAGON MODELS)
61±23
AVENSIS REPAIR MANUAL (RM1018E)
REAR SEAT BELT (WAGON MODELS)
COMPONENTS
http://vnx.su
Page 1523 of 2234
660CU±01
I35778
A: 150 mm (5.91 in.)
B: 50 mm (1.97 in.)
C: 480 mm (18.90 in.)
D: 295 mm (11.61 in.)
E: 310 mm (12.21 in.)F: 275 mm (10.83 in.)
G: 130 mm (5.12 in.)
H: 420 mm (16.54 in.)
I: 280 mm (11.02 in.)
Front:
AB
C
DE
FG
HI
A
A
A
B
B
B
C
66±22
±
WIPER & WASHER WASHER NOZZLE SUB±ASSY
AVENSIS REPAIR MANUAL (RM1018E)
WASHER NOZZLE SUB±ASSY
ADJUSTMENT
1. REMOVE WASHER NOZZLE SUB±ASSY
(a) With the engine running, check that the point where the washer fluid hits the windshield and the rear window is within the range indicated by the hatched line.
http://vnx.su