2003 NISSAN 350Z ECO mode
[x] Cancel search: ECO modePage 2 of 227
IMPORTANT INFORMATION
ABOUT THIS MANUALYou will see various symbols in this manual.
They are used in the following ways:
WARNING
This is used to indicate the presence of a
hazard that could cause death or serious
personal injury. To avoid or reduce the
risk, the procedures must be followed
precisely.
CAUTION
This is used to indicate the presence of a
hazard that could cause minor or moder-
ate personal injury or damage to your
vehicle. To avoid or reduce the risk, the
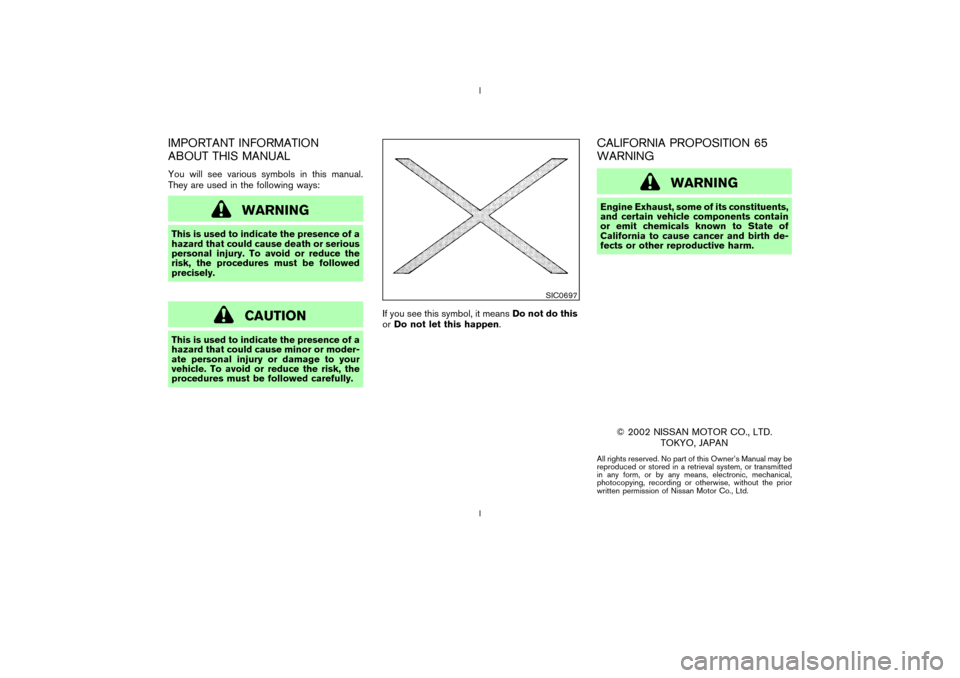
procedures must be followed carefully.If you see this symbol, it meansDo not do this
orDo not let this happen.
CALIFORNIA PROPOSITION 65
WARNING
WARNING
Engine Exhaust, some of its constituents,
and certain vehicle components contain
or emit chemicals known to State of
California to cause cancer and birth de-
fects or other reproductive harm.
2002 NISSAN MOTOR CO., LTD.
TOKYO, JAPANAll rights reserved. No part of this Owner's Manual may be
reproduced or stored in a retrieval system, or transmitted
in any form, or by any means, electronic, mechanical,
photocopying, recording or otherwise, without the prior
written permission of Nissan Motor Co., Ltd.
SIC0697Z
02.9.13/Z33-D/V5.0
X
Page 48 of 227

temperature displayed on various signs or bill-
boards.Distance to empty (dte Ð mile or km)The distance to empty (dte) mode provides you
with an estimation of the distance that can be
driven before refueling. The dte is constantly
being calculated, based on the amount of fuel in
the fuel tank and the actual fuel consumption.
The display is updated every 30 seconds.
The dte mode includes a low range warning
feature: when the fuel level is low, the dte mode
is automatically selected and the digits blink in
order to draw the driver's attention. Press the
mode switch
qAif you wish to return to the mode
that was selected before the warning occurred.
The dte indicator will remain blinking until the
vehicle is refuelled.
When the fuel level drops even lower, the dte
display will change to (----).
NOTE:
IIf the amount of fuel added while the
ignition switch is OFF is small, the dis-
play just before the ignition switch is
turned OFF may continue to be dis-
played.
IWhen driving uphill or rounding curves,
the fuel in the tank shifts, which maymomentarily change the display.
Average fuel consumption
(Mpg or l/100 km)The average fuel consumption mode shows the
average fuel consumption since the last reset.
Resetting is done by pressing the trip computer
setting switch
qB
for more than approximately 1
second. (The average speed is also reset at the
same time.)
The display is updated every 30 seconds. At
about the first 1/3 miles (500 m) after a reset,
the display shows (----).
Average speed (MPH or km/h)The average speed mode shows the average
vehicle speed since the last reset. Resetting is
done by pressing the setting switch
qB
for more
than approximately 1 second. (The average fuel
consumption is also reset at the same time.)
The display is updated every 30 seconds. The
first 30 seconds after a reset, the display shows
(----).
Elapsed time (h:m:s)The elapsed time mode shows the time since the
last reset. The displayed time can be reset by
pressing the trip computer setting switch
qB
for
more than approximately 1 second. (The tripodometer is also reset at the same time.)
Trip odometer (MLS or km)The trip odometer mode shows the total dis-
tance the vehicle has been driven since the last
reset. Resetting is done by pressing the setting
switch
qBfor more than approximately 1 second.
(The elapsed time is also reset at the same time.)
Stopwatch (h:m:s)You can use the trip computer as a stopwatch.
Each time the trip computer setting switch
qB
is
pressed, the stopwatch will be operated as
follows:
After 100 hours, the time will start from the reset
display again.
Even if the display is switched to the other mode
while the time is starting, the stopwatch contin-
ues to advance until you stop the time in the
stopwatch mode. When the ignition switch is
turned OFF, the time is reset.Tire pressure indicator (PSI) (if so
equipped)The tire pressure indicator shows tire pressure
(0 - 51 psi) of all wheels (except the spare tire)
Instruments and controls
2-9
Z
02.9.13/Z33-D/V5.0
X
Page 49 of 227
by sending a signal from a sensor that is installed
in each wheel. Press the trip computer setting
switch
qBto change the display to F (front) or R
(rear).
The tire pressure sensor will activate only when
the vehicle is driven at speeds above 20 MPH
(32 km/h). If the tire pressure signal cannot be
received correctly, the display shows (----).
The tire pressure indicator mode includes a low
tire pressure warning feature. If the vehicle is
being driven with very low tire pressure or a flat
tire, the tire pressure indicator mode is automati-
cally selected and the PSI indicator will blink in
order to attract the driver's attention. Press the
trip computer mode switch
qA
if you wish to
return to the mode that was selected before the
warning occurred. The PSI indicator will con-
tinue blinking until the tire pressure of each tire is
properly adjusted.
For additional information, see ªLow tire pres-
sure warning systemº in the ª5. Starting and
drivingº section and ªFlat tireº in the ª6. In case
of emergencyº section.
Tire pressure shown in the display may rise
or fall while driving depending on the driv-
ing conditions (heat, etc.) and/or the out-
side temperature. This does not indicate a
system malfunction.
WARNING
The low tire pressure warning system is
not a substitute for the regular tire pres-
sure check. Be sure to check the tire
pressure regularly and adjust it to the
COLD tire pressure shown in the tire
placard.Up-shift indicator setting (rpm) (for
manual transmission models)The up-shift indicator setting mode is used to
set the desired engine speed (rpm) for the
up-shift indicator (situated in the tachometer) to
illuminate. When the engine speed approaches
or reaches the set figure, the up-shift indicator
will flash or illuminate to show the driver the
timing for shifting into a higher gear. See ªDriving
the vehicleº in the ª5. Starting and drivingº
section for the use of the up-shift indicator.
When the up-shift indicator setting mode is
selected, the rpm indicator blinks and the engine
speed currently set is displayed. (The initial
factory setting is 6,600 rpm.) The figure can be
changed between 2,000 and 8,000 rpm by
pressing trip computer setting switch
qB. Press-
ing the switch for less than approximately 1second will add the figure by 100 rpm. If press-
ing for more than approximately 1 second, the
figure will increase by 500 rpm.
If the battery cable is disconnected, the set
engine speed will be returned to the initial figure
(6,600 rpm).
Display priorityIf a low outside air temperature warning,
low dte (distance to empty) range warning
and low tire pressure warning occur simul-
taneously, other display modes switch au-
tomatically to the outside air temperature
display.
When trip computer mode switch
qA
is
pressed, the display switches to the mode
chosen before the warning display, but the
ICY indicator will continue blinking.
2-10
Instruments and controls
Z
02.9.13/Z33-D/V5.0
X
Page 51 of 227
Automatic transmission check
warning light (A/T models)
When the ignition switch is turned ON, the light
comes on for 2 seconds. If the light blinks for
approximately 8 seconds, it may indicate the
automatic transmission system is not functioning
properly. Have your NISSAN dealer check and
repair the transmission.
or
Brake warning light
This light functions for both the parking brake
and the foot brake systems.
Parking brake indicator:
When the ignition key is in the ON position, the
light comes on when the parking brake is ap-
plied.
Low brake fluid warning light:
The light warns of a low brake fluid level. If the
light comes on while the engine is running with
the parking brake not applied, stop the vehicle
and perform the following:
1. Check the brake fluid level. Add brake fluid as
necessary. See ªBrake and clutch fluidº in the
ª8. Maintenance and do-it-yourselfº section.
WARNING
IYour brake system may not be work-
ing properly if the warning light is on.
Driving could be dangerous. If you
judge it to be safe, drive carefully to
the nearest service station for re-
pairs. Otherwise, have your vehicle
towed because driving it could be
dangerous.
IPressing the brake pedal with the
engine stopped and/or low brake
fluid level may increase your stop-
ping distance and braking will re-
quire greater pedal effort as well as
greater pedal travel.
IIf the brake fluid level is below the
MIN mark on the brake fluid reser-
voir, do not drive until the brake sys-
tem has been checked at a NISSAN
dealer.
2. If the brake fluid level is correct, have the
warning system checked by a NISSAN
dealer. Avoid high speed driving and abrupt
braking.
If both the brake warning light and the anti-lock brake warning light come on simulta-
neously, it may indicate the anti-lock brake
system is not functioning properly. See ªAnti-
lock brake warning lightº earlier in this sec-
tion.
Charge warning light
If the light comes on while the engine is running,
it may indicate that the charging system is not
functioning properly. Turn the engine off and
check the alternator belt. If the belt is loose,
broken, missing or if the light remains on, see
your NISSAN dealer immediately.
CAUTION
Do not continue driving if the belt is
loose, broken or missing.
Door open warning light
This light comes on when any of the doors
and/or rear hatch are not closed securely while
the ignition key is ON.
Engine oil pressure warning
light
This light warns of low engine oil pressure. If the
light flickers or comes on during normal driving,
pull off the road in a safe area, stop the engine
2-12
Instruments and controls
Z
02.9.13/Z33-D/V5.0
X
Page 53 of 227
at a low level. Add washer fluid as necessary.
See ªWindow washer fluidº in the ª8. Mainte-
nance and do-it-yourselfº section.
Seat belt warning light and
chime
The light and chime remind you to fasten seat
belts. The light illuminates whenever the ignition
key is turned to ON, and will remain illuminated
until the driver's seat belt is fastened.
See ªSeat beltsº in the ª1. Seats, restraints and
supplemental air bag systemsº section for pre-
cautions on seat belt usage.
Supplemental air bag warning
light
After turning the ignition key to the ON position,
the supplemental air bag warning light will illu-
minate. The supplemental air bag warning light
will turn off after about 7 seconds if the system is
operational.
If any of the following conditions occur, the
supplemental front air bag, supplemental side air
bag and curtain side-impact air bag systems,
and pre-tensioner seat belt need servicing and
your vehicle must be taken to your nearest
NISSAN dealer.
IThe supplemental air bag warning light re-
mains on after approximately 7 seconds.IThe supplemental air bag warning light
flashes intermittently.
IThe supplemental air bag warning light does
not come on at all.
Unless checked and repaired, the Supplemental
Restraint Systems and/or the pre-tensioner seat
belt may not function properly. For additional
information, see ªSupplemental restraint systemº
in the ª1. Seats, restraints and supplemental air
bag systemsº section.
WARNING
If the supplemental air bag warning
light is on, it could mean that the
supplemental front air bag, supplemen-
tal side air bag and curtain side-impact
air bag systems and/or pre-tensioner
seat belt system will not operate in an
accident.INDICATOR LIGHTS
Automatic transmission
position indicator light (A/T
models)
When the ignition key is turned to the ONposition, the indicator in the tachometer shows
the automatic transmission selector lever posi-
tion. See ªDriving with automatic transmissionº
in the ª5. Starting and drivingº section.
Cruise main switch indicator
light (if so equipped)
The light comes on when the cruise control main
switch is pushed. The light goes out when the
main switch is pushed again. When the cruise
main switch indicator light comes on, the cruise
control system is operational.
Cruise set switch indicator
light (if so equipped)
The light comes on while the vehicle speed is
controlled by the cruise control system. If the
light blinks while the engine is running, it may
indicate the cruise control system is not func-
tioning properly. Have the system checked by
your NISSAN dealer.
High beam indicator light
(Blue)
This light comes on when the headlight high
beam is on and goes out when the low beam is
selected.
2-14
Instruments and controls
Z
02.9.13/Z33-D/V5.0
X
Page 54 of 227
Malfunction indicator lamp
(MIL)
If the malfunction indicator lamp comes on
steady or blinks while the engine is running, it
may indicate a potential emission control mal-
function.
The malfunction indicator lamp may also come
on steady if the fuel filler cap is loose or missing,
or if the vehicle runs out of fuel. Check to make
sure the fuel filler cap is installed and closed
tightly, and that the vehicle has at least 3 US
gallons (14 liters) of fuel in the fuel tank.
After a few driving trips, the
lamp should
turn off if no other potential emission control
system malfunction exists.
Operation
The malfunction indicator lamp will come on in
one of two ways:
IMalfunction indicator lamp on steady Ð An
emission control system malfunction has
been detected. Check the fuel filler cap. If the
fuel filler cap is loose or missing, tighten or
install the cap and continue to drive the
vehicle. The
lamp should turn off after a
few driving trips. If the
lamp does not
turn off after a few driving trips, have the
vehicle inspected by a NISSAN dealer. Youdo not need to have your vehicle towed to the
retailer.
IMalfunction indicator lamp blinking Ð An
engine misfire has been detected which may
damage the emission control system. To re-
duce or avoid emission control system dam-
age:
a) Do not drive at speeds above 45 MPH
(72 km/h).
b) Avoid hard acceleration or deceleration.
c) Avoid steep uphill grades.
d) If possible, reduce the amount of cargo
being hauled or towed.
The malfunction indicator lamp may stop
blinking and come on steady.
Have the vehicle inspected by a NISSAN
dealer. You do not need to have your vehicle
towed to the retailer.
CAUTION
Continued vehicle operation without
having the emission control system
checked and repaired as necessary
could lead to poor driveability, reduced
fuel economy, and possible damage to
the emission control system.
Slip indicator light
The light will come on for about 1 second and go
off after the ignition switch is turned to the ON
position. This light will blink when the vehicle
dynamic control (VDC) system or the traction
control system (TCS) is operating, thus alerting
the driver to the fact that the road surface is
slippery and the vehicle is nearing its traction
limits.
Traction control system off
indicator light (if so equipped)
After turning the ignition key to the ON position,
the light will illuminate. The light will turn off in
about 1 second if the traction control system
(TCS) is operational.
The light comes on when the traction control
system (TCS) off switch is pushed to OFF. This
indicates the traction control system is not op-
erating. When the traction control system off
indicator light and slip indicator light come on
with the traction control system turned on, this
light alerts the driver to the fact that the traction
control system's fail-safe mode is operating, that
is the system may not be functioning properly.
Have the system checked by your NISSAN
dealer. If an abnormality occurs in the system,
the traction control function will be canceled but
the vehicle is still driveable. For additional infor-
Instruments and controls
2-15
Z
02.9.13/Z33-D/V5.0
X
Page 55 of 227

mation, see ªTraction control system (TCS)º in
the ª5. Starting and drivingº section of this
manual.
Vehicle dynamic control off
indicator light (if so equipped)
After turning the ignition key to the ON position,
the light will illuminate. The light will turn off in
about 1 second if the vehicle dynamic control
(VDC) system is operational.
The light comes on when the vehicle dynamic
control (VDC) off switch is pushed to OFF. This
indicates the vehicle dynamic control system
and traction control system are not operating.
When the vehicle dynamic control off indicator
light and slip indicator light come on with the
vehicle dynamic control system turned on, this
light alerts the driver to the fact that the vehicle
dynamic control system's fail-safe mode is op-
erating, that is the system may not be functioning
properly. Have the system checked by your
NISSAN dealer. If an abnormality occurs in the
system, the vehicle dynamic control system
function will be canceled but the vehicle is still
driveable. For additional information, see ªVe-
hicle dynamic control (VDC) systemº in the ª5.
Starting and drivingº section of this manual.
Turn signal/hazard indicator
lights
The light flashes when the turn signal switch
lever or hazard switch is turned on.AUDIBLE REMINDERS
Key reminder chimeThe chime will sound if the driver's side door is
opened while the key is left in the ignition switch
(ignition switch is turned off). Remove the key
and take it with you when leaving the vehicle.Light reminder chimeThe chime will sound when the driver's door is
opened with the headlight switch on unless the
key is in the ignition switch. Make sure to turn the
light switch off when you leave the vehicle.Brake pad wear warningThe disc brake pads have audible wear warn-
ings. When a brake pad requires replacement, it
will make a high pitched scraping sound when
the vehicle is in motion whether or not the brake
pedal is depressed. Have the brakes checked as
soon as possible if the warning sound is heard.Your vehicle has two types of security systems,
as follows:
IVehicle Security System
INissan Vehicle Immobilizer System (NVIS)
SECURITY SYSTEMS
2-16
Instruments and controls
Z
02.9.13/Z33-D/V5.0
X
Page 76 of 227
WARNING
IDo not use the HomeLink
Universal
Transceiver with any garage door
opener that lacks safety stop and
reverse features as required by fed-
eral safety standards. (These stan-
dards became effective for opener
models manufactured after April 1,
1982). A garage door opener which
cannot detect an object in the path of
a closing garage door and then auto-
matically stop and reverse, does not
meet current federal safety stan-
dards. Using a garage door opener
without these features increases the
risk of serious injury or death.
IDuring programming, your garage
door or gate may open or close.
Make sure that people and objects
are clear of the garage door or gate
that you are programming.
IYour vehicle's engine should be
turned off while programming the
HomeLink
Universal Transceiver.
PROGRAMMING HomeLinkTo program your HomeLink Transceiver to oper-
ate a garage door, gate, or entry door opener,
home or office lighting, you need to be at the
same location as the device. Note: Garage door
openers (manufactured after 1996) have ªrolling
code protectionº. To program a garage door
opener equipped with ªrolling code protectionº;
you will need to use a ladder to get up to the
garage door opener motor to be able to access
the ªsmart or learnº program button.
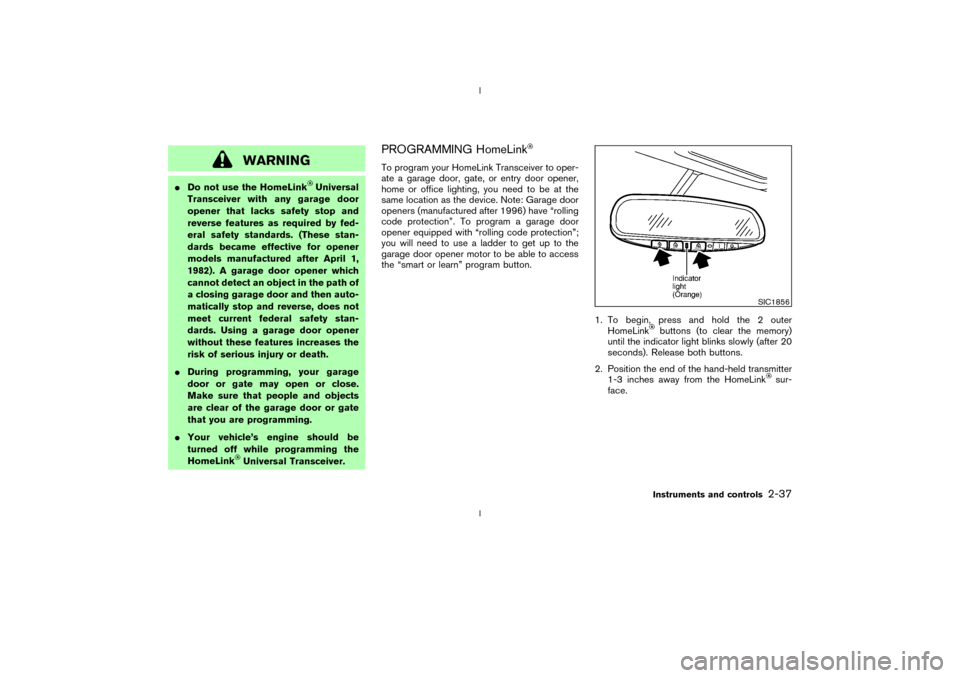
1. To begin, press and hold the 2 outer
HomeLink
buttons (to clear the memory)
until the indicator light blinks slowly (after 20
seconds). Release both buttons.
2. Position the end of the hand-held transmitter
1-3 inches away from the HomeLink
sur-
face.
SIC1856
Instruments and controls
2-37
Z
02.9.13/Z33-D/V5.0
X