Page 66 of 227

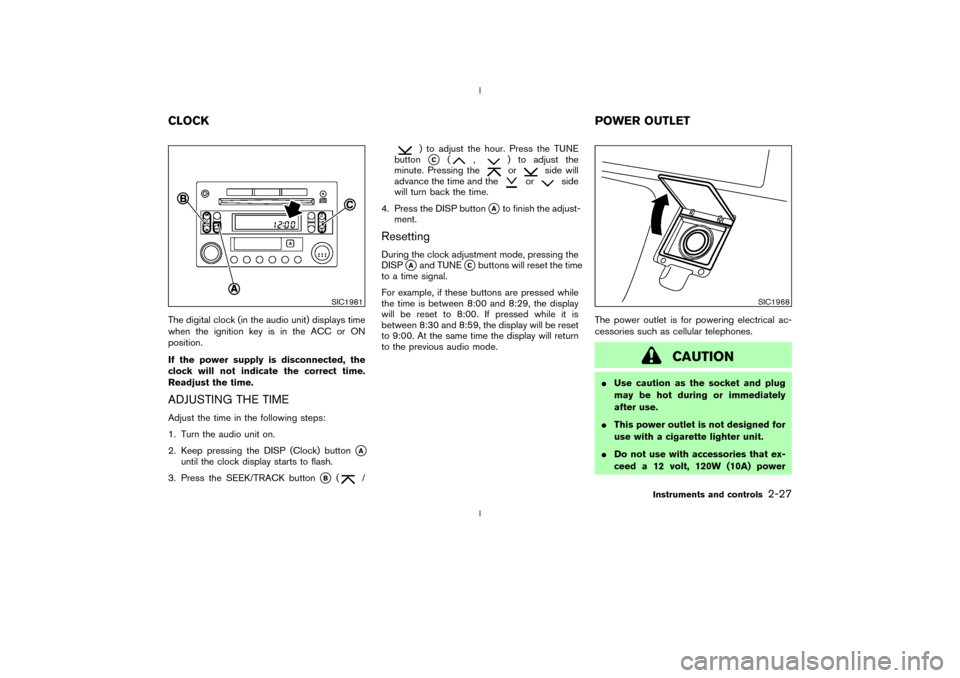
The digital clock (in the audio unit) displays time
when the ignition key is in the ACC or ON
position.
If the power supply is disconnected, the
clock will not indicate the correct time.
Readjust the time.ADJUSTING THE TIMEAdjust the time in the following steps:
1. Turn the audio unit on.
2. Keep pressing the DISP (Clock) button
qA
until the clock display starts to flash.
3. Press the SEEK/TRACK button
qB
(
/
) to adjust the hour. Press the TUNE
buttonqC
(
,
) to adjust the
minute. Pressing theor
side will
advance the time and the
or
side
will turn back the time.
4. Press the DISP button
qAto finish the adjust-
ment.
ResettingDuring the clock adjustment mode, pressing the
DISP
qAand TUNE
qCbuttons will reset the time
to a time signal.
For example, if these buttons are pressed while
the time is between 8:00 and 8:29, the display
will be reset to 8:00. If pressed while it is
between 8:30 and 8:59, the display will be reset
to 9:00. At the same time the display will return
to the previous audio mode.The power outlet is for powering electrical ac-
cessories such as cellular telephones.
CAUTION
IUse caution as the socket and plug
may be hot during or immediately
after use.
IThis power outlet is not designed for
use with a cigarette lighter unit.
IDo not use with accessories that ex-
ceed a 12 volt, 120W (10A) power
SIC1981
SIC1968
CLOCKPOWER OUTLET
Instruments and controls
2-27
Z
02.9.13/Z33-D/V5.0
X
Page 110 of 227
FM-AM RADIO WITH CASSETTE
PLAYER AND COMPACT DISC (CD)
CHANGER1. CD LOAD button
2. SEEK/APS REW, APS FF/TRACK
CHANGE button
3. DISP (Display) CHANGE (Clock, CD play
time) button
4. SCAN tuning button
5. CD PLAY button
6. TAPE PLAY button
7. FM/AM band select button
8. PTY (Program type) button
9. RPT (Repeat) play button
10. RADIO TUNE/FF×REW/AUDIO (Bass,
treble, fader, balance and NR (Dolby)) AD-
JUSTING button
11. CD EJECT button
12. ON×OFF/VOL (Volume) control knob
13. Audio/Clock display
14. Station and preset (FM/AM)/CD insert or
CD play select button
15. TAPE EJECT button
16. AUDIO (Bass, treble, fader, balance and NR
(Dolby)) button
SAA0604
Heater, air conditioner and audio systems
4-13
Z
02.9.13/Z33-D/V5.0
X
Page 146 of 227

verse), or the automatic transmission
into P (Park).
INever change tires when the vehicle
is on a slope, ice or slippery areas.
This is hazardous.
INever change tires if oncoming traffic
is close to your vehicle. Wait for pro-
fessional road assistance.
IWhen a spare tire is mounted or a
wheel is replaced, tire pressure will
not be indicated and the low tire
pressure warning system will not
function. Contact your NISSAN
dealer as soon as possible for tire
replacement and/or system reset-
ting. (For models with the low tire
pressure warning system)
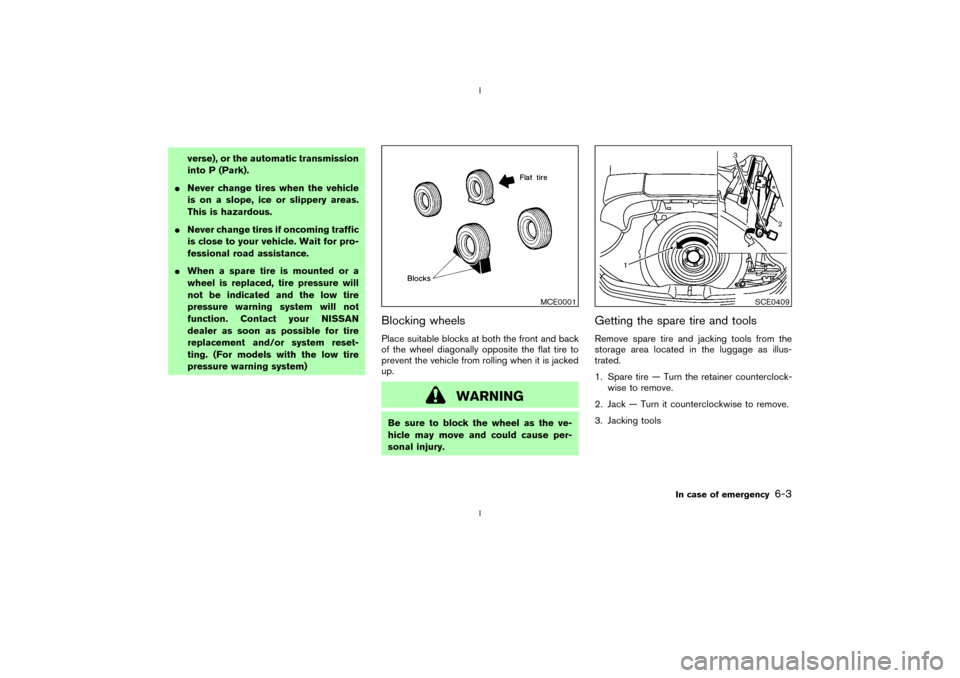
Blocking wheelsPlace suitable blocks at both the front and back
of the wheel diagonally opposite the flat tire to
prevent the vehicle from rolling when it is jacked
up.
WARNING
Be sure to block the wheel as the ve-
hicle may move and could cause per-
sonal injury.
Getting the spare tire and toolsRemove spare tire and jacking tools from the
storage area located in the luggage as illus-
trated.
1. Spare tire Ð Turn the retainer counterclock-
wise to remove.
2. Jack Ð Turn it counterclockwise to remove.
3. Jacking tools
MCE0001
SCE0409
In case of emergency
6-3
Z
02.9.13/Z33-D/V5.0
X